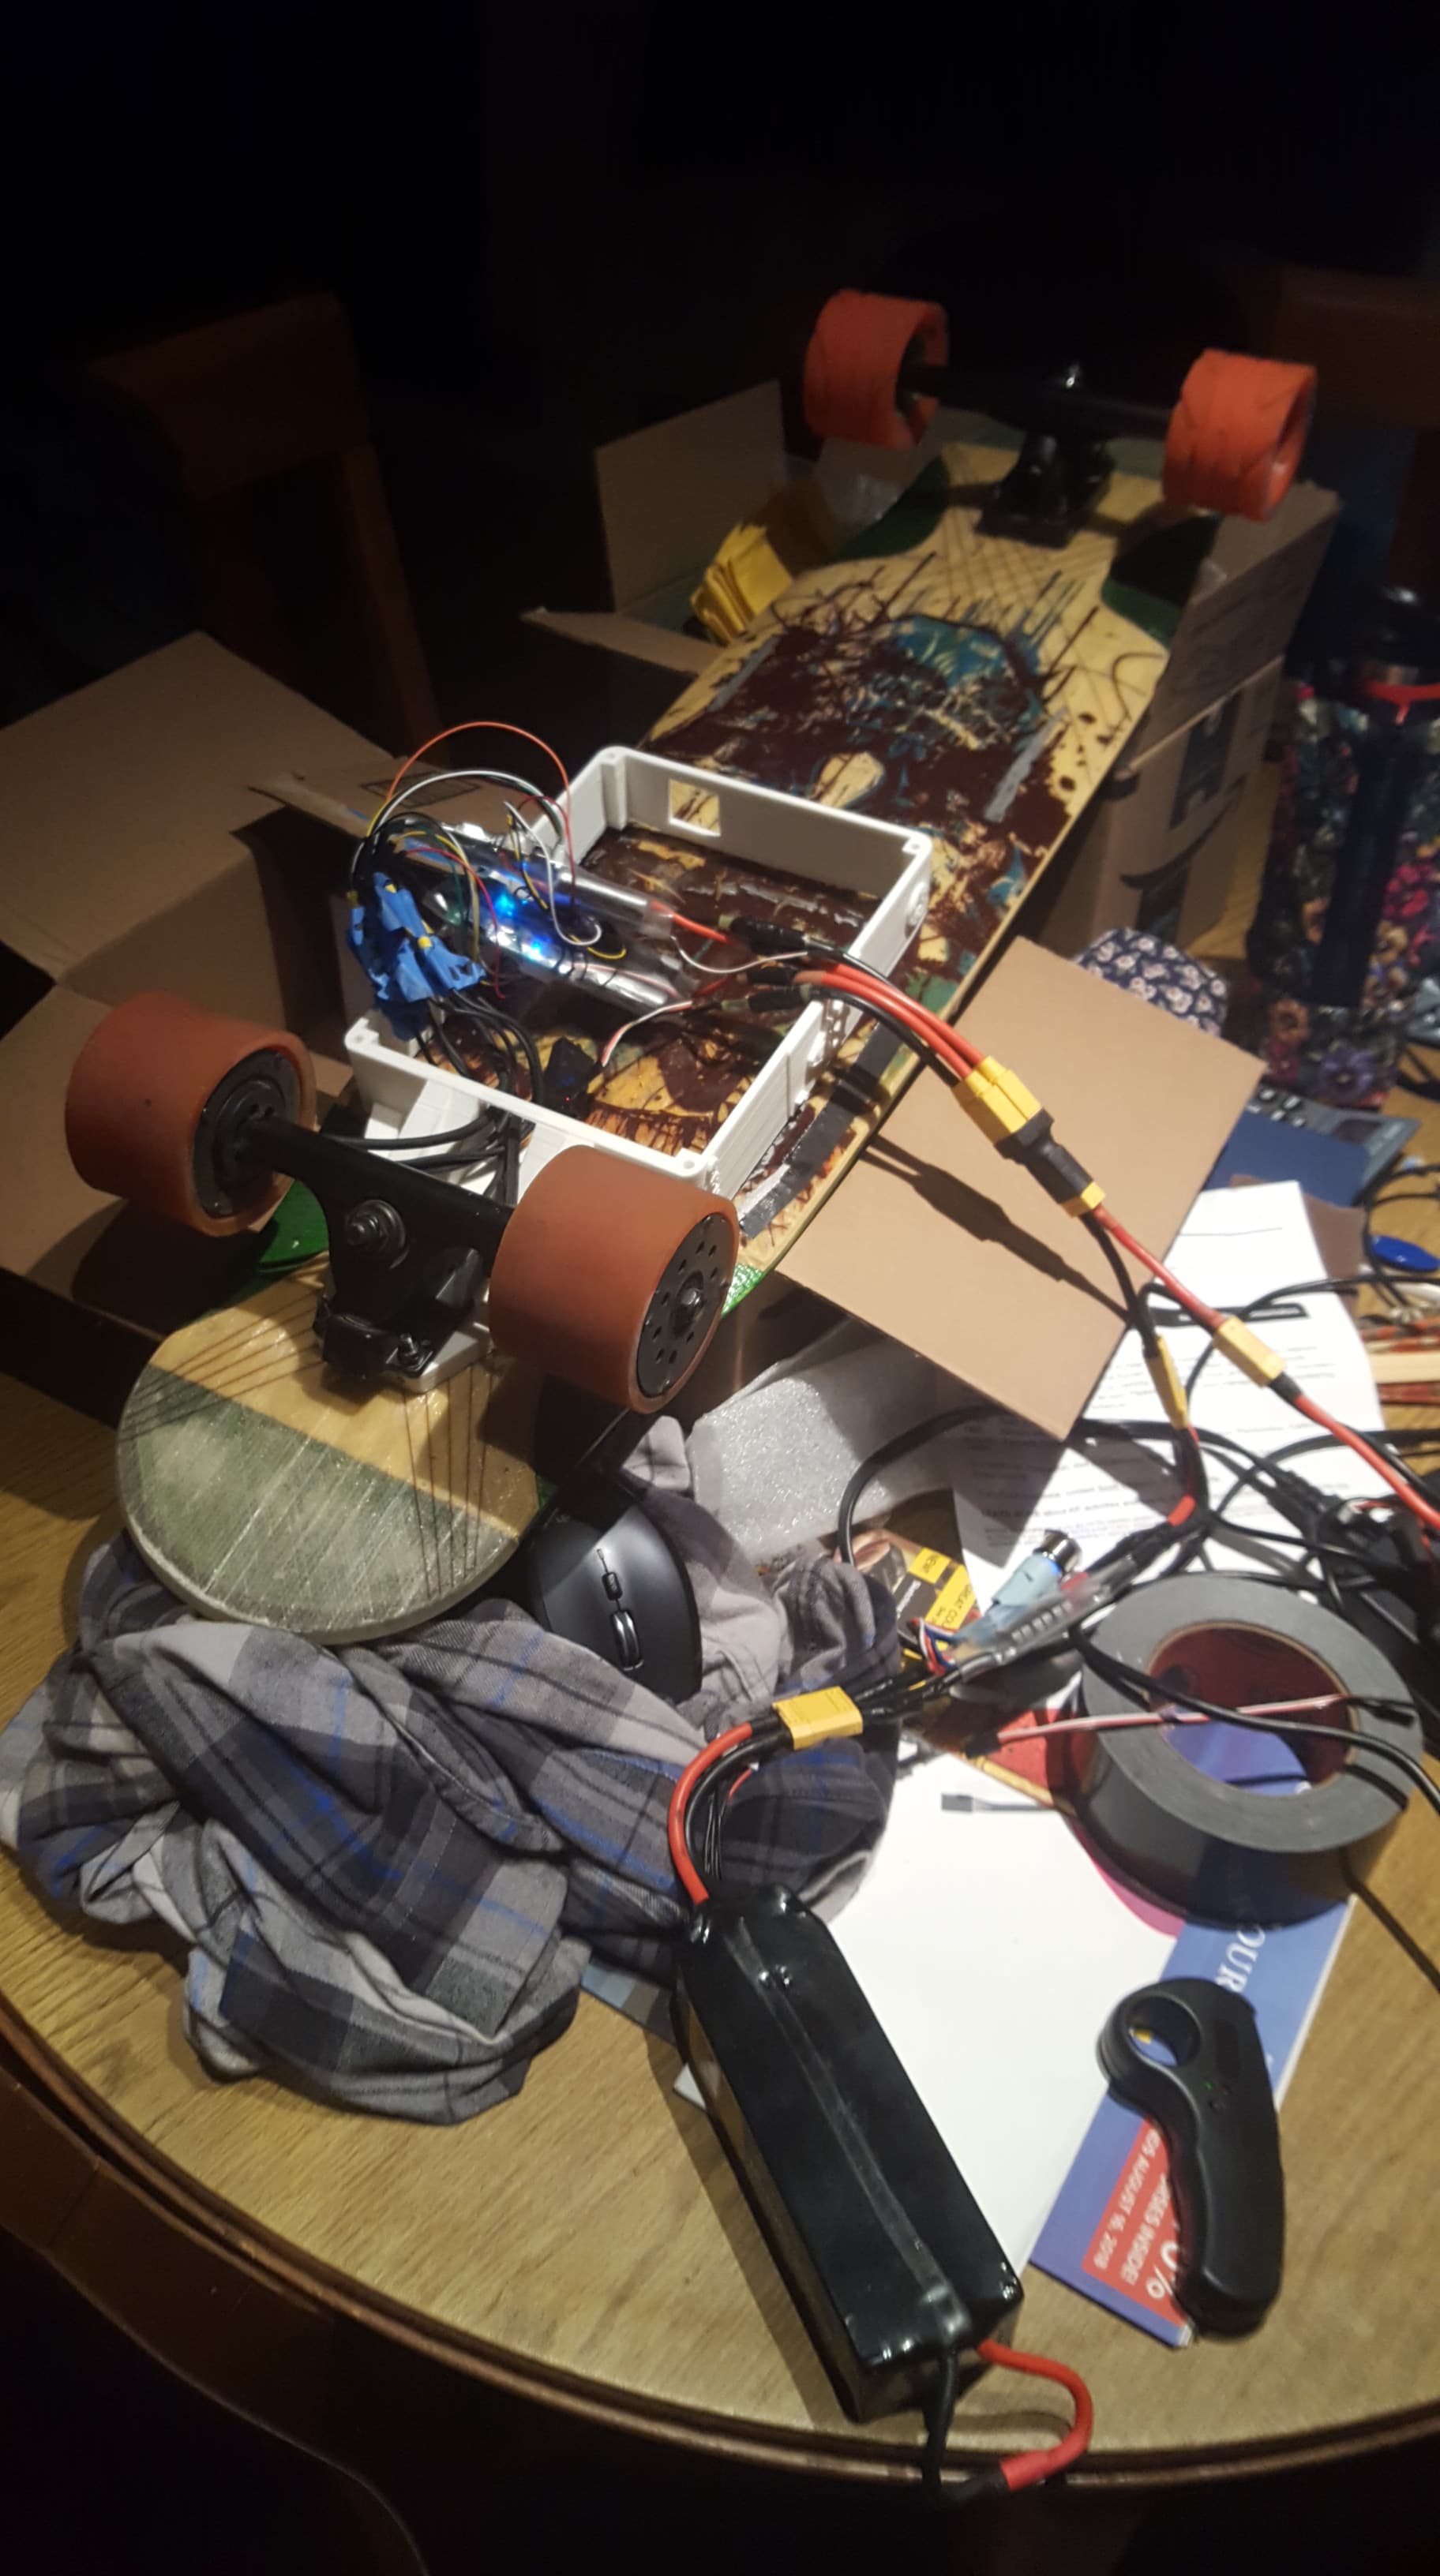
I’ve been designing a 3d printed box that attaches under the trucks as a half inch riser and so far version 2 has held up for a few rides. There are a couple aluminum rods running through the base to hold it steady. My vesc’s died after 4 rides on the new box so I’m waiting on replacements to really put it through its traces.
I really didn’t want to drill any holes in my Bustin Board (not to be confused with Boosted) so I came up with a new option. The lid was originally going to be held on by screws but I wanted easier access inside the box and the screws would eventually strip especially with PLA. I went to the hardware store and as you can see in the pictures came up with a new idea.
There was a hole in the box for the push button switch, but the switch broke after the first ride so back to the loop key. There is a square cutout in the back as well as the front for little mini fans from rc’s, but I used the front cut for the wires from the hubs since I lost my mini fans and am waiting for more to come in.
Any input on additional ideas would be great. Any interest in buying one for a super reasonable price to help offset the cost of my 3d printer/general esk8 costs?
Think if you want to make an enclosure that attaches to the trucks then the main advantage is being able to easily swap it to another deck and for that to be feasible you would need to have a completely enclosed box with some cushioning between the deck and box but good idea none the less.
This enclosure doesn’t bolt to the deck. If you dont want to screw anything through your deck this is for you. Also its easy to open up so I switch lipos mid ride in moments. I can custom print the box to whatever dimensions you want (within limits). I can easily add a bottom to the box so that it is fully enclosed and easily switchable between decks. That was the original idea, but it kinda got lost. Easy to add though.
Well, it works right now, no droop and no rattle and no need to run the length. I feel you, but with the aluminum rods in it, even the PLA is holding up quite well.
What is the reason for running the length of the board? I’m open to making a better design if you have ideas, but I think we are thinking about 2 different ideas Trdolan. I originally wasnt sure what deck I was riding on and didnt want to drill holes so I started designing an easily switchable box. Ended up sticking with the Bustin Board, and wanted something basically similar to the Onan or Landwheel or even the Mellow.
Fair enough. I’ve got time this week, lemme see if I can whip up a design that runs the length. Its easy to hot swap batteries on it for me so I just carry an extra set instead of attaching bigger batteries to the board, but we all have different supplies and setups, that’s the beauty of DIY! My lady says to offset the cost of the 3d printer by selling these at something like $40 for custom dimensions and custom outside art or text. If you really are interested lemme know, I’ll draw up a design under both trucks. You don’t have to buy the finished product, but you gotta help me critique it
Hello @Sherriffwhalley, sorry to dig up your post but I’m currently working on a similar project, like my own mellow.
But my main question is making the bottom plate of the enclosure (so board side), so that it holds the weight of the rest of the electronics including battery)
Some questions for you, that I hope you can answer :
1- How’s everything holding up on this build, through time and rides ?
2- What’s the weight of the electronics ? with the battery ?
3- Can you show me those aluminum rodes, and how they are under the enclosure ?
I’m going for dual vesc, and a 12S3P (so quite heavy pack) !
The major force in esk8 is not the weight of everything but the vibrations, that could destroy heavy built stuff through time ! That’s why I’m planning more on a full aluminum plate (I need to think about its thickness, about 5mm I think) and its shape.
Would love to see what you did, what worked out and what didn’t !
I hadn’t seen this post from earlier in the year, but it’s an interesting idea. I understand that you don’t want to drill holes in your deck, but I would be very wary of having all that gear (battery,vesc etc) hanging underneath the deck without some other form of support. The vibrations will probably destroy that box in a short time, and even the Mellow, that you are emulating here, is screwed to the underside of the decks it is designed for.
The are other ways around it, and seeing as aesthetics aren’t the main play here, I would suggest at the very least implementing some form of strapping that passes through the enclosure, looping over the top of the deck and relieving the momentary forces exerted on the pivot point in front of the trucks. Wide velcro, or heavy duty rubber strapping might work, or the ratchet with nylon band straps you see in hardware stores.
Also, is the top cover necessary. It’s another point of potential failure and you could print it like a tray that the electrics could rest on. Would provide more dust and water ingress protection, especailly if the box supported with strapping to the underside of the deck.
Anyway, interested as well to see where you went with this concept. Have you any more pictures?
Really ? I would have thought there were screw underneath the battery ? Had no idea, sorry. Guess that whole set up is stronger though with being made of magnesium.
Hey-o. So far so good printed in PLA. I did tape the inside of the box to the deck with duct tape but it seems to have held together admirably. With these hubs and 12s lipo i average about 15mph but have taken it to 25mph. I’m mostly in the bike lane and sidewalks that are decently paved so I’m not sure how well it would hold up if you really abused it.
I just added hollow tubes through the design for the trucks and ran a couple small aluminum rods through and just super glued in.
I havn’t tried a new design yet since I lost access to the 3d printer I was using. Ive got a Tronxy X5SA coming in the mail and I’ll try printing up a new design that is fully enclosed without the lid or open bottom when that gets set up. It’ll have thinner aluminum rods, and they’ll run through the box edges as opposed to just reinforcing the truck connection like it is now.
Im using big ol 6s lipos I had sitting around, they’re not ideal being thick bricks, but they work, I also swap in 3 4s lipos. I’m not sure on the weight, but they’re not light. I orignally was going to build the box with aluminum sides and base but 3D printing it was easy and being able to iterate multiple designs quickly seemed like a great idea. Unfortunately I lost my 3d printing ability until the Tronxy comes in at the end of this month so wasn’t able to update anything. But I will say I’m surprised at how well everything held together. The 3 printed lid which turns out to be the wrong way to do it still works great. You can see by the holes in the lid and box that the original idea was to use inserts and screw the lid on and off, but I think having the lid be part of the box as one hole will be better in the long run.
You can see the where the rods go in on the second picture. They’re bigger diameter than they need to be I think, and they run all the way up to the the first wall of the box. The box itself has no reinforcement aside from being taped to the deck inside, and now a little on the outside since the brackets holding the lid on came off (E6000 didn’t hold) and I now tape the lid on. Ya, don’t do a lid, it’s crazy hassle. I thought I’d be able to swap my batteries easier, but this design is too basic and frustrating. The PLA is keeping together though.