This will be my first build which I think is worth doing a build thread.
My goal is to have a plush ride with hopefully min. 30 miles 45km of range good torque and topspeed around 26-30 mi/h 45-50km/h. But topspeed is not my main concern.
My previous builds where always with Hubmotors for stealthy reasons. But as most of you know there are not many good choices on the market right now. I desperately wanted @Hummie 's hubs but somehow always had no spare cash or missed the buying window when they were available. So after trying Maytech hubs, which are not really satisfying, generic Chinese hubs, which are better but still lacking and the Enertion hubs, which are more powerful and comfortable but reduce the range of my battery by 50% compared to the other motors, I decided to build a new board around the Nano gear drives.
Deck is the Jet Banshee 38"
Trucks are E-Caliber from @okp with 44° baseplate in the rear and normal 50° Caliber II front. Thanks again for the very reasonable price and shipping!
Dual Nano gear drive from @3DServisas
Dual ESCapes from @stewii might use my Unity not decided jet.
10S5P 30Q double stack battery pack
Selfmade fiberglass enclosure
Dual 6355 190KV motors from Flipsky, they will be exchanged with better motors after I have settled on motor size and KV.
110mm really big wheels from @torqueboards
Now some pictures from the first progress. The next days will be warmer that I can actually build my enclosure.
First mockup to choose the right length for the Kicktail.
Checking for enough clearance for the motors.
Enclosure mold mockup.
Sealing with Silicon for smooth corners.
Extension for the wires
After smoothening
I really look forward to suggestions, advise and your insights.
Thanks for reading!
All my pants have holes from mall grabbing. Some handle out of durable fabrics like the Canoe handle is something I will look into. But aesthetics are also a big factor for me this time.
Thanks man, your builds are a big inspiration for me!
The Silicon was what I had available from other projects. For sure clay is easier and cleaner to use.
So, made some progress the last two days.
Making the enclosure.
The deck after sanding.
With paint.
Now on to gear drive assembly.
Fitted on to the deck.
From here on comes the more crucial part of building the electrical components in a reliable way.
I am based in Osaka, haven’t met any e-skaters either.
There’s one guy in Tokyo who is reviewing prebuild boards on You Tube and another guy in Kyushu somewhere also on YouTube that I am aware of.
But I guess Tokyo must have more people into e-skates, I hope it will pick up at some time despite the bad image skating sadly has here.
I am level -1 when it comes to fiberglass but you made it look really easy (compared to most other around here). Would you mind sharing what materials, tools you used and a overview of step-by-step on what you did?
This are basically all the tools and materials needed.
I used clear epoxy resin with the appropriate hardener and woven #200 glasfiber mats. First you have to make a mould, I used wood because it was available for me, other stuff works too but you need to make sure it doesn’t gets melted by the epoxy. @bigben mentioned somewhere that you can use tape to make even foam stuff resistant to the epoxy.
The second step I took was to cover everything, deck and mould, with masking tape. Then I used silicone to create the rounded edges and let that cure. You can also use clay for this as mentioned in the post above. When that is done cut the glasfiber, for me the woven stuff is easier to work with. I found that 4 to 5 layers is good in the thickness of fiberglass I use.
After that you put the cut fiberglass on the mould and apply the epoxy, make sure it’s completely soaked and sticks to your mould without any air bubbles. In the video @Sender posted is a good explanation of how to deal with the overlapping materials at the corners. You basically stick the overlapping sheet together and cut along the edge with a scissor when the epoxy starts to tack. Stick the single fibers to the edge using your fingers. After you have finished all the layers I added some strips, two or three layers, on the flange where the holes will be drilled to attach the enclosure to the deck.
After letting it cure for 24h pull out the mould and use bodyfiller used for touching up small dents in cars and fill in all of those imperfections with a small scraper. Then sand it and repeat until you like it. Be careful with sanding starting with 120 grid is good.
https://www.google.com/url?sa=t&source=web&rct=j&url=https://m.youtube.com/watch%3Fv%3DaqwhcfQZT8U&ved=2ahUKEwjH2O2ntMDgAhUSneAKHSyrCtAQwqsBMAF6BAgGEAg&usg=AOvVaw3YJNRgOZ_potpE7FeHXfFc
Wear gloves and use a mask when sanding this stuff is nasty.
Can’t wait to see your enclosure and get more creative with the shape then I did!
A little progress,
the Really Big Wheels should be here any day soon. This is the last missing part. To get on the board asap I installed the enclosure with inserts. I used strong loctite to glue them in, but somehow they feel flimsy and doesn’t make me confident. I might drill through the deck if I see them getting loose.
It’s alive!
I just finished the build and took it out for 10min. Road vibrations are almost gone @torqueboards the 110’s are lovely.
I didn’t took too many pictures, but will update what I have tomorrow. I had to rename the build in to BACK IN BLACK. I had plans for colorful glass frit and purchased materials for doing this but ended up preferring black coarse grip.
With the 110mm wheels and 1:2,67 gearing 190kv motors might not have been the best choice, torque and brakes could be stronger. But I need to play a bit more with battery and motor amps.
Wonderful build!
I also used gear drive recently, but it is very good.
It is comfortable to ride and the freerolls are excellent.
I also had the same idea and I was interested in things other than hub motors.
 First mockup to choose the right length for the Kicktail.
 Checking for enough clearance for the motors.
 Enclosure mold mockup.
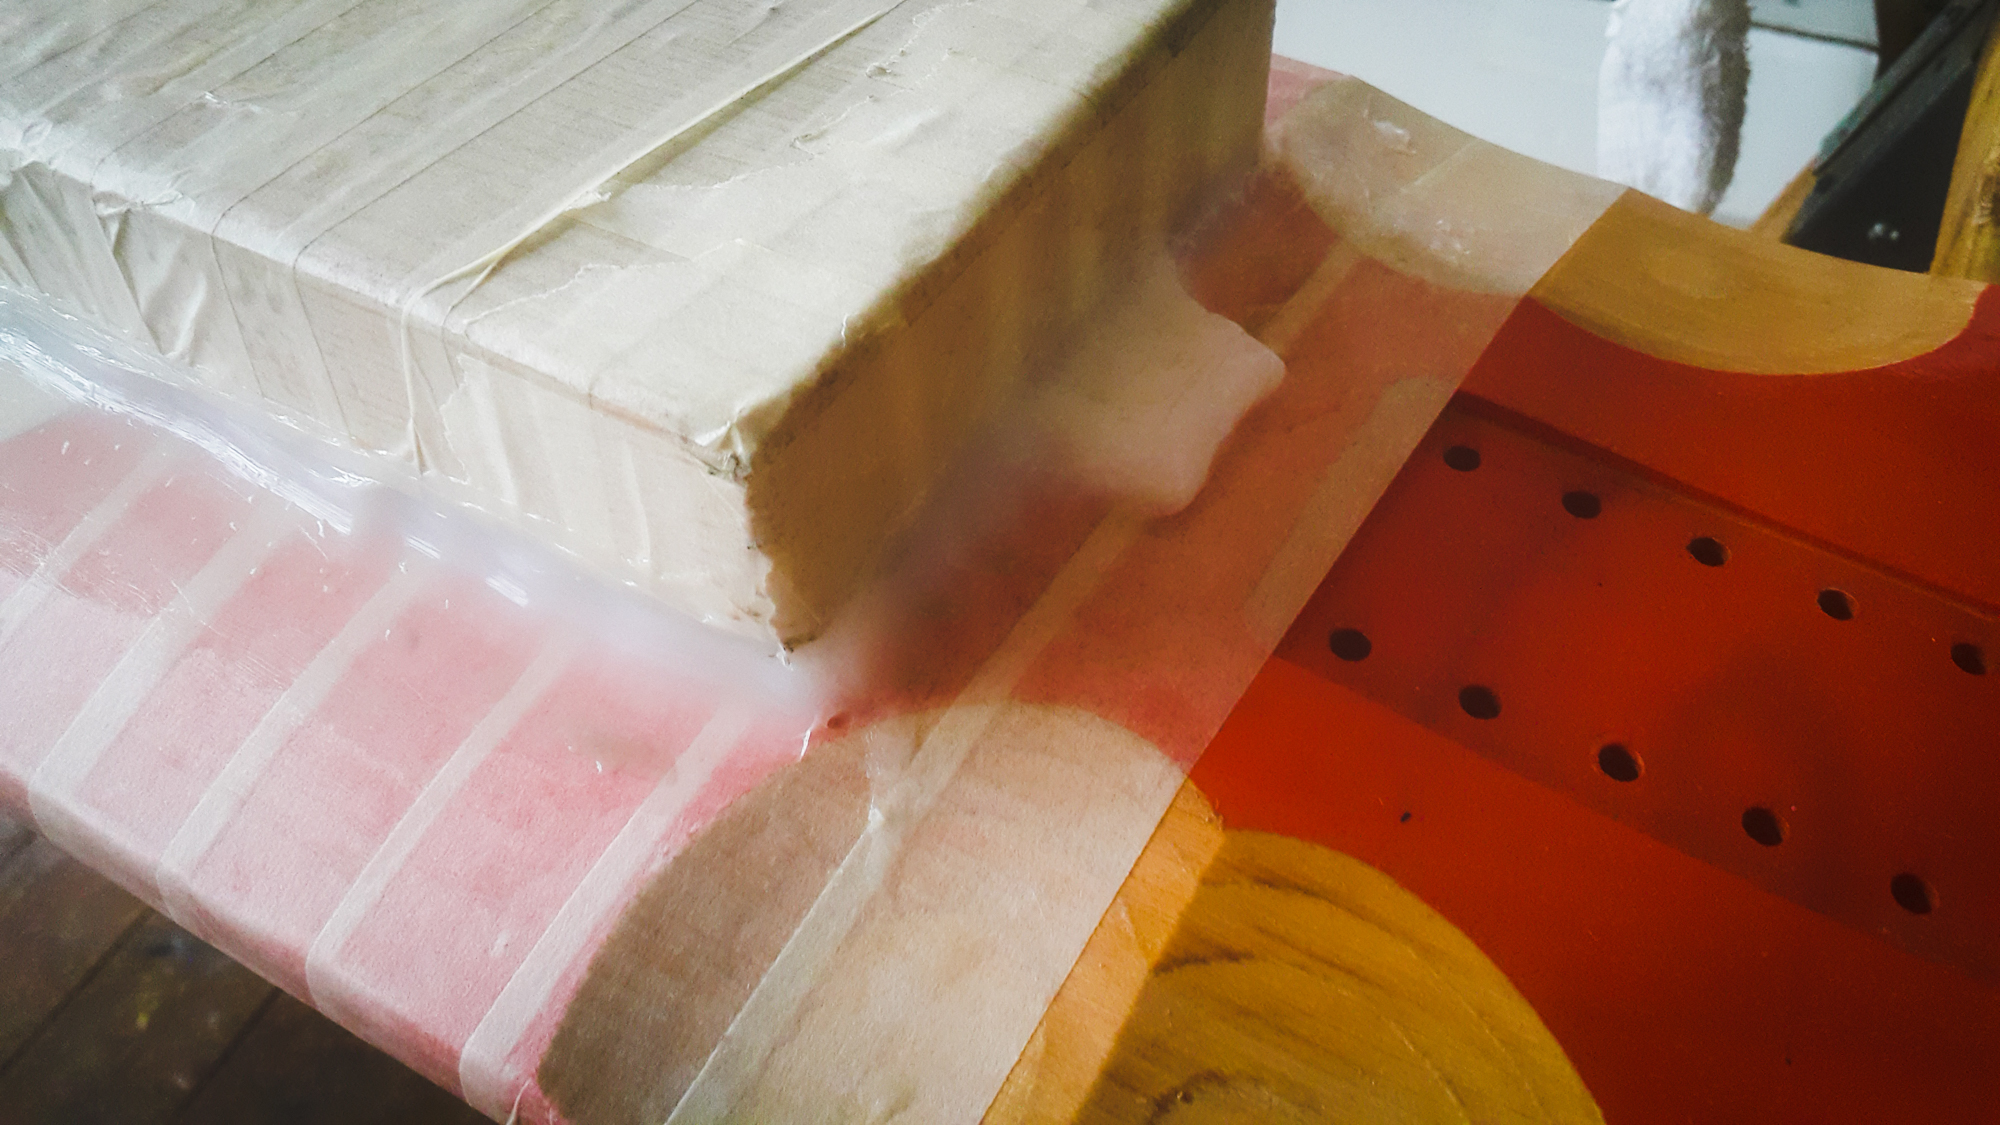
 Sealing with Silicon for smooth corners.
 Extension for the wires
 After smoothening
 Some handle out of durable fabrics like the Canoe handle is something I will look into. But aesthetics are also a big factor for me this time.
 Making the enclosure.


 The deck after sanding.
 With paint.
 Now on to gear drive assembly.
 Fitted on to the deck.
From here on comes the more crucial part of building the electrical components in a reliable way.
Fitted on to the deck.
From here on comes the more crucial part of building the electrical components in a reliable way. I used clear epoxy resin with the appropriate hardener and woven


