Brushless outrunner bearings change [how to]

So, to start, sorry for my bad english. I hope that you understad what I try to explain.

Sometimes, you will need to change the weels bearing, because they do not work the same as before, so the same those from the brushless. I was searching on the internet how to extract them, but I didn’t found any video or something that explain how to do it. Then the few things I’ve found, they used an bearings extractor ( something that you find to buy) But I wanted something easy, fast and withouth buying any strange tool.

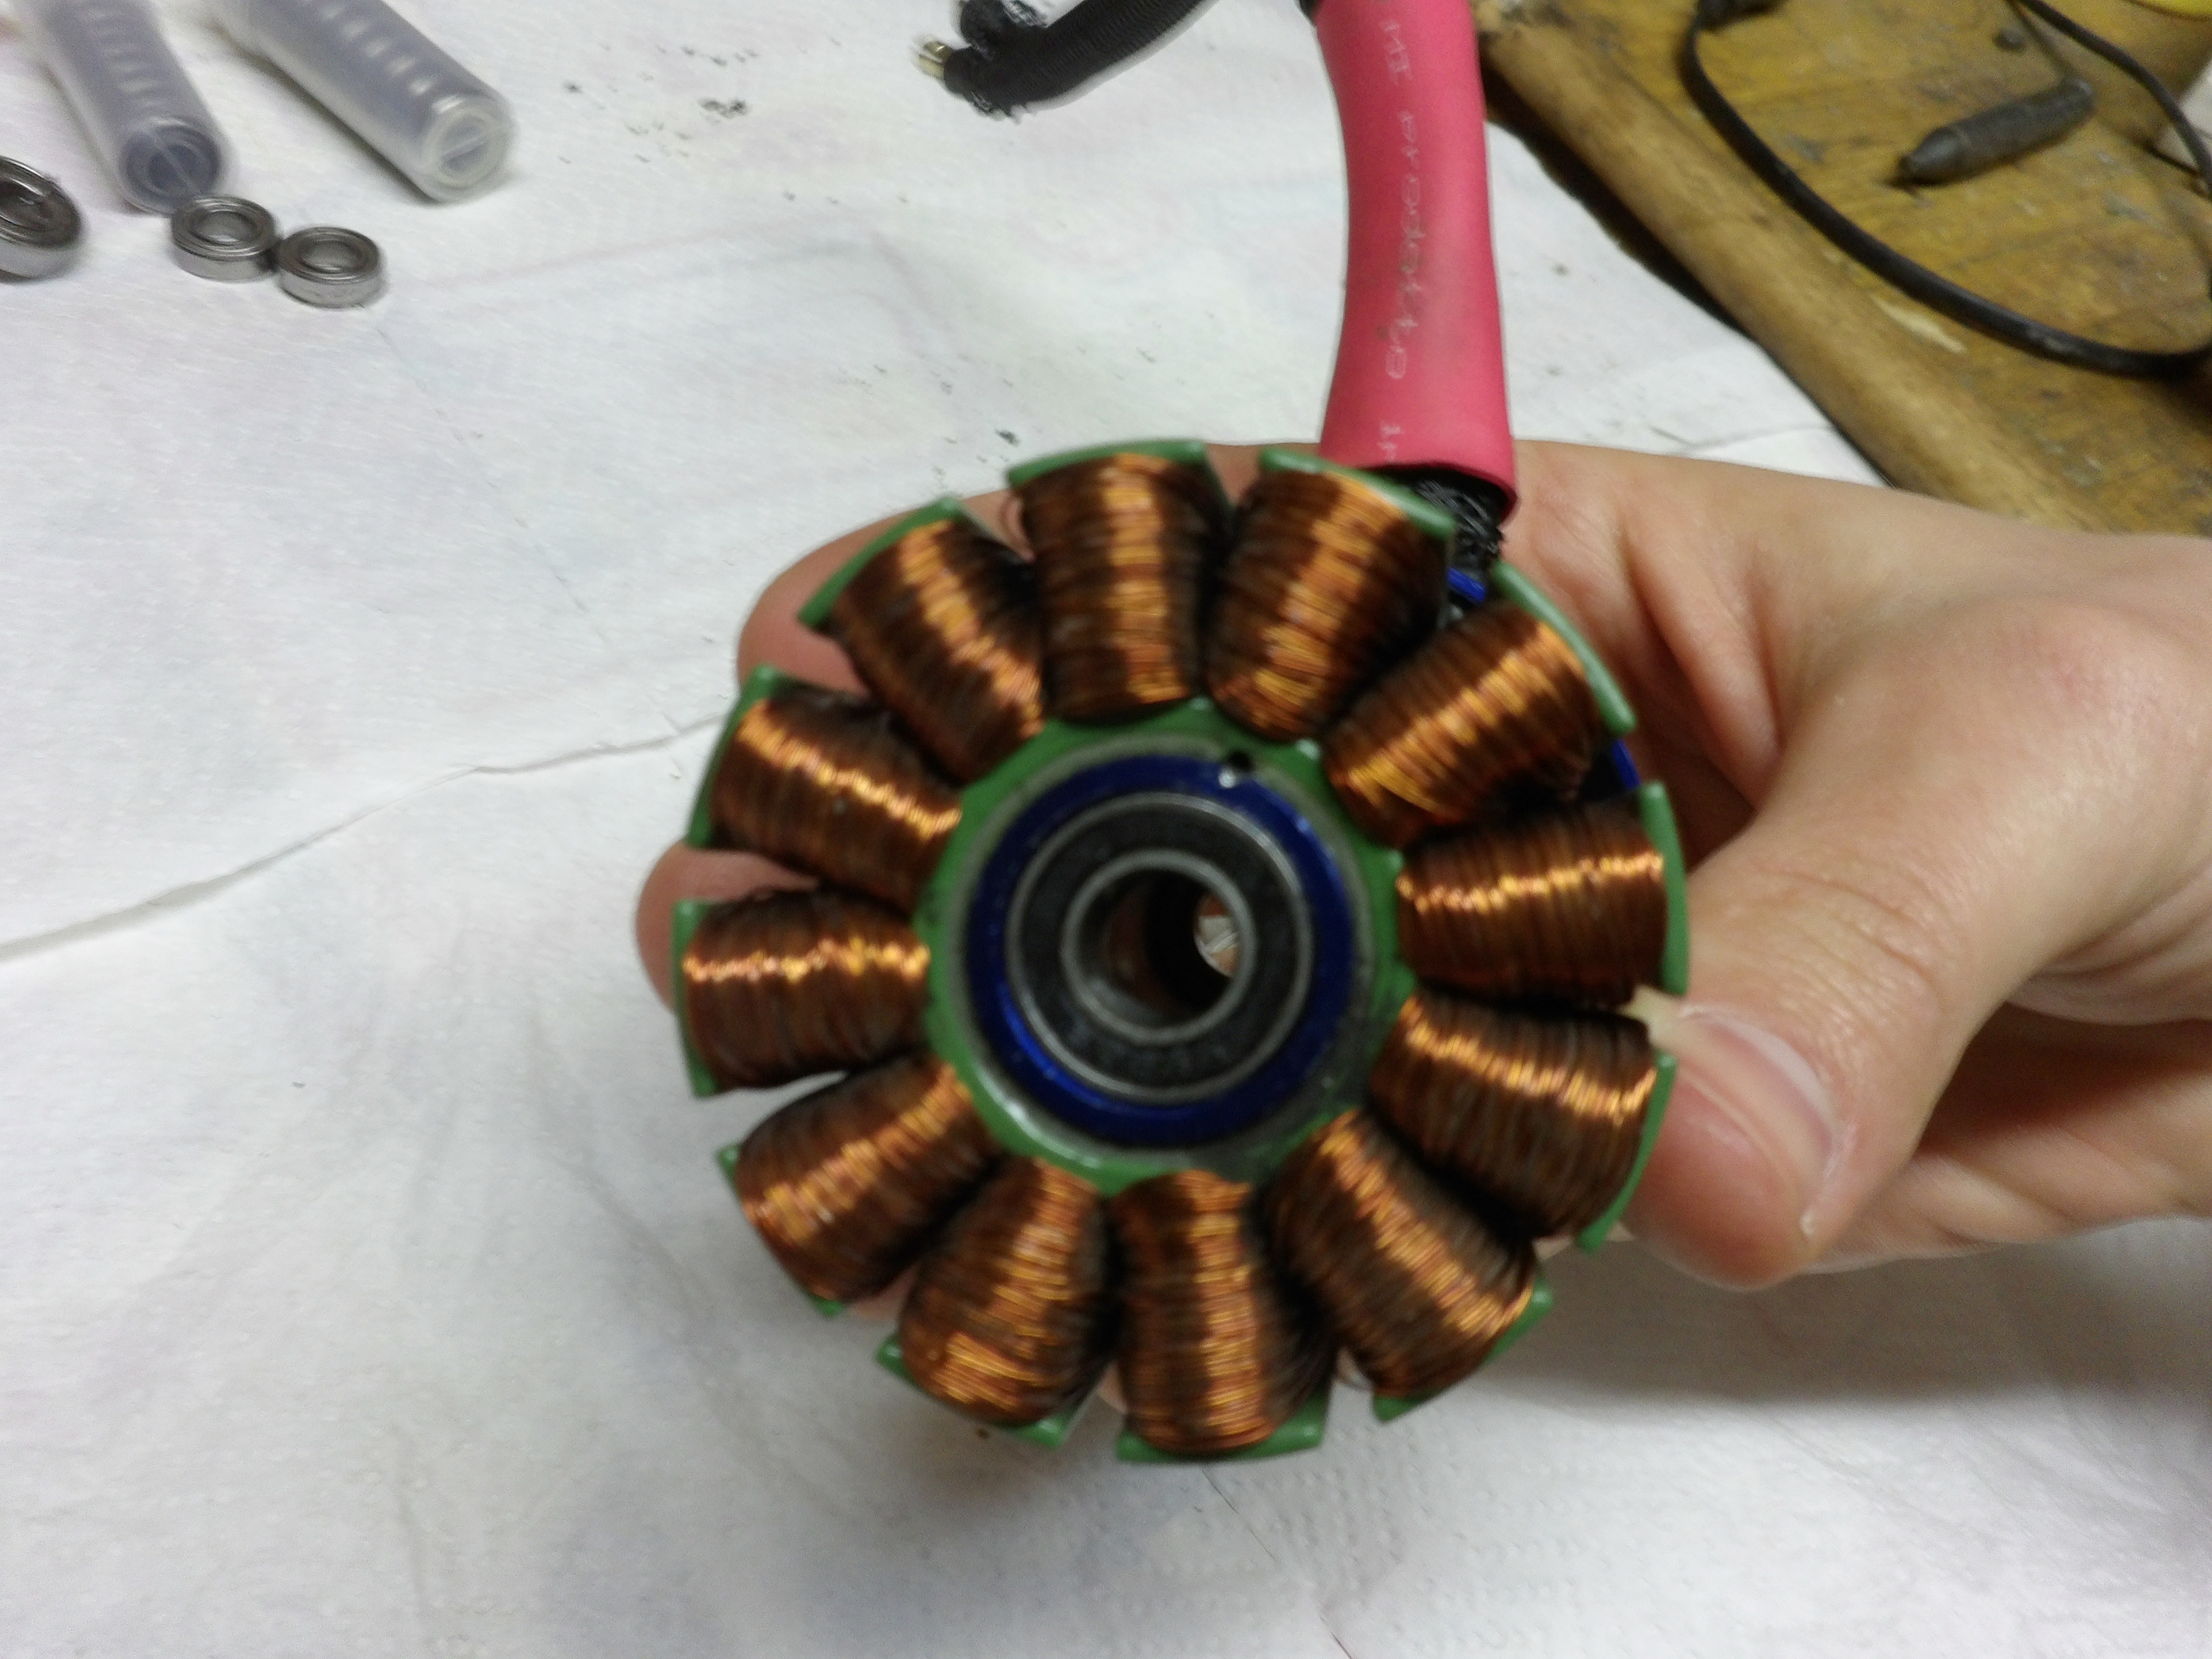
I’ll not show you how to open the motor. there are dozens of videos and even here on the web you can find some good tutorials 
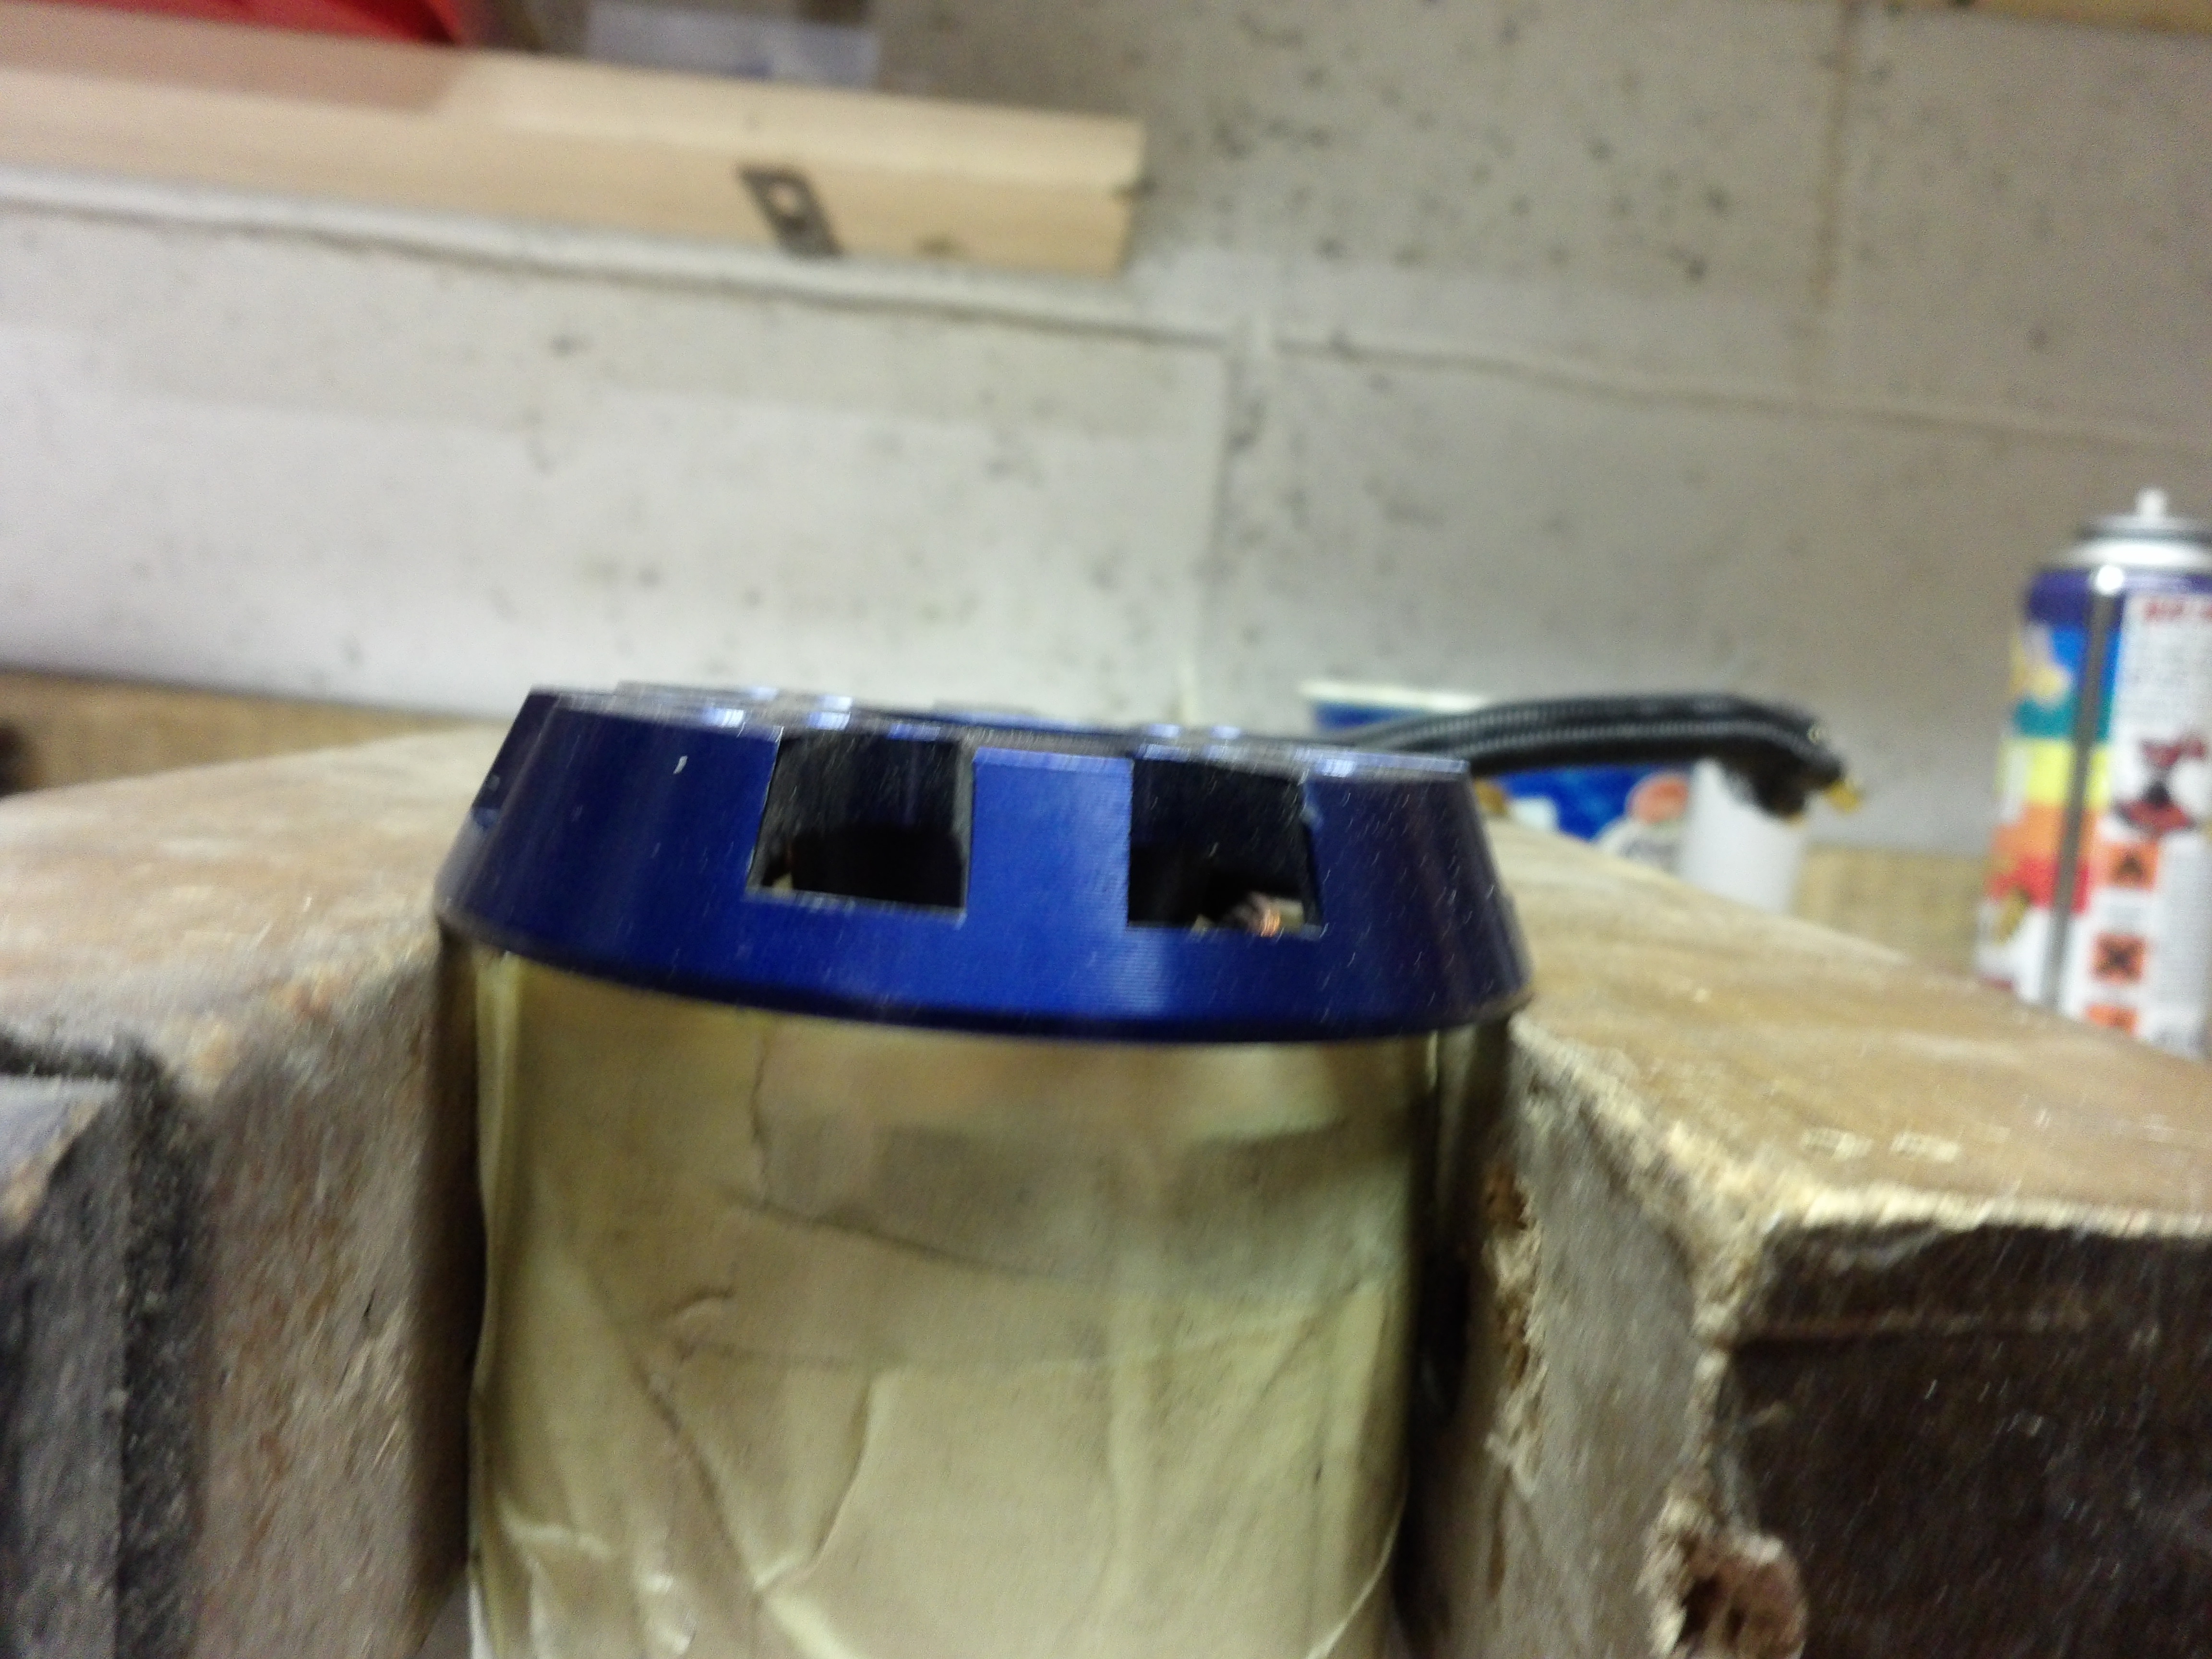
To start, try to protect your motor. I covered it with tape. The tools that I used are: a hammer, 2 equal pieces of wood 1 different piece of wood iron wire 
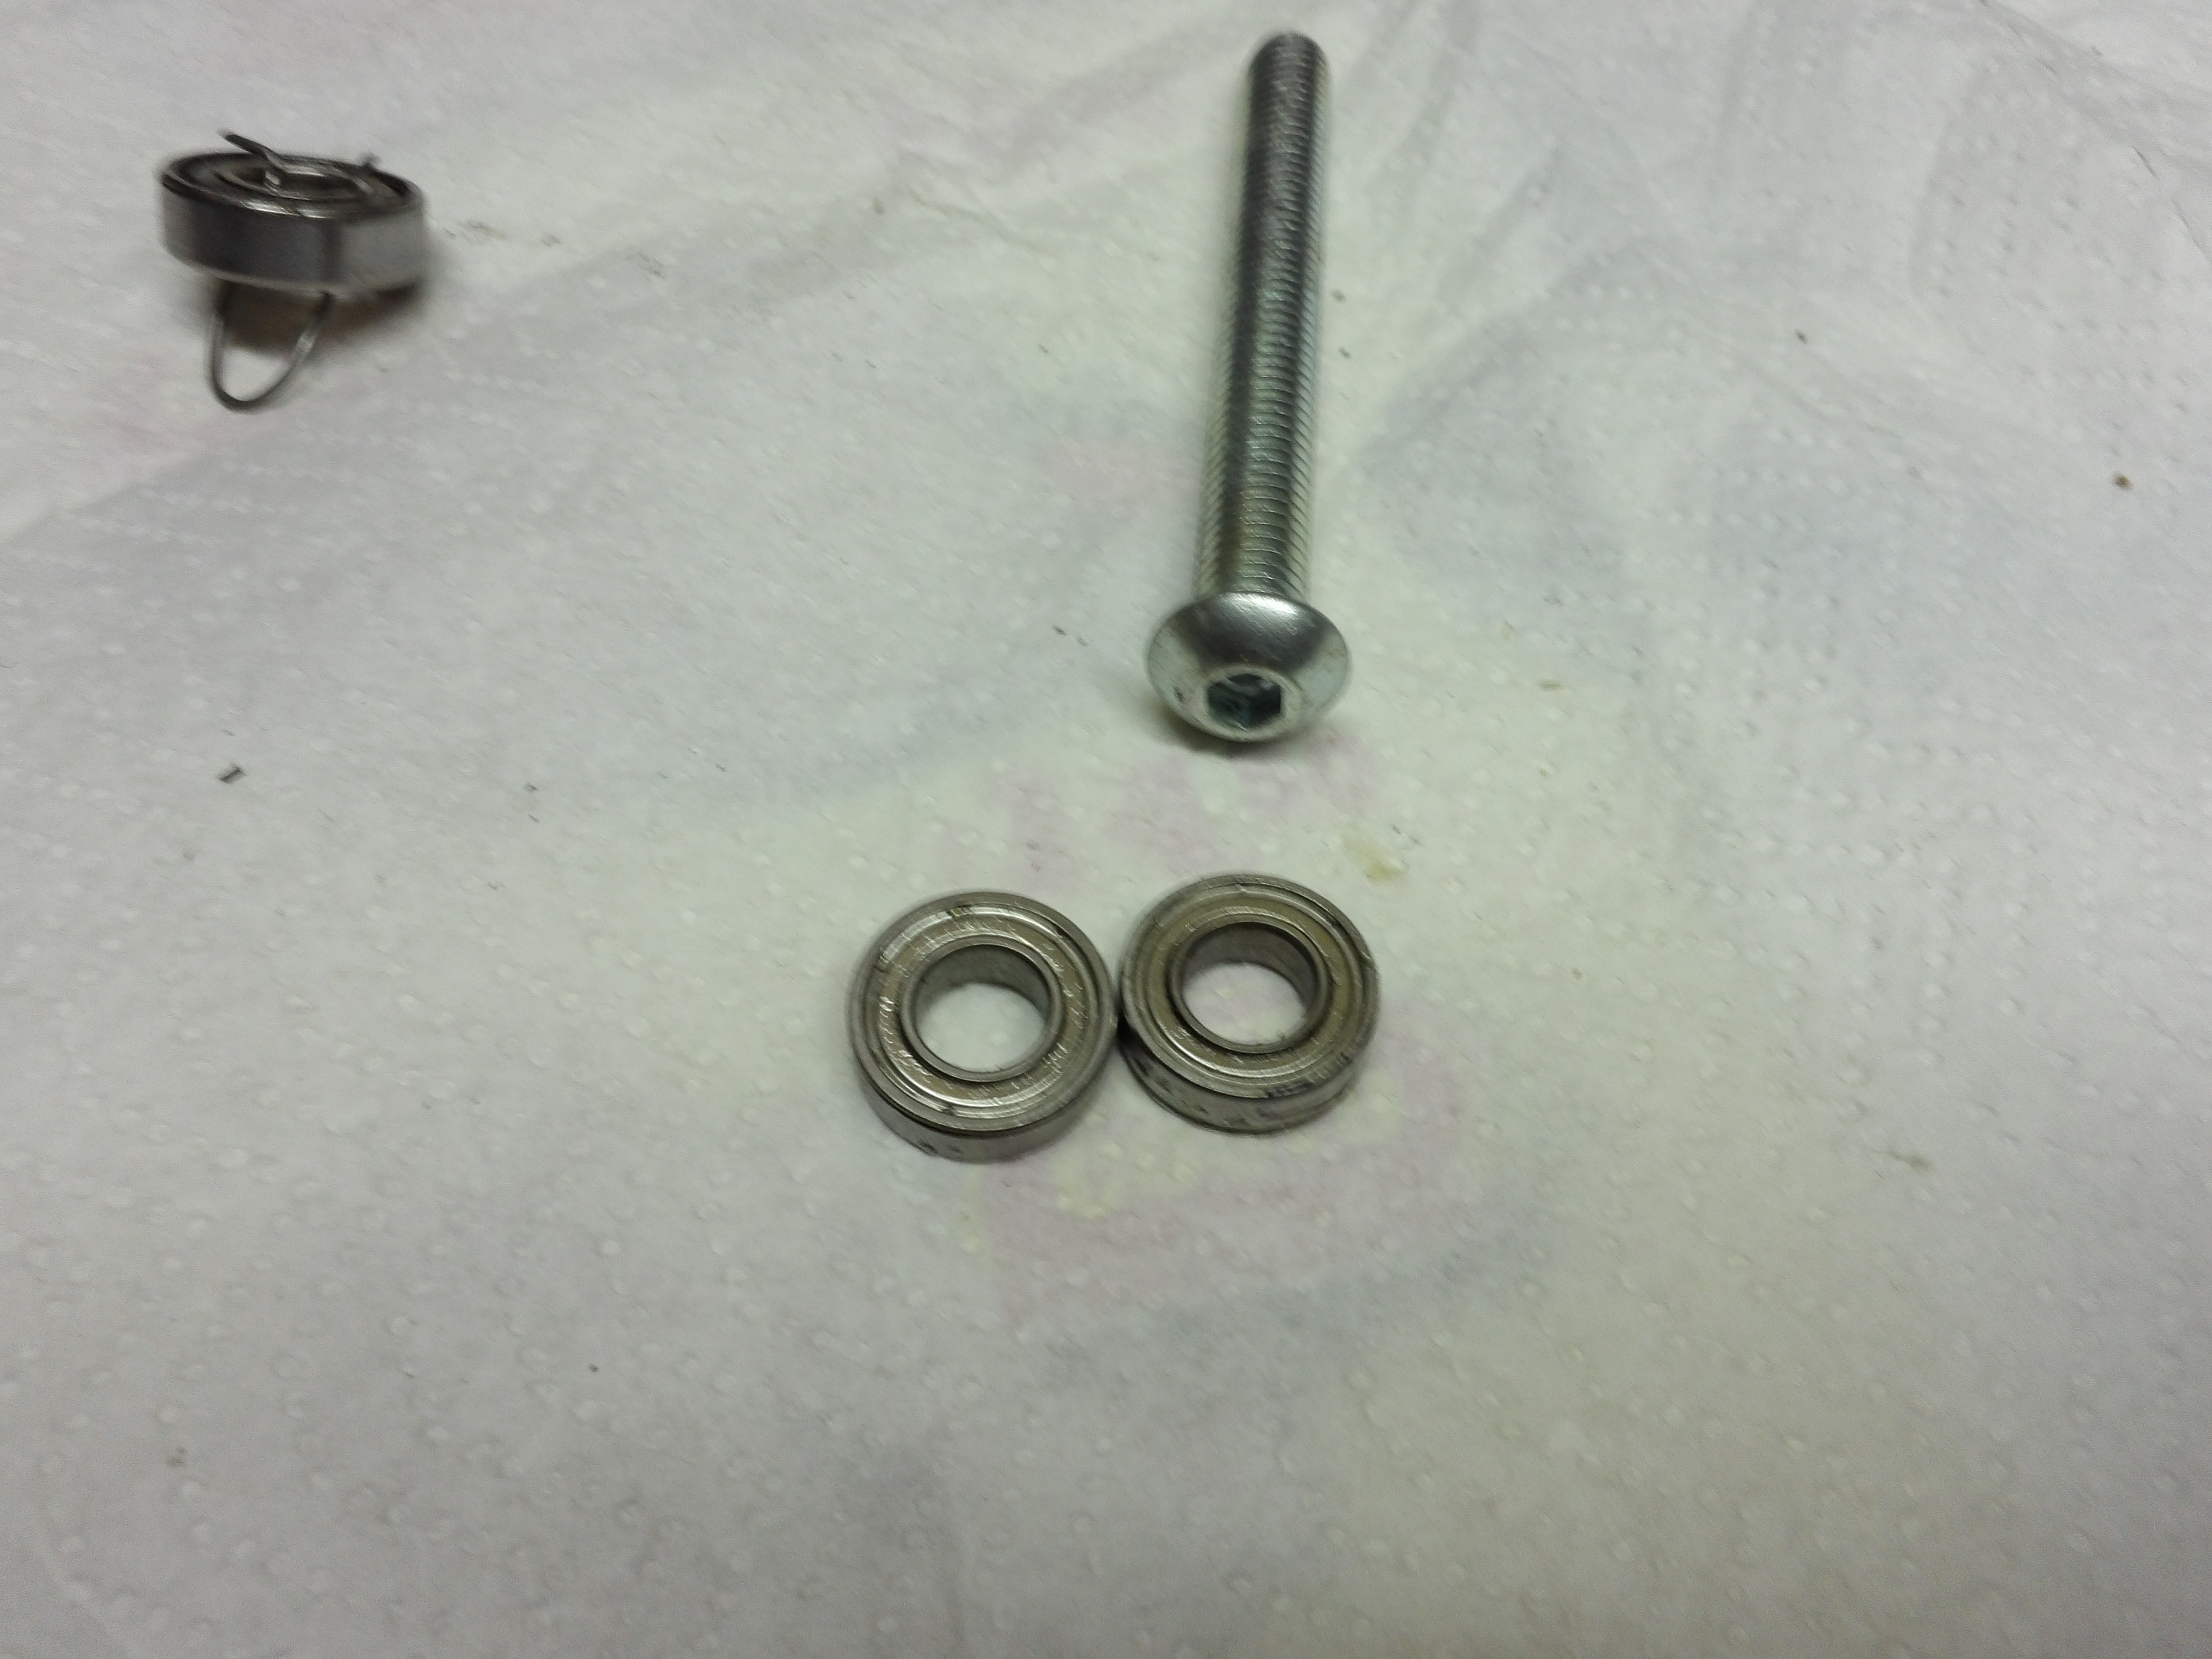
1 metal screw that need to be as large as the hole of the bearing, with a flat head and bottom and the most important, the new bearing :+1:

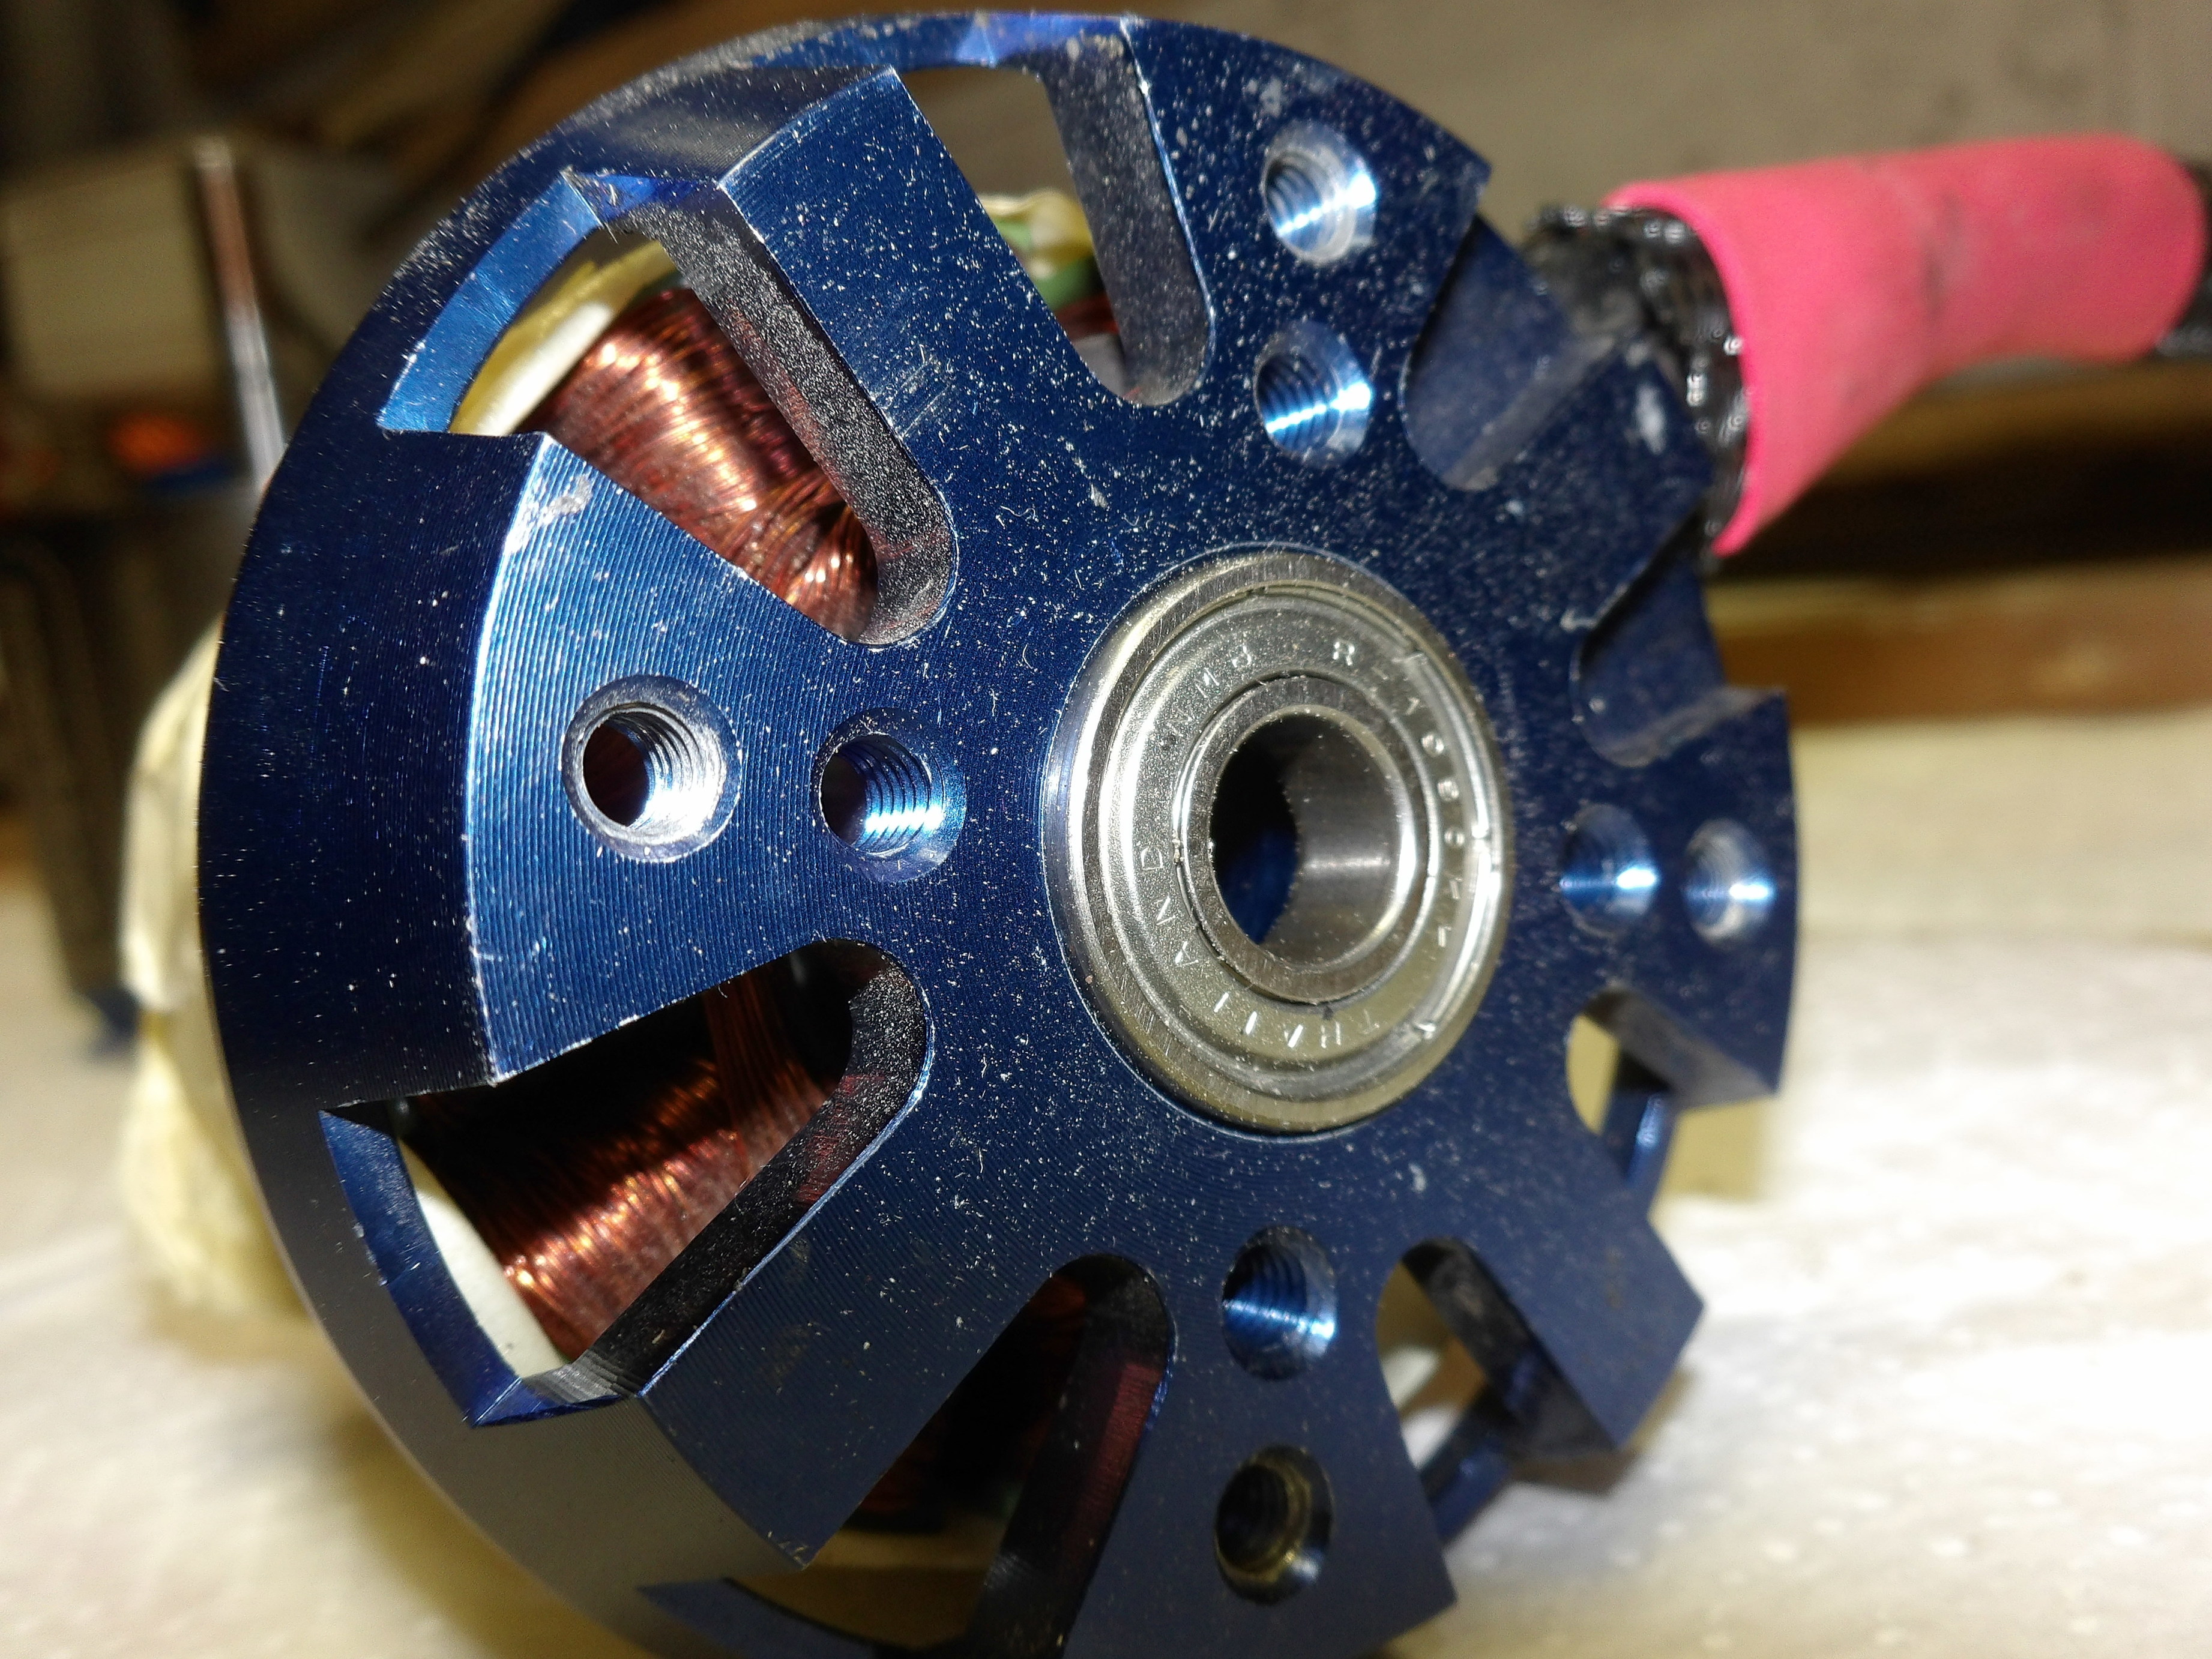
so I had 3 bearings to change: 1 big in the front, and 2 small one on the other side ( I use a enertion motor)

I started by bending the iron wire like in the foto

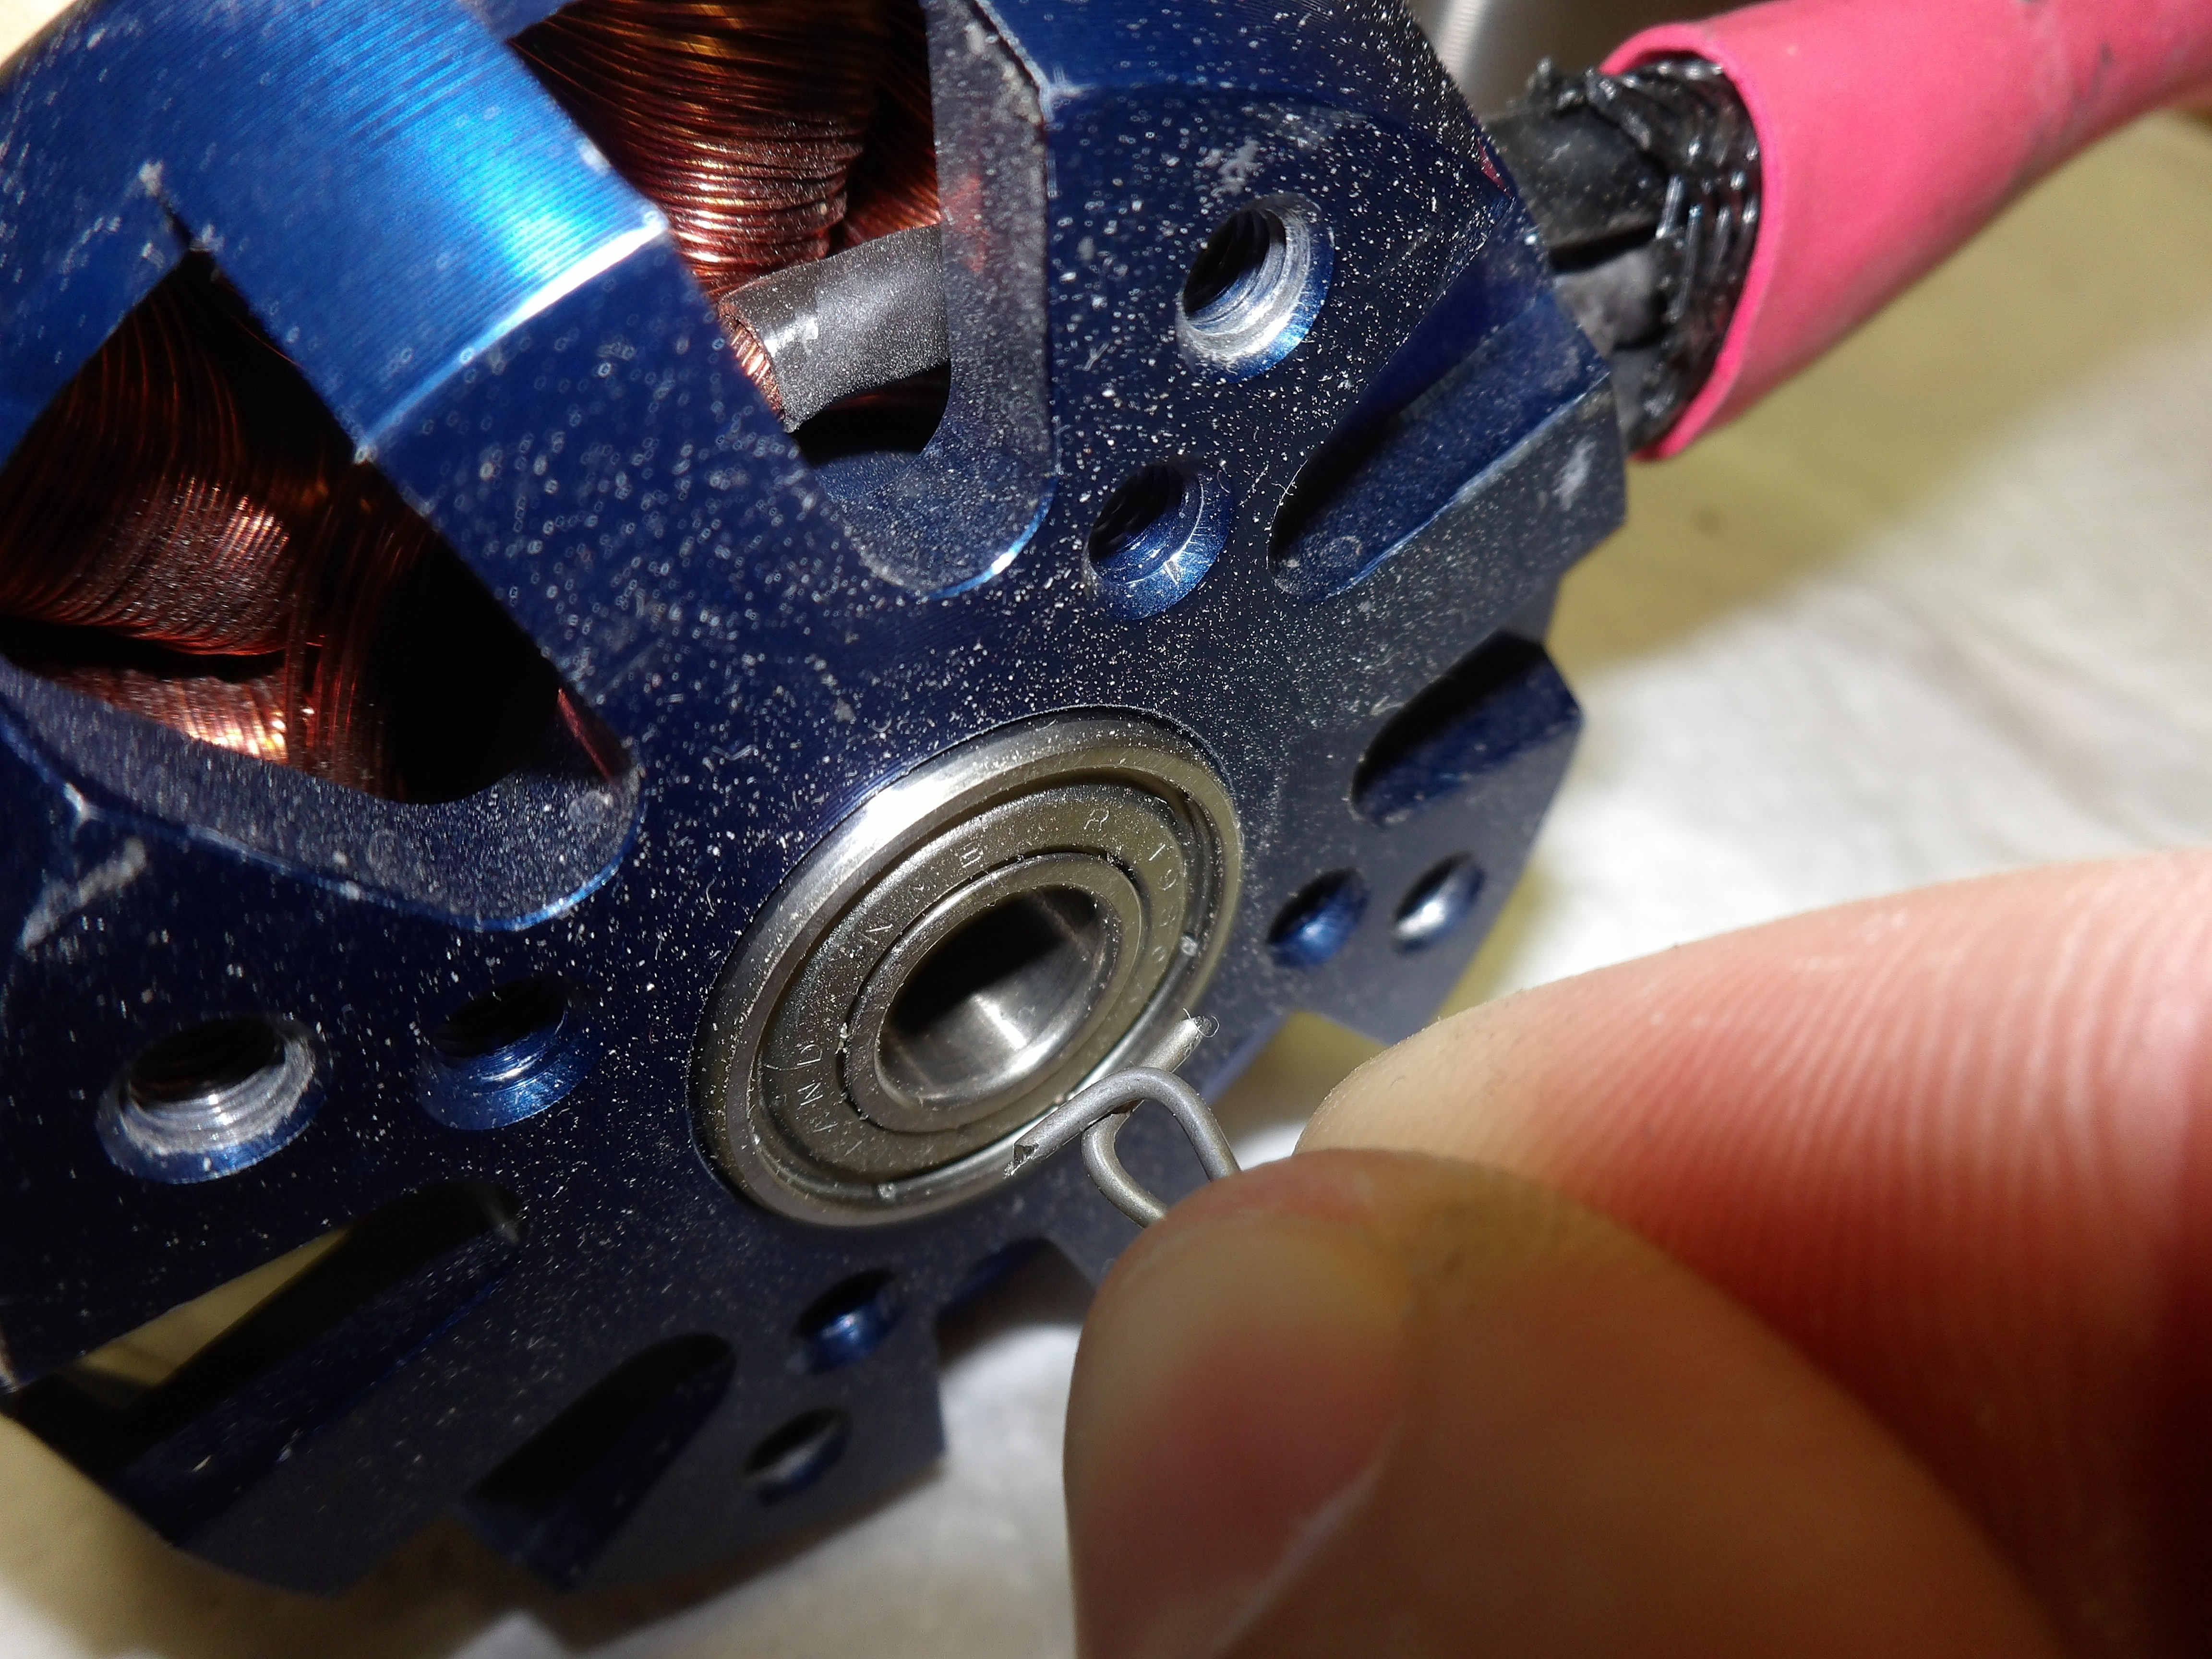
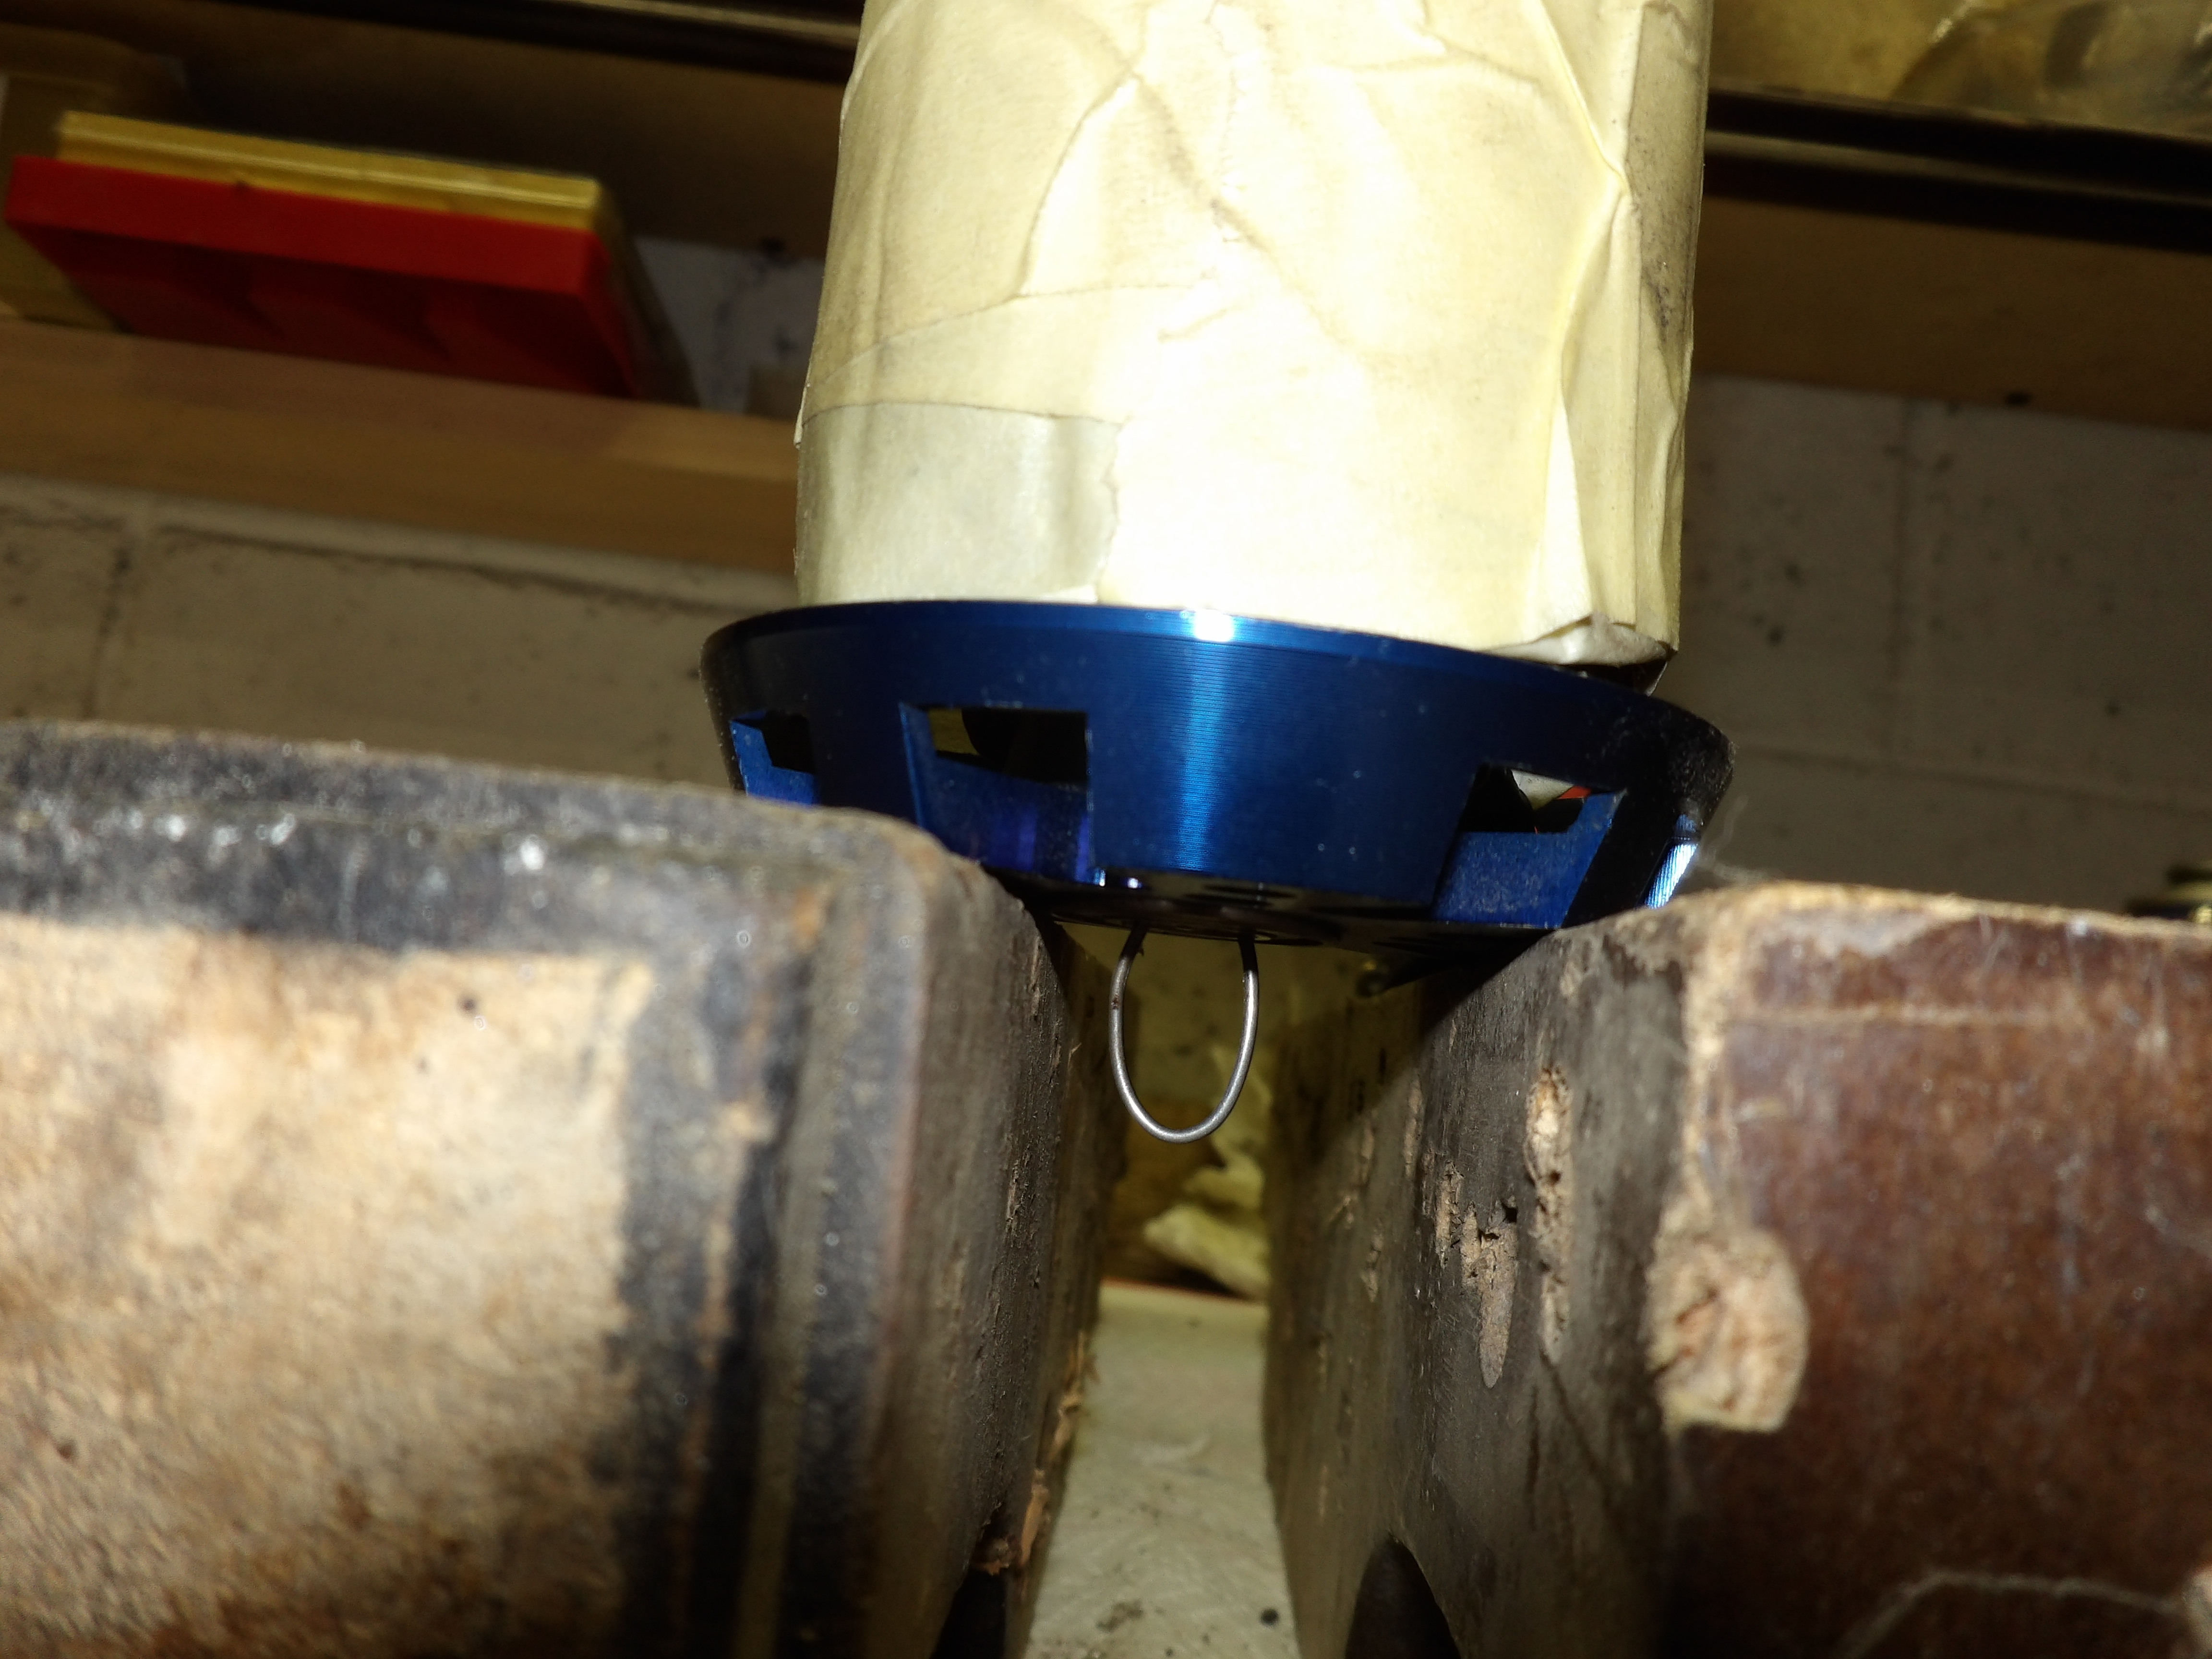
place the wire where you have just 1 bearing because it was easyer to get out that one, and face it down on top of the 2 equal pieces of wood ( like in the photo). So I’m using a screw that has the same diameter of the bearing but; because of that wire on the other side the screw ill stop os the top of the bearing. Some of you may ask why i don’t bend the screw a bit and hit directly the bearing. Because I may damage the bearing enclosure because it will not get out straight.

Then I hit a few times and the bearing pops out.

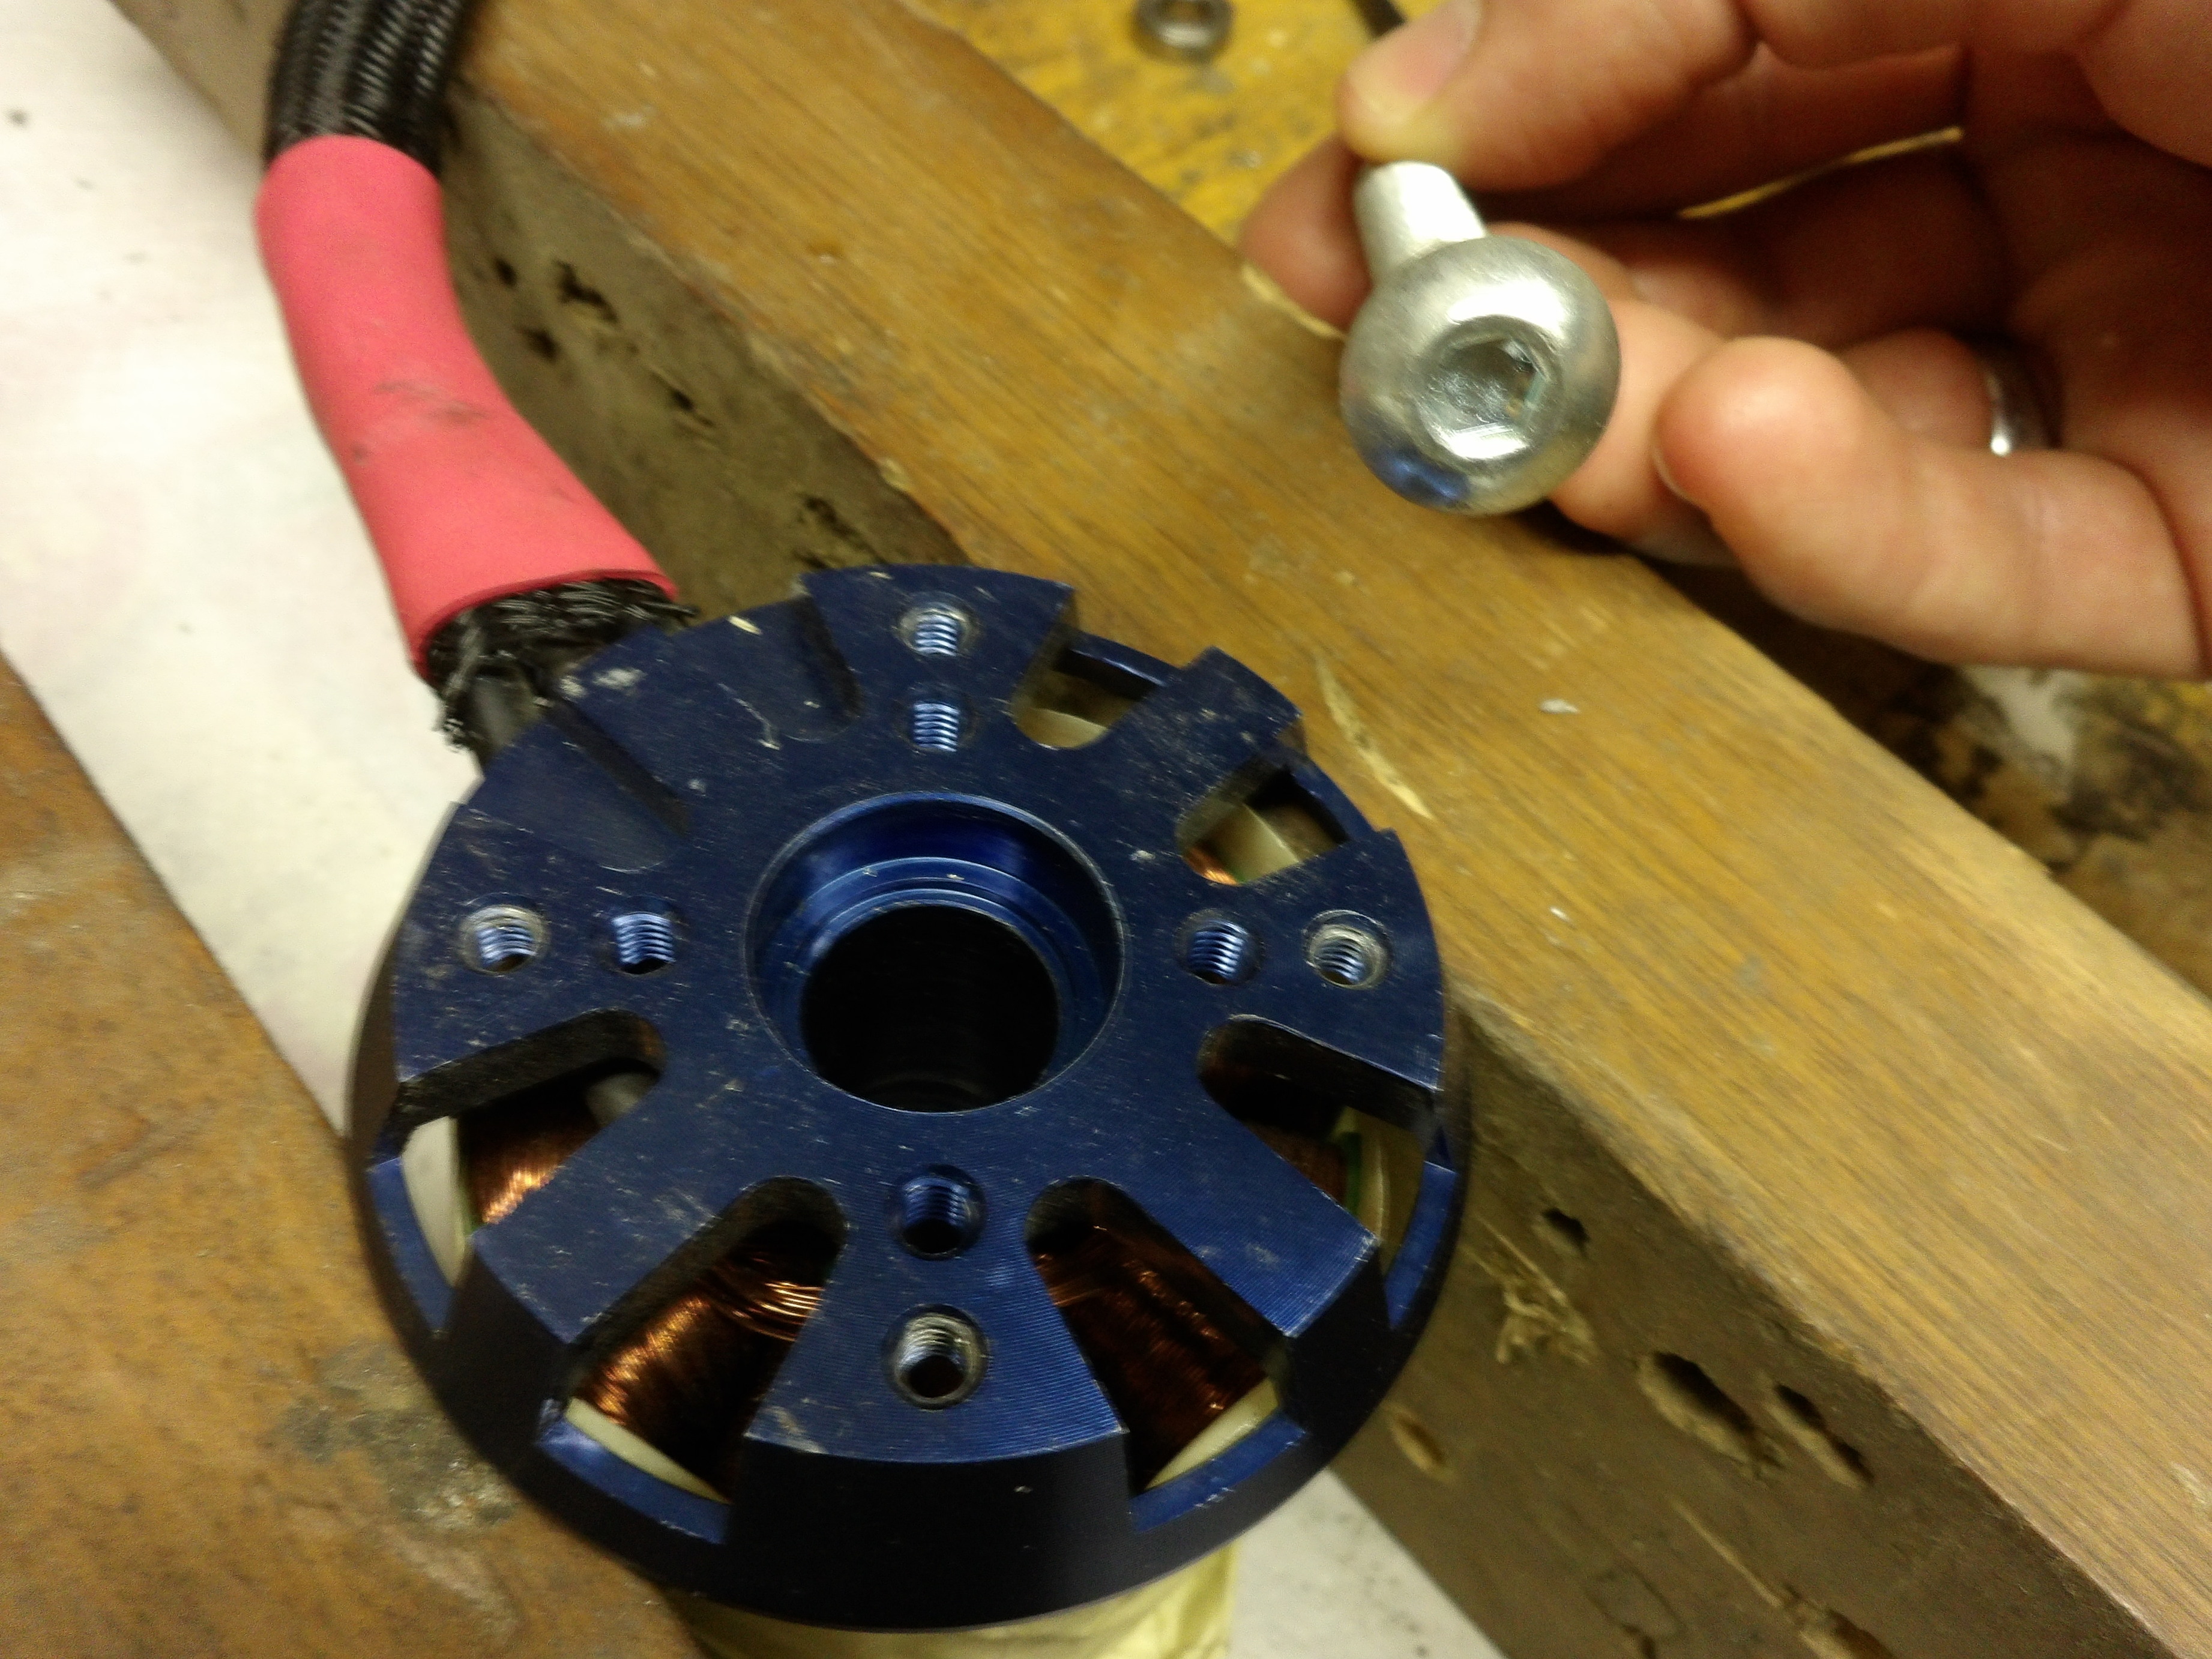
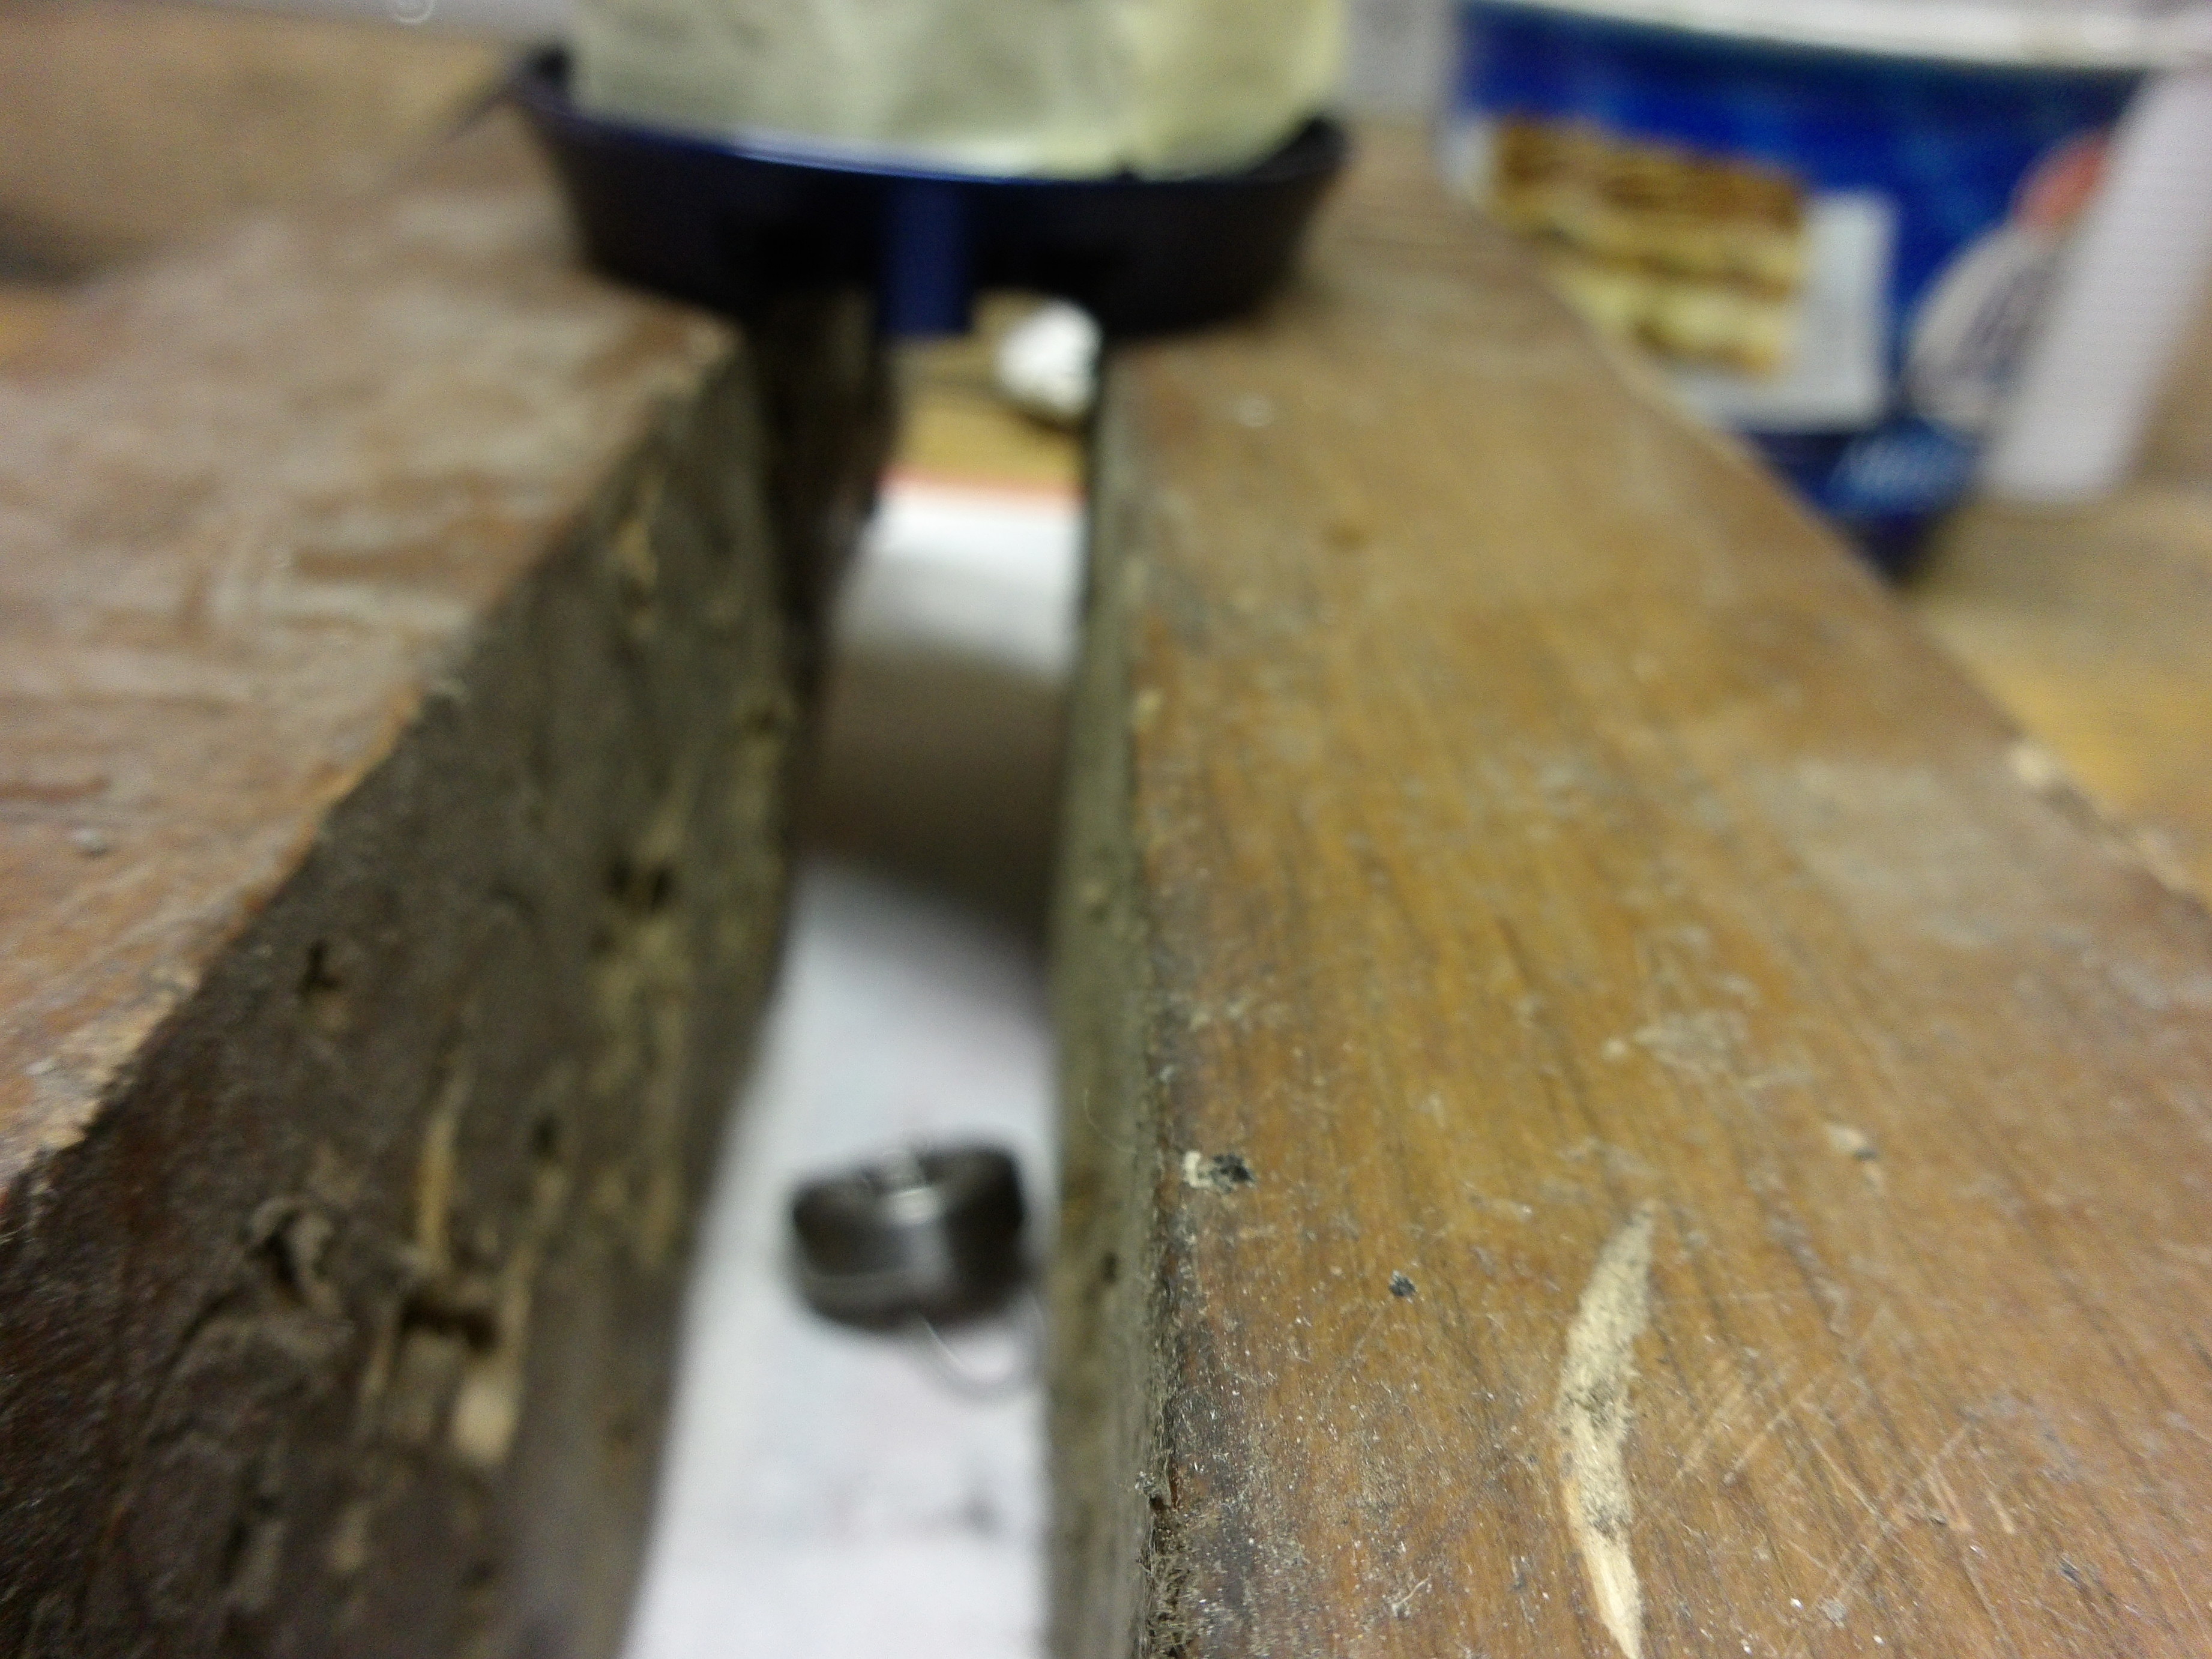
Now, for the other side, don’t lay the motor on the coper wires because you will need to use again the hammer and you may dammage it. instead, use again the 2 pieces of wood like in the photo (see that the motor didn’t tuch the table)

then use the screw head that showld be large enought, and hit hard :japanese_ogre:

Now to put the new one, use anothe piece of wood to cover the bearing so you don’t hit directly with tha hammer, or you may damage it

The job is done!!! That’s the way I do it, and never had any problem.

And I want to use this topic to show my diy Looooong long longboard, entirely made by me. (1 meter and 10 cm long )

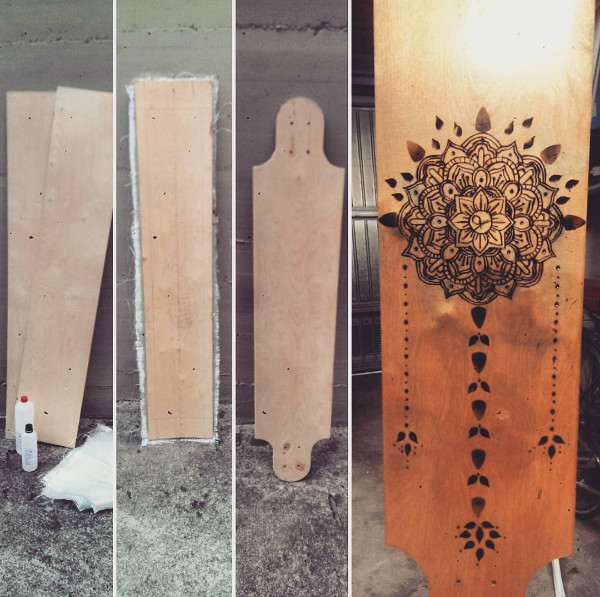
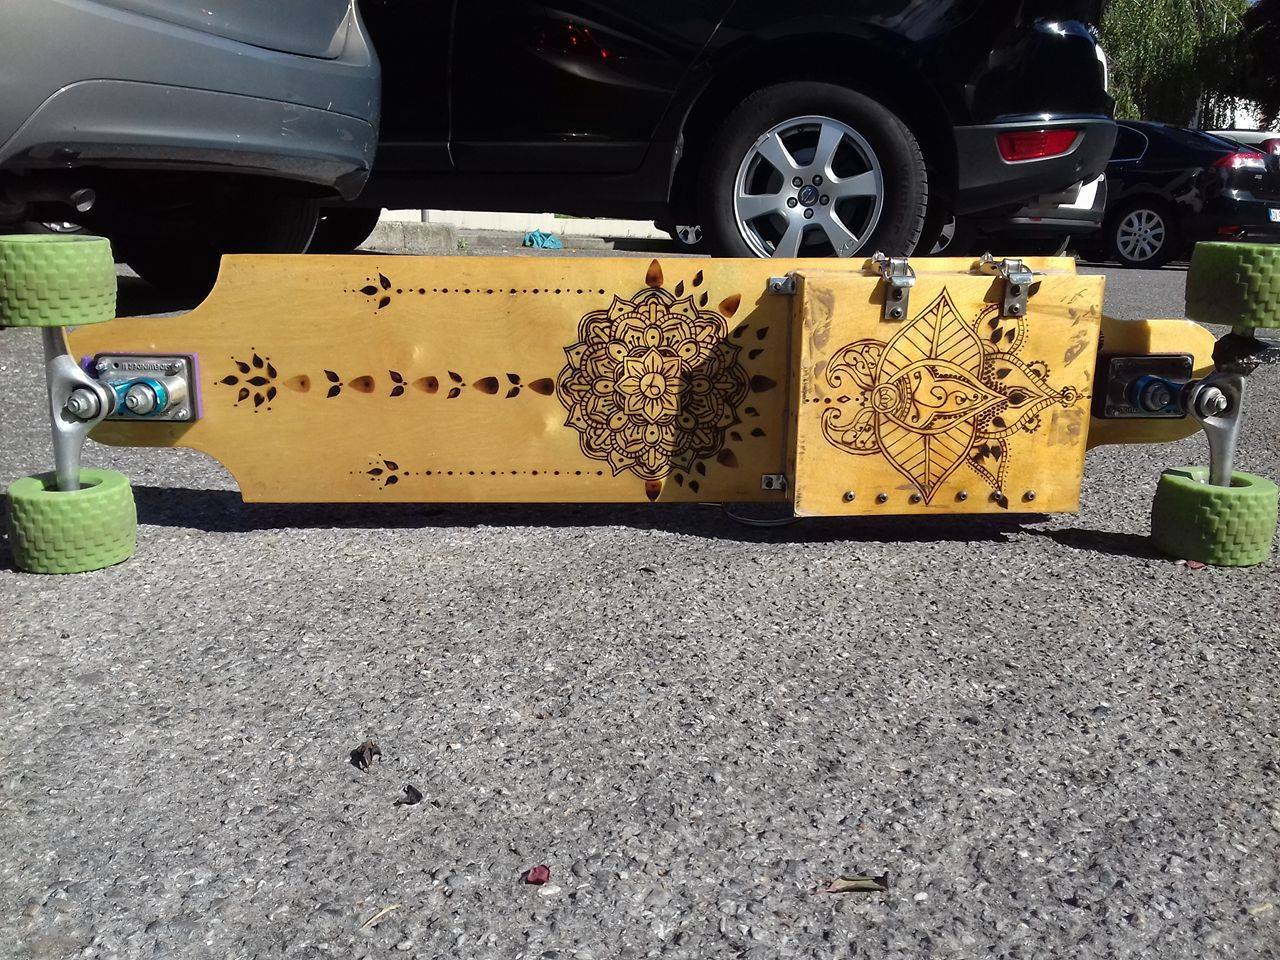
2 4S lipo HV turnigy battery 1 vesc 1 r-spec 6374 1 e-switch from alienpowersystem 1 wireless hand controller from alienpowersystem 2 double basher truck longboard from gullwing sidewinder II 100mm wheels from mtb all terrain (the green one) and block pad raiser. that’s all

Hope that it will be usefull to someone

13 Likes

this is a great tutorial.

Id also recommend ceramic bearings if you are going to go to the effort. you will probably never have to replace them again.

2 Likes

I would like to have seen how you removed the bell housing first… oh well thnx anyway

the bell is easy, just take the circlip and copper washer off the shaft and pull it off. (please no shaft pulling off puns.)

And what if the bell housing doesn’t want to come off without a fight? My fried sk3 hasn’t wanted to come apart for me yet, and I’m trying to figure what to try next without damaging it.

once the circlip and washer are out it should just slid out with only the magnets to hold it in place… they are strong magnets though. you could try putting the base of the motor in a vice and gently tapping the shaft with a soft hammer.

this site has nice pictures https://apollo.open-resource.org/mission:log:2012:07:17:howto-disassemble-a-brushless-motor

The housing is hard to get off. ThE magnets are strong. I made a little gap between the housing and the stator, and I place in a flat screwdriver, and open it a bit, just so I can place in my fingers and pull

@alindaniel93: Great tutorial! Would you mind tagging your post with “how-to” and add “[How to]” in the topic? We have a few post like that and it will help people find it.

Also, for anyone that is trying to remove the outer housing, be careful so that you don’t loose the grip. The magnets are strong and if you lose grip, the housing will snap back in place and if you have fingers in the wrong place it will hurt. A lot.

1 Like

everyone has to do that at least once. it’s a rite of passage.

4 Likes

Nice write-up, @alindaniel93. How well do the MBS All-Terrain wheels handle really rough asphalt? Does the board shake like crazy?

it shake less than my older wheels. If you don’t want to feel anything, you showld use the bigger one with tires in it.

1 Like

Cool. What wheels did you have before?

normal 83 mm soft wheels. there’s a big difference between 83 and 100 mm. but, because the mtb wheels aren’t smooth (see in the photo) at verry low speed on a perfectly smooth grownd, you can feel some tiny vibration, almost nothing, but they make a nice WOOOOOOO sound

Interesting. Someone should design a 100mm wheel with a rounded profile and make it smooth in the center and nubbed on either side.

I meant motor mount lol

I went to a blacksmith who did that piece for me. I paid 50 euros for it. so It’s better if you buy it online… is the same price

Although my comment is late, I just wanted to say it was great.

It is advisable to replace your old bearings with high-quality bearings, maybe change them once a year or every two years. Maintain your bearings by cleaning them regularly or once a month, especially if you ride often. Inspect the bearings to see if they are worn.