Dorian Wiskow eMTB Build - Trampa HolyPro 17, E-Toxx Belt Drive, Twin SK3 6374s, Twin MAX6 ESCs & 6S 16,000mAh Lipo

I have recently completed an Electric Mountain Board build, which is based on the following equipment;

  • 1 x Trampa HS11 Brake Deck (Holy Pro 35 with Magura hydraulic brakes)
  • 1 x E-Toxx Trampa Motor Mount and 25mm Belt Drive System (6:1 Ratio)
  • 1 x E-Toxx ESC/Receiver Mounting Plate with Traxxas Waterproof Receiver Box
  • 2 x Hobbyking SK3 6374 192kv motors
  • 2 x Hobbywing MAX6 ESCs
  • 1 x Winning Remote/Receiver
  • 1 x 6s 16,000 mAh HobbyKing MultiStar 10C Battery (I have bought a couple of these at only $80 each)
  • 1 x B&W International 500 Waterproof Case

By the way, I want to publicly acknowledge Jens Kappel/E-TOXX who have a brilliant product and provide fantastic support/assistance to customers to help them get their project off the ground. If you intend to build anything like my eMTB, I recommend E-TOXX motor mounts and drive systems which are bullet proof and come complete with great instructions and every washer, bolt or screw you will need in comprehensively labeled separate plastic ziploc bags.

The entire board is completely waterproof and with the 8in/200mm pneumatic wheels can be ridden in any weather and on any surface (you just need to be careful on wet grass which is like ice).

I weigh 120kg, so am no lightweight and wanted enough power to comfortably ride off-road and up hills . . . the speed and range measurements I have made are with my mountain board carrying 120kg of me !

I have both calculated and measured the speed of my eMountainBoard at 25-30 KPH or 16-19MPH (30KPH on a fully charged battery reducing to 25KPH as the battery voltage drops).

I found the acceleration/braking on the MAX6 ESC (set to punch 5, braking 100%) to be a little too abrupt and sharp, so I have developed a small board (hardware/software) to fit between the receiver and the ESCs that ā€œmanagesā€ the rate of change (up or down) of the PWM signal . . . it has four different modes of operation (selected using a button on the board ā€“ with LED feedback to indicate mode).

  • Mode 1 - pass through (no modification of any type to the PWM signal)
  • Mode 2 - Slow (limits the maximum throttle to 50% and adds a ramp up/down curve to smooth any sudden acceleration/deceleration)
  • Mode 3 - Eco (limits the maximum throttle to 70% and adds a ramp up/down curve to smooth any sudden acceleration/deceleration)
  • Mode 4 - Fast (doesnā€™t limit the maximum throttle (i.e 100%), but adds a ramp up/down curve to smooth any sudden acceleration/deceleration)

The default mode is mode 4, which means I can slam full throttle on and, rather than throw me off, it smoothly accelerates to full speed . . . equally, I can slam full brake on (at maximum speed) and it will smoothly come to a stop . . . modes 2 & 3 are for learners and limit the top speed while providing even smoother acceleration/deceleration (really useful if you let people try the board for the first time). This also means that in the event of signal loss from the hand held transmitter my board will simply reduce throttle and apply braking in a smooth manner (preventing any sudden stop that will usually throw the rider off the board). This reduces the risk of accidents and makes it extremely smooth and easy to ride !

I have recorded the performance over a number of rides and am experiencing a 17-20 kilometer or 10-12 mile range with this set up and my 6S 16,000mAh battery (so with a second/spare battery in my backpack can easily achieve overall 30-40km distance).

The 10C 16,000mAh battery is able to put out 22-25 volts at 160 amps, so has plenty of power to drive the motors (even with my 120kg on board). Obviously, I could increase the performance and overall speed of the board to 40KPH/25MPH by moving to an 8s battery, but frankly the current 30KPH/20MPH delivered by the 6S battery is plenty for me at the moment (and the battery from HobbyKing is a bargain at only $80).

I am currently running with the Yellow (65 shore) Dampas and the springs only very lightly loaded to get maximum turning from the trucks. This means I need to continue to develop my balance and/or reduce speed when I experience high speed wobbles. I have tried both loading the springs and fitting the Green (75 shore) Dampas, but feel I lose some of the control (steering) of the board at lower speeds.
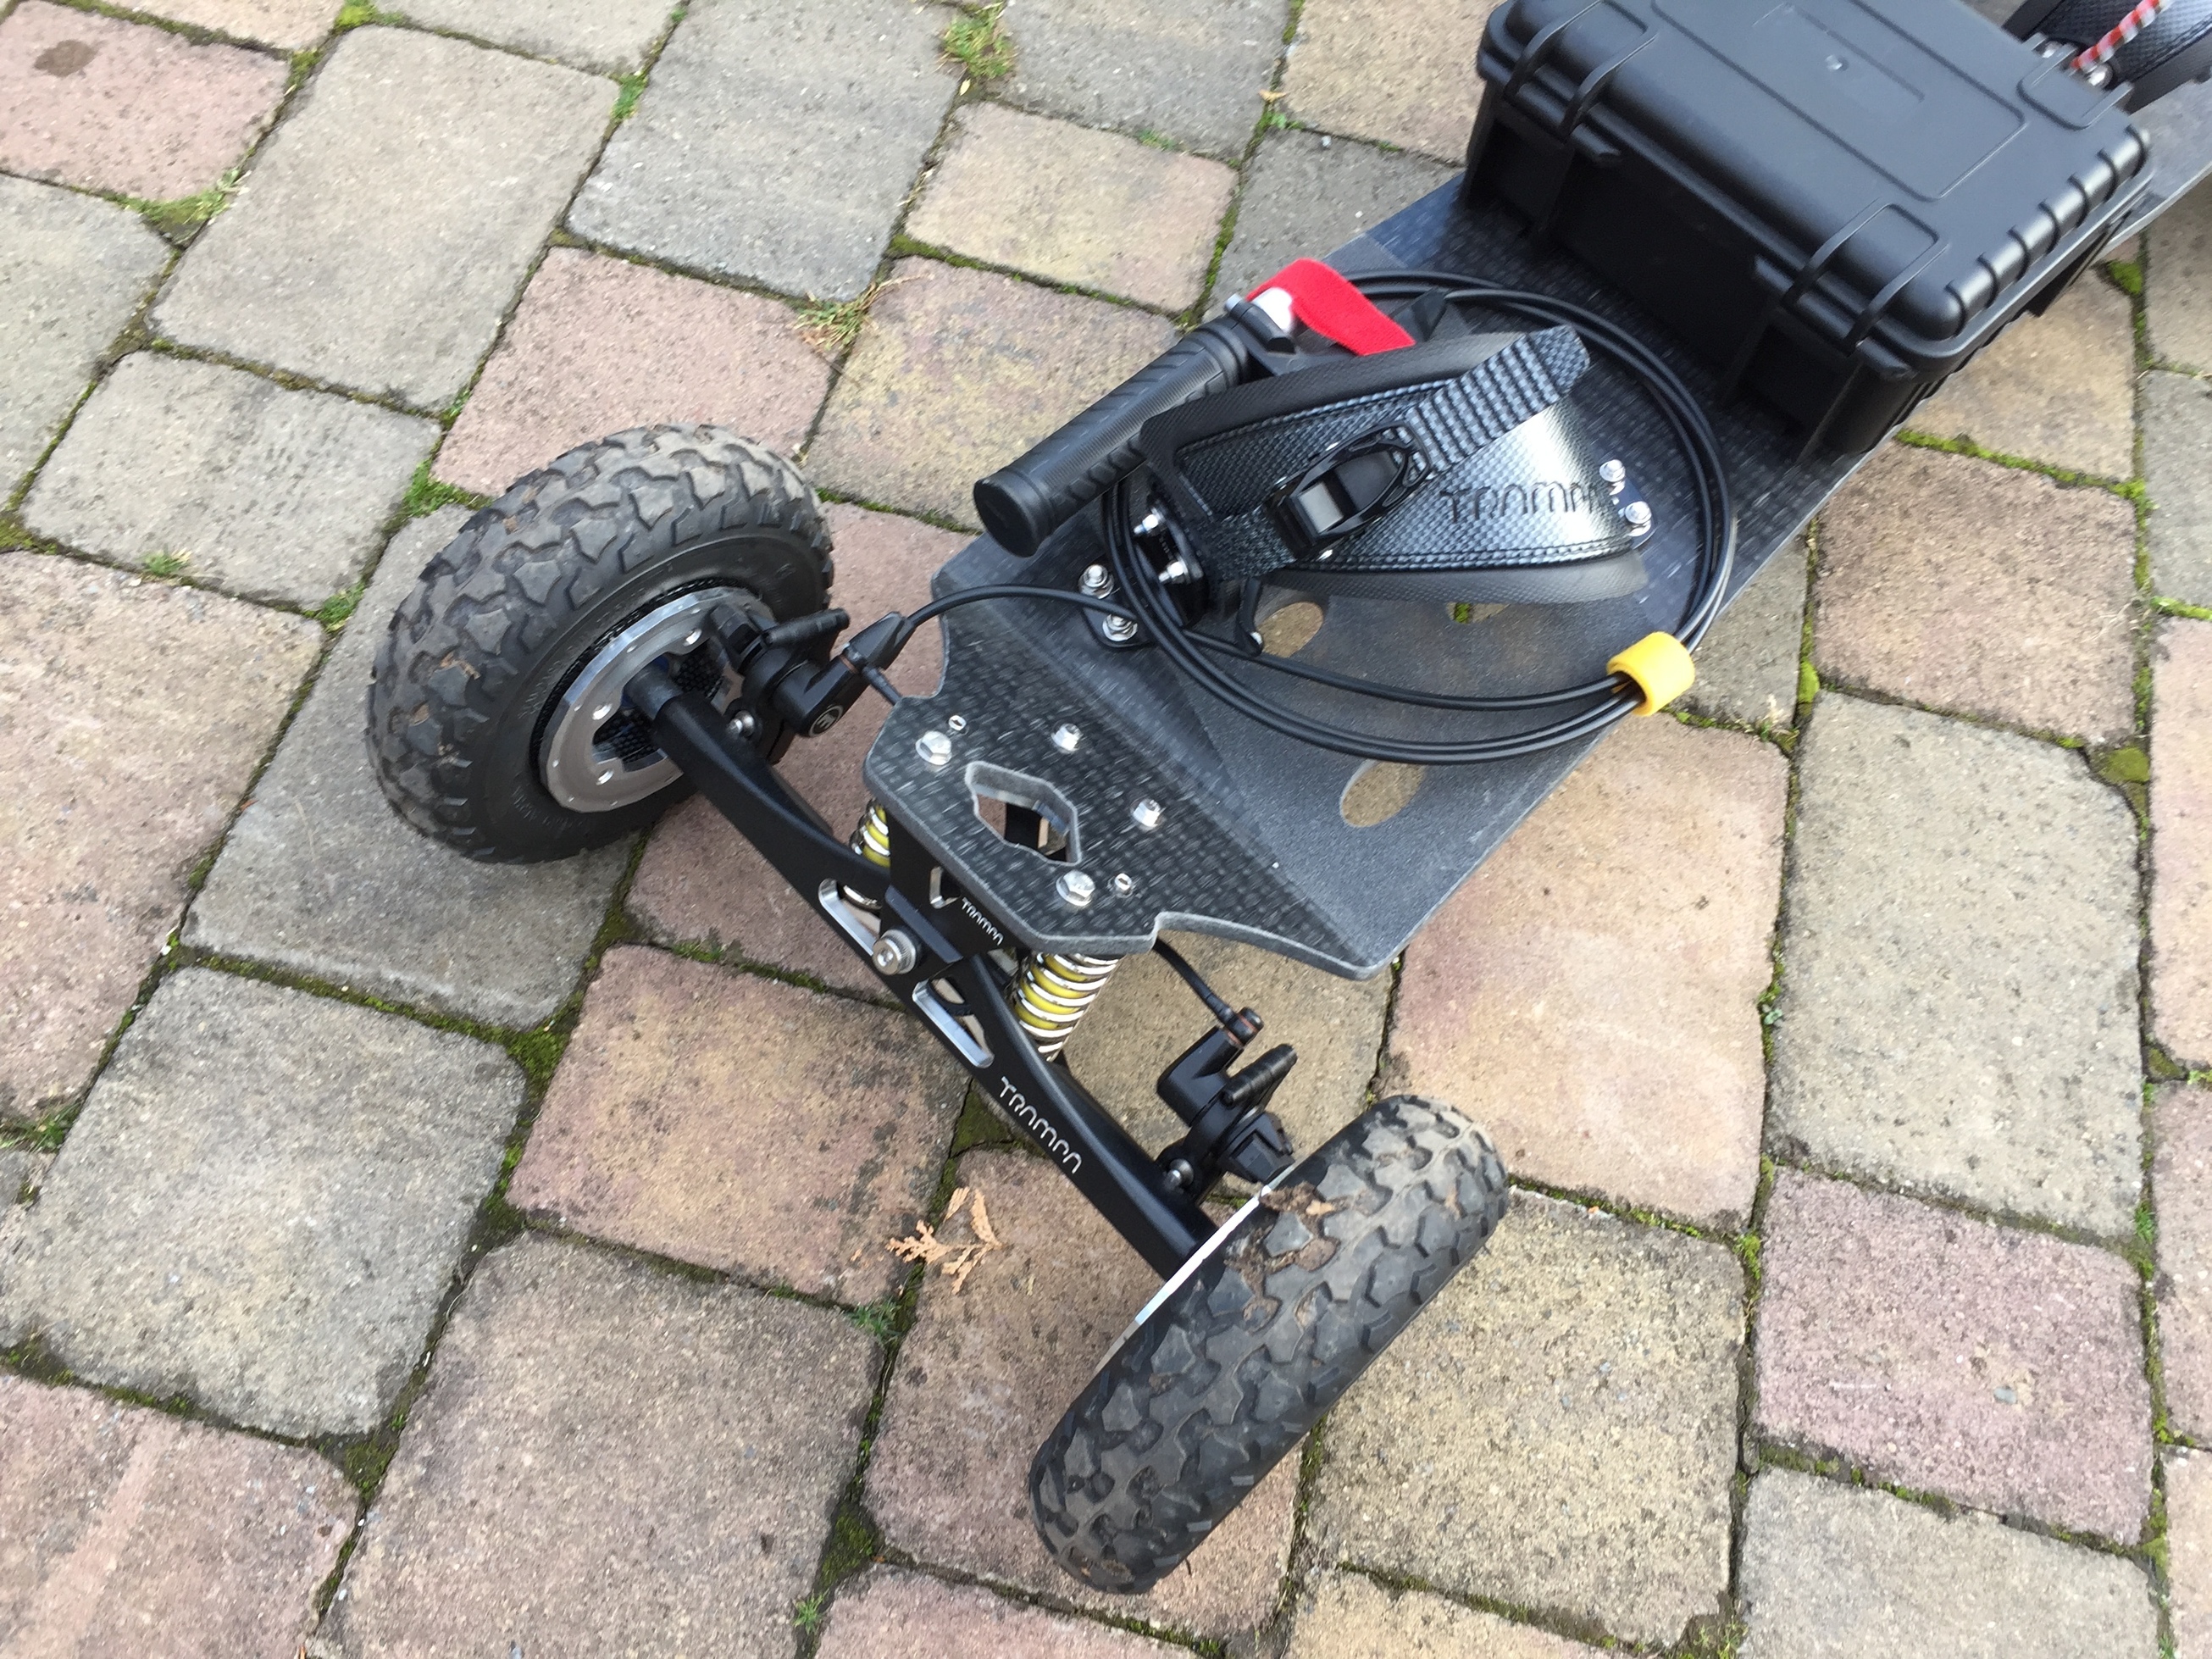
Magura hydraulic brakes ā€“ mechanical backup in case things go wrong !

Waterproof MAX6 ESCs, Receiver in Traxxas Waterproof Box, plus my Magic PWM Manager

E-Toxx Motor Mount & 6:1 25mm Belt Drive

B&W International 500 Waterproof Case holding Battery, Remote, Keys etc

HobbyKing 6S 10C 16,000mAh Battery, Winning Remote, Wallet, Keys, etc

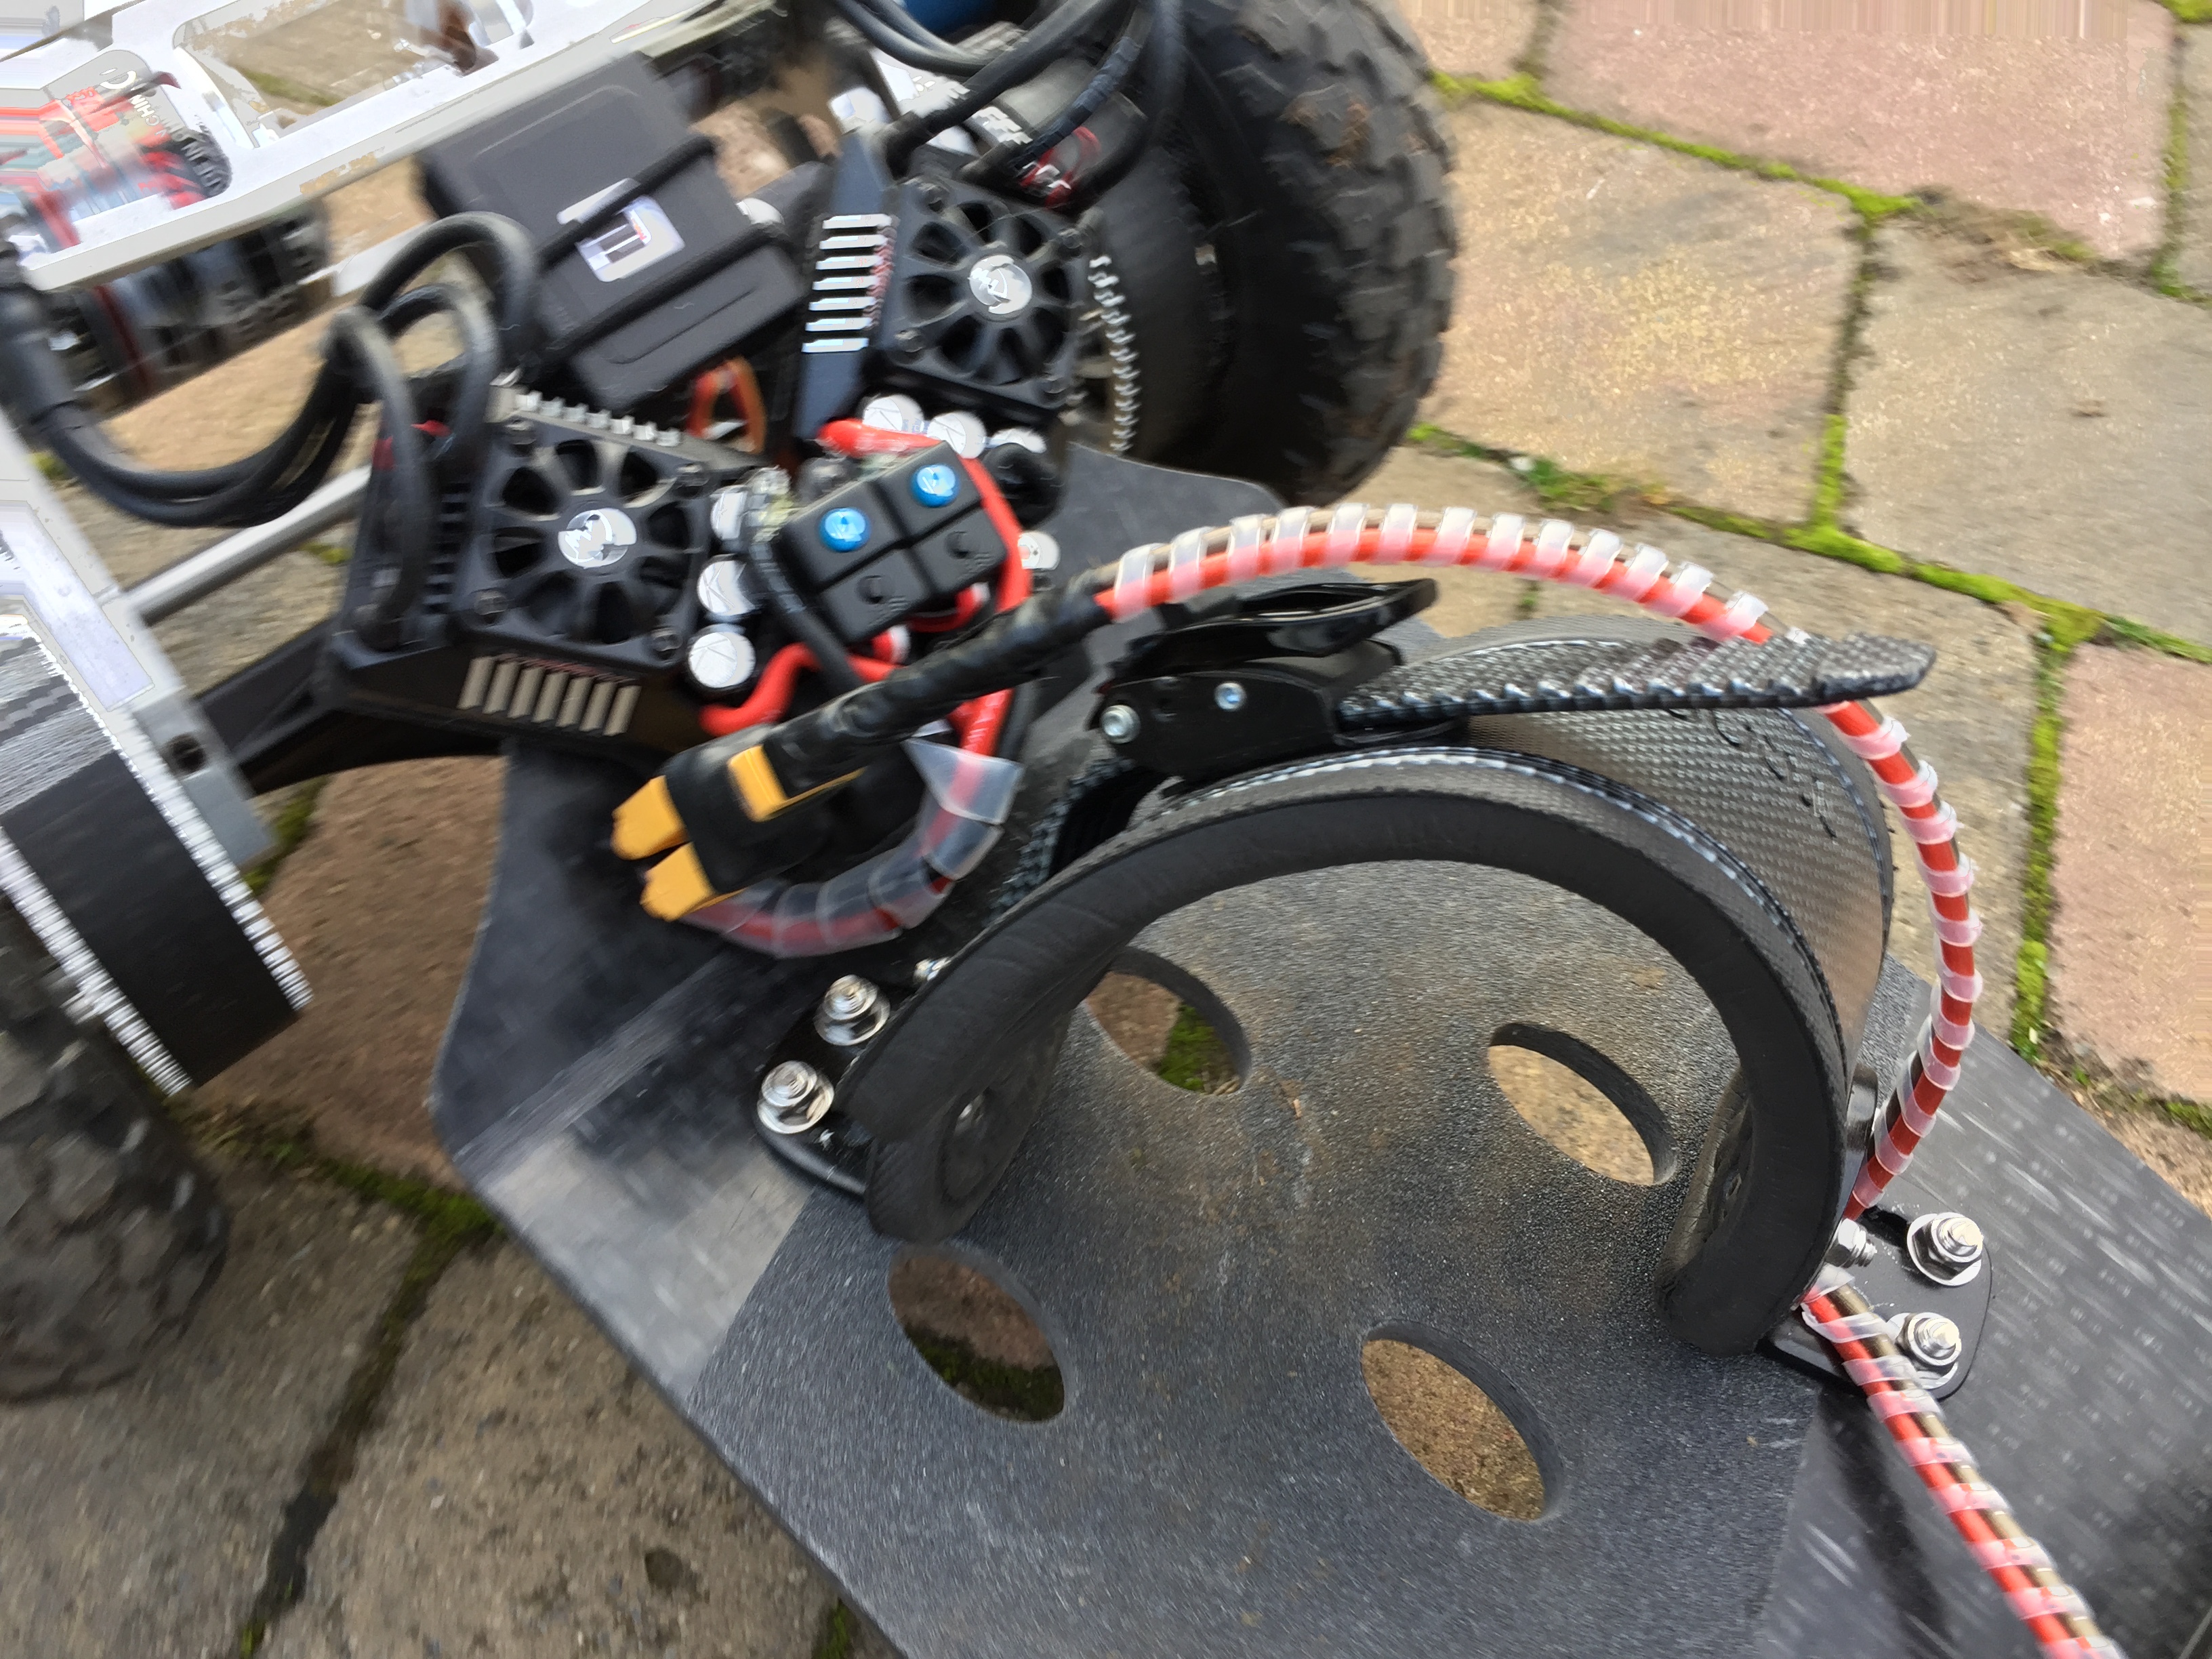
Battery wiring to Speed Controllers & Electronics

Battery wiring & two way splitter using XT90s with MAX6 ESCs Soft Start Power Switches

17 Likes

wow thats a beast. but the brake thing, i wish somehow you hook it up with a servo and control it wirelessly , thats would be awesome :smiley: :smiley: :smiley: :smiley:

I do control it wirelessly . . . using the Winning Remote Controller (which provides brake and accelerator control) . . . the Magura Hydraulic Brakes are deliberately a completely independent mechanical system (because sh*t happens) and I always like to have a ā€˜Plan Bā€™

1 Like

Soooo you are riding two hands?? Does that feel weird?

No not weird . . . I am left handed and ride goofy . . so wireless remote in left hand (at the rear of the board & close to the receiver), and hydraulic brake lever loosely held in right hand (just in case it is needed).

It also makes it really easy to mount and adjust the feet bindings when on a hill . . . I just hold the board with the hydraulic brake while I get my feet in and adjust the bindings.

2 Likes

Nice! Interested in your ā€œmagic PWM managerā€. Looks like it could be the solution to having a beginner mode on builds. You donā€™t have any problems with your multistar with it being just 10c?

10C would definitely be a problem if the battery were smaller capacity, but 10C on a 16,000mAh battery means that it can deliver a constant 160amps . . . my motors are SK3 6374s which pull a maximum current of 80amps and can handle a maximum voltage of 44volts . . . so 2 x 80amps = 1 x 160amps which means this battery can supply all the juice the motors can consume (and it is relatively small and inexpensive, so you can easily carry a spare or two and charge via a normal RC balanced charger)

By the way, these two motors can produce up to 2,750 watts of power each . . . Thatā€™s 5,500 watts or a little over 7 horesepower . . . plenty to haul me along at more speed than I can handle !

With respect to my Magic PWM Manager, you are absolutely right, mode 1 & 2 are perfect for beginners or children where the risk of injury (or loss of confidence) is serious given the power and instant acceleration/braking eBoards are capable of delivering . . . I wouldnā€™t discount the stress it takes out of full power either. Knowing that an inadvertent ā€˜nudgeā€™ on the remote when going over rough ground or a sudden loss of signal is enough to throw you off the board and hurt you, really reduces the enjoyment when out riding. My Magic PWM Manager removes all of that anxiety and risk by delivering a buttery smooth experience when either accelerating or braking.

2 Likes

What range do you get from that brick?

Are you gonna be making your magic pwm manager available to the community?

Range is detailed in my original build post . . .10-12 miles or 17-20 kilometers.

I would need to work out how best to do that, but if there is enough interest then definitely.

4 Likes

Love the build! Looks sweet! Iā€™m loving the disc brakes as well. It has even crossed my mind recently to add that to my build. We will see.

I think your Magic PWM manager is a fantastic idea. I have been worried about any of my friends trying my board as it is hard to describe how sensitive these controllers are until you actually try it yourself. That along with the crazy amount of grip and torque as I found out by stacking it hard the first time lol.

I donā€™t know how it works but would it be possible to have 2 control knobs, one to control max speed and one for ramp up/ramp down aggression between throttle states? Sorry Iā€™m just thinking out loud, its just got my mind thinkingā€¦

Really good work btw!

@EssEnn I guess you need to think of the one I built as a prototype . . . you are on the right track regarding having a setting for speed an another for the acceleration/braking curves . . . I ā€˜fixedā€™ the speed setting by allowing four modes;

  • Pass Through - that changed nothing
  • Slow - 50% throttle and ramp up/down curves applied
  • Eco - 70% throttle and ramp up/down curves applied
  • Fast - 100% throttle and ramp up/down curves applied

Interestingly, I found that different curves were required for each mode . . . and the acceleration and braking curves also needed to be different . . . both the maximum speed/power in each mode and the curves are likely to be personal preference though.

Doing this was easy on my prototype, I just adjusted the software accordingly . . . to make this general purpose and allow individual adjustments to be set requires a bit more thought about the user interface, particularly if the device is to be located inside an enclosure with limited access.

I will have a play and see what is possible.

2 Likes

@DWiskow I keep having ideaā€™s about this so Iā€™m going to just throw them out there if you donā€™t mind. I just like brain storming but if iā€™m annoying just say and Iā€™ll shut up.

To have something that was adjustable by the user could you not have a pot like the one below to adjust variables such as max throttle and ramp rate

And then just switch between the 4 modes that would have different ramp curves? Also would it be possible to have the fast mode always start from neutral? So lets say you go full throttle and then full reverse, can the ramping be instant to neutral and then the curve applied during the braking and visa versa?

Are you using an Arduino?

@EssEnn Your instinct is right about ā€˜starting from neutralā€™ and that is the way my code already works . . . not sure regarding the use of pots, if the board is installed in a location that is not readily accessible (e.g. inside an enclosure).

Very nice build. Clean simple effective. Post a video!

How are the brakes? Iā€™m thinking about installing some on my mountain board since Iā€™m strapped in and canā€™t bail if I need to. I almost got hit by a car. Held onto a stop sign for dear life.

1 Like

I donā€™t see any issue mounting pots in an enclosure to adjust parameters. Thing is, can it be done?

Iā€™m totally in helping out where ever I can with this as I think it is a great idea. Do I need to learn to program an Arduino? How can I help? I got loads of ideas at least

Lucky in the UK I canā€™t ride on the roads or pavements. Well I can but police would not be happy about it and take the board. Not worth the risk.

Still I have been thinking about the brake kit as it looks sick as well as giving an option to stop if things go wrong.

Dudeā€¦ you guys are freaking me out :grinning: Do these things really just take off, and/or lockup unexpectedly? :fearful:

@barajabali Why did you have to hang onto a stop sign?

Really nice work @DWiskow !! I like it! Im not sure i saw a response to the question of whether you are using arduino to control the acceleration? This is something that could really allow friends/family to safely experience an emtb ā€¦ would you mind sharing your code? Keep up the good work !!