First Build (Feedback Wanted) | Vanguard Flex 2 | TB Dual Motor Electric Skateboard Kit | 10s4p Samsung 25R | Kegel 80A | Caliber II 50 | TB 2.4GHz Nano Controller

Hello everyone, My name is Andrew. I am currently a 1st year Mechanical Engineering student at the University of California, Santa Barbara. Most of the students here commute on bikes and longboards, and I thought it would be very convenient to have an electric skateboard to get around the campus. The bigger focus of this build is to create a project that would look good on my resume, and to a great conversation starter. I planned on building it over the summer so I did some intensive research in the past week or so. I understand that to build a decent board isn’t going to be cheap, but I am somewhat going to treat this as an investment for future opportunities. So my budget is set to around $1000.

The following are the parts I have decided to use.

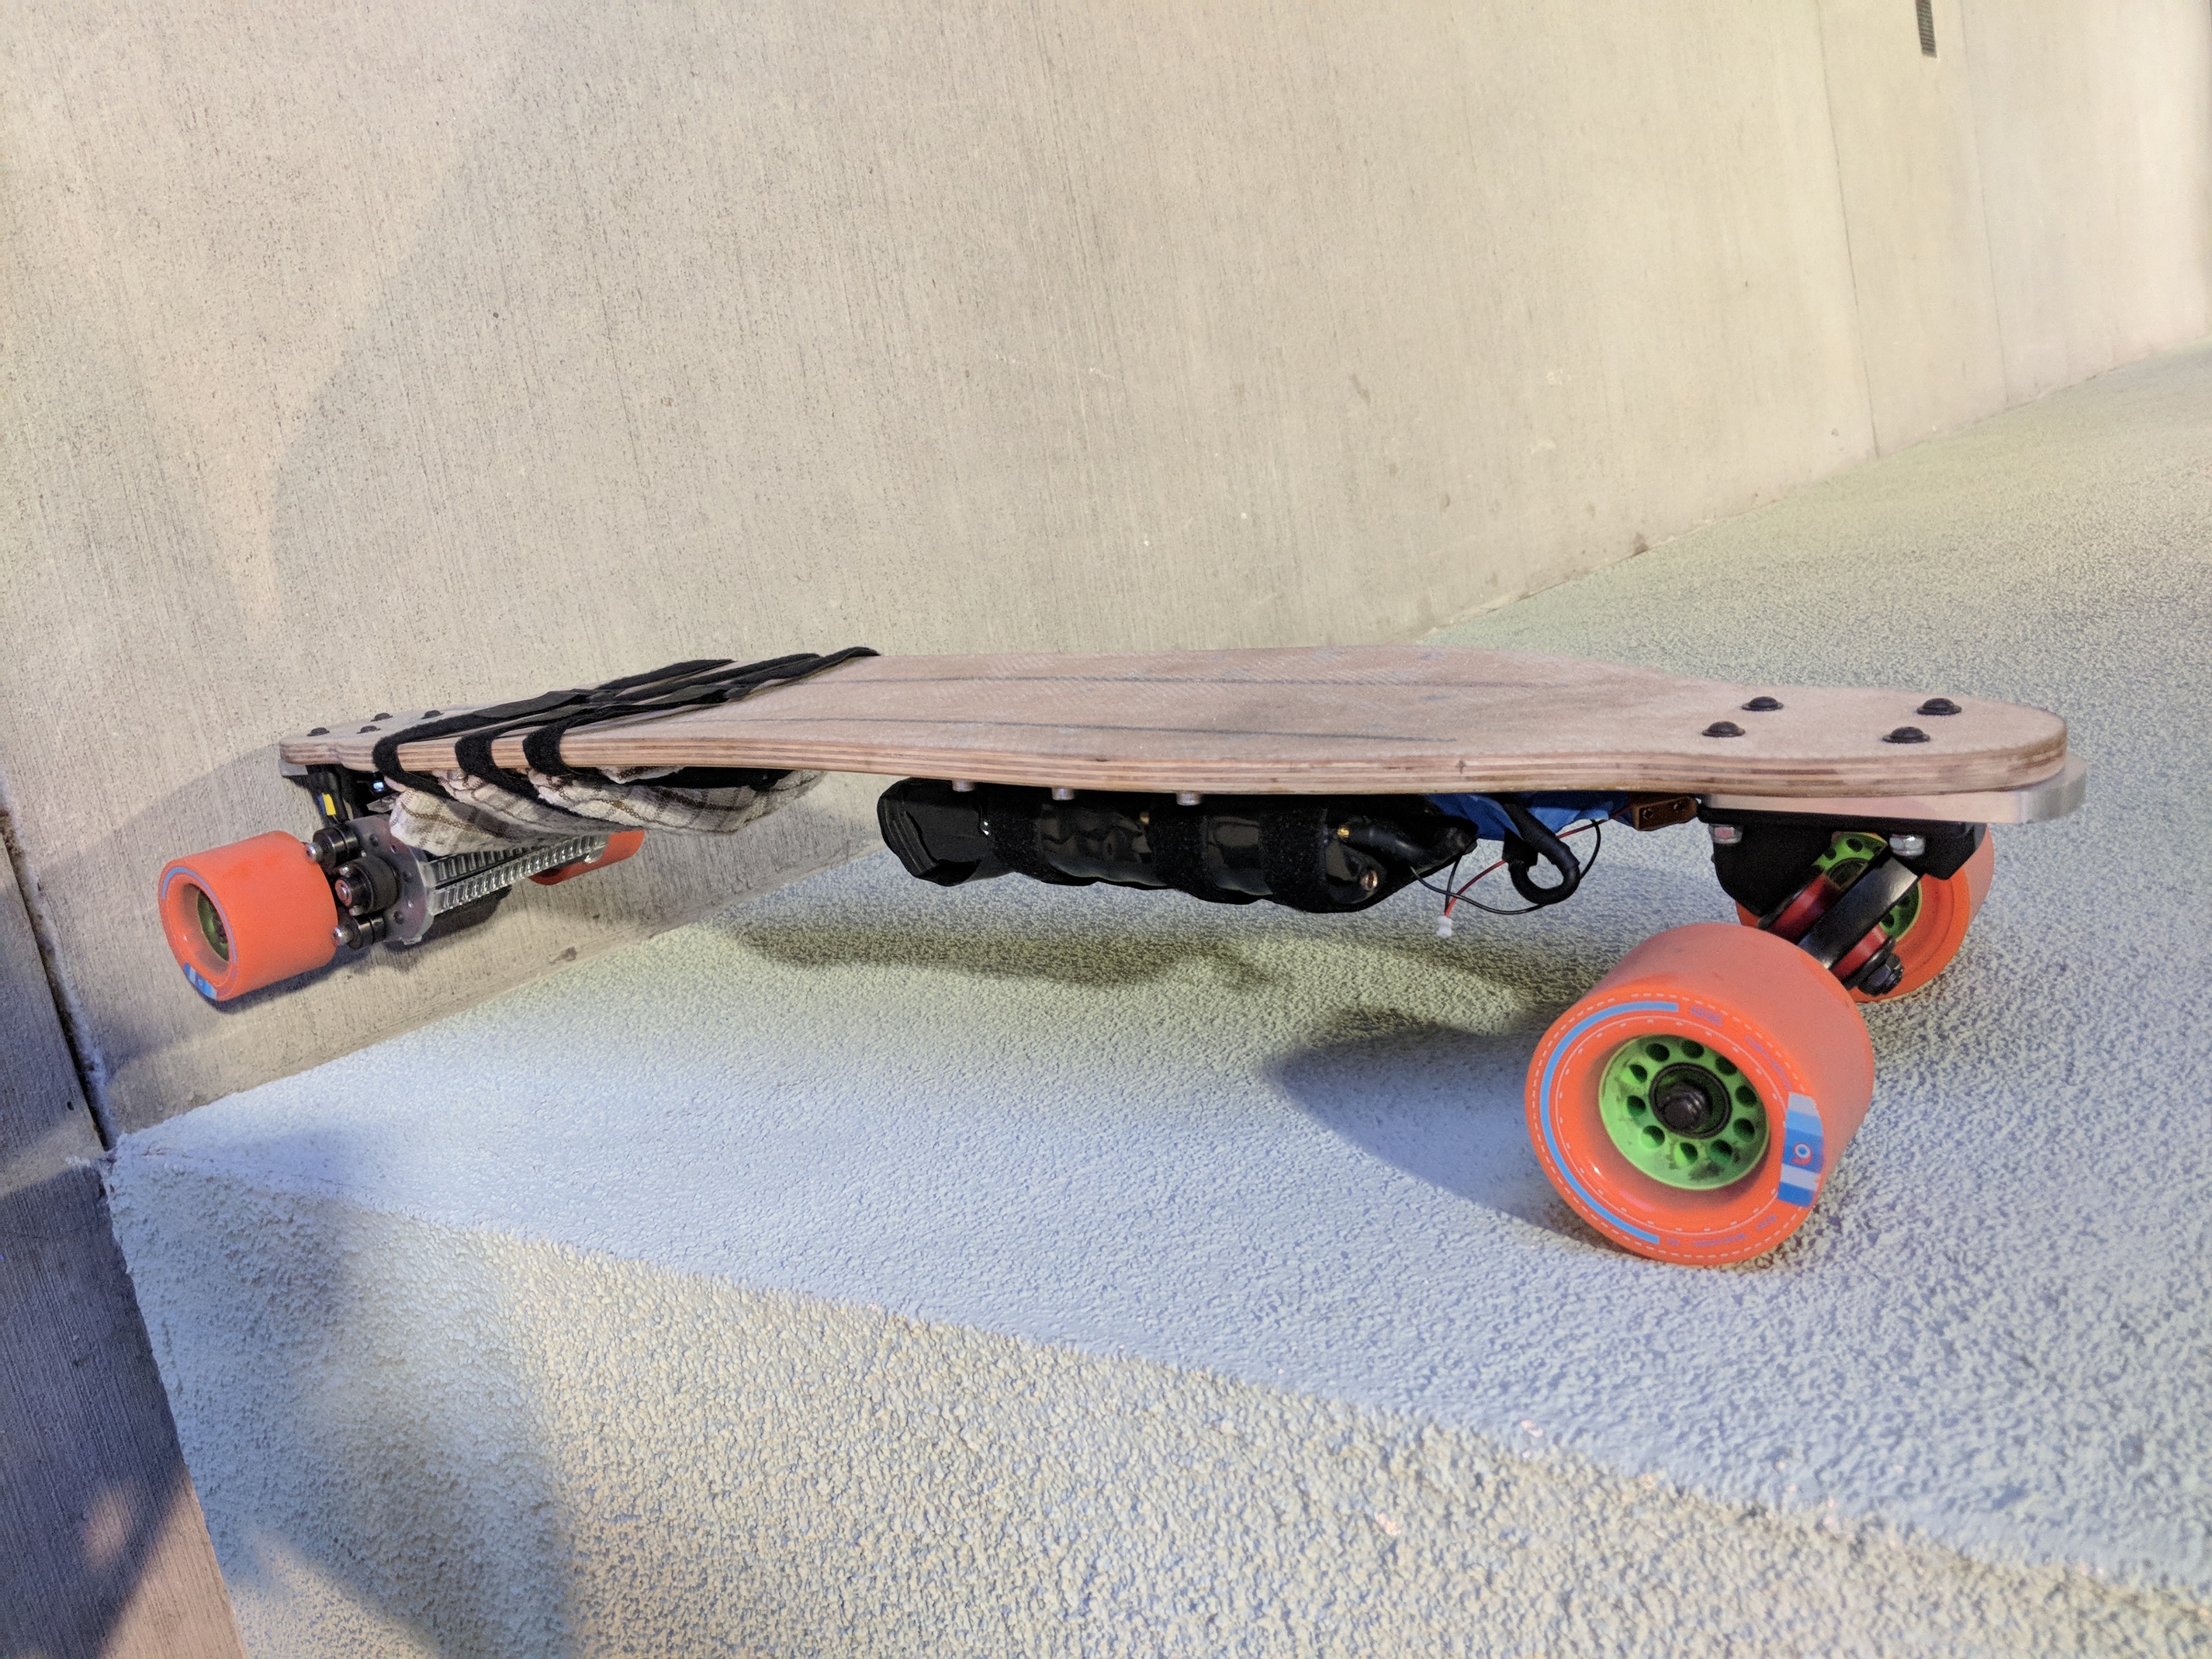
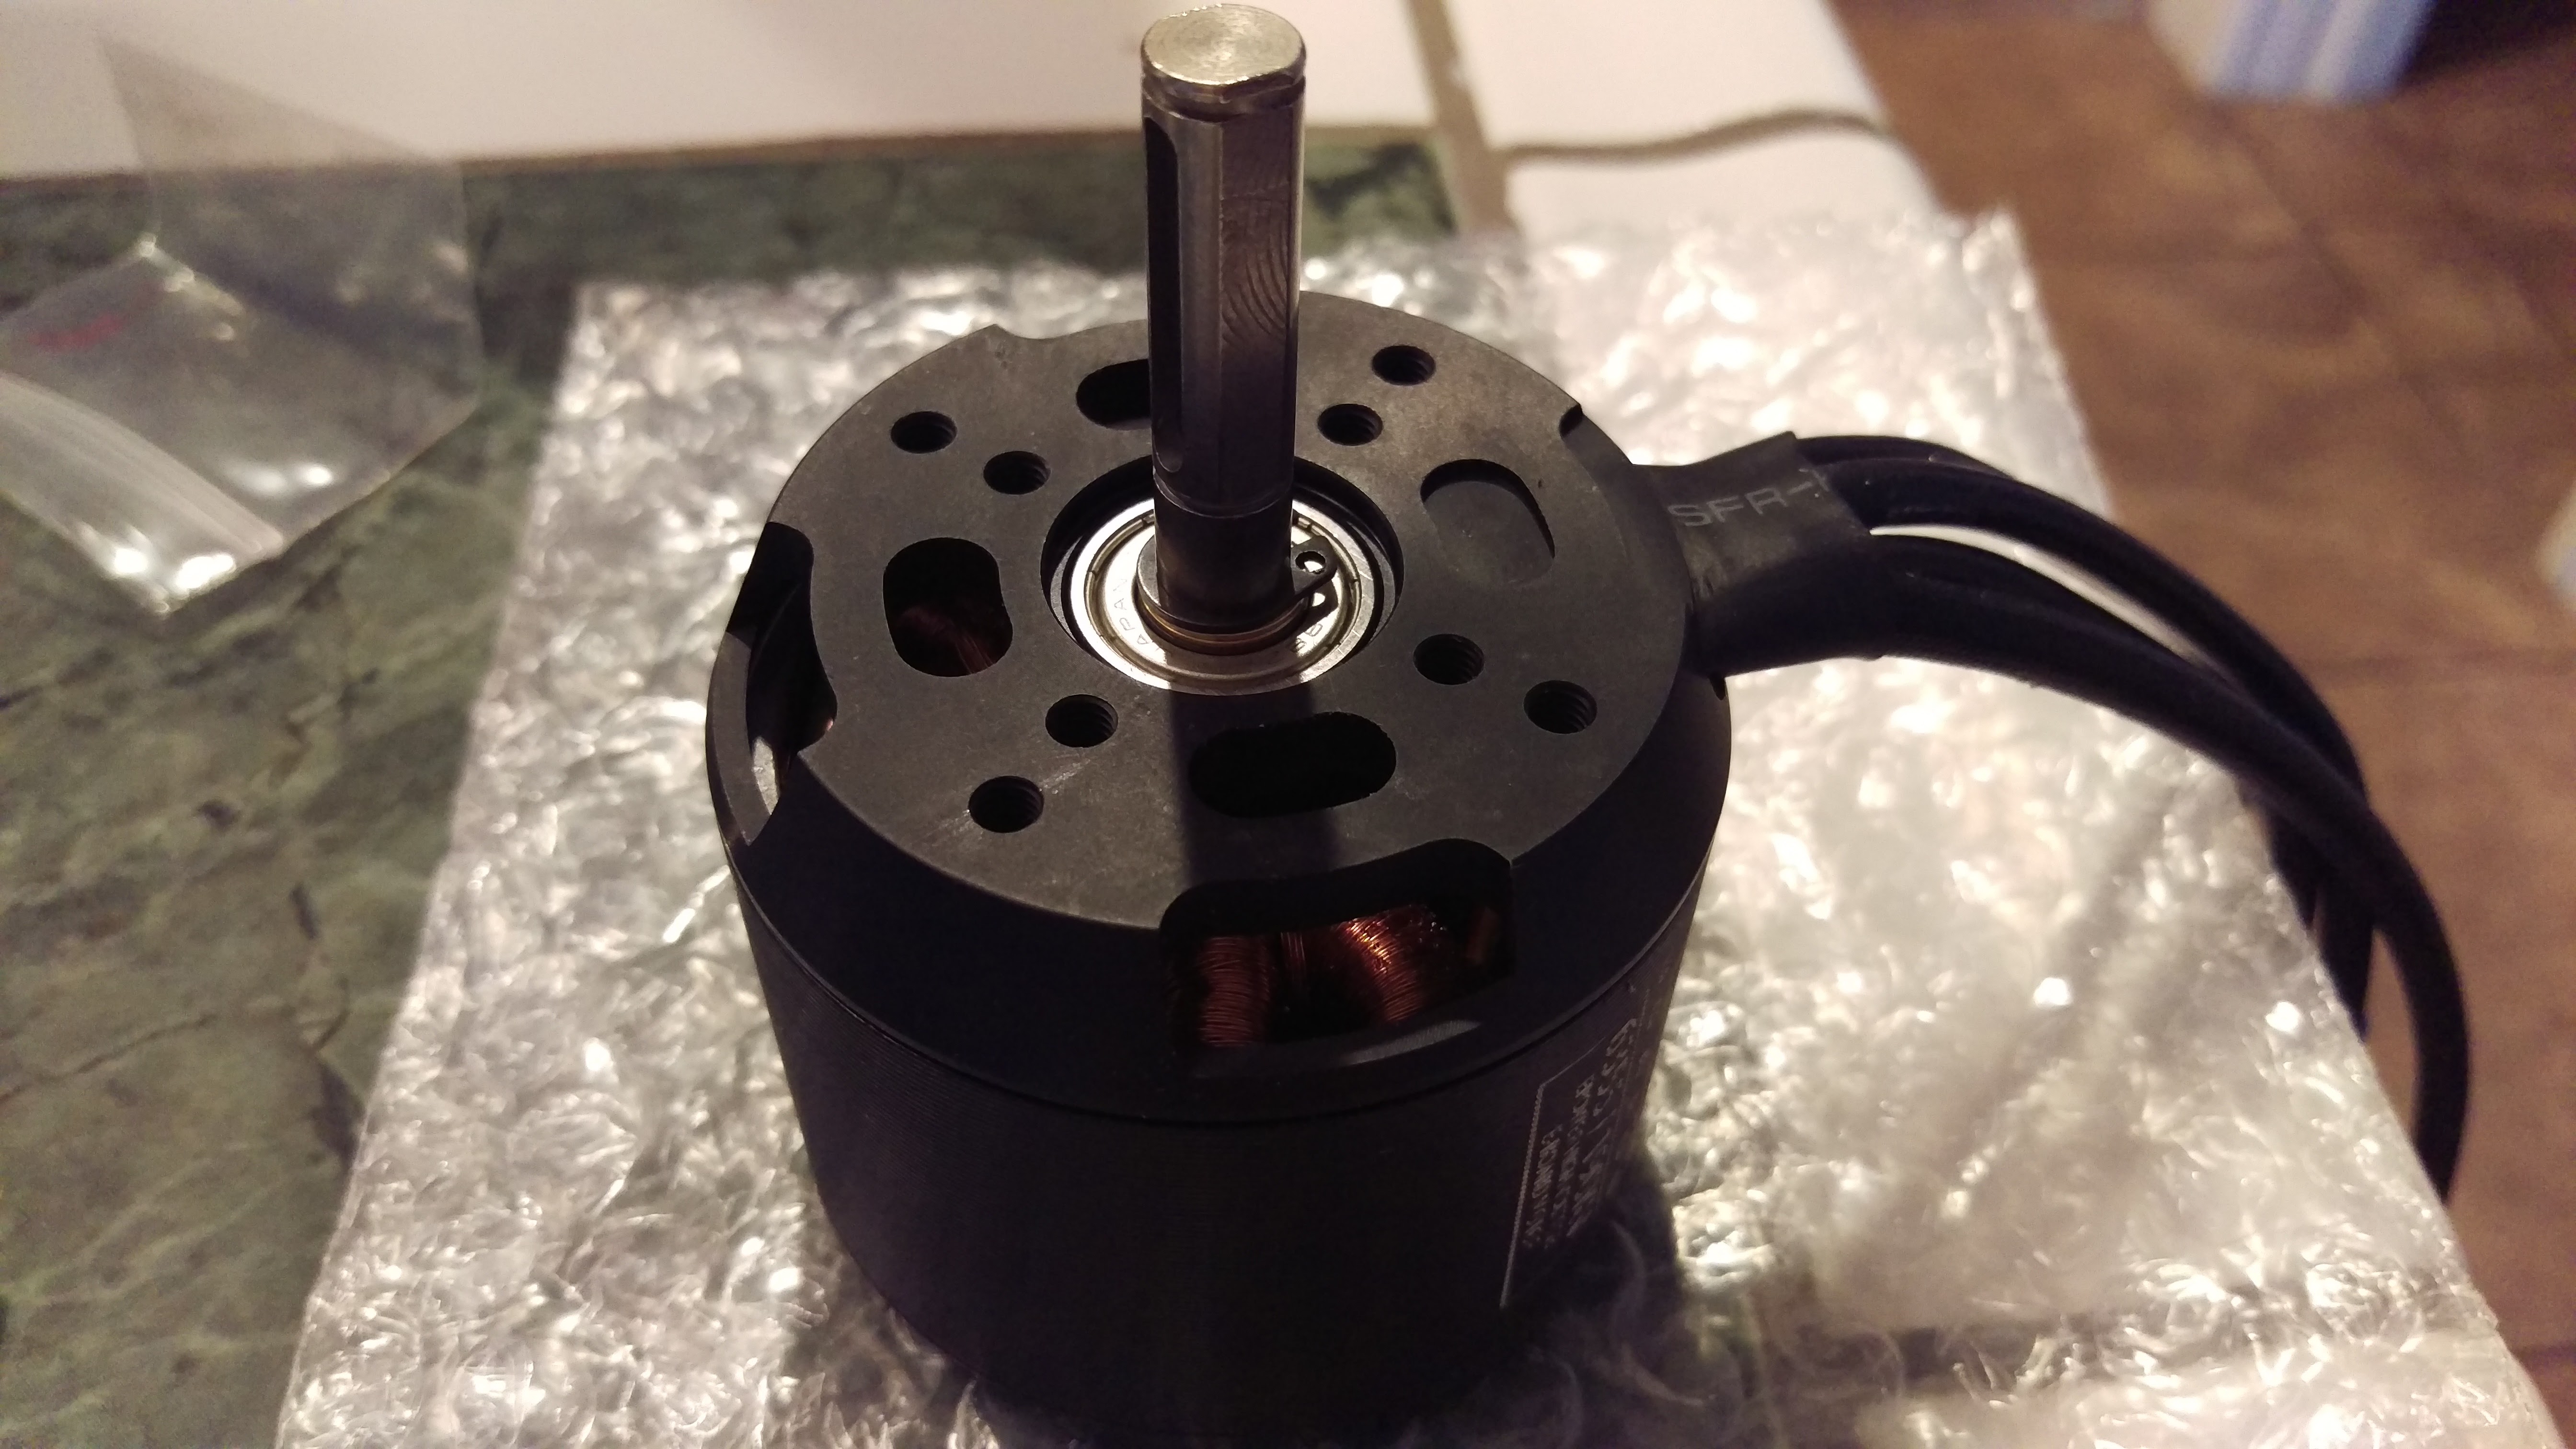
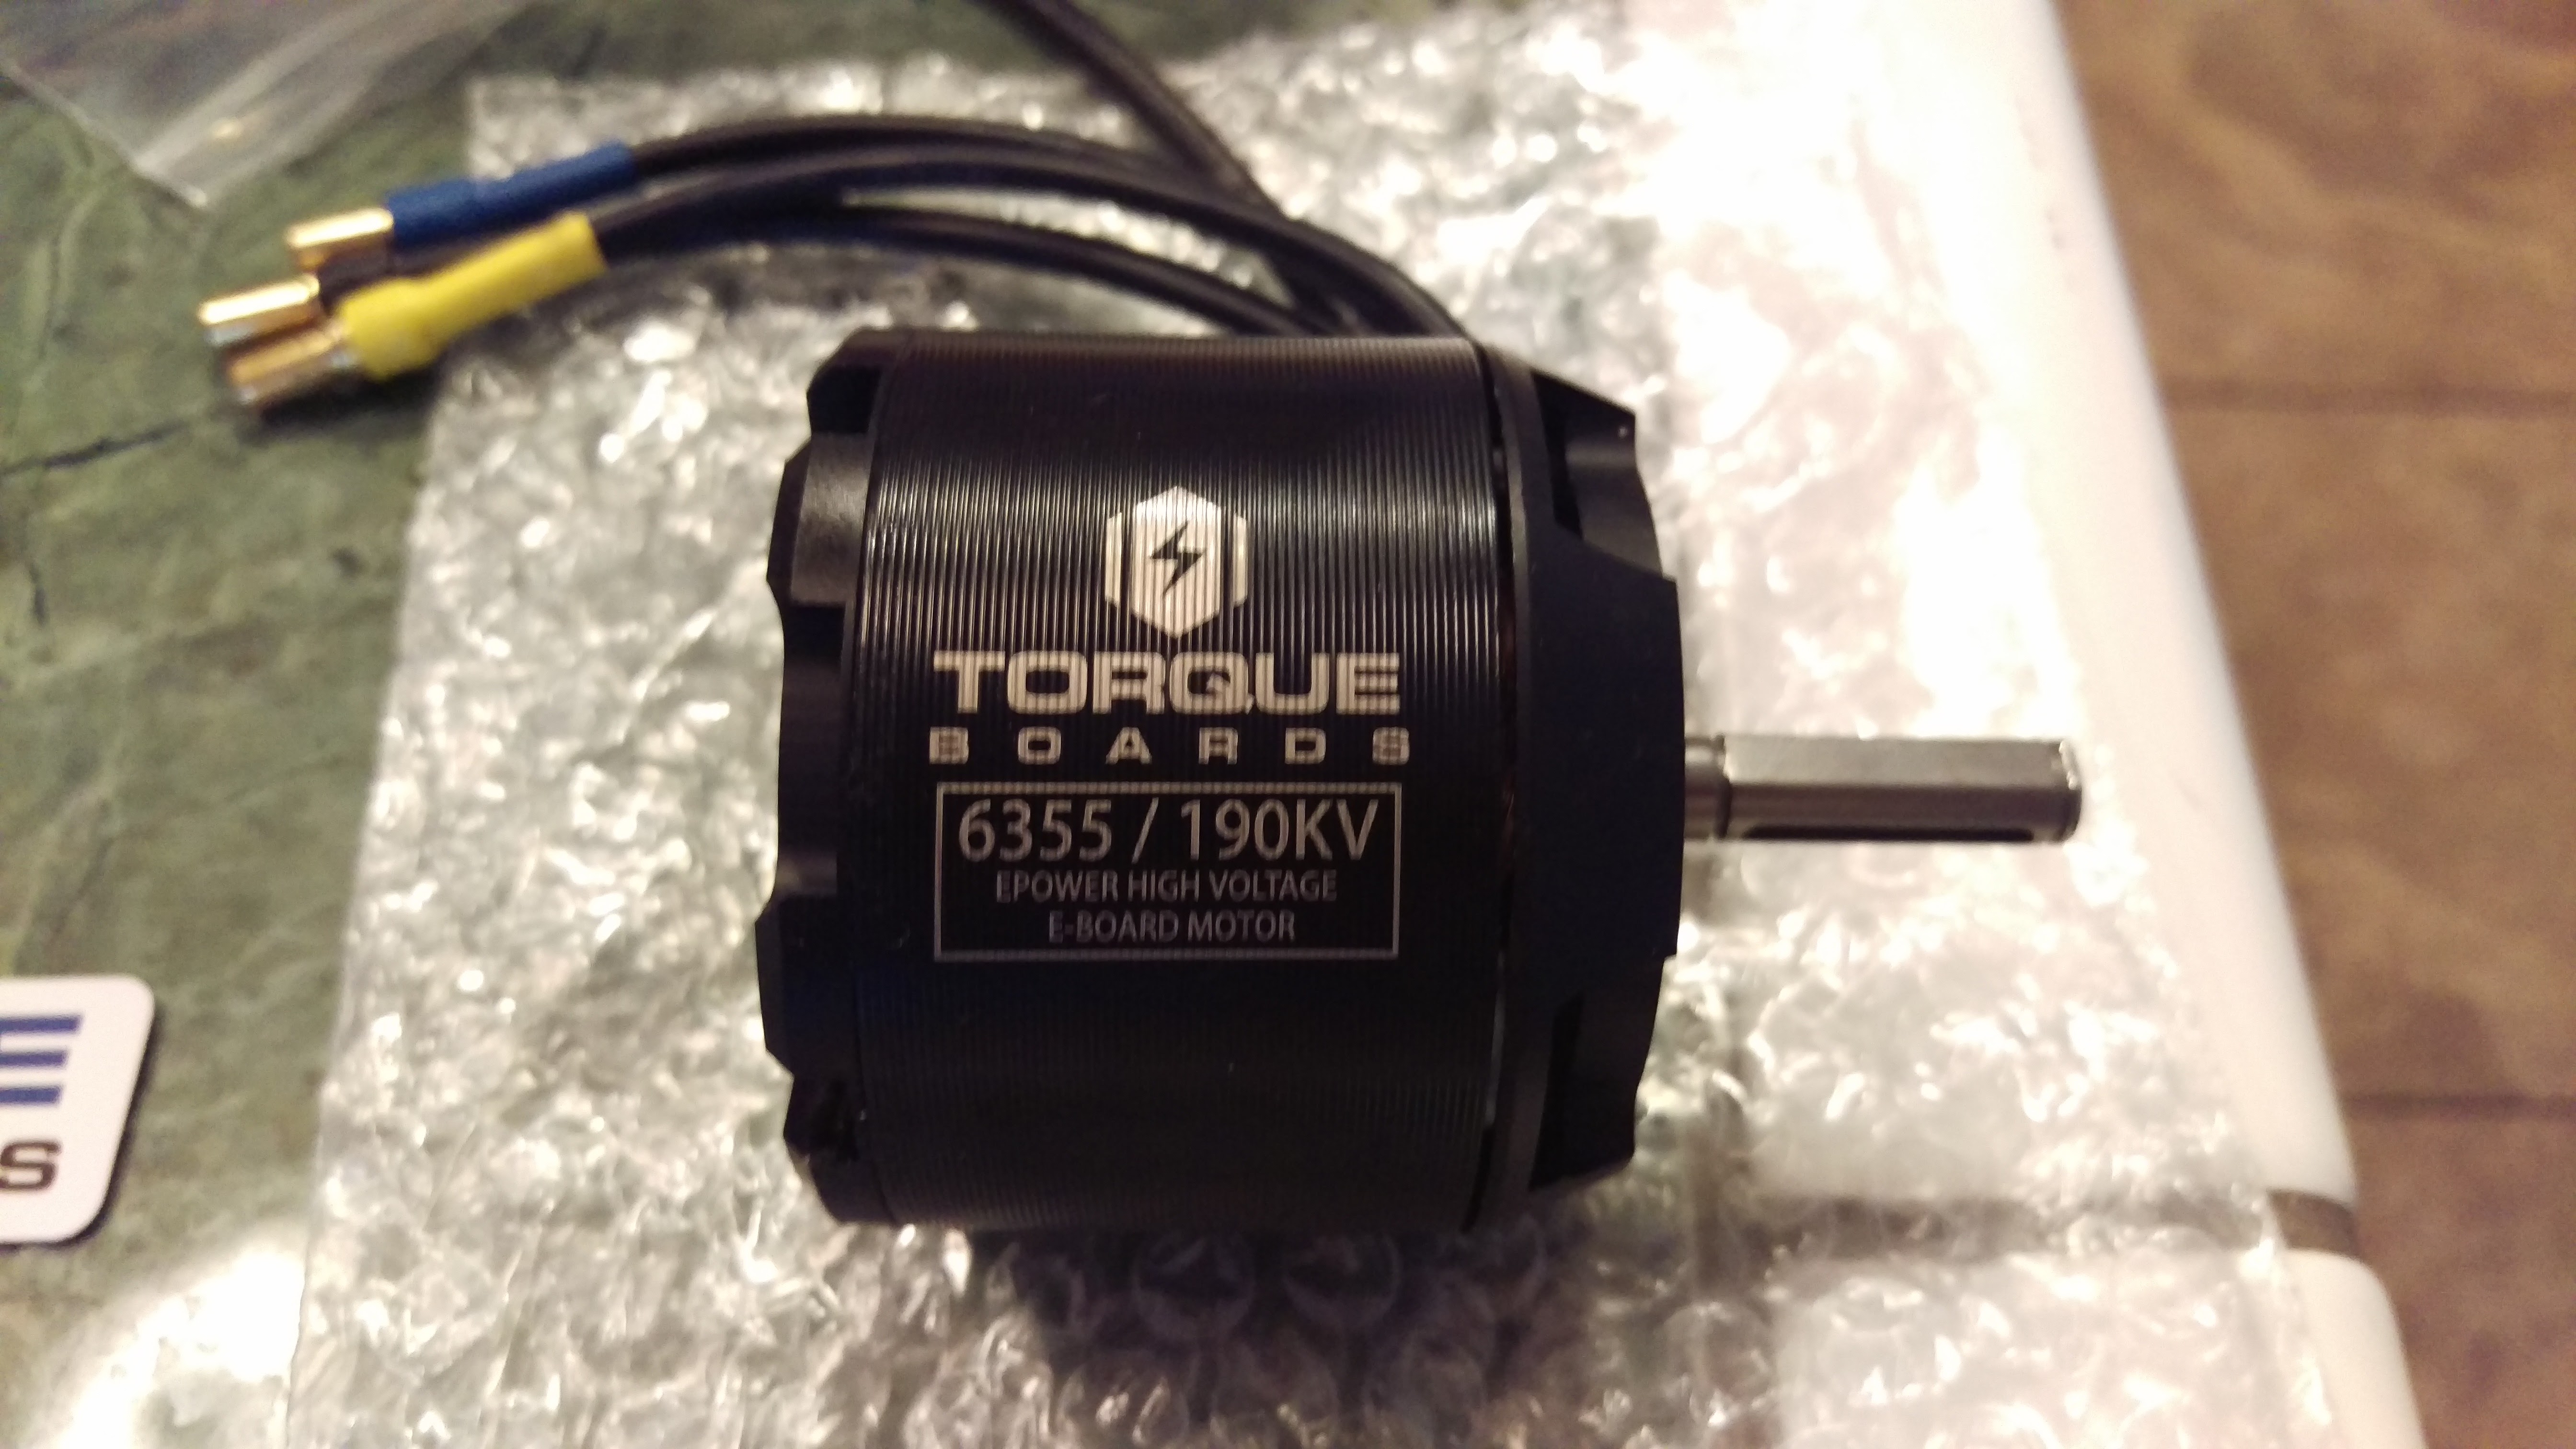
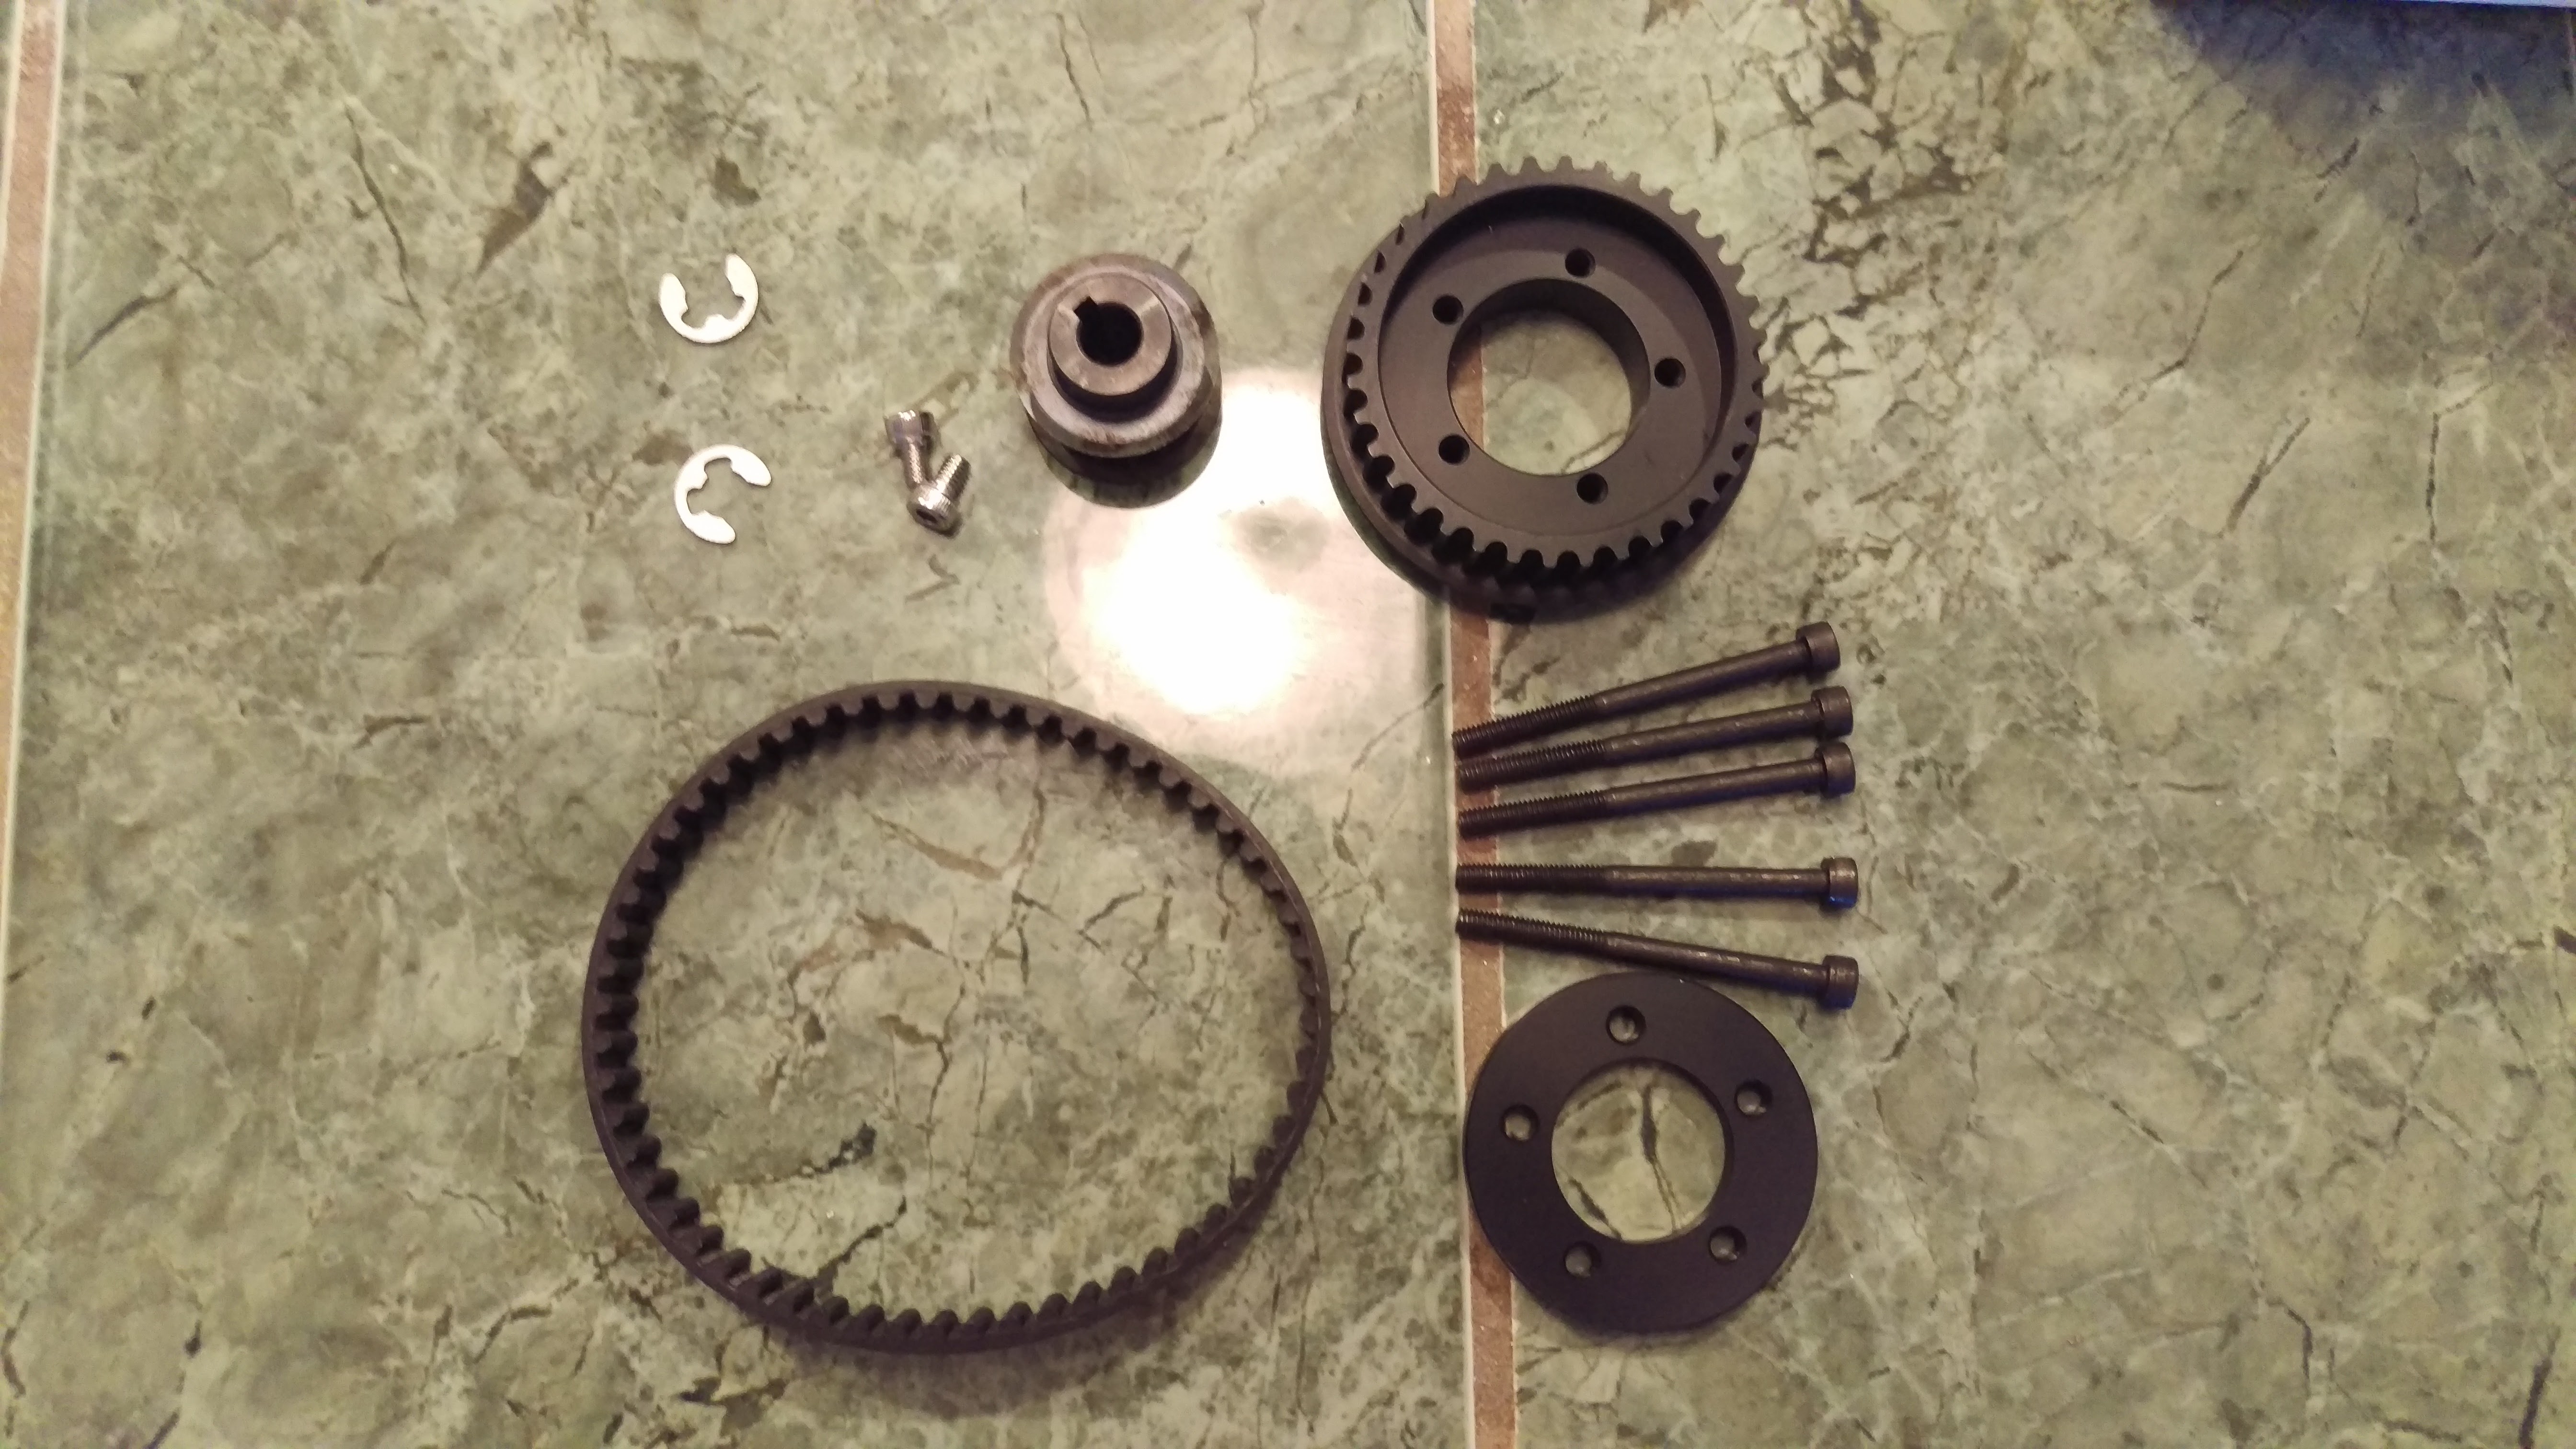
From @torqueboards ($528.97 plus shipping = ~$550?): Dual Motor Electric Skateboard Kit, which includes: (2) 6355 190KV (I am assuming is the 6355 190KV at 2500W motor) (2) VESC (I think is TORQUE ESC VESC ® BLDC Electronic Speed Controller) (1) Male to Male Connector (1) VESC Canbus Connector (1) Dual VESC XT90 Parallel Connectors *the assumptions were made based on the prices, @torqueboards please let me know if I am wrong Longboard Bearings 8mm 2x 36T KEGEL Pulley Combo Kit Looking to get the 13T motor pulley TorqueBoards 2.4ghz Nano Remote Controller

From Amazon ($95): Orangatang Kegel 80mm 80A Caliber Trucks Cal II 50°

From Hobby King (~$140): 4x Turnigy 5000mAh 4S 25C Lipo Pack Planning to put 2 in series and 2 in parallel to get 8S 10000mAh

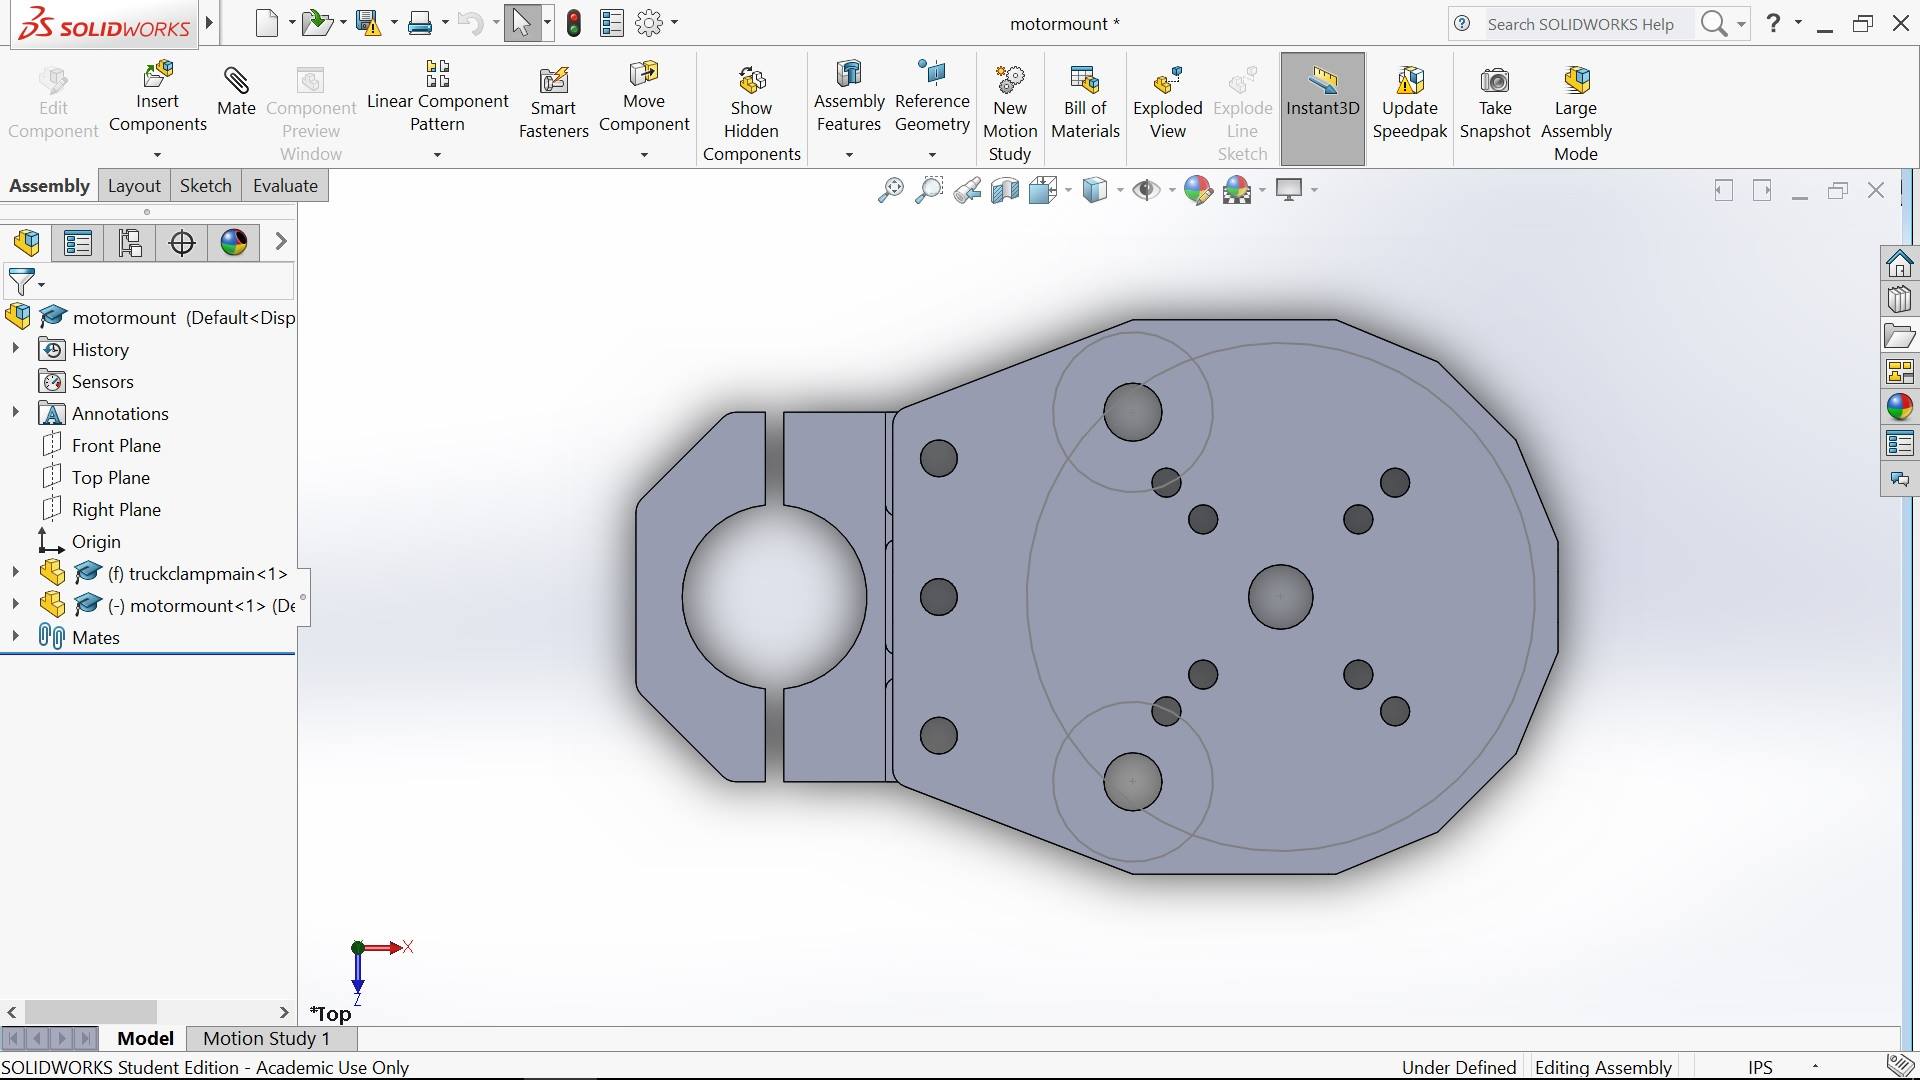
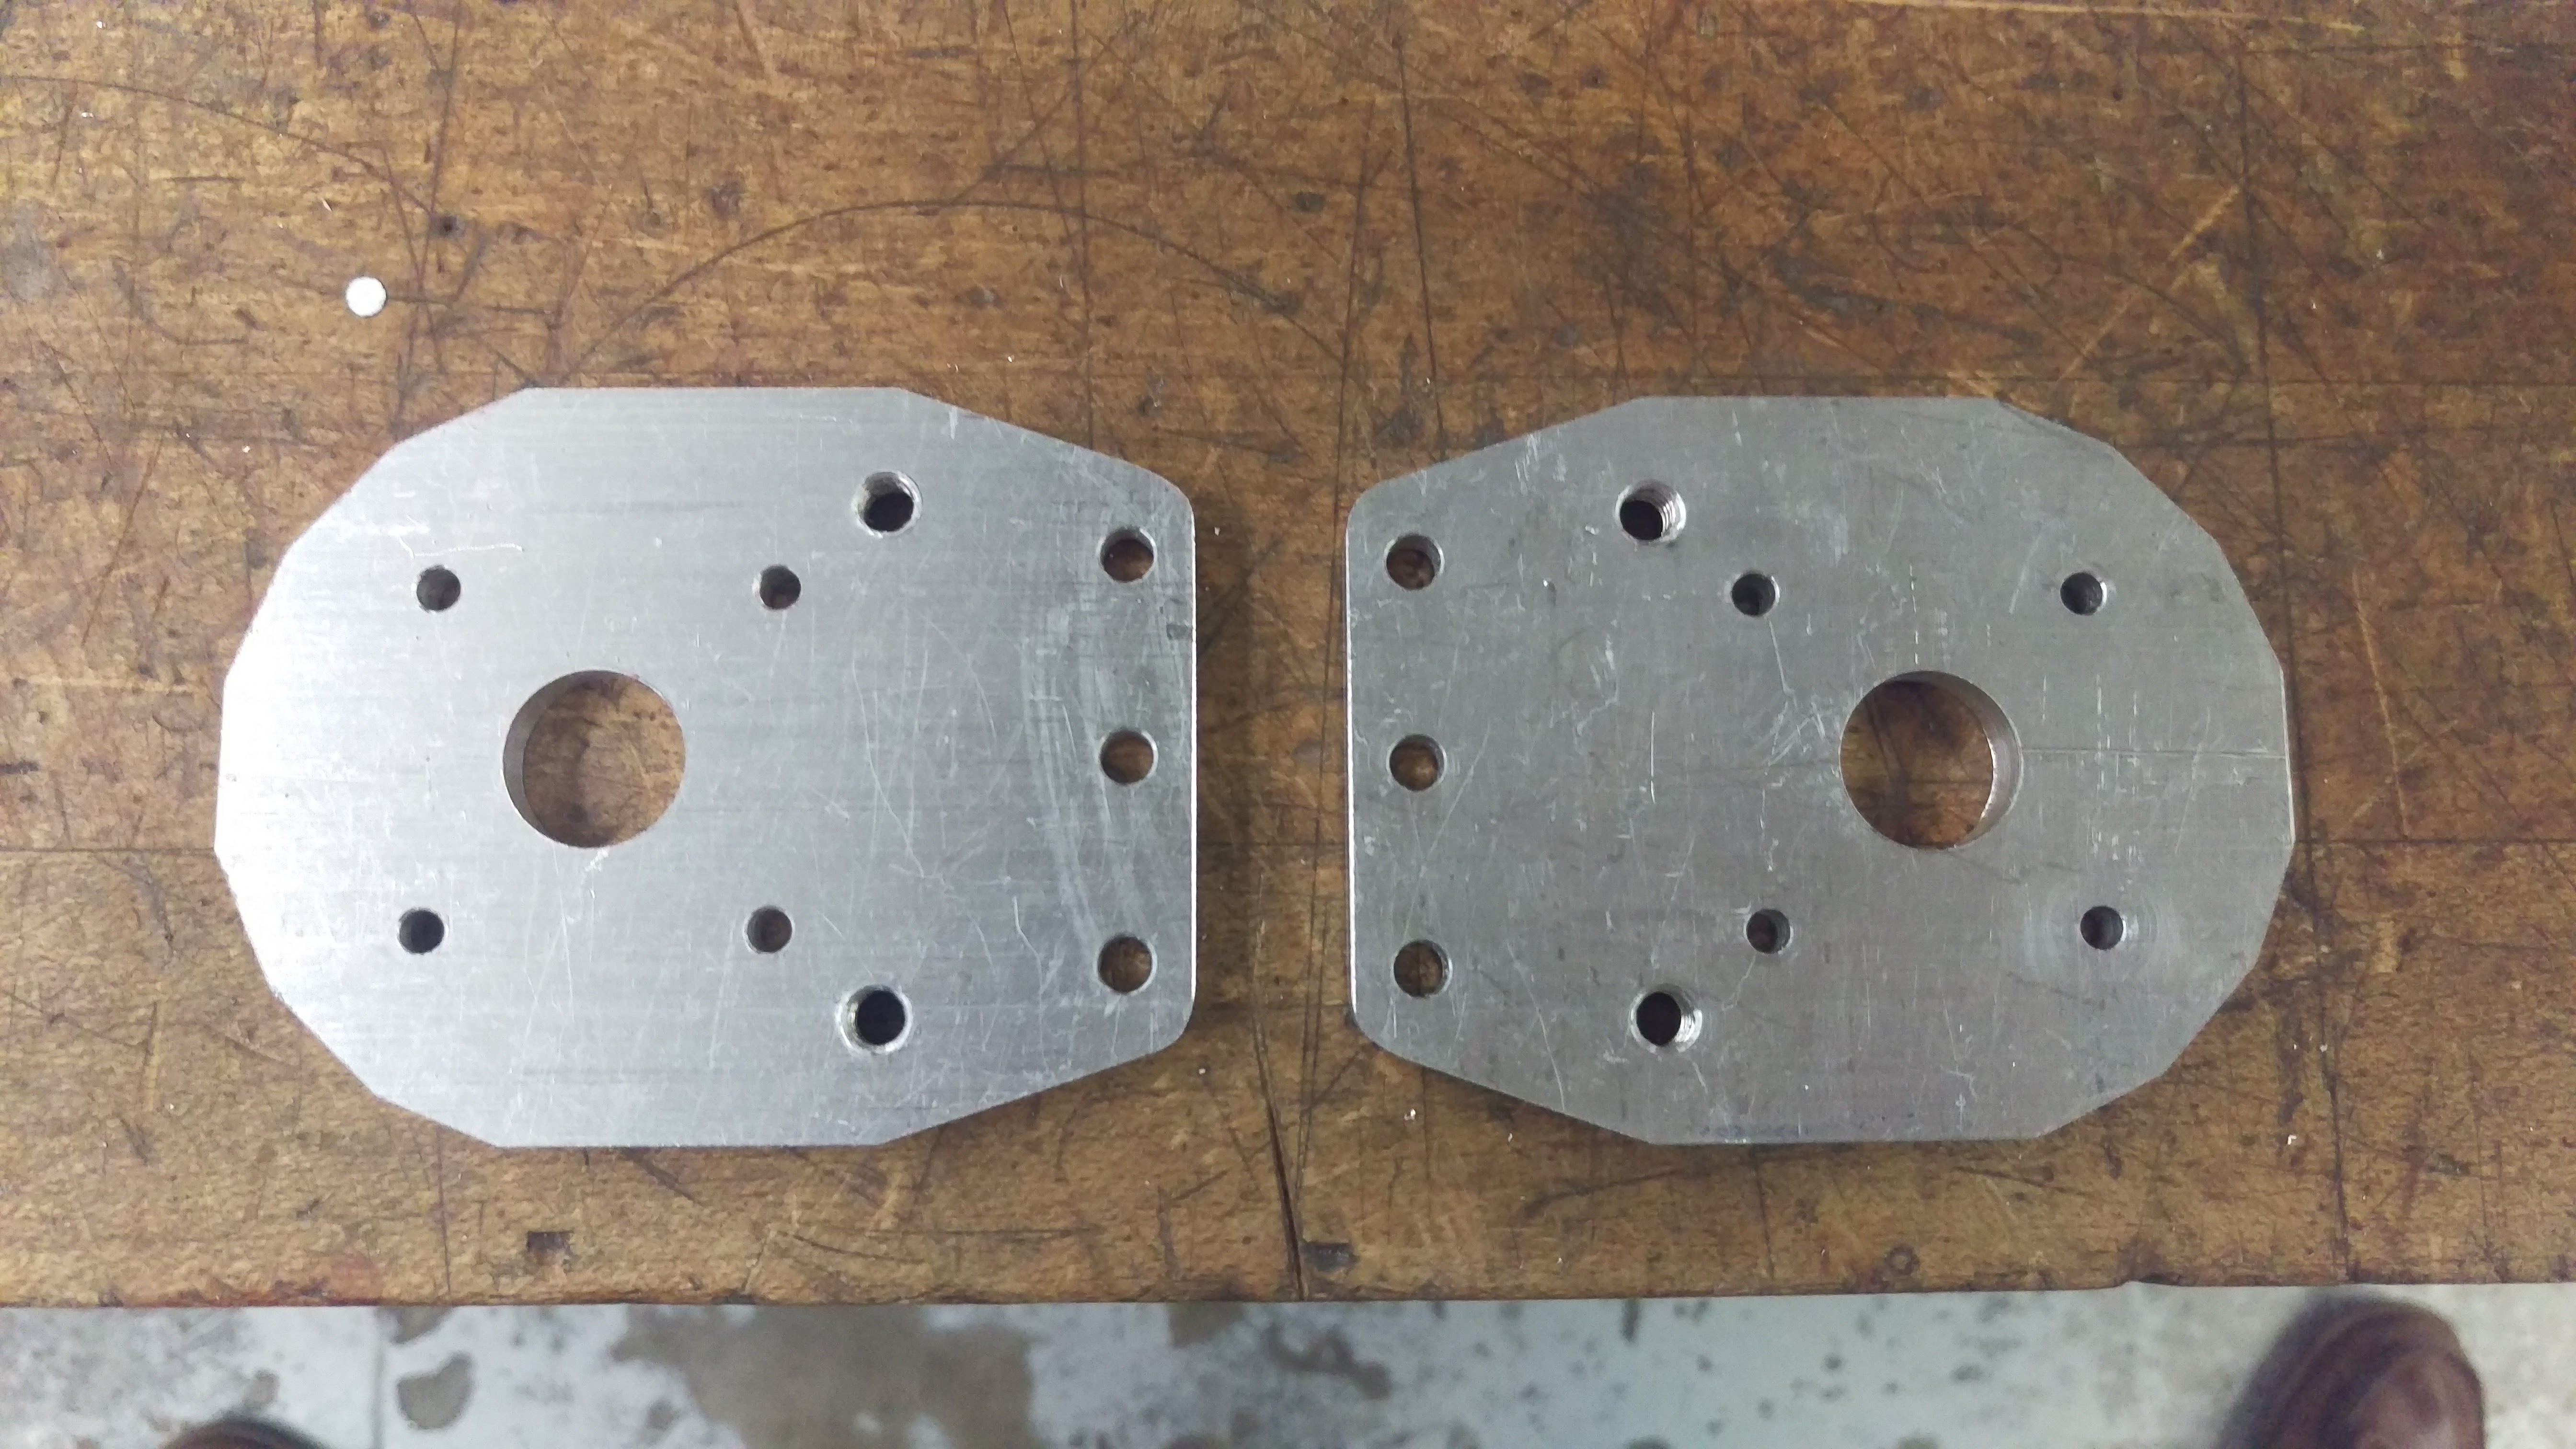
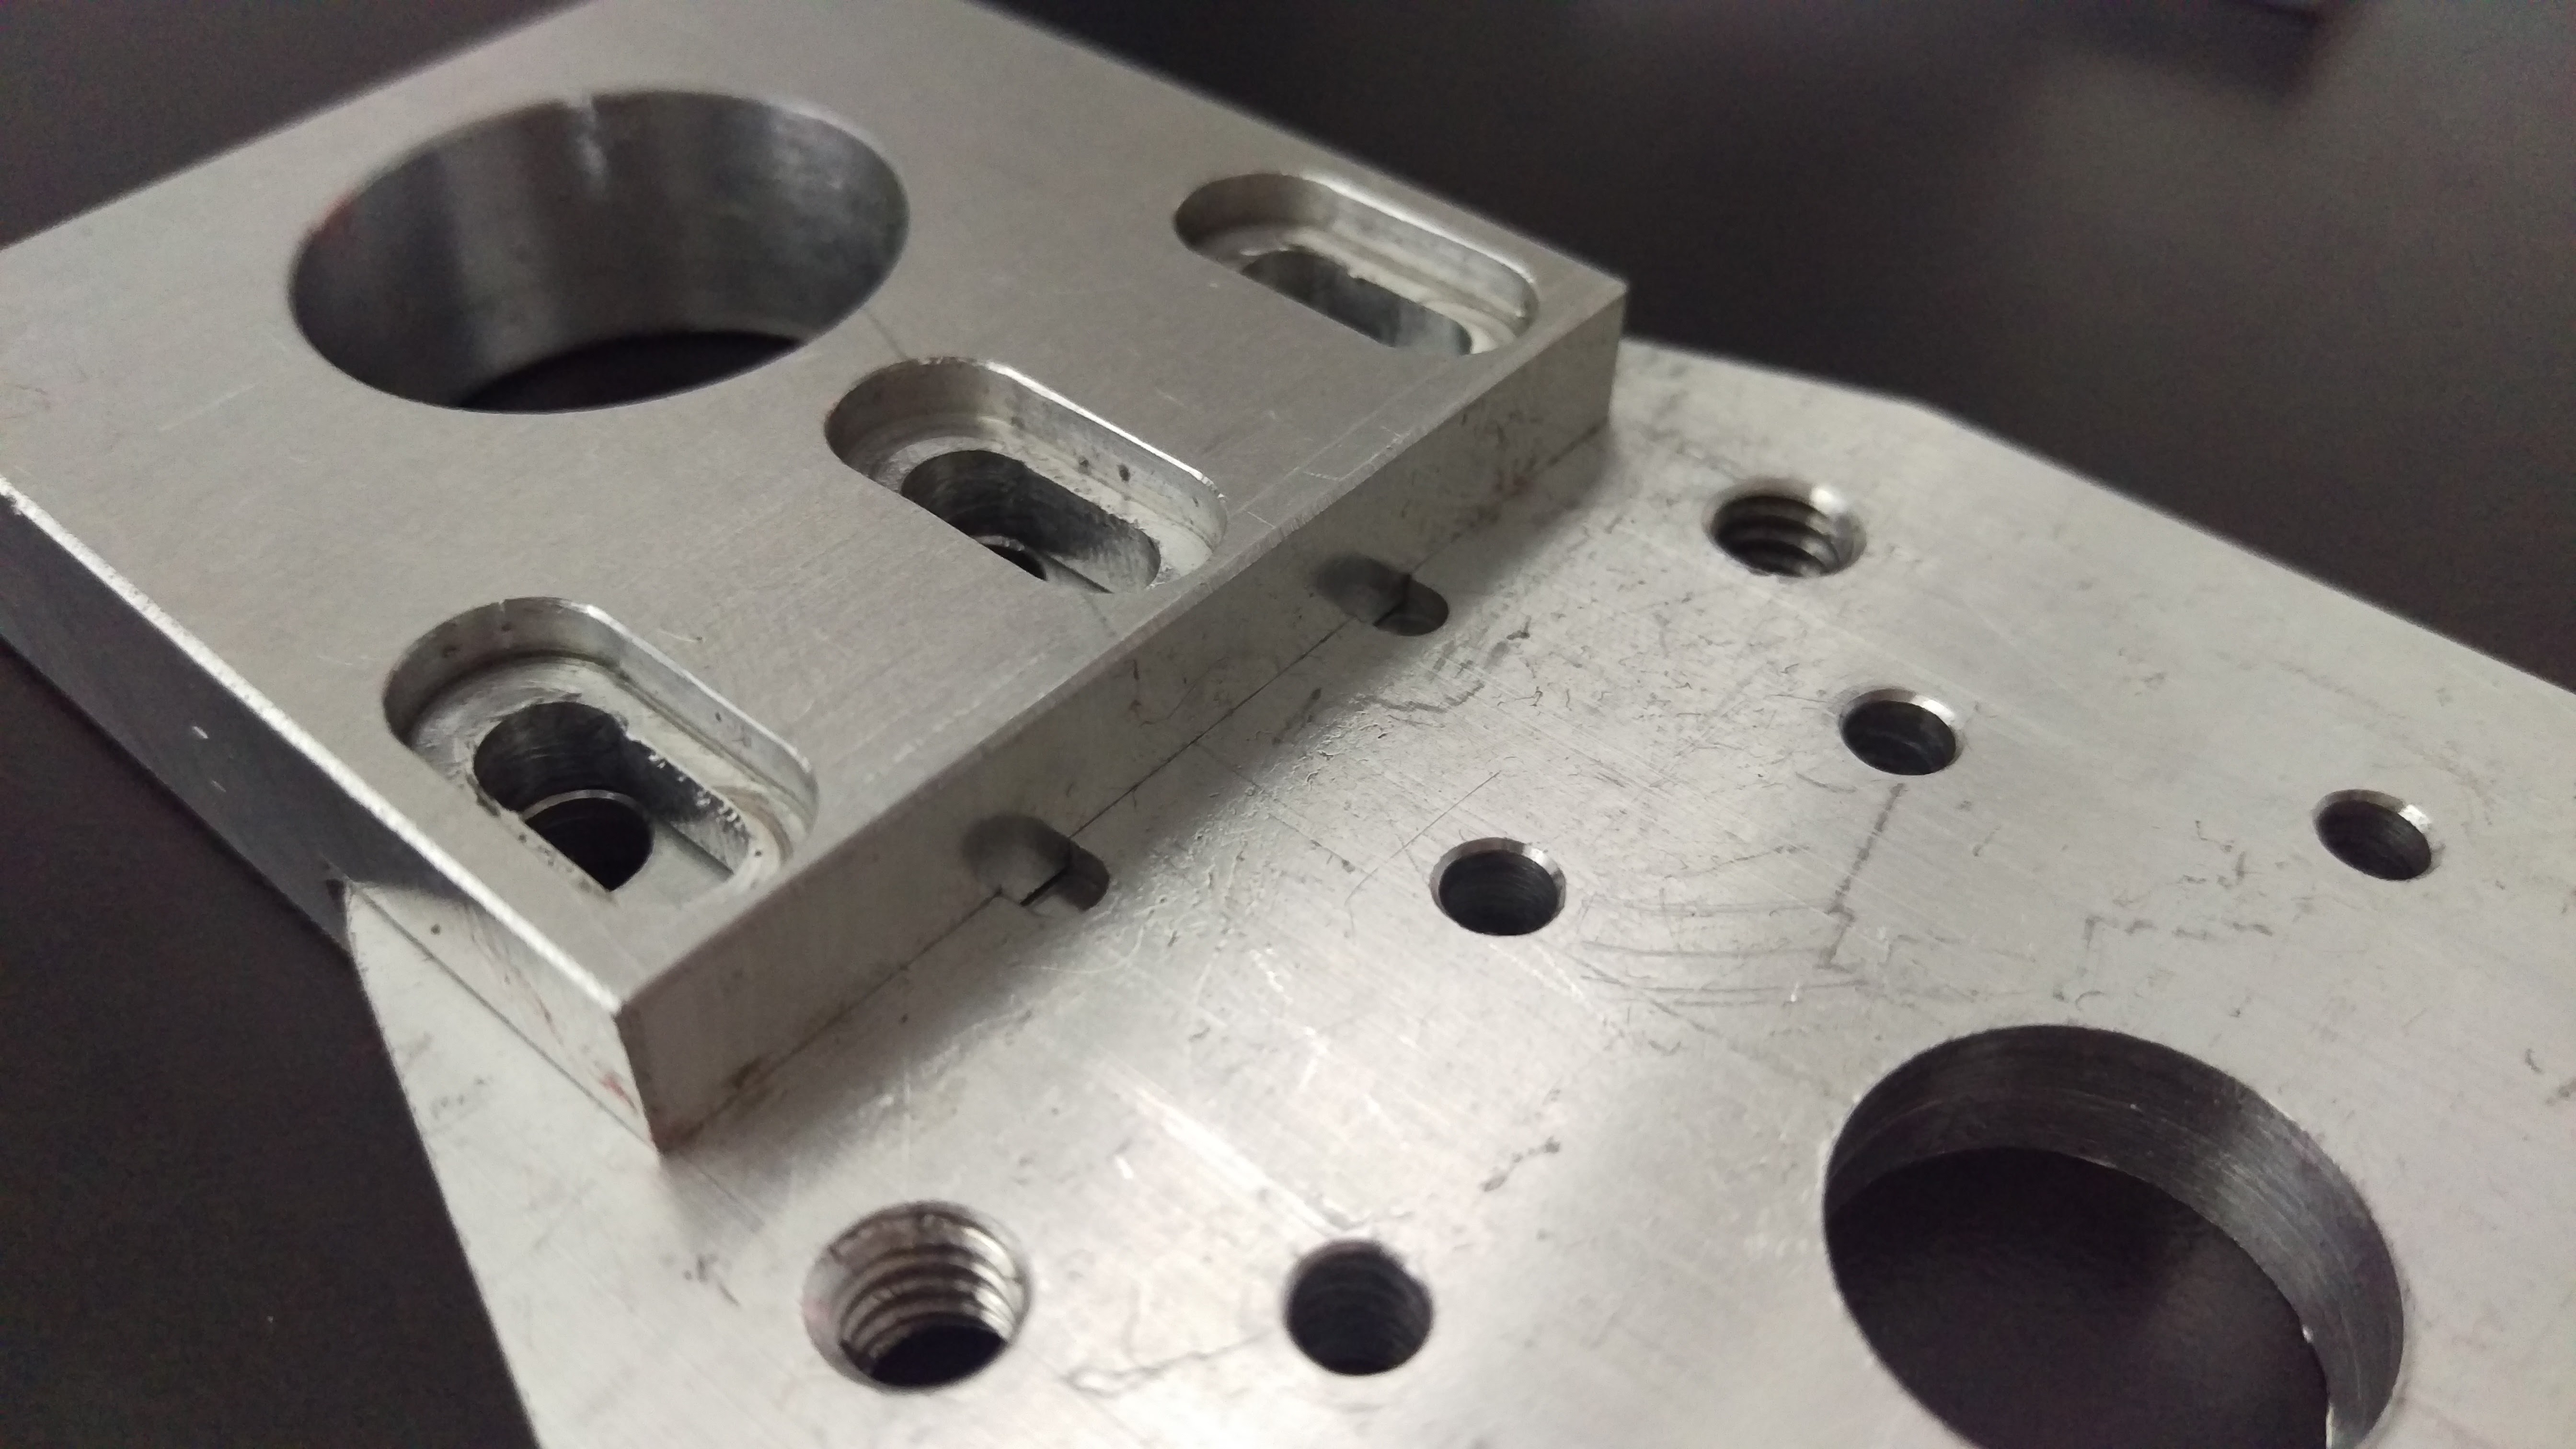
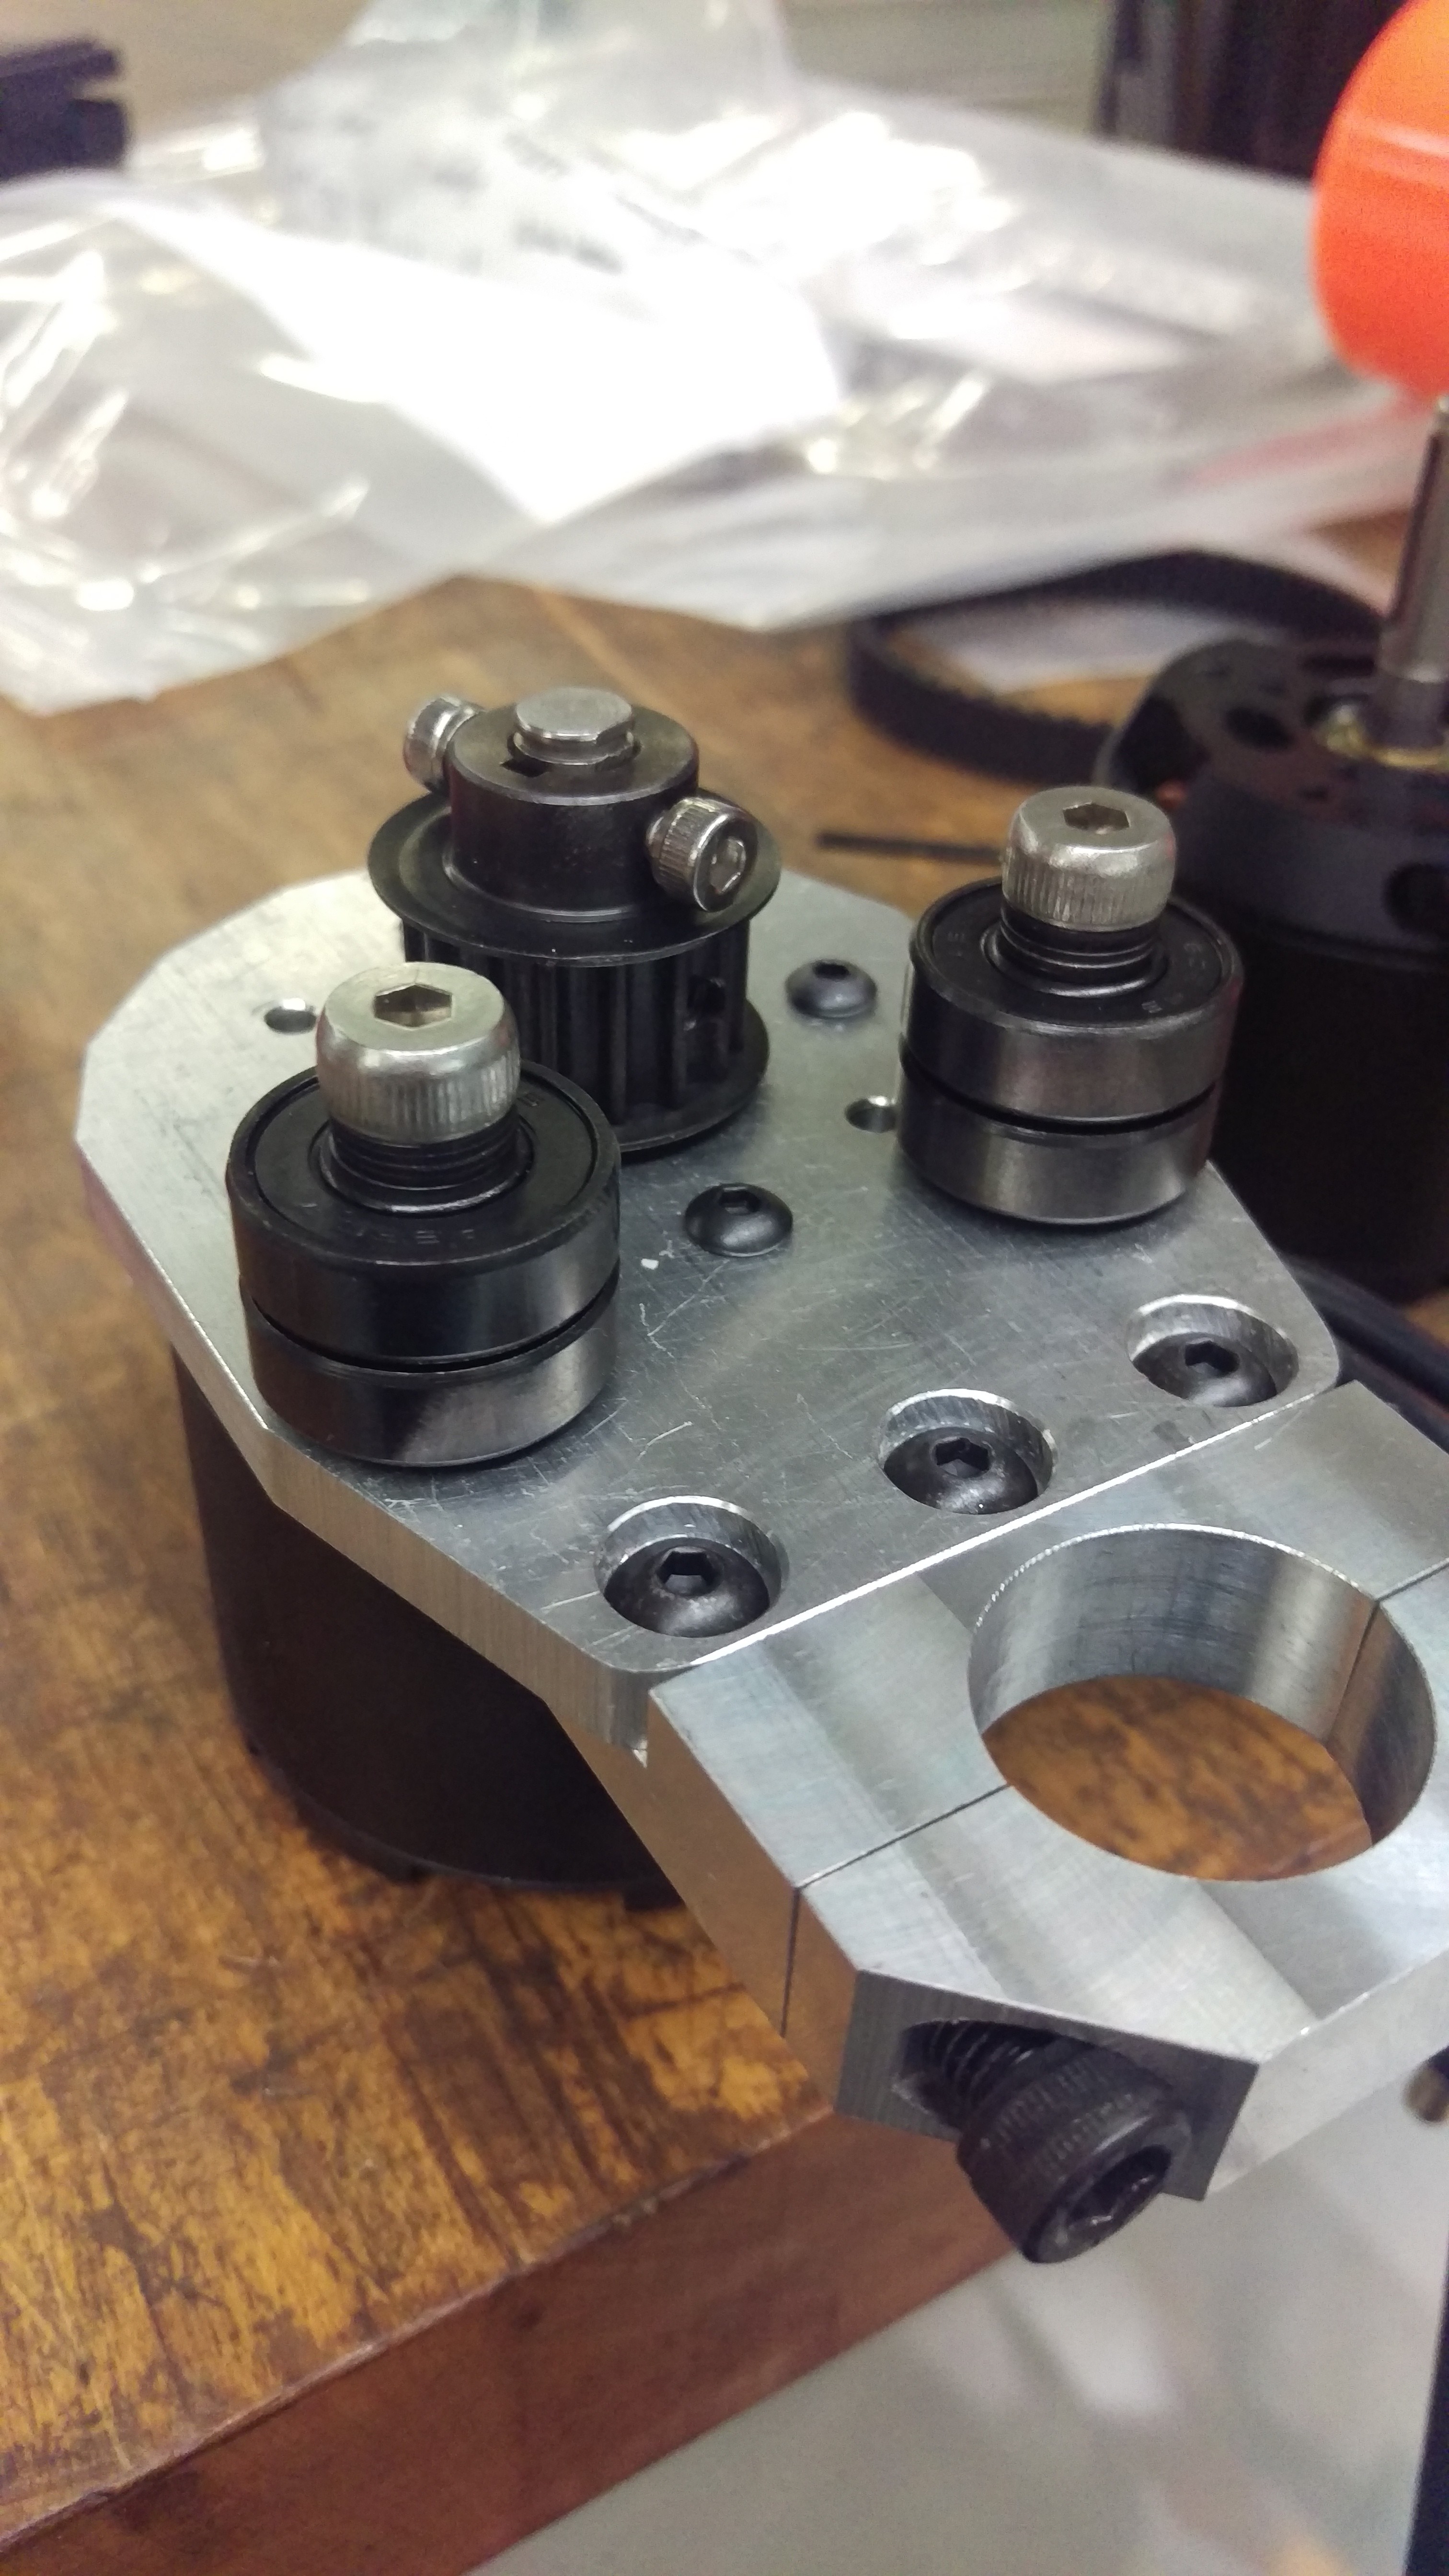
For the motor mounts, I have some pretty good machining skills, so I think I will be able to machine them myself on a mill. (I might need some drawings)

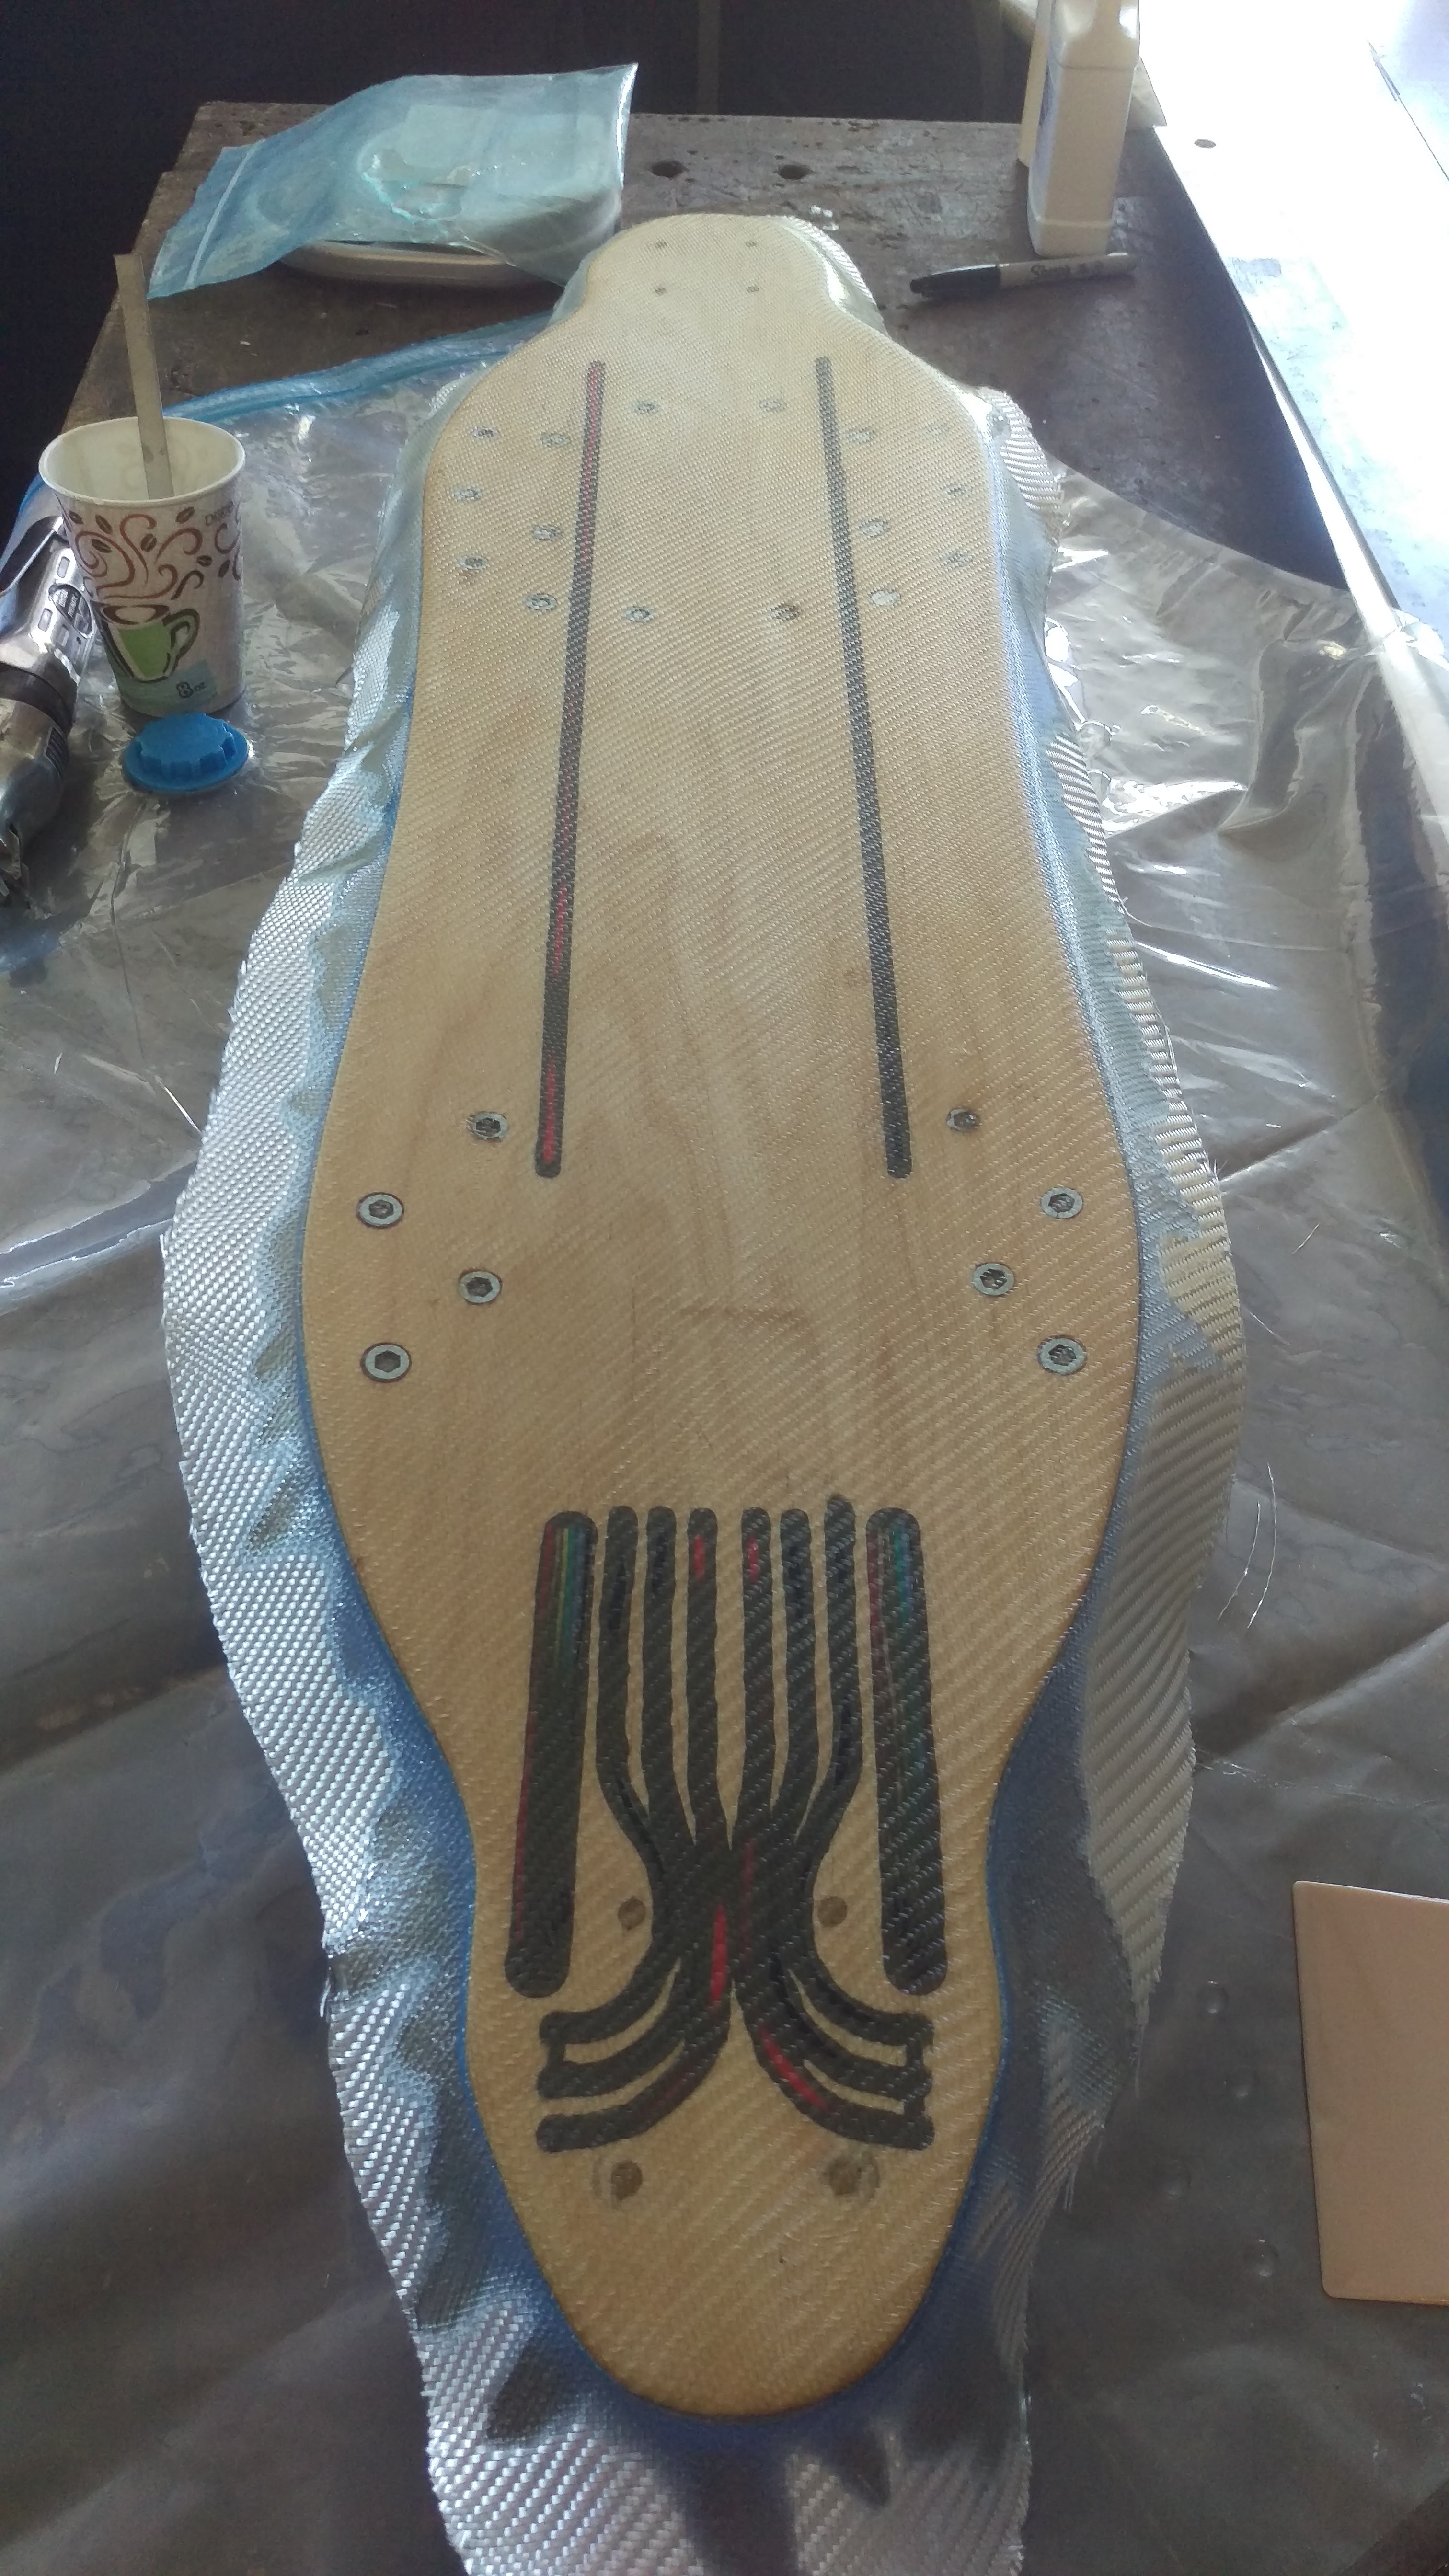
As for the deck, I am looking for a deck that has similar concave (and maybe flex) to the Vanguard (the Vanguard itself is wayy to expensive), but I am not really in a rush to decide on a deck because I want to see how much space I really need to fit all the stuff underneath it. Decks that I am looking at: Madrid 2017 Weezer Longboard Skateboard Deck w/ Grip ($104.95) Sector 9 2017 Mini Fractal Longboard Skateboard Deck w/ Grip ($93.95) Sector 9 Lookout Longboard Skateboard Deck w/ Grip ($84.95)

And the enclosure, I was planning on 3D printing a two part enclosure after finding out how much space I need.

None of this is 100% set, hence the reason I am reaching out to you guys to get feedback. I want to build something that is decent quality and would at least last me through 4 years of college. My visions for this board is to get around 22 - 25 mph top speed (not crazy fast but decent), and get around 12 - 15 mile range. It would also be nice if I could get a BMS connected to my batteries so I wouldn’t have to worry about the balance charging thing.

Like I said earlier, I want this build to be a project that I could put on my resume. Which means the more DIY I do, the better I can demonstrate my skills to future employers. I have seen many people on this forum who built their own battery pack, but I think for me that might be a tad bit advanced. But should I custom make my own wheel pulleys rather than buying them?

PLEASE let me know what you guys think about what I have so far, what I need, and the concerns I have. THANK YOU for reading all this haha.

1 Like

UPDATE:

Thanks to advice from @MBuilder, I am now going to build my own 10s4p battery pack with 40 Samsung 25Rs. Attaching that to this BMS PCB Board for 10 Packs 36V Li-ion Cell max 30A w/ Balance, and just an anti-spark XT90 for my switch. For soldering the battery pack, I am going to use pure nickel strip (0.15mm x 7mm) from ebay. And hopefully this 70W soldering iron will do the job (Soldering Iron Kit, Full Set 70W 110V Adjustable Thermostat Soldering Iron) I would like some suggestion on what solder I should use, and if I should get a different soldering iron.

Also, the Loaded Vanguard Flex 2 went on sale on Amazon for $97 + tax ~ $104, so I bought one. I might trim the deck down from 42" to 38" the way that @TranxFu did on his. (Loaded Vanguard Deck Trimming) Just so that it would be a little more portable.

At this point, I’ve ordered pretty much everything except the Kegels (out of stock on Amazon). Opening the packages when they arrive is gonna be like Christmas!

1 Like

Wow, thanks @andchiang for the advice! I just ordered the last discounted Flex 1 on amazon for my build. You saved me 80 bucks. :thumbsup:

As usual: don’t get 25R but 30Q instead - less voltage sag

1 Like

The 30Qs are out of my budget haha that’s another $50, I guess I’ll just have to live with the voltage sag. And honestly I’m not going to go on long rides often, the daily commute would only be around 5 miles.

where are you getting your cells from? the 30Q are 60ct per cell more expensive at ru.nkon.nl (the site for outside of the EU) than the 25Rs. With 40cells that is 24$ more and well worth it.

Also why would you want to solder nickel strips? if you solder use silicone wire and remove the silicone at the spots where your cells are going to be. Or use solid copper “bars”

1 Like

I bought them off IMR, which is $150 for 25R ($3.75 each) and $200 for 30Q ($5 each)

I wanted to use nickel strips to keep the battery pack a little smaller

well you should have asked before you commit on buying - you could have gotten your cells for like 2.25€ per cell from nkon https://ru.nkon.nl/rechargeable/18650-size/samsung-18650-inr18650-25r.html nickel is only good for spot welding - you’d also need several layers to make it work for the current (a single layer is only good for 15A) and soldering several nickel strips will be super messy if not impossible

For the nickel strips, I though many people made it work with soldering. @Eboosted’s battery was soldered with nickel strips, as to how many layers he used I’m not sure. How long would it take for cells to ship from nkon to the California?

I don’t recall his battery being soldered. Do you have an image?

No idea how long it takes. Ask some US guys like @PXSS

Does ru.nkon.nl ship to the US?

That is the page for all overseas orders. AFAIK a lot of US people have ordered from them including @longhairedboy

Awesome! The 30q are out of stock ATM unfortunately.

You can see in this video that they are soldered on

Another Update (07/15)

I received my order from @torqueboards two weeks ago.

I could not tell you how happy I was to see the postman that day

This was probably the most expensive unboxing I’ve ever done haha

And the contents of the box did not dissappoint

Awesome looking @torqueboards motors

And the kegels pulley set (16-36 ratio with 280mm HTD5 belts)

I was slightly disappointed that the screws that came with the pulley set didn’t fit the kegel holes perfectly, it meant that I had to take some time to get the pulley cocentric with the wheel

Then I got to making my motor mounts

Spent some long nights designing the mounts in solidworks

Then I started making them

Sizing my 1/4 inch 6061 aluminum on the mill

Drilling the holes that I needed

Profiled the edges with a vertical bandsaw and a large sanding disk

Milling this on a hand mill was about the most haunting thing I’ve ever done, one wrong turn with the end mill and all my hard work would’ve gone down the drain

This is what they looked like after all the milling part, everything fit together pretty well

I then cut the clamp part in half and gave it a big 45 degree chamfer For those who wondered what the threaded holes were on the motor plate, they’re for idler pulleys

The adapters that turn the caliber truck profiles to a nice circular shape that my clamps can clamp on. I did try to make them with the bandsaw and files, but it was too hard. I ended up getting them cut out from an EDM machine (Electrical Discharge Machining)

This was the test fit of everything, I am pretty pleased on how the motor mounts came out.

Now that I am done with the mechanical part, time to work on the electrical component of the board (aka battery and wiring)

To be continued…

8 Likes

WOW looks great!! Everything looks like its coming together! Im impressed with the mounts and especially the adapters. Im doing a MTB build so theres alot of differences you can imagine. I’m attempting to build a 18650 cell along the way though…:stuck_out_tongue_winking_eye: Im excited to see how your battery comes out!! Be sure to post your specs when your finished discharging! Have you busted out any hills with the naked vanguard yet?

I did receive my Vanguard flex 2 and it looks awesome! However, I have my own paradox with using the flex 2. First of all it is a very expensive board, and even though I know that the quality of that board justifies the price, but I am kinda scared to modify it (drill holes and stuff). Second, the flex 2 is slightly too big…and if I do try to trim it down, I risk having a narrower board or ruining the nice curve.

So for now, I am trying another route. I bought a blank longboard that looks a lot like the Vanguard. And I plan to trim down the edges so it would look EXACTLY like the Vanguard flex 3, and maybe make it a little shorter.

The blank longboard has a good concave but has no camber (one of the things that look amazing on the Vanguard). So my thought is to add a fiberglass layer on the bottom of the board while bending the board to the camber I want, so that when the epoxy dries the board would stay in that shape.

dang thats serious. I stink at fiber/resin but thats just me. @ 25 bucks Id have fun with it! Gonna keep the flex on the wall fer awhile? :smirk:

1 Like

After almost a year this is another update (03/18):

Most of this was done around August 2017, just never got around to post the updates haha.

I custom soldered the 10s4p Samsung 25R battery pack. Thanks a lot to @MBuilder that pretty much walked me through the process of the battery building process.

For the board, I decided to go with cheap vanguard shaped board. I copied the exact shape of the vanguard and trimmed the board to that shape. Next, I worked on getting that camber in the board, I just steamed the board over a boiling pot of water for about 20 min and clamped the board down with a block in the center. After a couple of times doing this, I got a decent camber, about 2 inches of difference between the ends and the center of the board. Then, with the camber still there, I laminated a sheet of fiberglass over the bottom side of the board, and then a sheet of bamboo ply.

After the board was done, I started thinking about how I wanted the wires to be routed from battery to vesc and vesc to the motors. The cleanest way I could think of was to inlay them in the board the way that @longhairedboy does on his boards. So drew up a template of the channels I was going to route out on the board, and just routed it out by hand with a wood router.

I also inlayed the power cables from the battery to the vsecs. I then temporary glued down the cables with superglue. Filled in the gaps with fiberglass-infused bondo, and sanded it flush with the board. Also, I drilled some through holes to screw in wood screw inserts for later holding my battery and attaching enclosures. Last, I laminated another layer of fiberglass on the top to make up for the materials I removed for the channels.

This is the board for now, still finding time to make a decent enclosure for it. WHEN this board was still working, I ran @Ackmaniac’s firmware and the Watt mode worked magically (definitely loved the custom acceleration and braking curves)! That being said, the board is currently not working because I fried my second DIYElectric VESC on this board (both time I was just cruising at around 15 mph on a flat road). Still trying to troubleshoot what exactly caused the DRV chips to fry. But in the meantime I’ve decided to switch over to some FOCBOXs, hopefully spending more $$ on them now will save me from frying more VESC in the future.

9 Likes

Running FOC or BLDC? DIY VESCs are ok running BLDC, but a lot of people don’t recommend running them on FOC. FOCBOXs are definitely more reliable.