Why I decided to build an electric skateboard:
I loved skateboarding when I was young but stopped around 14. I am now 36, and have a 4-year-old son who is getting into scootering, so I jumped at the excuse to buy a regular skateboard, which I convinced my wife was “to encourage the little one to scoot at the skate parks”. It ended up being a great purchase as it got us out of the house doing something fun we both enjoyed.
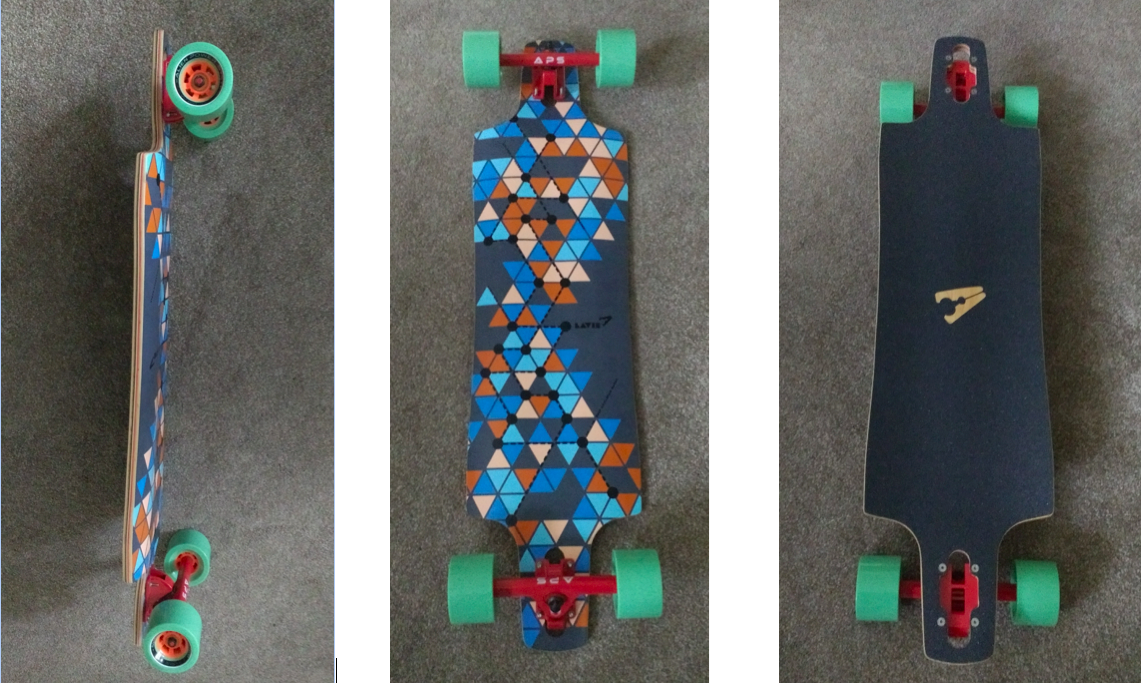
Picture of my regular skateboard decorated with the help of my son:

So after a bit of youtubing skateboard stuff, I discovered the Boosted Board and could not believe that I’d never heard of electric skateboards before! At which point I became super obsessed and needed to have one.
I could not justify spending all that money on a Booster Board (especially being base in the UK with shipping, import tax, lack of local customer support), so I started looking at cheaper alternatives (i.e. koolwheel, yuneec, slick revolutions) however each had its own drawbacks. Plus I figured that at my age making an electric skateboard might be slightly more socially acceptable than buying a ready-made one. I initially thought that the DIY root would be too time consuming, costly and complicated, as I had no previous experience with RC electronics. I think the biggest deterrent was the lack of instructions with anything I’d have to purchase and worrying about the cost if it all went terribly wrong, as apart from the forums there isn’t much in the way of guidance. However after looking at numerous esk8 videos, build logs and online stores, I realized that it wouldn’t be too difficult (as long as I didn’t try to build everything myself from scratch, like motor mounts and the battery).
So I came to the conclusion that I would build my own e-board as:
- I could buy the parts in stages (paycheck to paycheck) so that the total cost would be spread out, and fly under the wife’s radar
- I could easily/cheaply change individual part out as and when they broke
- I could customize it to suit my personal requirements and upgrade it in the future
- It would give me a new hobby that would teach me something new
- I could use it to commute to work freeing up the car for my wife (this was the main selling point to the missus)
- I could teach my son a little bit about building stuff
- I could relive my youth
I found out that one of the major UK supplier of parts (Alien Power Systems - APS) is based in Liverpool. After emailing Bruno (the owner of APS) explaining my interest in building an e-board and my requirements he sent me advice on several different board setups that he would recommend, and told me to pop by his workshop anytime. For the following reasons I brought all my components (aside from the deck) from APS as:
- I could be confident that all the components should be compatible with one another.
- I could reduce my shipping cost, as I’d pick up components directly from APS’s workshop.
- After reading esk8 forums online it became apparent that APS sell high quality products (especially their motors, motor mounts & remotes) and have a solid customer services record.
- If there were any issues then Bruno came across as a genuine guy who would help out if one of the components was not working.
- When I mentioned to Bruno that I planned to purchase all my components from APS, he gave me a discount for customer loyalty.
The Parts List
Stage 1:
- Deck - Peg La Vie (purchased from Amazon). 38” x 10”, 9 ply Canadian maple, symmetrical, w-concaved deck with a 0.95cm Micro drop.
- Trucks - Alien Power Trucks 180mm (red), 50 degrees, 85A bushings
- Wheels - APS Power wheel 83mm 78A (green)
- Bearings - Alien Power System ABEC9 bearing with built in spacer
- Truck Attachments - M5x35mm SS A2 Longboard HEX bolts and nuts
Decision process behind parts selection:
- Peg Deck – I wanted a stiff deck so that the battery and enclosure installation would be as simple as possible as I had read that flex in the deck can damage the battery. I also wanted a board with cutouts over the wheels to eradicate any possibility of wheel bite and allow for future customizations (i.e. bigger wheels / 6” pneumatic wheels).
- Alien Trucks – The trucks are Caliber clones. If in the future I need to change the trucks I’d most likely chose caliber due to easy motor mount installation. I read that Paris truck can sometimes require filling. I would have liked to have mounted the trucks using the drop-through but it is not recommended on the suppliers website and the board has a micro drop so motor / road clearance would be reduced.
- Alien Wheels – The wheels are ABEC clones. In the future I may want to used ABEC 11 Flywheels 97 mm/ 107mm, so I wanted the wheel attachment to be compatible with ABEC wheels
Stage 2:
- Mount - Alien Drive Systems electric longboard DIY kit 63mm motor
- 15T motor pulley, 32T hud drive pulley, belt (HTD280 – 5M, 15mm wide 280mm length, 56 teeth)
- Motor - Alien 6374 FR outrunner BLDC motor 170KV 3200W
- Risers - Alien Power System 6mm risers pad

Decision process behind parts selection:
- Single motor mount – Rather than go with a dual mount setup (i.e. 2x motor, 2x motor mount and 2x VESC), I wanted to keep initial costs down, with the option to install a second motor mount in the future (diagonal motor setup).
- Gearing ratio – I just went with what came with the kit.
- Motor – Since I had opted for a single motor setup, I through that a powerful 6374 motor (rather than the standard 6355 motor) would provide smoother acceleration as I am 85 kg and therefore need more torque. I also went with a sensorless motor so that there was one less thing to go wrong when riding.
- Bruno threw in the risers for free to increase motor / road clearance and dampen vibrations.
Difficulties encountered at this stage:
- Firstly, I forgot to file down the keyway on the motor shaft. As such when sliding the motor pulley on to the shaft it got stuck half way on the keyway. It then took a lot of time and effort trying to get it back off again.
- Aligning the mount and determining the correct belt tension took a bit longer than expected.
- I managed to get the grub screw stuck in the motor pulley, and I needed Bruno’s help to tap it back out.
Stage 3:
Electronic Speed Controller – Maytech VESC 3-12 cells FW v2.18 HW v4.12 (with boot loader preinstalled) Remote - Alien Power System 2.4Ghz electric skateboard remote control

Decision process behind parts selection:
- VESC - Initially I was not planning to use a VECS as Maytech had previously received mixed reviews, and I wanted to keep the build as simple as possible (ESCs are generally plug and play). However, after a bit of digging around I discovered that as long as I did not program the VECS in FOC they were reliable, and as long as the Bootloader was installed then they were easy to setup using BLDC Tool (which I downloaded from http://esk8.de).
- Remote – It gets good reviews.
I borrowed a Power Supply Unit (PSU) from work to power up the VESC for the first time whist I waited for the battery pack to arrive.
The picture below is of my son waiting for the board to blow up the first time I powered it up:

The next step was programming the VECS, which was pretty straightforward. I watched several YouTube clips to find out how to program it. The hardest part was finding the BLDC Tool software for a Mac.
Difficulties encountered at this stage:
- At this stage I could not get the remote to pair with the VESC. The motor would spin when using the computer arrow key in the BLDC Tool, and the receiver and transmitter seemed to be communicating with one another, however the motor would not spin when pulling the trigger on the remote. Initially I thought it was the input from the PSU being high enough to spin the motor using the laptop arrow keys, but not high enough to fully power the remote transmitter. So I waited until I had installed the battery pack to see if the issue would resolve itself.
Stage 4:
- Battery Pack – Alien Power Pack (18650 Li-ion 8S4P 29.6V 10Ah 296Wh)
- Battery Enclosure – APS enclosure (including M3 10mm screws, M3 threaded inserts, self adhesive foam sheet, double sided Velcro)

Decision process behind parts selection:
- Battery – Initially I was planning to buy a couple of Lipo’s, however I changed my mind after I compared the costs of the APS battery pack vs. buying: o A couple of Lipo’s o Anti spark power switch o Balance charger o Parallel adapter o Battery indicator display o Soldering gun / cables / connectors There are also other aspects that swayed my decision: o Volatility of LIPOs o All the cabling looks messy o Time spent making it and the chances of something going wrong o Number of charging cycles In the end I went with an 8S battery based on cost and Bruno’s recommendation.
- Bruno threw in the battery enclosure for free.
Difficulties encountered at this stage:
- I had soldered circuit boards a long time ago when at Uni, and as such thought that this bit would be relatively easy, however my first attempt was a complete disaster. I managed to completely melt the plastic XT60 connector, as I had not soldered the connector with the other side attached. I also heated the wires up so much that the heat shrink shrank before I could move it over the soldered joints. One of the reasons I was having such difficulties was that I was trying to solder 10 AWG wires to a XT60 connector.
Picture of my initial disastrous soldering attempt:

After watching a few more YouTube clips I de-soldered my failure and soldered the 10 AWG wires to an XT90 connector instead. My next attempt was passable.
Note: Only much later did I find out that that solder contains mercury, so remember to wash your hands and work area afterwards.
Stage 5:
- Connect it all together and install the enclosure

Difficulties encountered at this stage:
- After connecting the battery pack, the remote still would not spin the motor. Bruno gave me another VESC to troubleshoot with, however this still did not resolve the issue. Eventually we worked out that I was using the wrong receiver. Bruno let me swap the replacement VESC for the Maytec VECS which was a Smart-Tech VESC (with boot loader preinstalled, HW v4.12, initial installed with FW v2.16 and later updated to v3.31 using the VESC Tool)
- Fixing the enclosure took longer then I through. Thankfully changing to the Smart Tech VESC (with thinner 14 AWG phase wires) made it easier to install in the enclosure over the electronics.
Additional information:
- Overall time scale of the build: approx. 5 months. I am glad it took me so long to build as it gave me time to read about the accidents people have had and it made me realize that a helmet and wrist guards are a must.
- Weight: 7.4 kg
- Final Cost: £650
What does it ride like:
- Initial attempt at riding the board on the living room carpet I found that the throttle was too sensitive so I adjusted it with the throttle curves in the VESC Tool and increased the deadband. Also, the motor was cogging when starting from a stand still.
- When starting from a stand still on the road there was no cogging and the board felt great. The throttle is not so sensitive, however I’ll need to get used to it as it’s a little jumpy.
- Wheels are great and roll over everything.
- I miss having a tail and it does feel incredibly long compared to my regular skateboard. The turning radius is very large and I have to stop to redirect it at sharp bends.
- It’s a little bit uncomfortable on my feet due to road vibrations and the concave of the board.
Possible future improvements:
- A flatter shorter board with a kick tail.
- A more protective enclosure with easier access to the VESC.
- A VESC that can handle FOC.
- Bruno mentioned that APS are planning to sell 6” pneumatics wheels that will fit their regular trucks and pulley system. Can’t wait for them to be available. Failing that, maybe a set of 107 original ABEC 11 Flywheel on wider trucks set up as a drop through.
Response from everyone:
- Family: My wife thinks I am having a mid life crisis. But is happy that at least it’s a harmless one. Maybe starting to get a bit annoyed that I am spending every spare minute on the esk8 forum.
- Work: My colleagues do not get it. There is slight interest, but the general vibe is that I’ll probably be nominated for the Darwin Awards next year. The engineering department on the other hand were super enthusiastic. They wanted regular updates and lent me some of the tools to build it (soldering gun, solder, PSU, heat shrink, cable ties, electrical tape).
- The owner of a skateboard shop: was a d&*k. He made me feel like I was too old to be doing such a stupidly dangerous activity.
Thanks to Bruno for:
- Giving me tons of advice on the build (106 plus emails and several trips to his workshop)
- Giving me a customer loyalty discount
- Throwing in freebies along the way
- His contribution and passion for this industry. With several different projects on the go, Bruno’s workshop is like a candy store! Experimental ebikes, eboards, mountain boards and ESC, its esk8 heaven.
Thanks to the esk8 community and all the people that made this a thing.