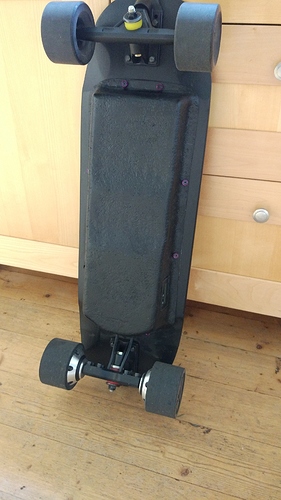
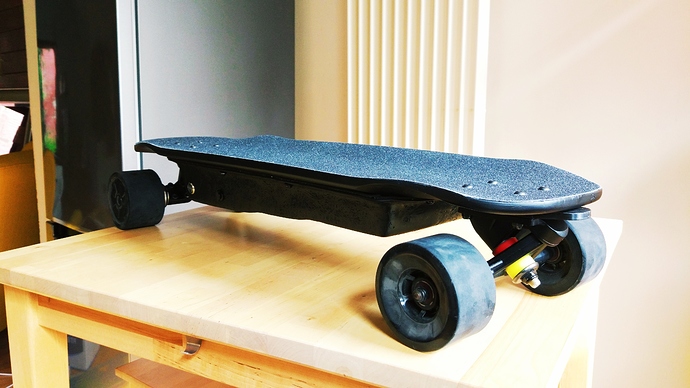
It looks very brittle. The white areas are bubbles of air(not good) and the flange which will be the area under most pressure looks very dry with no resin. You can add extra layers of mat but I would start again, you’re just locking air and weak layers. You want it to look like the area on the deepest part of your enclosure where it is a solid colour with no white bubbles or dry spots. Probably not the answer you are looking for.
Thx for the reply. It’s my first time so all the suggestions are welcome. The thing is that I pressed the surface with a roll at every layer so I am not sure I can do better next time. The top part is the one came out on since it is the one more compressed by the vacuum bag. Do you have a trick to do get rid of the air bubbles?
Thx I will watch it. I am using 260g/m2 mat fiber glass
Thats pretty light mat, it should be easy to work with and not get bubbles. The heavier the mat, the more difficult it is to get to lay nicely into intricate shapes. All about a bit of practice! Do you wear a mask when you use the resin and glass? I use these.
Yes I used a mask with small filter but less protective than the one you showed. Anyhow I didn’t definitely press so firm on the layers during lamination. Although I see that procedure really difficult to do it with the shape of my enclosure and at the edges. I knew it making a fiber glass enclosure it’s a art, but it’s really difficult do make it right.
If I remake it. How many layers would you suggest? I will attached all the electronics ecc to the deck so the enclosure is there just to cover. Thx
I use a total of 1200gsm but that’s very solid.
That’s a lot. I probably used 350gsm in total. Then I don’t have enough material to make another attempt. 
I’ve seen your 3D printed spud enclosure, you know how to model and obviously know how to use a 3D printer fair enough to be able to print ABS. This whole vacuum forming/molding technique has always seem very messy to me, plus all the very toxic fumes involved, and a lot more money in mats vs 3D printing mats, and not forgetting you lose all the detail of a nicely printed enclosure when you make a mold. All of this trade off just to use a slightly stronger structural material like fiberglass or carbon fiber.
It feels like people do the molds when they feel 3D printed parts are not strong enough. But the truth is most people don’t own 3D printers and from the few that do, most don’t know enough to make proper prints with ABS (poor layer adhesion, warping, etc). But we have so much more. We have PETG, Polycarbons, Nylon, etc.
The best kept secret is cheap basic PLA, annealed in water @ 70 C for 30 mins. Annealed PLA is 40% stronger and more heat resistant than both ABS and PETG. Why water? It will heat up evenly and not warp, do not bake it, that is what causes warping. The only drawback is still dimension change of around 3-4% but that is fine for an enclosure.
Now, take that resin you bought and give the print a coat. You just made it waterproof and increased impact resistance. You can even sand it down after that and paint it if you want.
Thanks for all the inputs. I agree 3D printing is awesome and I printed other parts of the skate too. For the enclosure I went for PETG and I liked the result. That been said for the first time printing PETG and now I know how to do it better but basically I had problem with clogged nozzle during the print and I had stop it clean the nozzle and resume it. It affected the layer adhesion in some spots. The enclosure was strong and flexible enough to work fine for almost one month and half, then in the previous mentioned spots I saw initial cracks. I could reprinted better but I wanted to try the fiberglass why and use my 3D enclosure as mold. The process of fairly easy, but it takes a lot of time and patience. I definitely learnt a lot. The final result is rock solid but heavy as wel in my case compare my printed enclosure.
You can see more pics it in my build log. I also though about reinforce the 3D printed enclosure with fiberglass but honestly I wanted to give it a try. Of course you have to invest money in it. I spent 30 Euro for the material but I printed out the tools I didn’t have it and to get the final perfect surface I should have spent 10-15 Euro more. I simply didn’t know before. I can always fix the one I made.
Could you please make a video or take pictures demonstrating this? I’m trying to use up all my remaining pla and abs before I switch to petg and the like.
You can check out an example of the water annealing process here.
You are basically doing sous vide on the PLA part, heat up to 70C, put part in a zip bag partially open, and slowly put inside the pot. The pressure will take out all the air and then you can seal it. Let it cook for 30 min.
For the high temp PLA, annealing makes those even stronger. Like Raptor HT PLA, you may need to anneal a bit higher temperature. This one becomes super durable and food safe/dishwasher safe. They even market it as a industrial grade high impact material. The best part is it still prints super easy like any other PLA.
Here are the strength results data. (note: test done with bake method)
In short, annealing PLA, specially in water, takes it to a whole new level. Super simple to print, and outclasses the durability of ABS and PETG. But it is still not perfect, PLA is still biodegradable and it still absorbs water, so for outdoor use (like an enclosure) you would need to seal it with something waterproof (waterproof wood glue/filler, or fiberglass resin).
Personally I plan to experiment a lot with annealing PLA for parts that don’t need millimeter specific dimensions. But I also did order a Printbite+ mat, which I heard many people use successfully to print Nylon. My ultimate goal is to perfect Nylon printing for all sorts of industrial-grade parts.


