Folding e board (first eboard build)

So I am new on these forums, and haven’t really been into long boarding until recently so i am kinda a noob. However recently I thought it would be a cool idea to build a long board i could use on campus that folds to fit into a backpack.

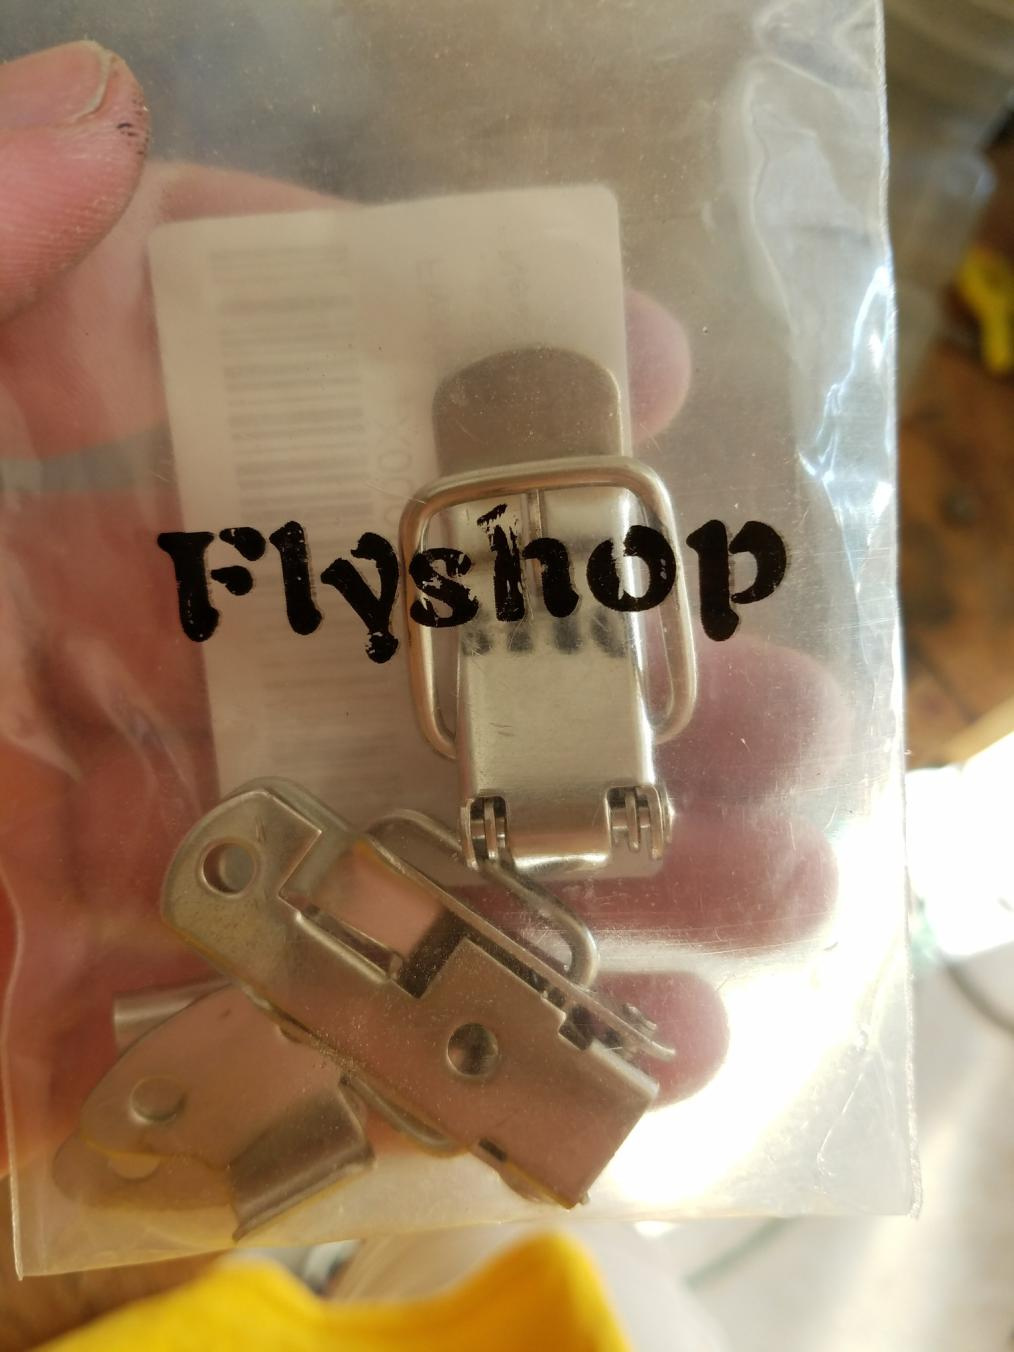
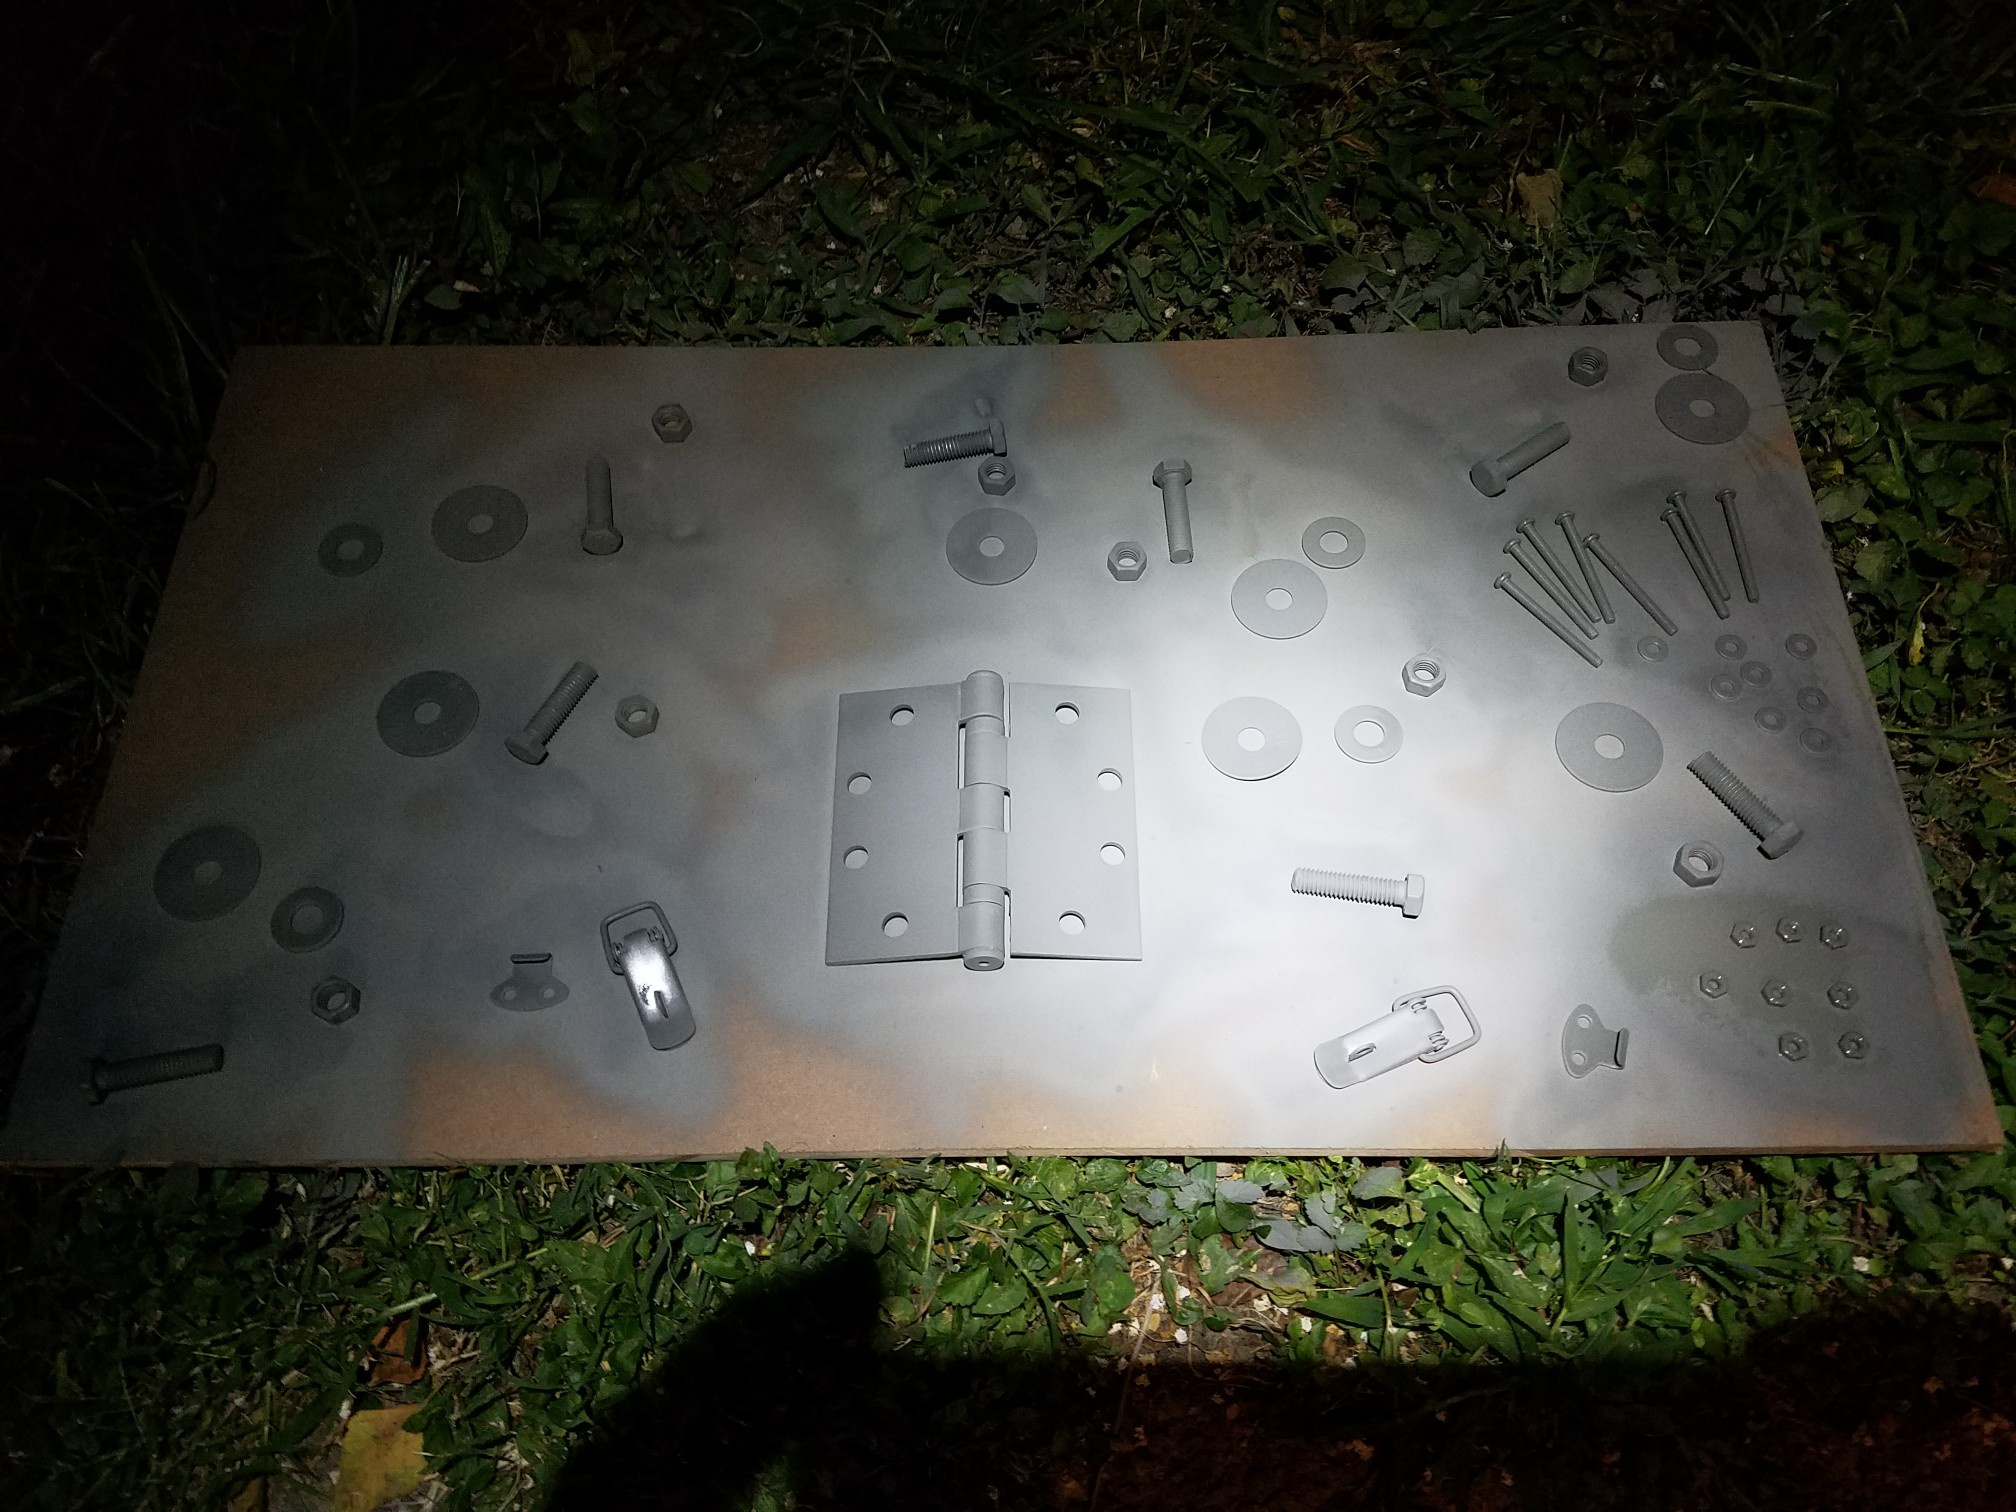
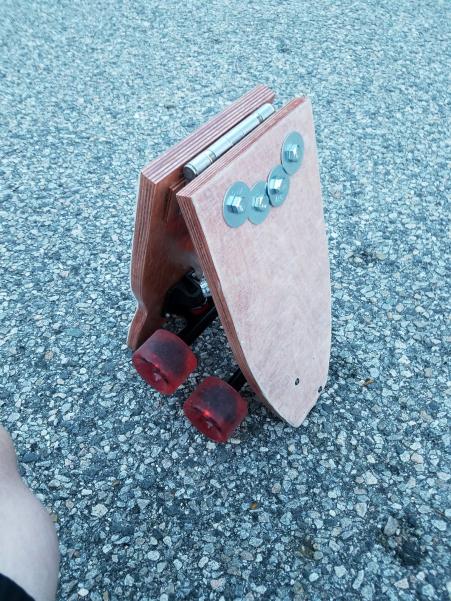
I started by testing on some standard 3/4 in ply to see if having a hinge bolted on and standing on it would break the wood ( I weigh about 200lbs). I knew the leverage would be massive and sure enough the plywood couldn’t withstand the force of the bolts and the holes ovaled. Not giving up on the idea i ordered some baltic birch ply in 3/4in which is extremely strong and has many plys. you can find it here I used a large door hinge (this) and bolted it to the bottom of the deck. I had to use 1/4 baltic birch as a riser to make room for the bump in the middle of the hinge. I sanded it smooth, beveled the top edges, applied red stain and multiple coats of spar urethane. you can see the working finished result of that here:

Not being satisfied with just a folding board i came across these forums and decided to motorize it. This is the current part list that im ordering.

motor: diy-electric-skateboard-kits-parts/6355-260kv-epower-motor/

esc: https://hobbyking.com/en_us/hobbykingr-tm-x-car-beast-series-esc-1-8-scale-120a.html

reciever/transmitter: https://hobbyking.com/en_us/quanum-2-4ghz-3ch-pistol-grip-tx-rx-system.html

motor mount: diy-electric-skateboard-kits-parts/single-bolt-on-motor-mount-only/?attribute_motor-mount-type=63mm+Motor+Mount

gearing: diy-electric-skateboard-kits-parts/36t-abec-drive-pulley-belt-combo-kit/?attribute_motor-pulley=16T+Motor+Pulley&attribute_belt-size=265mm+12mm+Wide

battery: 2x https://www.amazon.com/gp/product/B00E6ZG1Z8/ref=oh_aui_detailpage_o00_s00?ie=UTF8&psc=1

Im going to post updates when the parts arrive and i figure out how im going to mount them. Hopefully ill post a final build price once its finished and other people will be able to use this post for ideas :slight_smile:

7 Likes

Nice that you have implemented the foldable deck concept :slight_smile: It will be interesting to see whenever battery compartment will be thin enough for you to still allow to fold the deck completely :slight_smile:

Nice to hear baltic birch is so strong… im actually from region of Baltics :smiley:

As about the remote - I think you could have found something more slim… plus some people dont always say the Quanum remote is the best, even though I dont remember what the issue was (maybe on/off switch?)

I think it is now possible to order ‘mini remote’ for about 30usd… but if you are in a hurry and nobody sells them near your location, then yeah, I assume you could use Quanum remote for awile… but since you said you gonna use it for campus, I would always get smaller remote. at least one which goes into jacket pocket or something.

1 Like

Just FYI, those batteries are really thick so it might be a good idea to get 2 3S batteries and wire them in series.

1 Like

For only 30 more dollars, you could get a vesc from diyelectric. It will be worth it in the long run.

2 Likes

Also you will need flywheels for your gearing kit such as these: https://www.amazon.com/dp/B01IBJ5ZCY/ref=cm_sw_r_cp_apip_6FLVuBCrkUmlB

1 Like

Loctite all those nuts and bolts holding the hinge’s on,you don’t want them coming loose through vibration. I recommend loctite 277 high strength,there are some shit roads where i live and 6 months later everything is still just as tight as when I first built my board.

2 Likes

i was going to use the wheels i already had and just drill holes through them.

1 Like

i have locktite if i need it but those are large bolts and they are torqued down pretty tight so i dont think ill have any issues.

im pretty cheap and my plan is if i want to upgrade ill just add another motor and esc later when i have the money

You’d be suprised what shakes loose, Now I lock tight every thing and check weekly.

3 Likes

yeah i checked its almost 2in thick, but i figure that should be ok if i make the enclosure just thick enough for that. I don’t know if ill have enough room for 2 batteries horizontally and the esc/receiver. The deck has about 4’’ of clearance and almost zero flex since its so strong.

I like the idea of a folding board. I like being able to skate somewhere and then not have to carry a massive heavy board around. also i’d probably get an X-car beast ESC from hobby king if you are going 6S. 2nd the idea of getting two 3S instead of one 6S pack for slimness. also loctite everything. I shudder at the thought of any bolt without loctite on it. things just come loose on skateboards.

that is a good bit cheaper. I assume you haven’t had any temp problems with that esc, because if not ill buy it instead (im ordering stuff today).

I have used them in about 5 or 6 different boards and I have never seen one fail. only gripe is that the brakes are loud.

1 Like

Thanks, i changed the list.

and if you ar looking ot save money check out my video https://www.youtube.com/watch?v=HuNxDbChhPw&lc /spam /spam /spam

nah seriously I put together the cheapest board I could. you might be able to get some tips.

1 Like

Build Updates:

I bought some spring loaded latches to hold the long board open while riding. as shown here:

Unfortunately the latches i bought were cheap and i had to bend the latch mechanism in to stop it from pulling out while being ridden on.

I spray painted all the bolts and latches black. Starting by coating them with some self etching primer

then black spray paint and clear coat on top of that. I know a lot of the paint may rub off the bolts and hinge, but it will still help them match the black trucks.

After putting the hardware back on and bolting the latches on to the board it looked pretty good.

The gearing arrived in the mail today so i started mounting the gear to the drive wheel. Since I am just using the wheels i have i needed to drill mounting holes. I started by screwing the wheel to a piece of plywood through the bearing.

I then aligned the gear into the center of the wheel with a pair of calipers, but you could probably get close enough just by eye.

using an angle grinder tool i had laying around i clamped the gear to the wheel and used a 3/16 drill bit to drill 2 alignment holes through the already existing ones in the gear (I only just put the tip of the drill bit into the wheel).

I chucked a 1/4 in drill bit into the drill press and aligned the bit with the alignment holes i had already drilled. I clamped the board down to make sure the wheel didn’t move while drilling. (finished holes)

I then clamped the gear down to the wheel again and screwed 2 of the bolts provided with the gear kit into it.

I thought it might be worth mentioning its useful to chuck up screws you don’t have the driver for to screw them in faster, specifically these worked well since they have barrel heads. after putting in the two bolts I drilled the rest of the alignment holes with the 3/16 bit, removed the gear and drilled the rest of the 1/4in holes back at the drill press. You can see the finished product with the bolts in here:

There wasnt enough bolt length to attach the second plate in the front, but the bolts are a very tight fit in the polyurathane and even with just two the gear was held on very tight. It is worth mentioning that the bolts were rubbing on the caliber trucks and i had to grind a little out of the edges to give them space.

After doing that however there didn’t seem to be any interference problems and the gear alignment seems good enough. https://drive.google.com/open?id=0B6vK_R7Mwg48cUNka1VEX0ljNU0

1 Like

Sorry about the time lapse between build updates, I know there are probably people following this who want to see the folding board concept implemented, but I always have multiple projects going on. I’ve finished most all of the soldering. I’m using deans connectors in a lot of places to make the electronics more modular. Here is the series connector i made for the two zippy compact 5,000 mah.

Im going to mount the batteries in front and run a wire across the hinge to the esc and receiver to save on space. Ive cut out the pieces for the rear box from 1/4" baltic birch plywood and they are glued together with 30min epoxy. Here is a picture with labels before the glue:

The wires coming from the motor will connect to the female bullet connectors on the outside of the box.

Ive also mounted the motor onto the trucks using the diy electric skateboard mounting kit, unfortunately i think i had to mount it kinda backwards because i bought smaller trucks, but it should still be fine.

Hopefully ill be able to update this again tomorrow and finish soon.

1 Like

just FYI your motor mounts and motor pulley are both on backwards. the way you have it now will produce excess lateral stress on the motor shaft and will be less efficient.

if you’re not sure what I mean the motor mount clamp should be on the Kingpin side and the motor pulley bolts should be towards the wheels

Unfortunately it wouldn’t fit on the trucks any other way. The shaft isn’t long enough for the motor pulleys bolts to grab on if it was reversed, and if i turn around the mount there wouldn’t be enough room for the wheel.