Glide v.2 - Boosted mini
Specs :
- Motor : 1x Sk3 245 Kv
- ESC : Vedder ESC
- Trucks : Caliber 2 180mm 50° (no clones)
- Wheels: Black Evolve GT 83MM 76A
- Mount : Enertion’s aluminum/carbon mount (not available anymore)
- pulleys : 15T - 36T by Enertion.
- misc : HobbyKing
If i forget anything, please tell me so i can update this list.
Build status : ON-GOING
Currently I’m working on my deck, I bought two big bambo sheets (2440mmx120mmx4mm) of caramel side-pressed. First difficulty, finding a retailer… Luckily I found a good one, even though they don’t really sell in such a small quantities, they made an exception for me (won’t name them here cause I don’t want to give them the extra load of another hundred builders, sorry guy’s).
So now that I have everything to actually start building the deck, that’s what i’m doing now…
Bare in mind I only have time during my weekends, so my builds are pretty slow… (last one took about 3 months) ![]()
Build info :
1) Deck
I bought two big bambo sheets (2440mmx120mmx4mm) of caramel side-pressed.
These got cut in by the retailer to 12 sheets of 800x600x4mm, thanks guy’s !
At home I realized i could even cut them in half, so I’d have 24 workable sheets. YEAHH, more bang for buck !! ![]()

I started by drawing a raster on one of my sheets, This seemed to be the best/easiest way to copy the shape of the Boosted Board.
Problem with this approach was, the wood EATS your pencil like hell !!! ![]() Also, to get an exact symmetric of the share in all quadrants isn’t as easy as it should be…
Also, to get an exact symmetric of the share in all quadrants isn’t as easy as it should be…
Thanks to some helpful thinking by a fellow interested party, We decided to take a big sheet op paper (wrapping paper works fine), fold it by 4 so you’re left with only a single quadrant. This way you can easy copy the shape and cut it out to get an exact symmetrical copy.


So I mentioned I’d be cutting my sheets in half didn’t I … ?

I also added the mark-up where the trucks would be placed. Starting to get shape aye ? ![]()

Now I was planning to add the holes for the wires, ESC to MOTOR. Yeah, I don’t like to have holes in my enclosure.
So I started to add everything on my board itself, And gosh… am I happy I took a 10S3P and not any bigger, close fit already… ![]()


So now I kinda know how to route the wires…

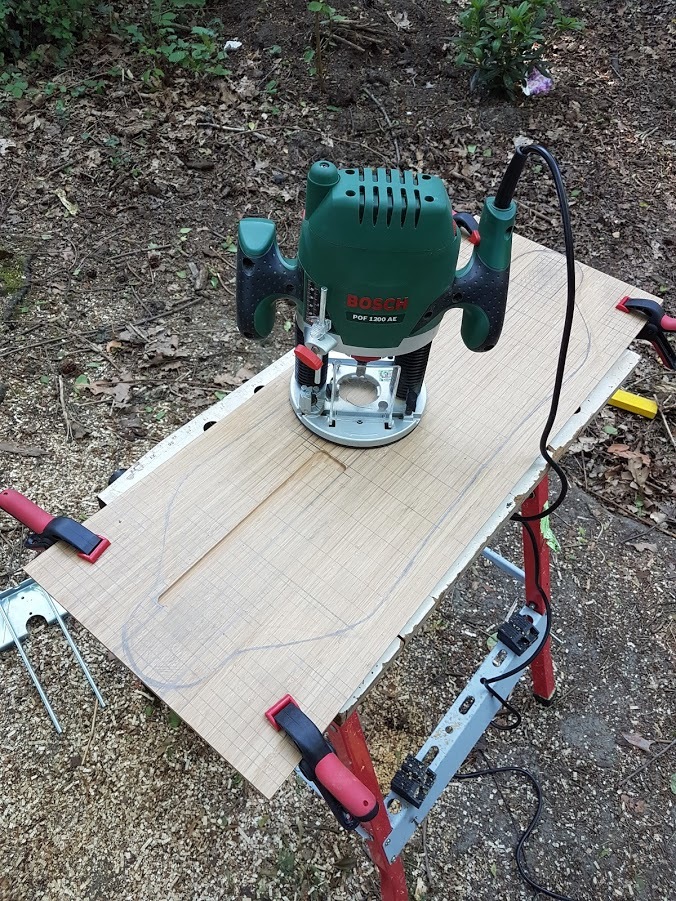
Used a Routering-tool to create the cable gutter.
Added a picture of the routering-tool I have above in case anyone is looking for a good one, I highly recommend this one from Boch. Not that i have any experience with others hahaha ![]() .
.
So, the gutter is in. Now I went to create my cables, not really sure if this is how everyone else does it but it ended-up working pretty well.
I created a small opening in my bullet connectors, so the cable can go in side-ways.
Please bare with me here, I’m no dremmel-expert and these bullet connectors are soooooo small lmao.
On a side note, If you’re also planning to do this… Keep in mind these bullet connectors are pretty fragile, so don’t over tighten them in your vise. Happend to me ![]() , luckily, since they are so fragile you can easly bring them back to shape with some pliers.
, luckily, since they are so fragile you can easly bring them back to shape with some pliers.

So once cut, I soldered the cable in.
I made sure that enough cable was stripped down so that there is enough in the tiny gap.
Kinda makes a “L” shape into the connector if ya know what I mean ![]() .
.
PS, I should look into getting one of those handy clamping tools, not sure of what they’re called though ![]() .
.

Drilled in some holes and tried the cable.
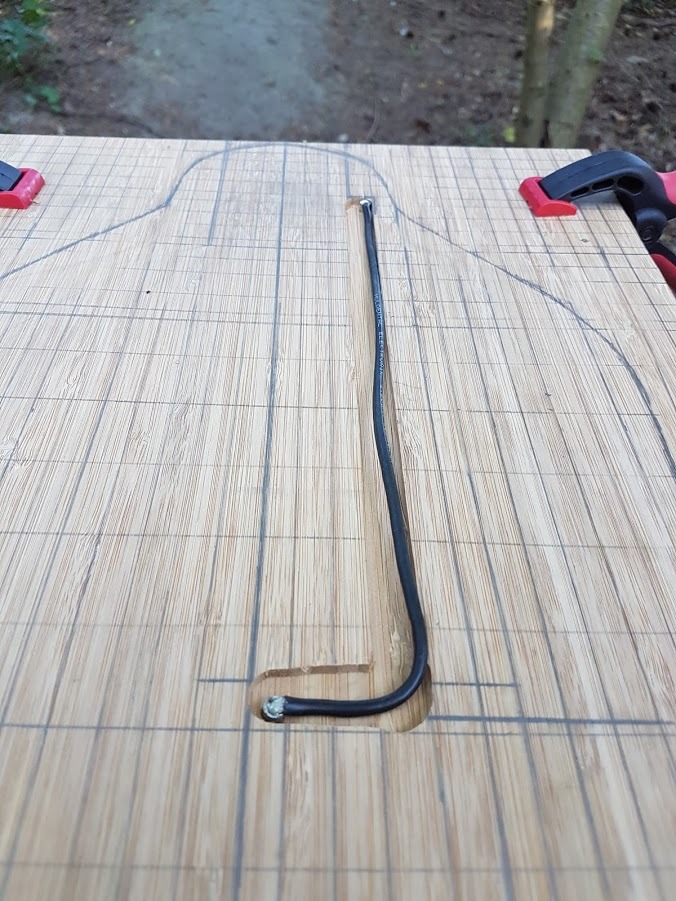
Fits pretty nice if I do say so myself, also nice and flush. Sadly once I had done all three cabled (single motor), I had some difficulties routing the three cables and some difficulties of the placement of the holes for the bullet connectors.
So Today I routed another gutter on another sheet (good that I have 24 of them, still what a waste…).
I got my inspiration from @longhairedboy’s style of cable-routing. Thanks dude !! ![]()
![]()

Update 11-06-2017:
Added the wires into the gutters.

Next steps : Gluing the sheets together…
2) Enclosure: Vacuum forming or polyester.
Update 11-06-2017:
I started out by creating the mold for the enclosure.
First I thought of 3D printing this, sadly the prices were too high.
so I decided to make it out of some MDF (=type of wood), and in the end I fell like the result is good enough for my likings. ![]()
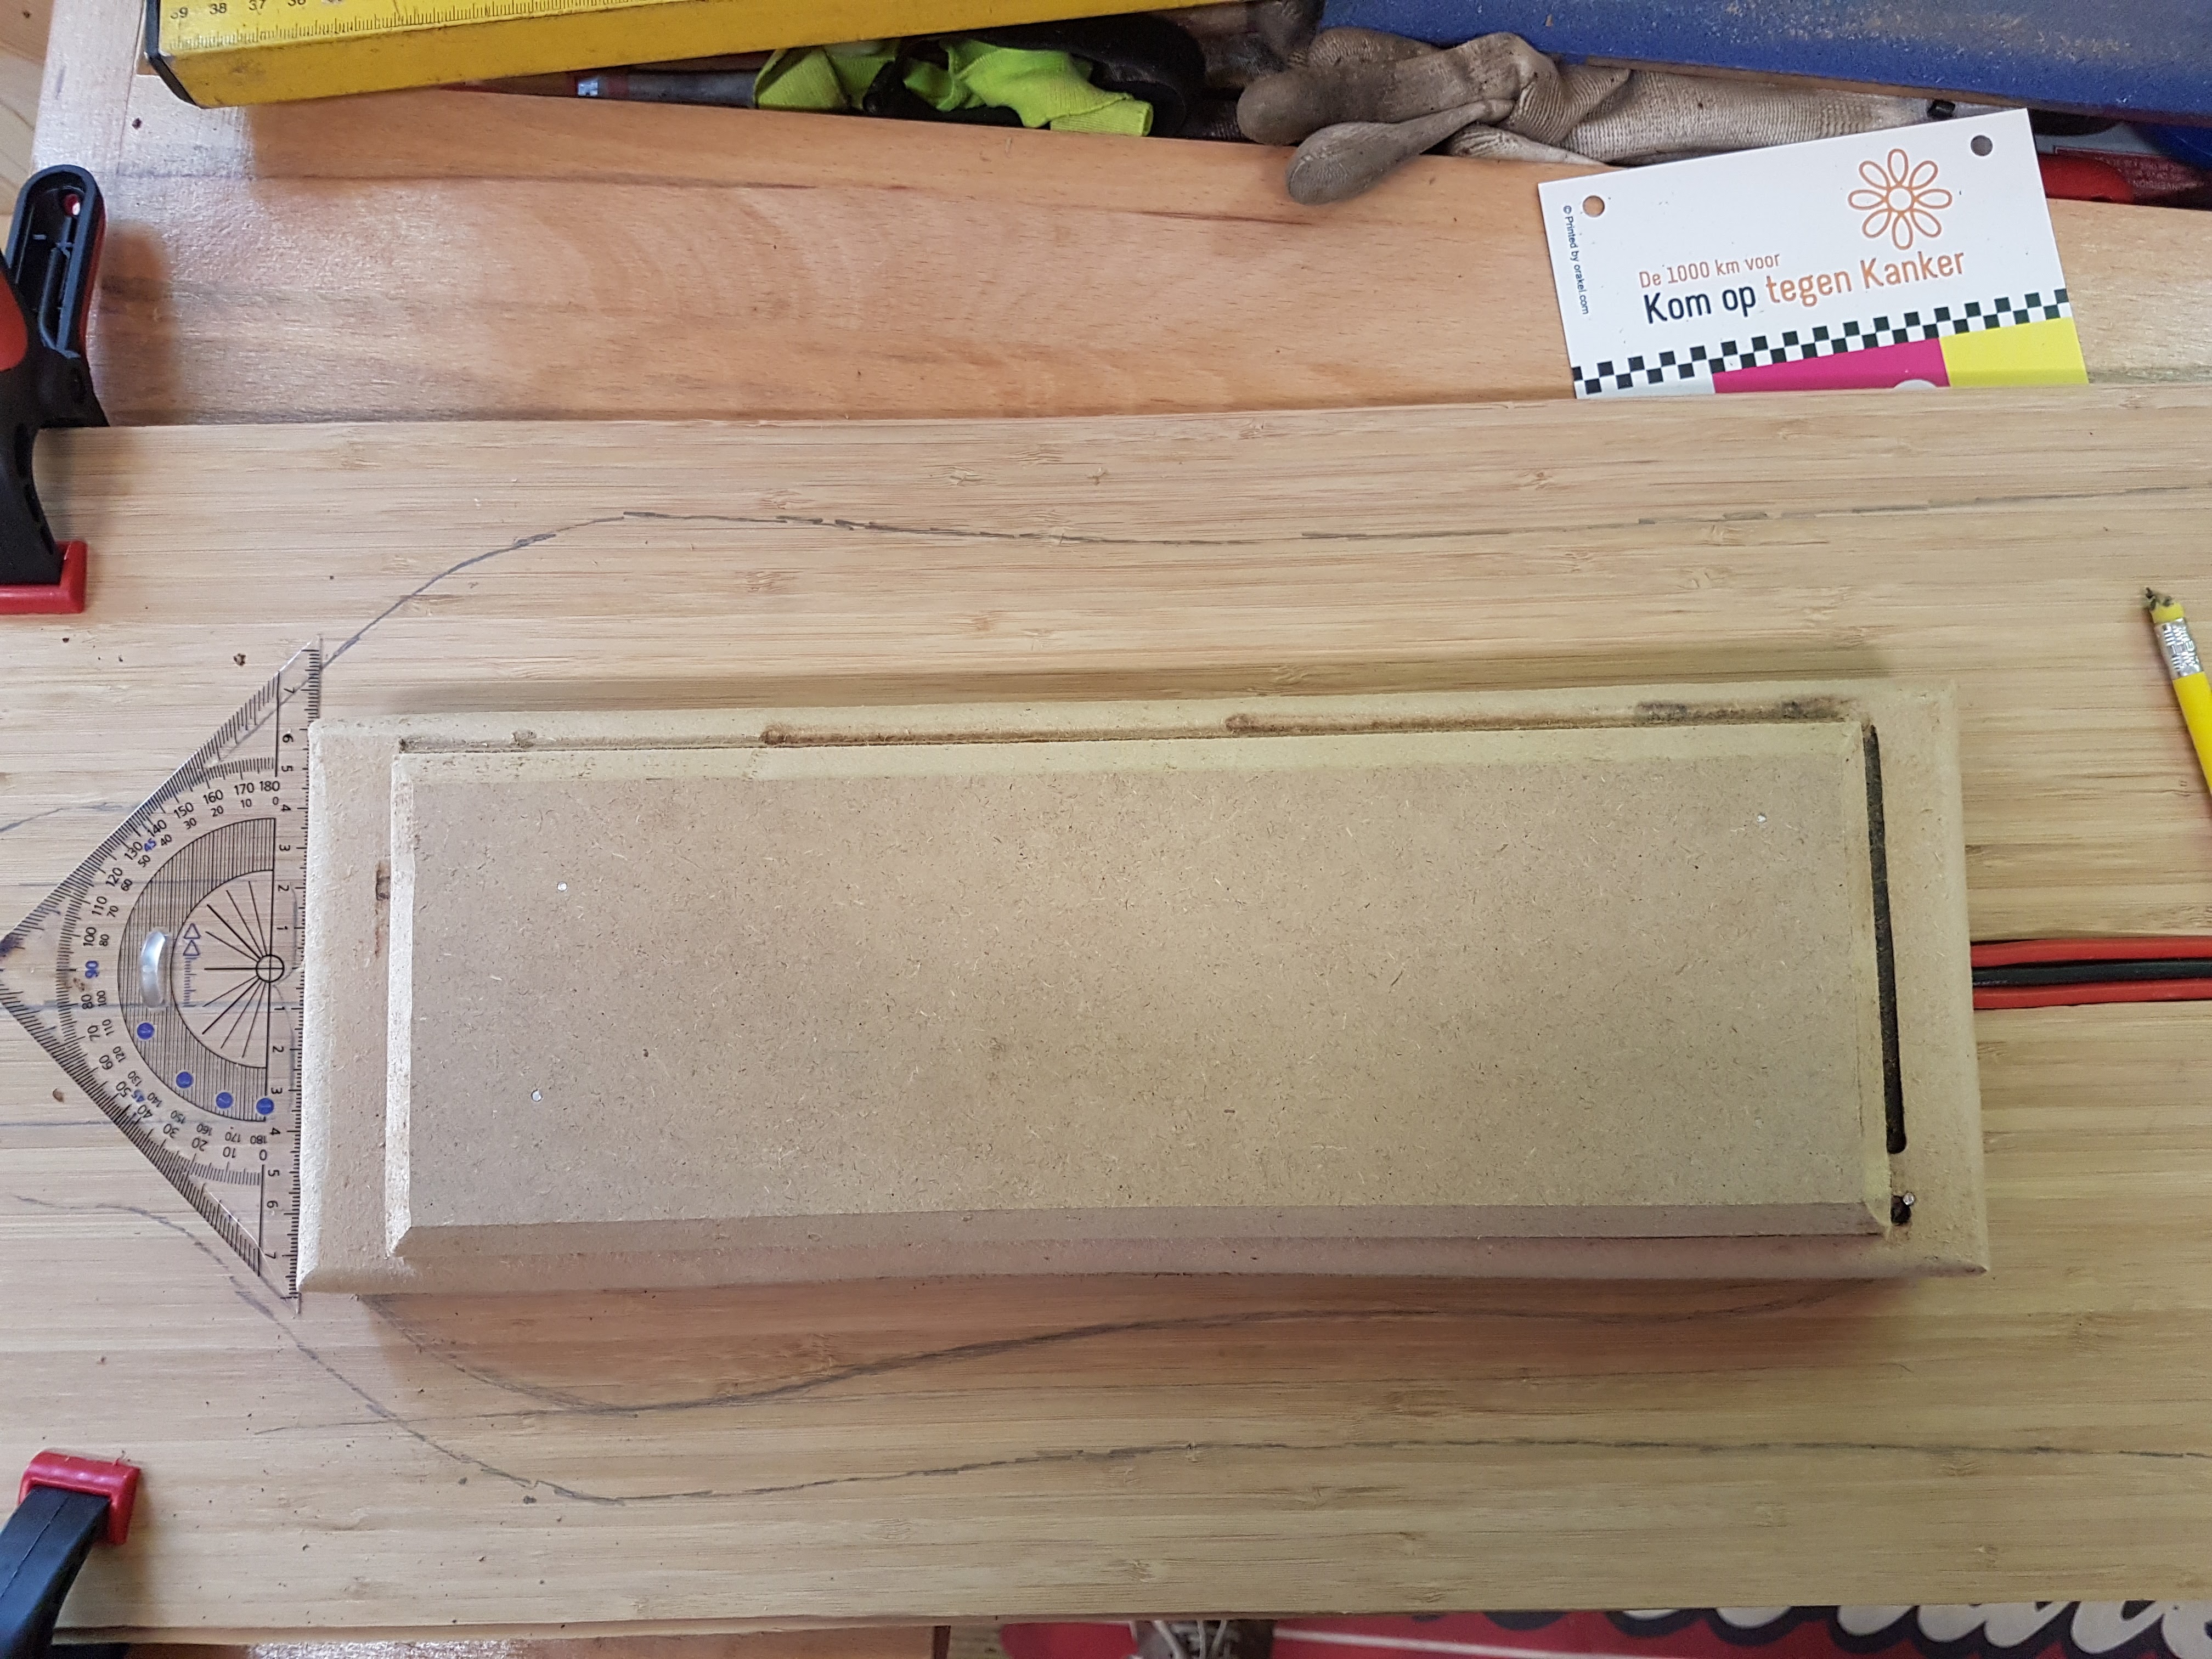
So I simply created a block with the dimentions of my battery and some extra space for the other electronics (vesc, switch, charging port, led lcd,receiver and fuse).
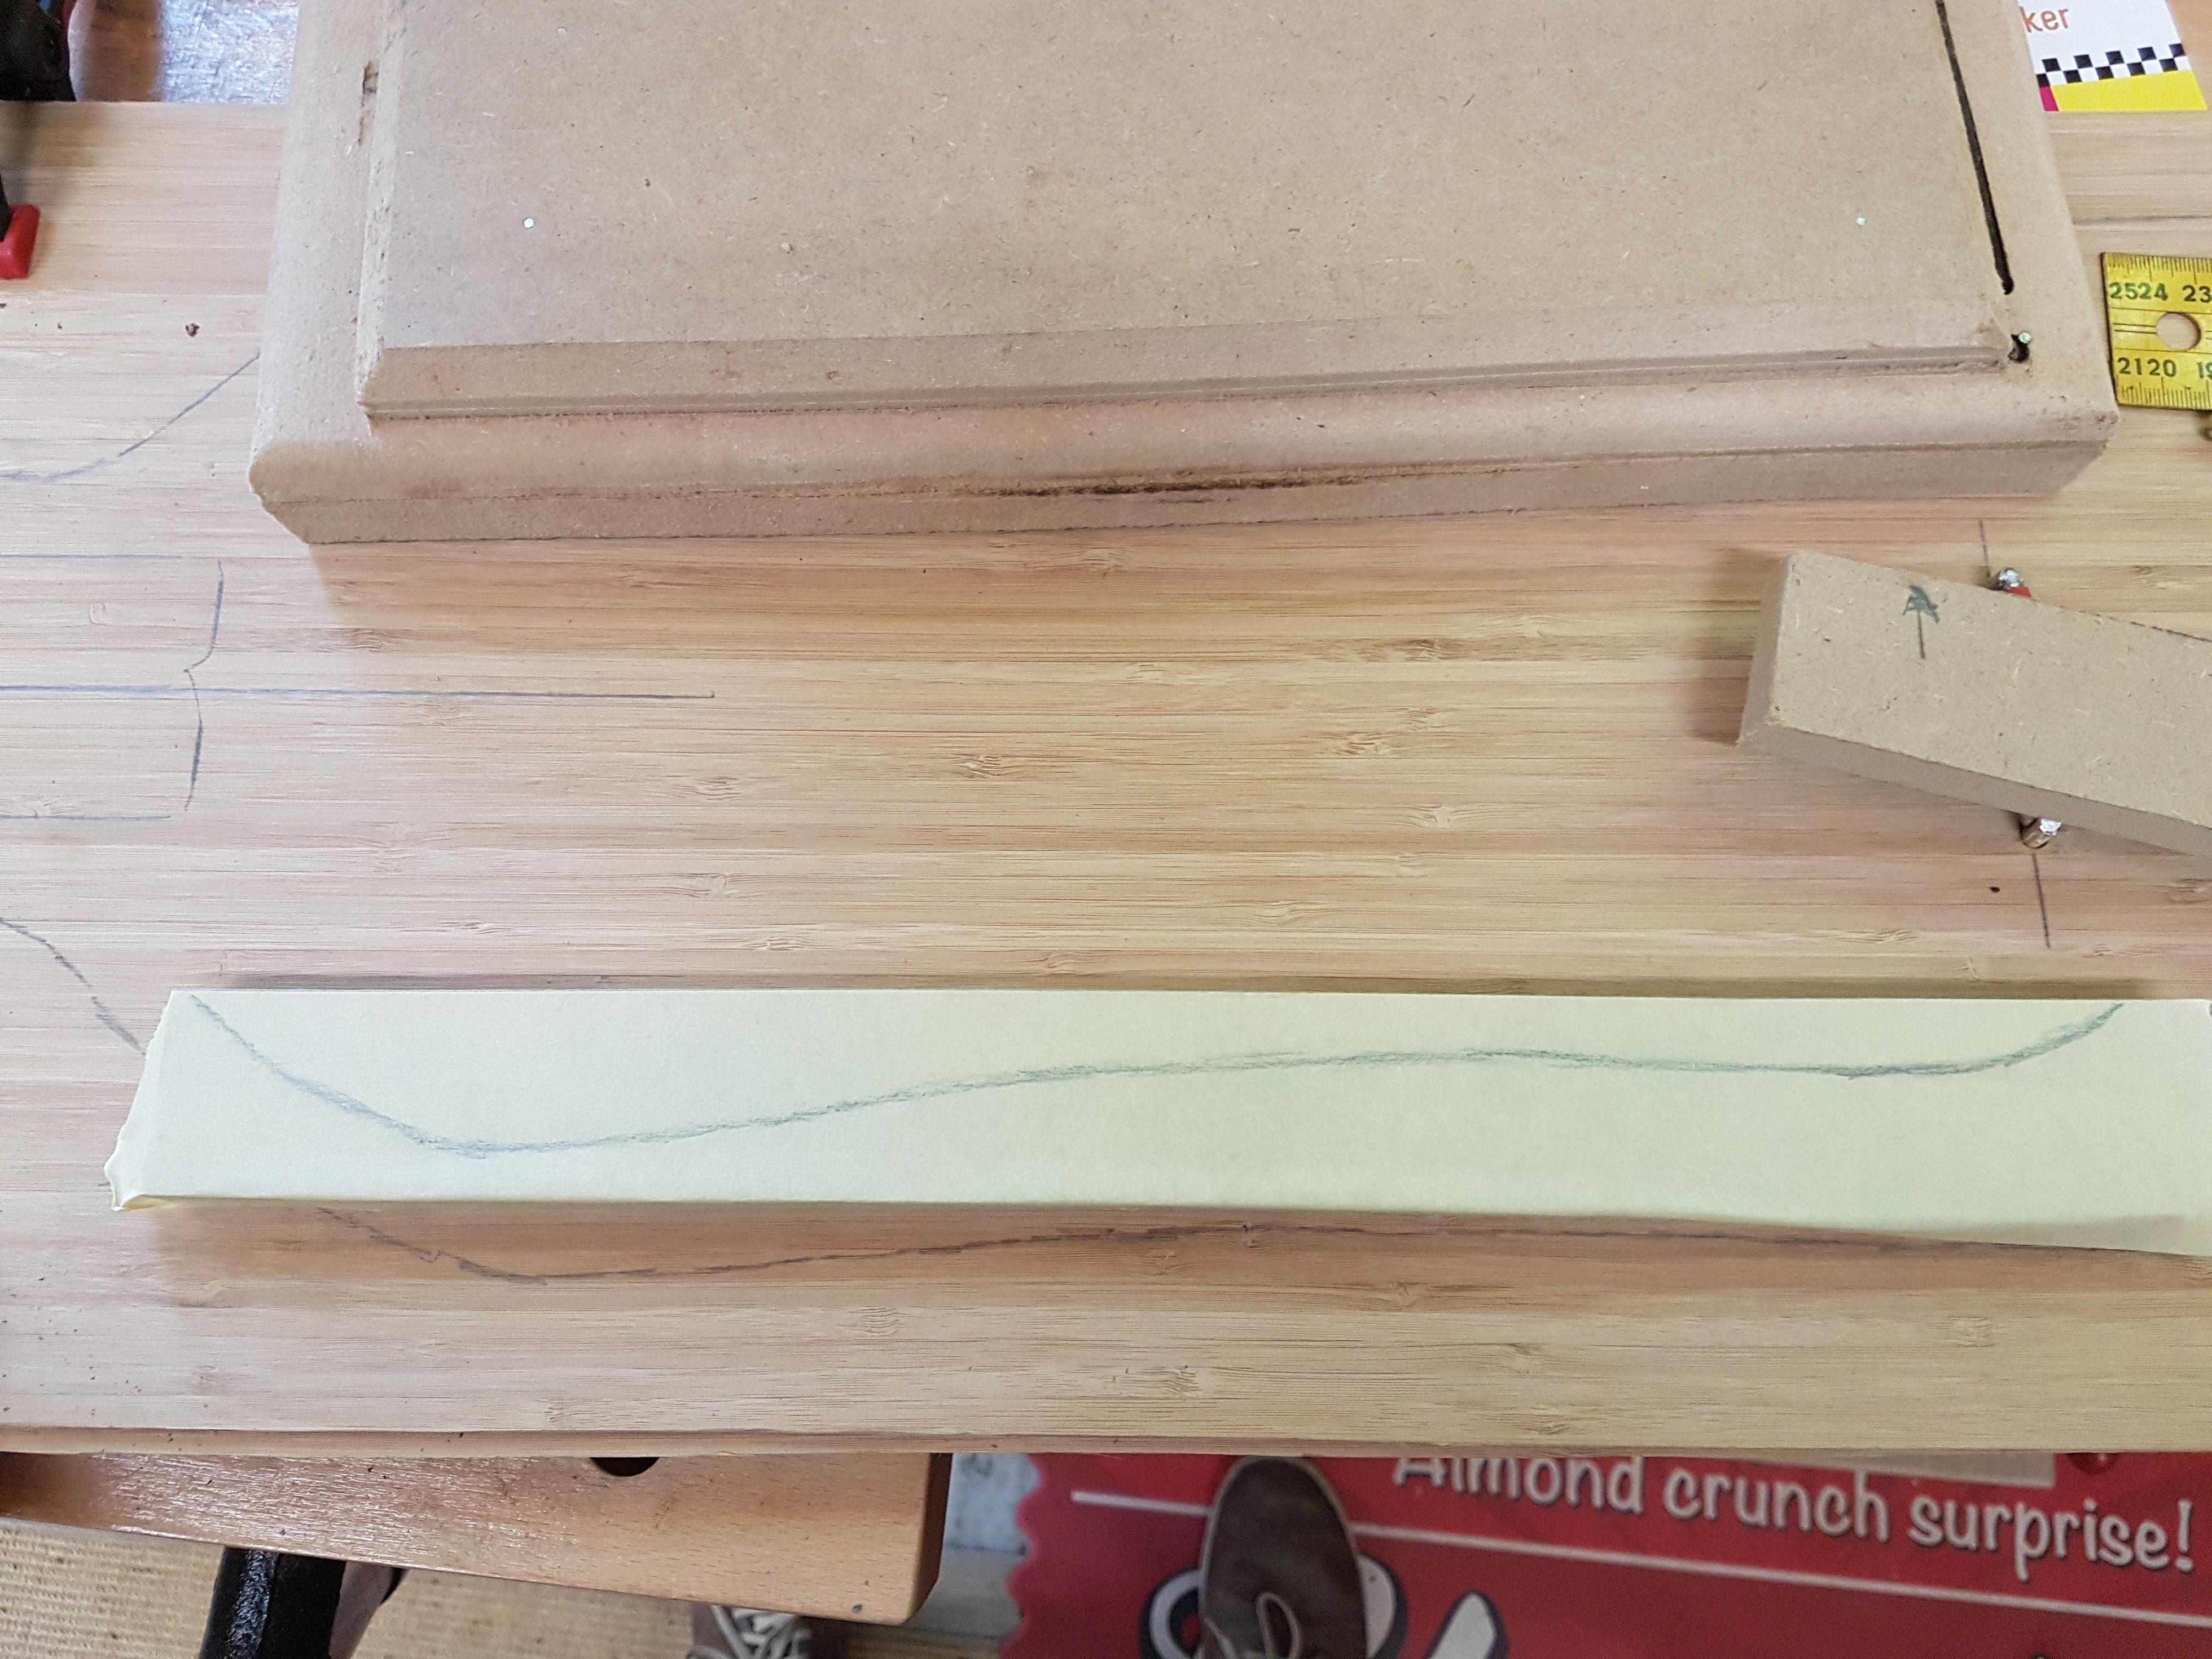
Now to make this box look a bit better asthetically, I deceided to add some side bumbers. First I tried some draft drawings on the bamboo deck itself.
Next, I drew the final bumper-shape on some paper-tape.

Which I then used to copy to create the bumpers themselves.

Next steps : Using the mold to create the actual enclosure 3) Electronics: Battery, BMS, Switch, Fuse, VESC setup. not here yet… 4) Software: BLDC not here yet…
Outro To everyone who made it to here, Thanks for ready and feel free to leave a comment on what you think, tips or anything else.
Also I try to add as much pictures as possible because that’s what I liked about other build logs, and that’s what helped me the most.
Shout out to @carl.1, @onloop for providing us with this forum, without them I probably won’t be into this. They deserve a bit more appreciation from all of us!
