Following, cause I’ll start building my board soon as well and would love to see the enclosures. I’m going to design my own, but these will need to fit two 5s 8000mAh lipo’s. Board is about the same, mine is a clone tho.
Here are some I’ve been working on. They either fit a 6s4p or 4s4p+VESC. Height is between 25mm-30mm. With wall thickness of 5-6mm so they all have around 20mm-25mm of space inside in height. It’ll make for a nice stealth thin enclosure.
However the more I work on these the simpler I want to go… The more “aesthetics”, curves and so on make it much bigger then it needs to be. I’ll likely go for a printer friendly design.
Be careful with printing enclosures, you need your screws to go through the whole piece keeping the layers up to the deck. Otherwise because of vibrations it might break the enclosure.
@BooYA Mhmm I guess its trial and error. I’ll have reasonable wall thickness on the parts and have it printed in ABS/PETG.
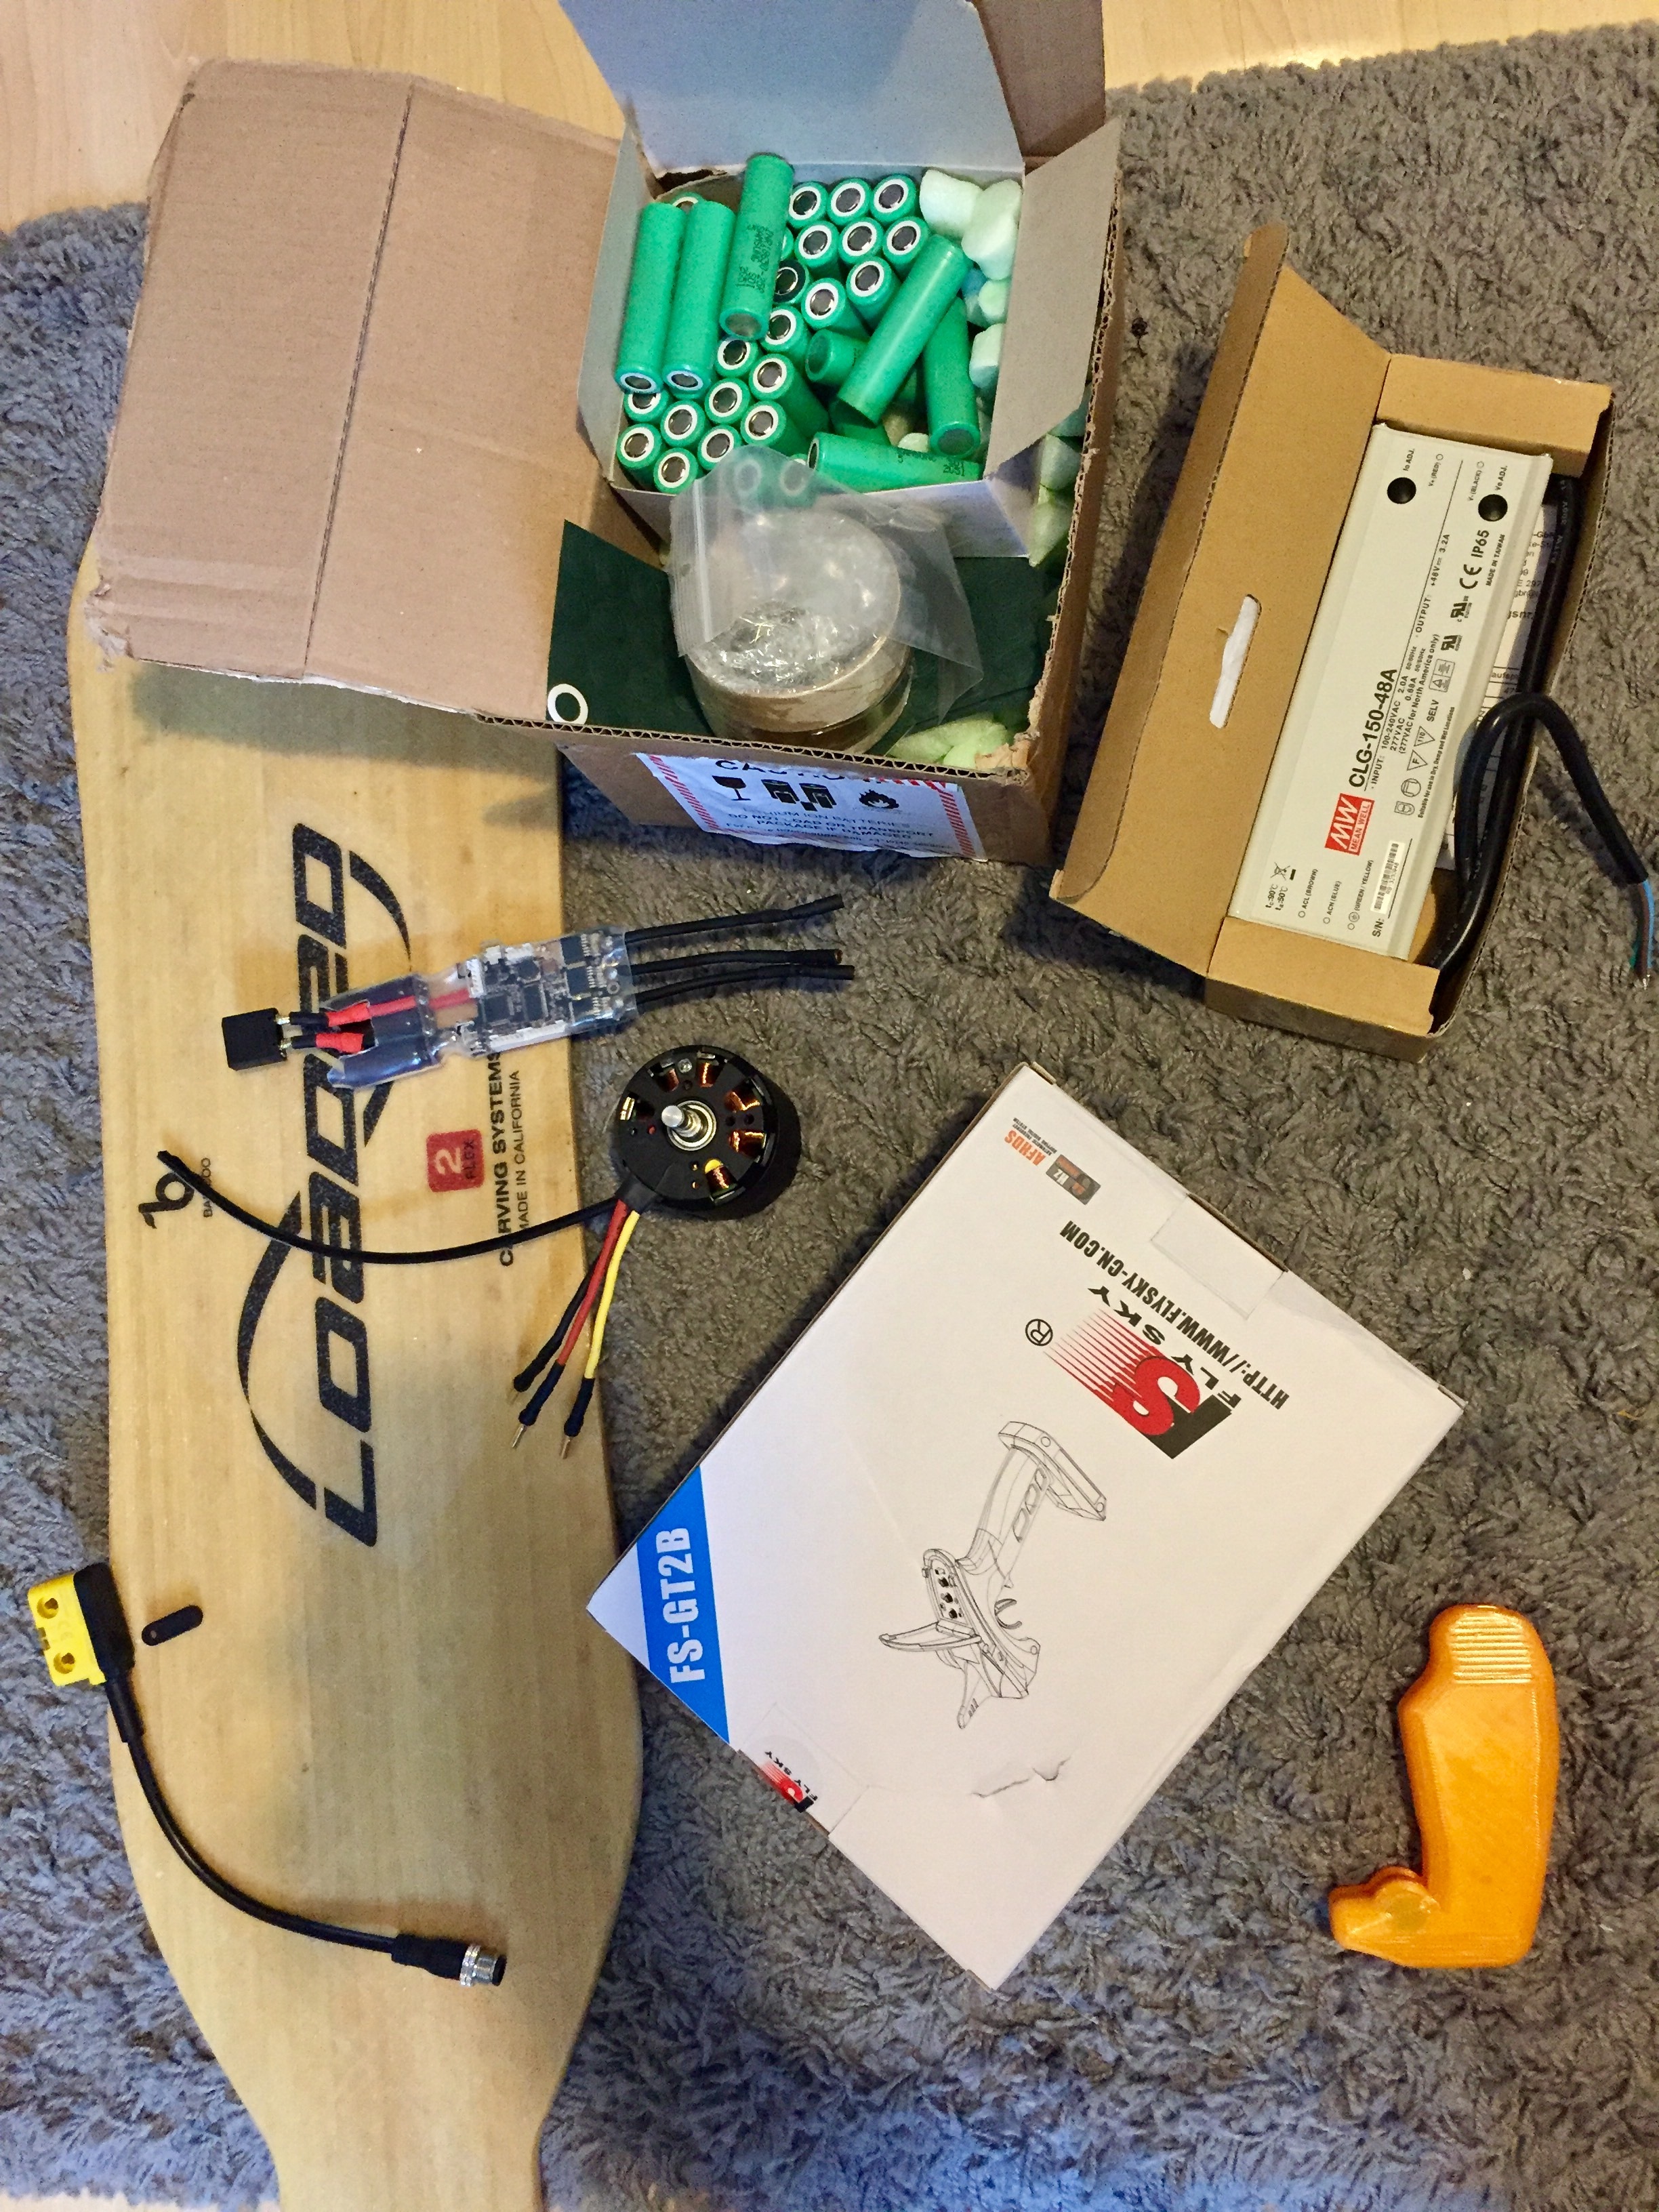
The PETG just arrived. I’ll have to reprint a GT2B mod. Either the sparkle or the mad/bad munkey/wolf. Any suggestions which one needs the least amount of soldering ?
In the meantime my Anti Spark switch arrived. Iam not confident in my solder skills but I tried anyway… Hope I didnt fry anything … The little resistors took me 20 mins…
I also got a JST 6Pin to connect to my hall sensor cable. I figured lets solder that too…
Cool enclosures and I’m with you just keep it simple. I’m still in doubt if I can put everything in one box or go for the 2 piece set up. The lipos are quite big, but it should be possible.
There are some members here that 3d print the enclosures and enforce them with some fiber glass on the inside. I want to make a small vacuum former and use the 3d print as a mold or might just use some wood as a mold.
As for the GT2B mods you mention, they both need the same amount of soldering. There are some other mods that don’t need soldering but they are quite big. The only one that is good I hear is the MasterCho mod (don’t think it need that much soldering), but those files are not shared.
Last tip is one for soldering wires together (for small wires you don’t need to put another wire around it tho, but it’s a good technique):
Cool video ! I guess I’ll need to get a new solder iron before risking any sh°t solder joints… I guess a single enclosure is way easier to do. And if you keep it nice and streamlined it’ll look quite good. Its just because of the flex that I have to go for the split enclosures. What board are you using ?
I’ll reinforce them too. I’ll think of a way to do that. Vacuum former + wood as a mold sounds good.
This guy had it done Looks good !
I’ll stay with the sparkle mod. I have another one printing which is scaled up by 5% should add some clearance for small finicky stuff. And tomorrow will be the print day for either the VESC or Battery enclosure
I was very lucky to buy a Weller soldering station for cheap from a colleague, they are quite expensive but I really see the difference in soldering. It got easier and more precise. Not saying you can’t solder with anything other, but I’m very happy with it.
As for the board I’m using a chinese version of the vanguard, so that’s why I doubt I can get everything in one box. I’m using two 5s 8000mAh lipos that are a bit bigger than I hoped, but should give me some decent miles. And I’m not able to really test the flex cause I’m waiting for my wheels from the EU group buy.
Can’t help you with the power part. For me I think I’ll be getting a 10s BMS and a charge port like you see on electric bicycles and buy a simple charger.
Good luck with printing, will you be able to print them in one piece?
Hi @TranxFu maybe you need to double check the anti spark doesn’t look so reliable. If it fail a solder while you are running the skate will stop suddenly. If you go fast is not nice. Overall looks good! I need a 3d printer too!
Edit: did you see the pulleys Cover junior potato did it for 3d print, they look so sweet!!
Small update on this build log:
10s4p: I’ve tried to get the spot welder to work the last few days. Mhmm… It just doesnt want to … Am tempted to go the mosfet route or get a thyristor…
Anybody in Germany who wants to spot weld my cells ?
I might just get a really good solder iron and solder them. Lets see…
Remote: Sparkle mod is up and running. Just finished the remote.
Enclosure: Can’t nail down the final enclosure design. Will do in a few days. Just want to print a single design since it takes up almost a whole roll of filament for one set of enclosures haha…
Rest: Still awaiting parts from the group buy to actually starting the work on the deck.
@Surfer hehe I figured those solder spots look miserable ! Will redo them once I get a new soldering iron. Yea those pulley covers look really nice ! Might do my own. Don’t think it’ll take a lot of time.
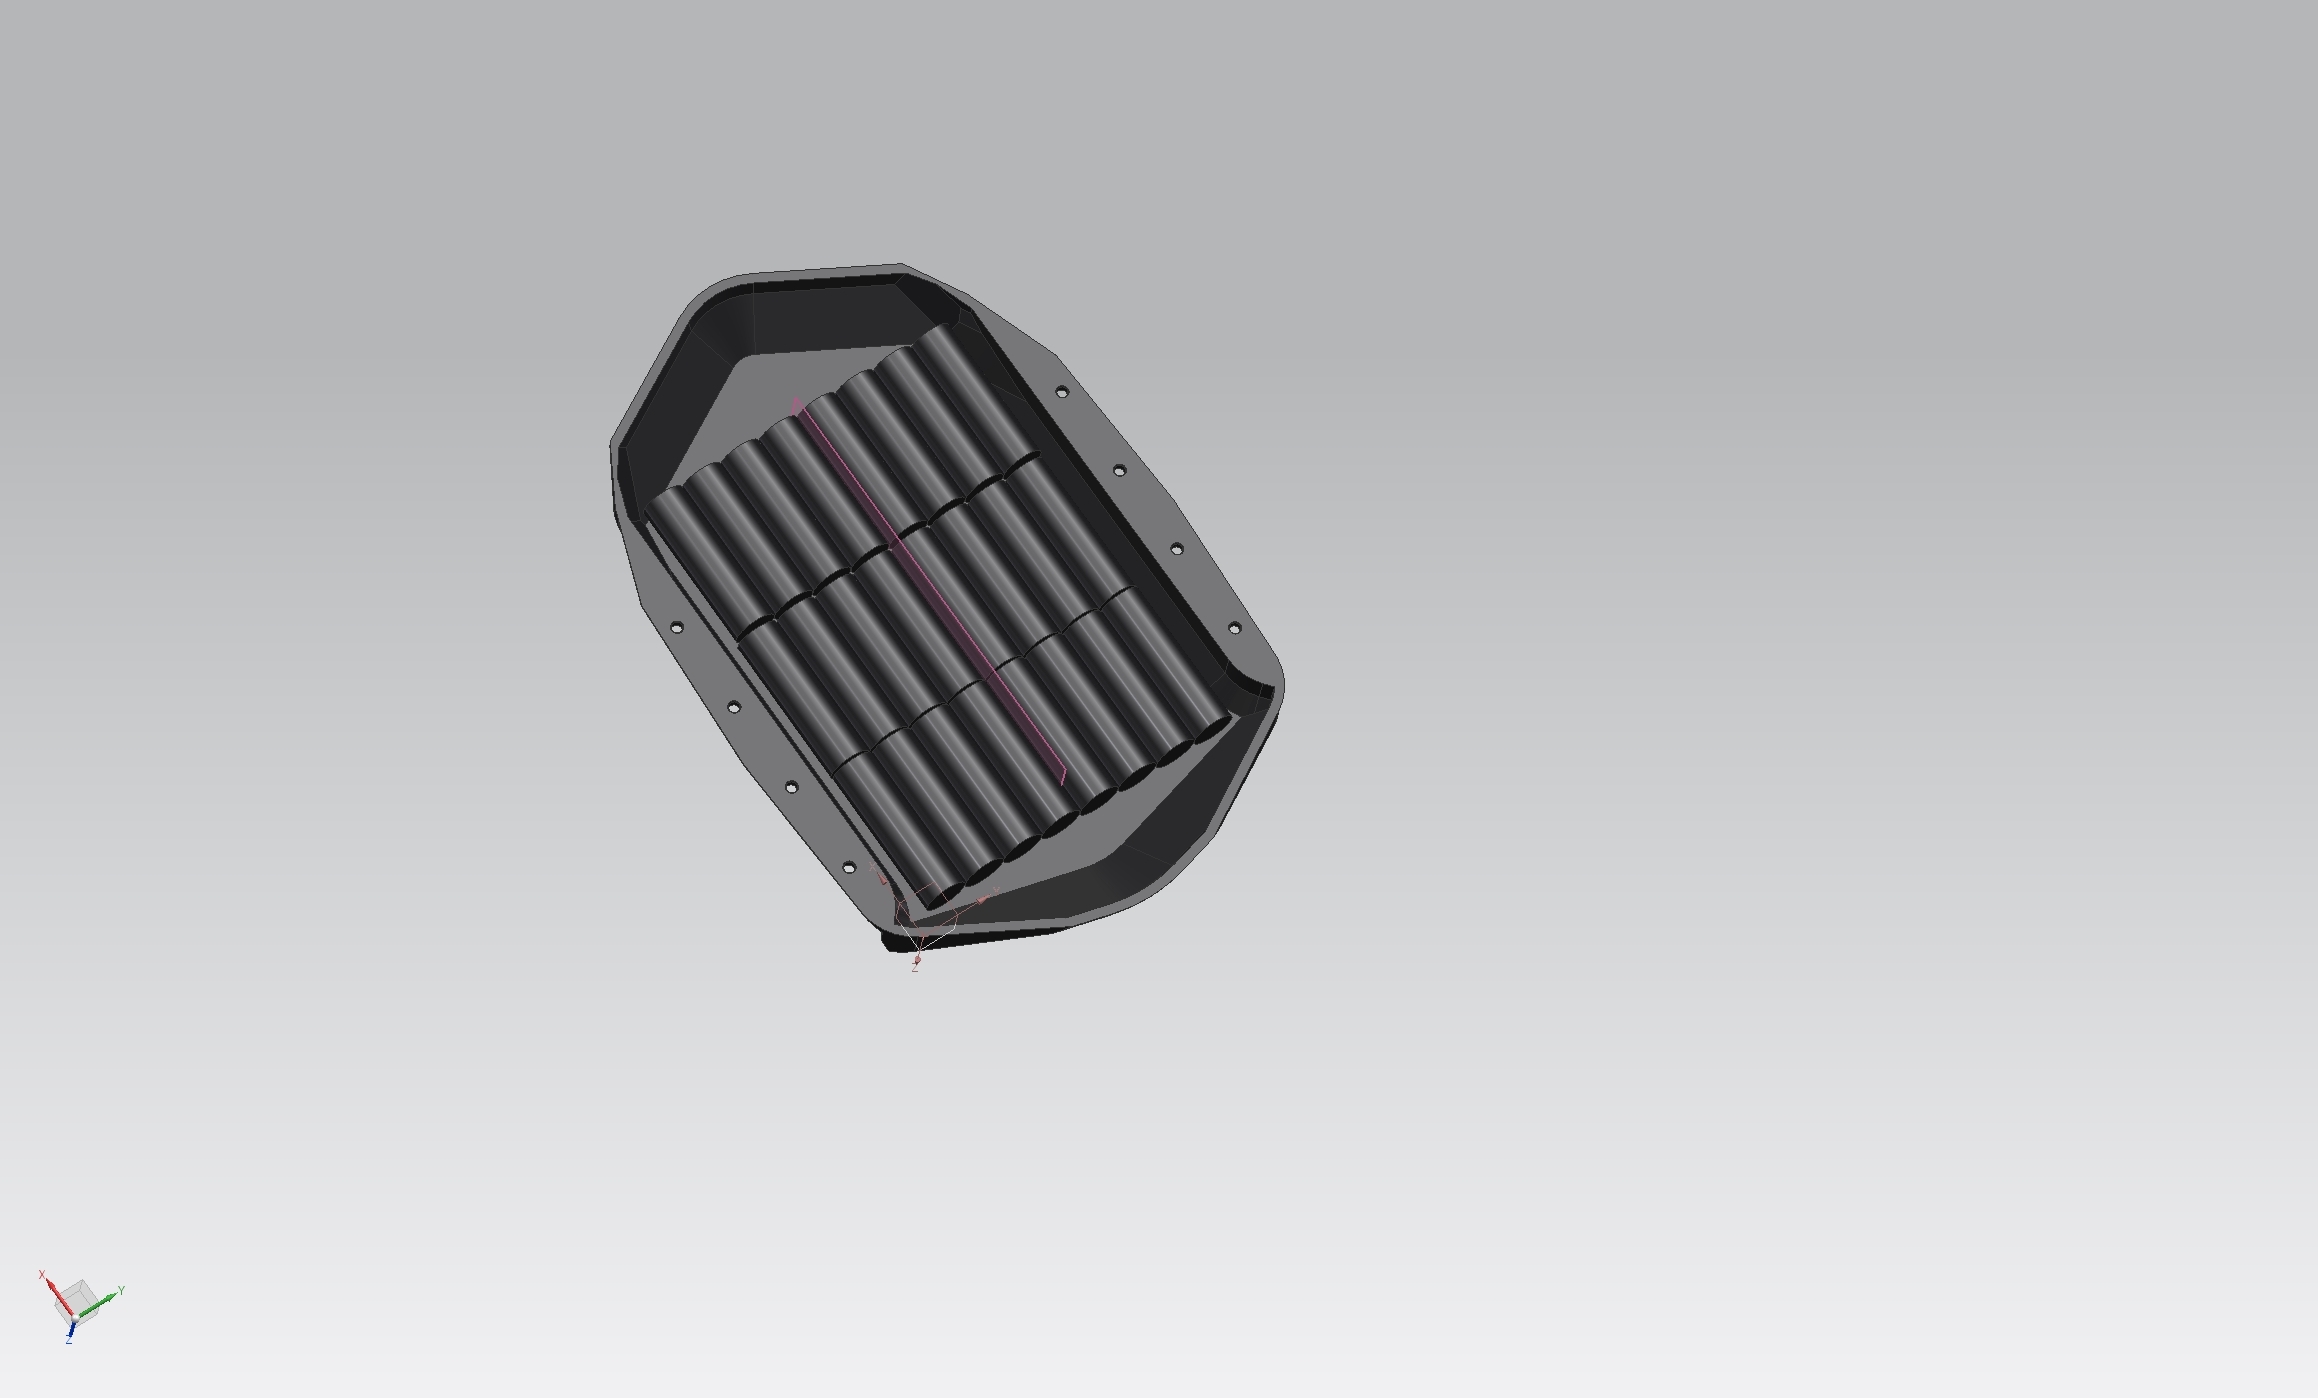
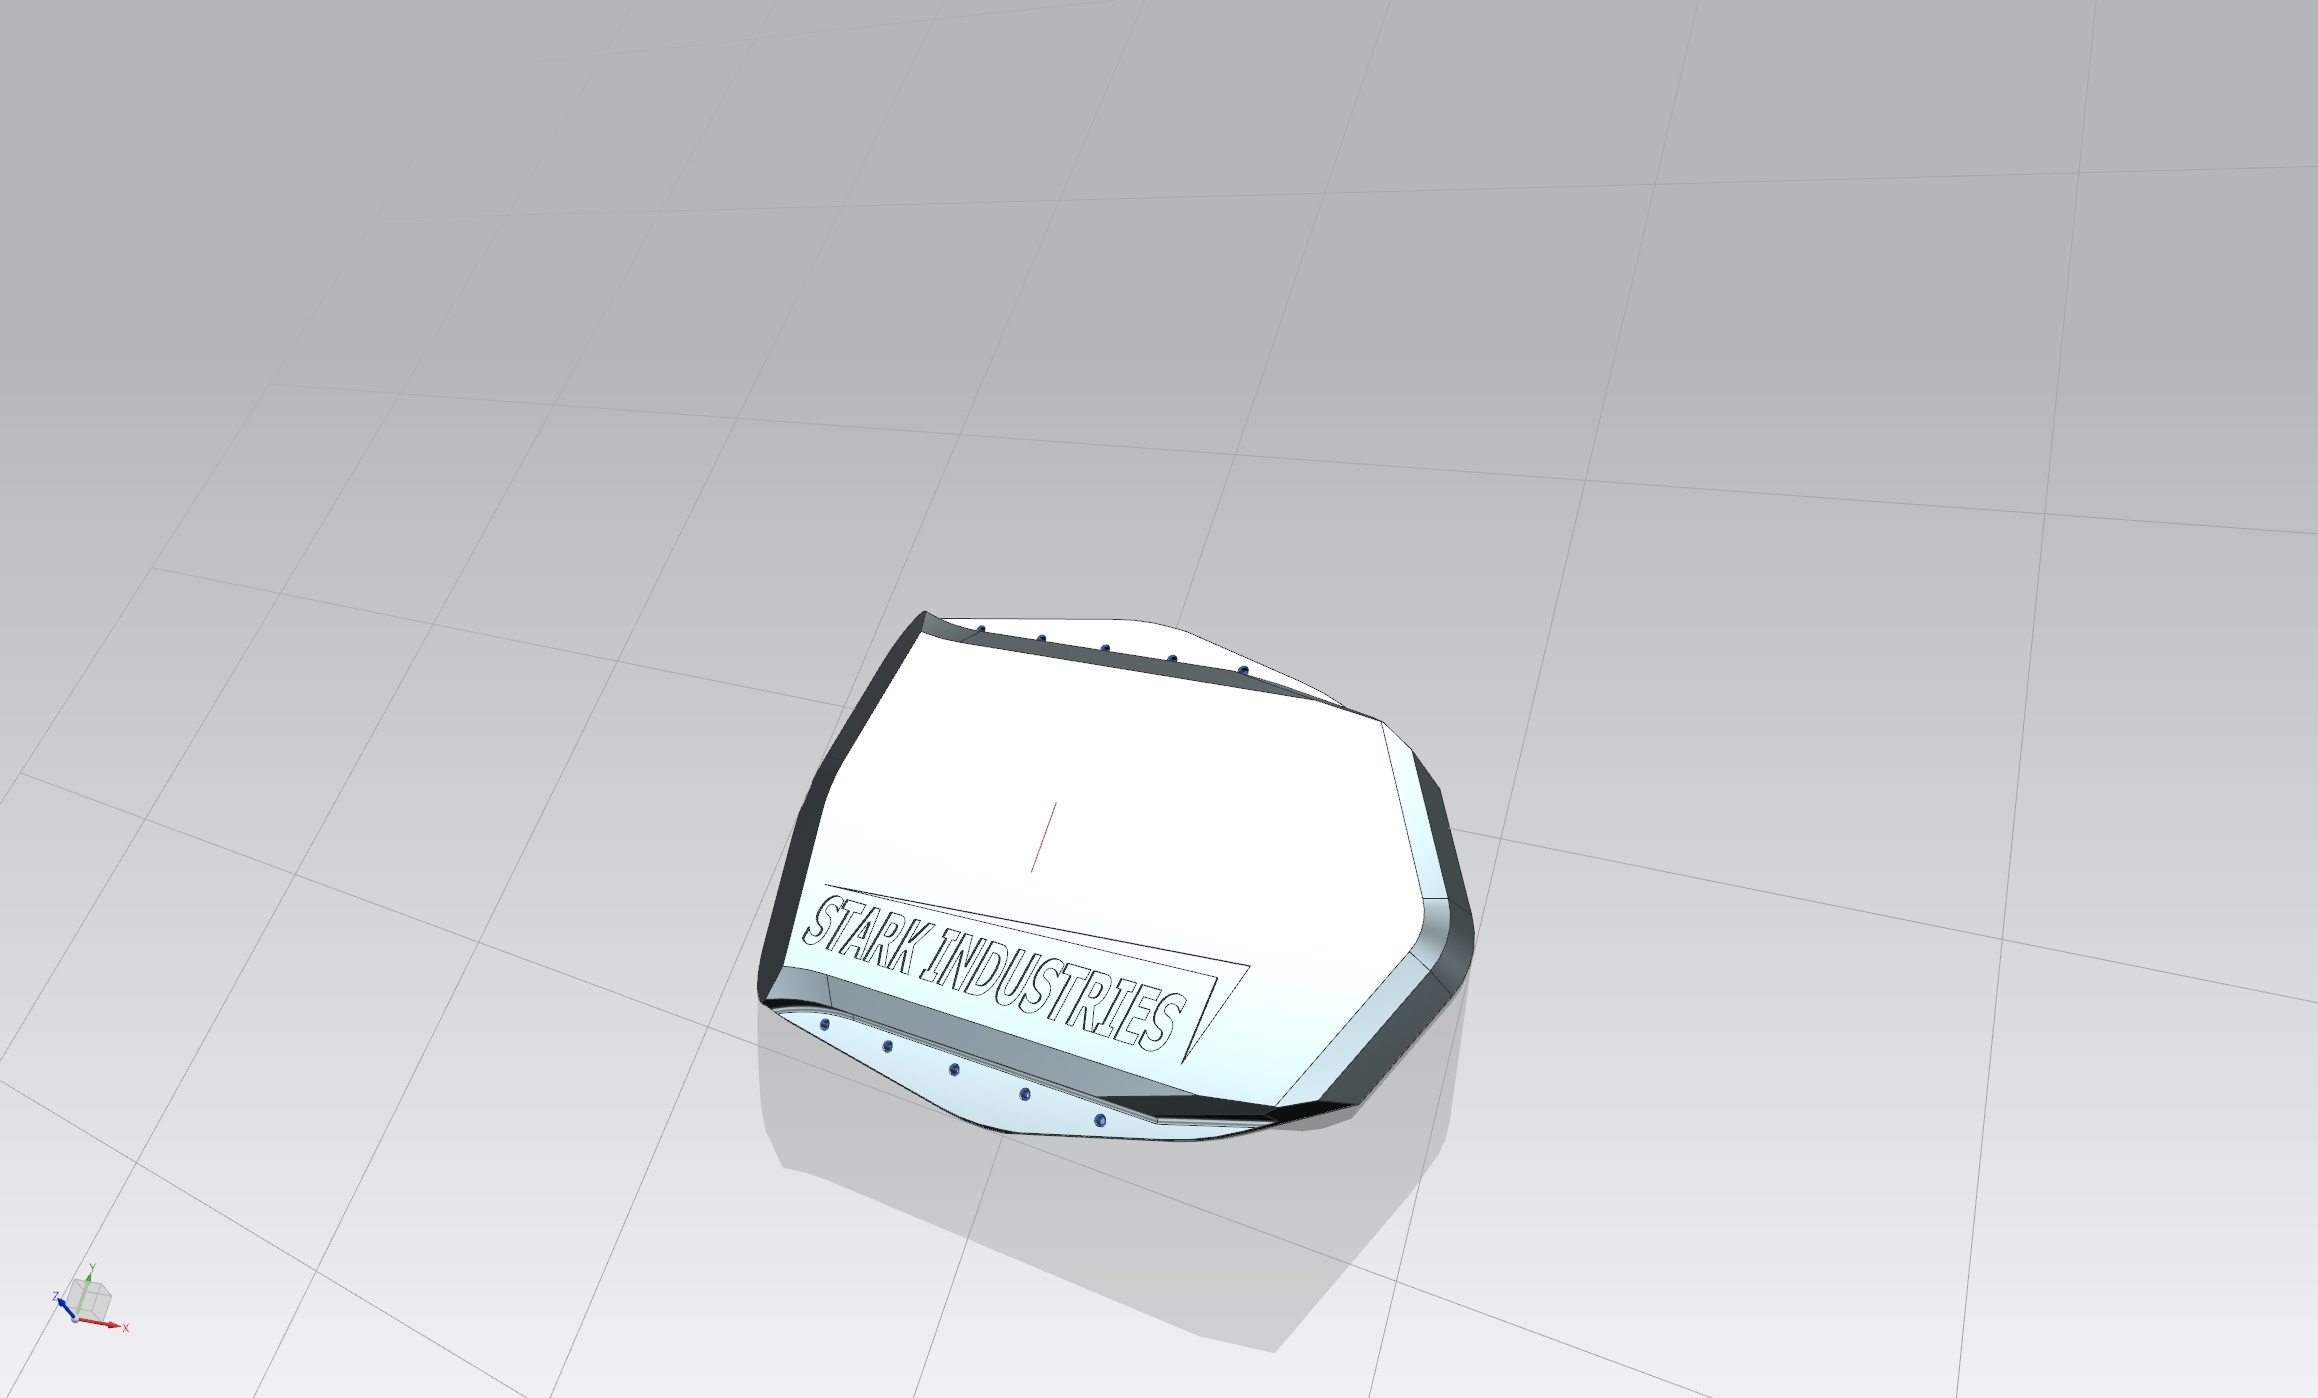
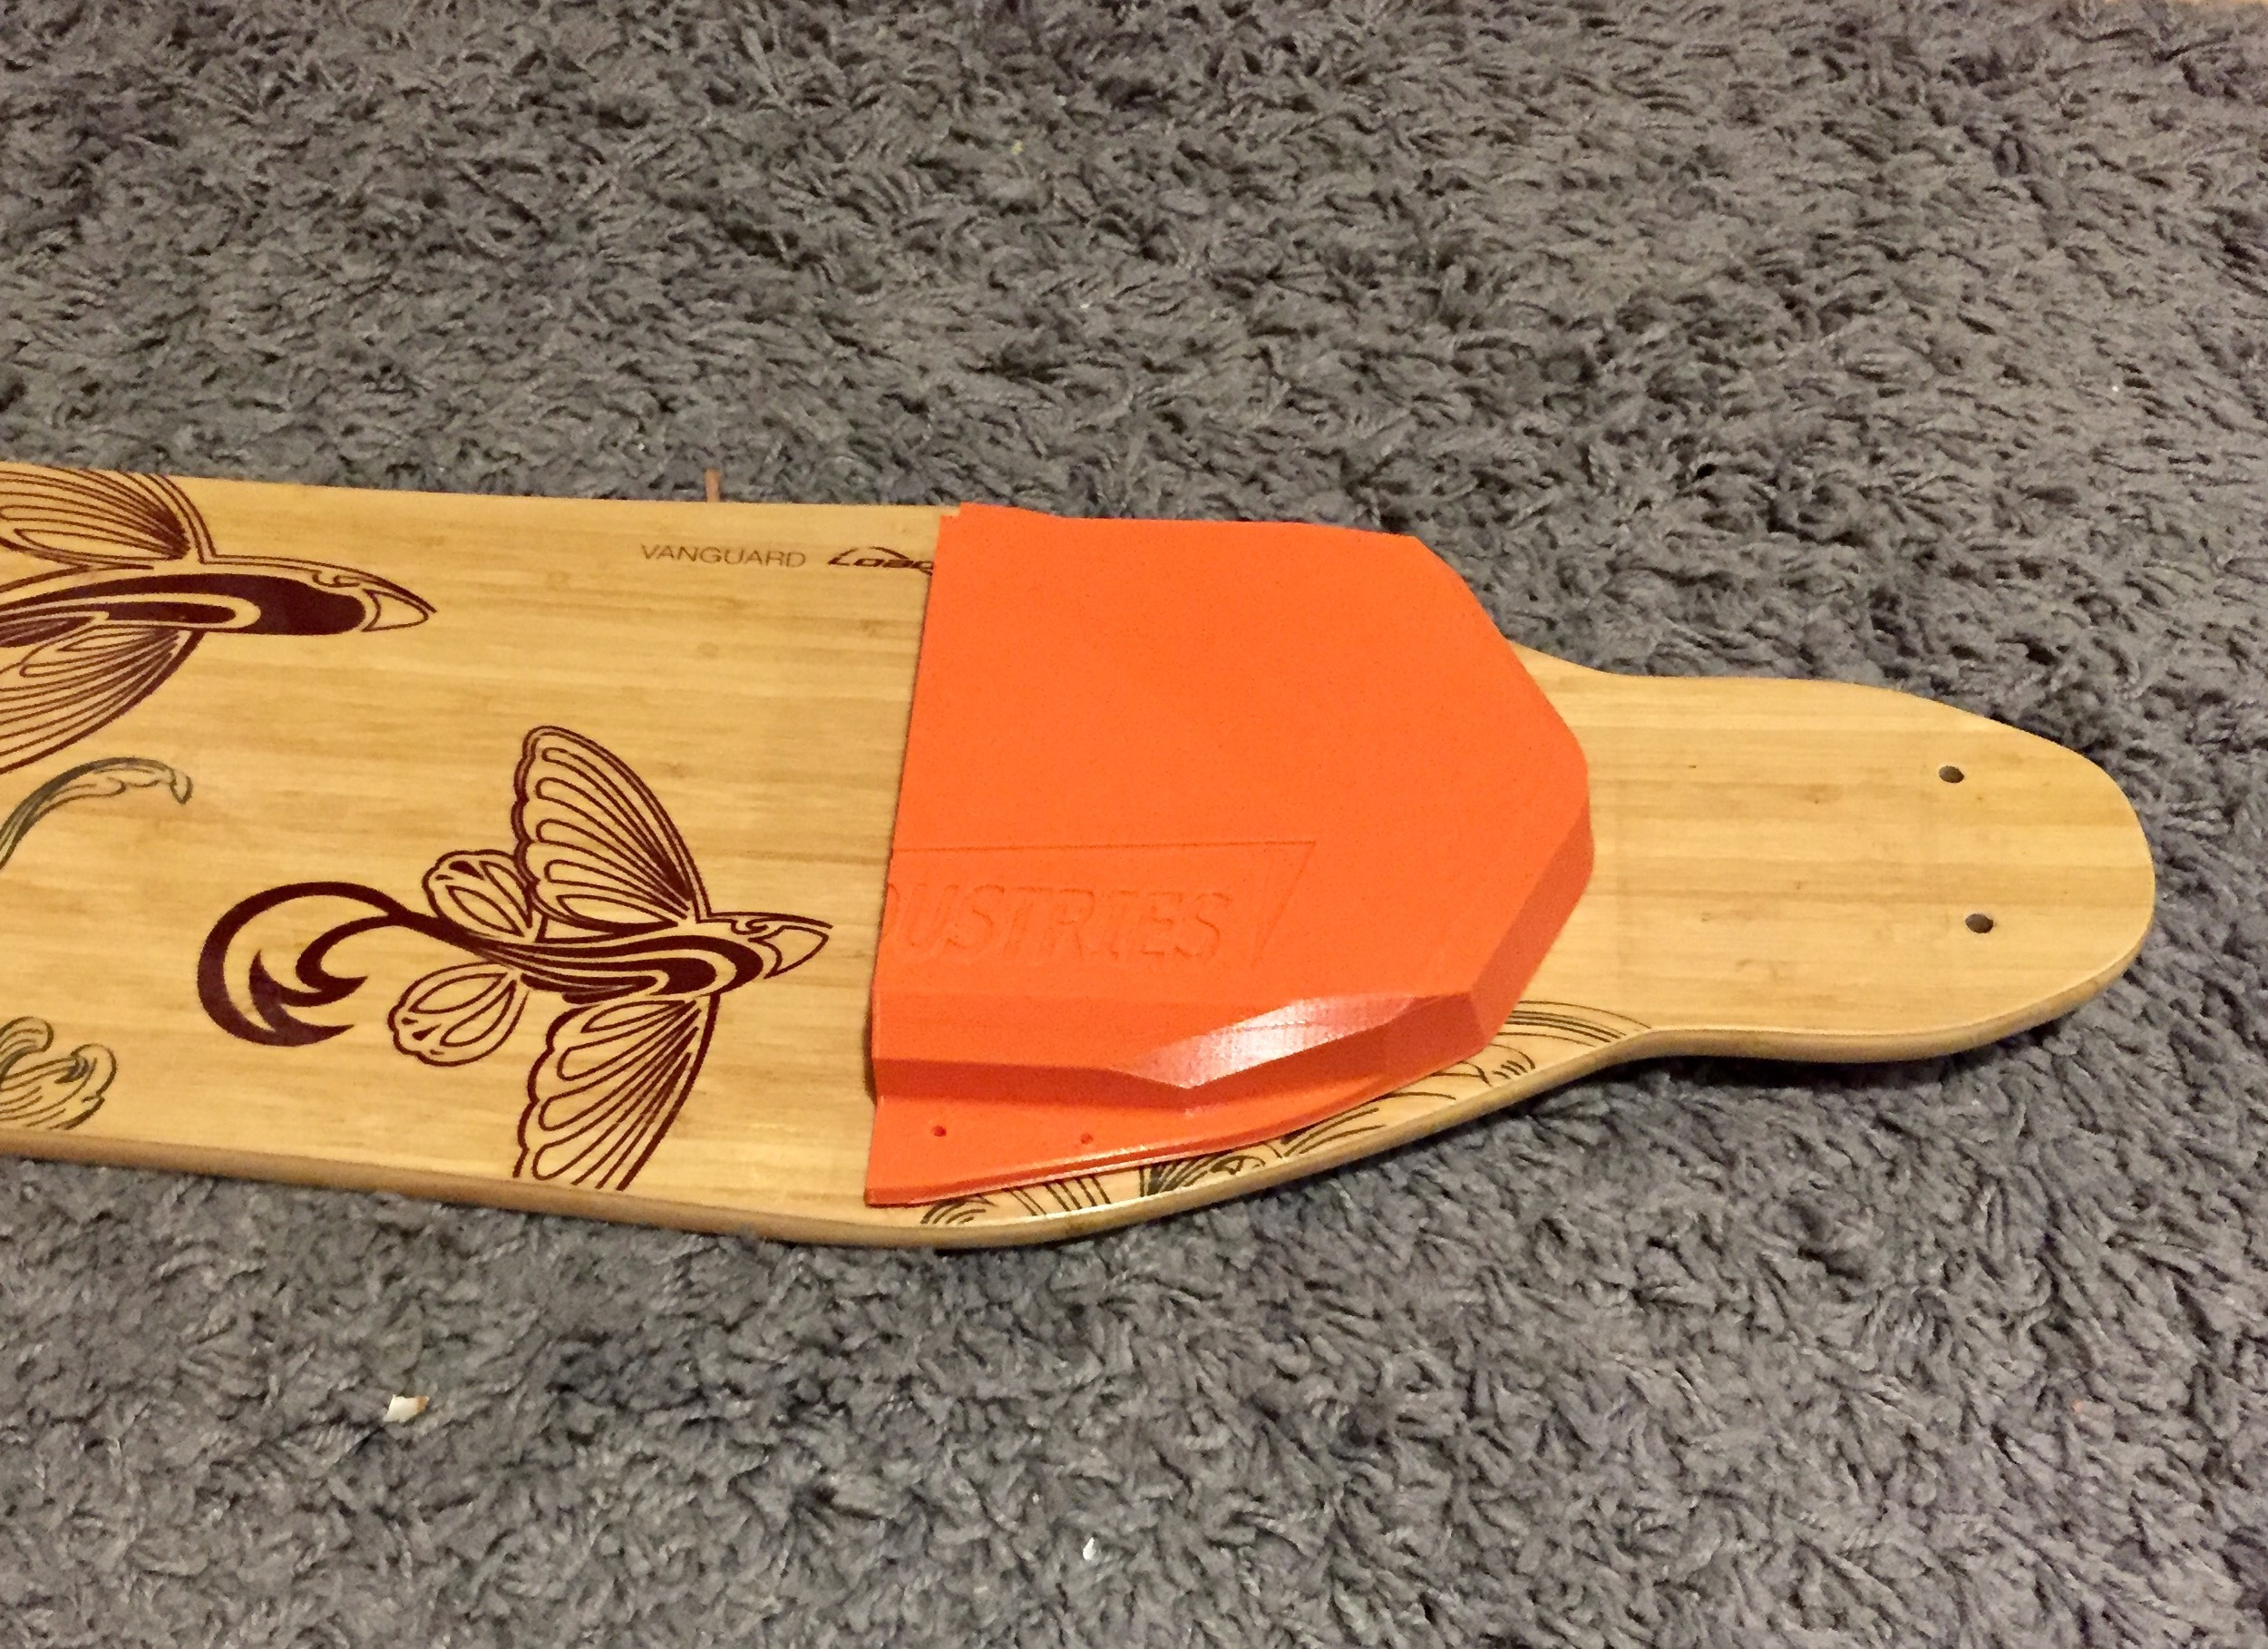
So I just quickly finalized my Battery enclosure. I tried to get in as much design as possible but priority was a simple and small footprint and easy to handle design for the 3d printer.
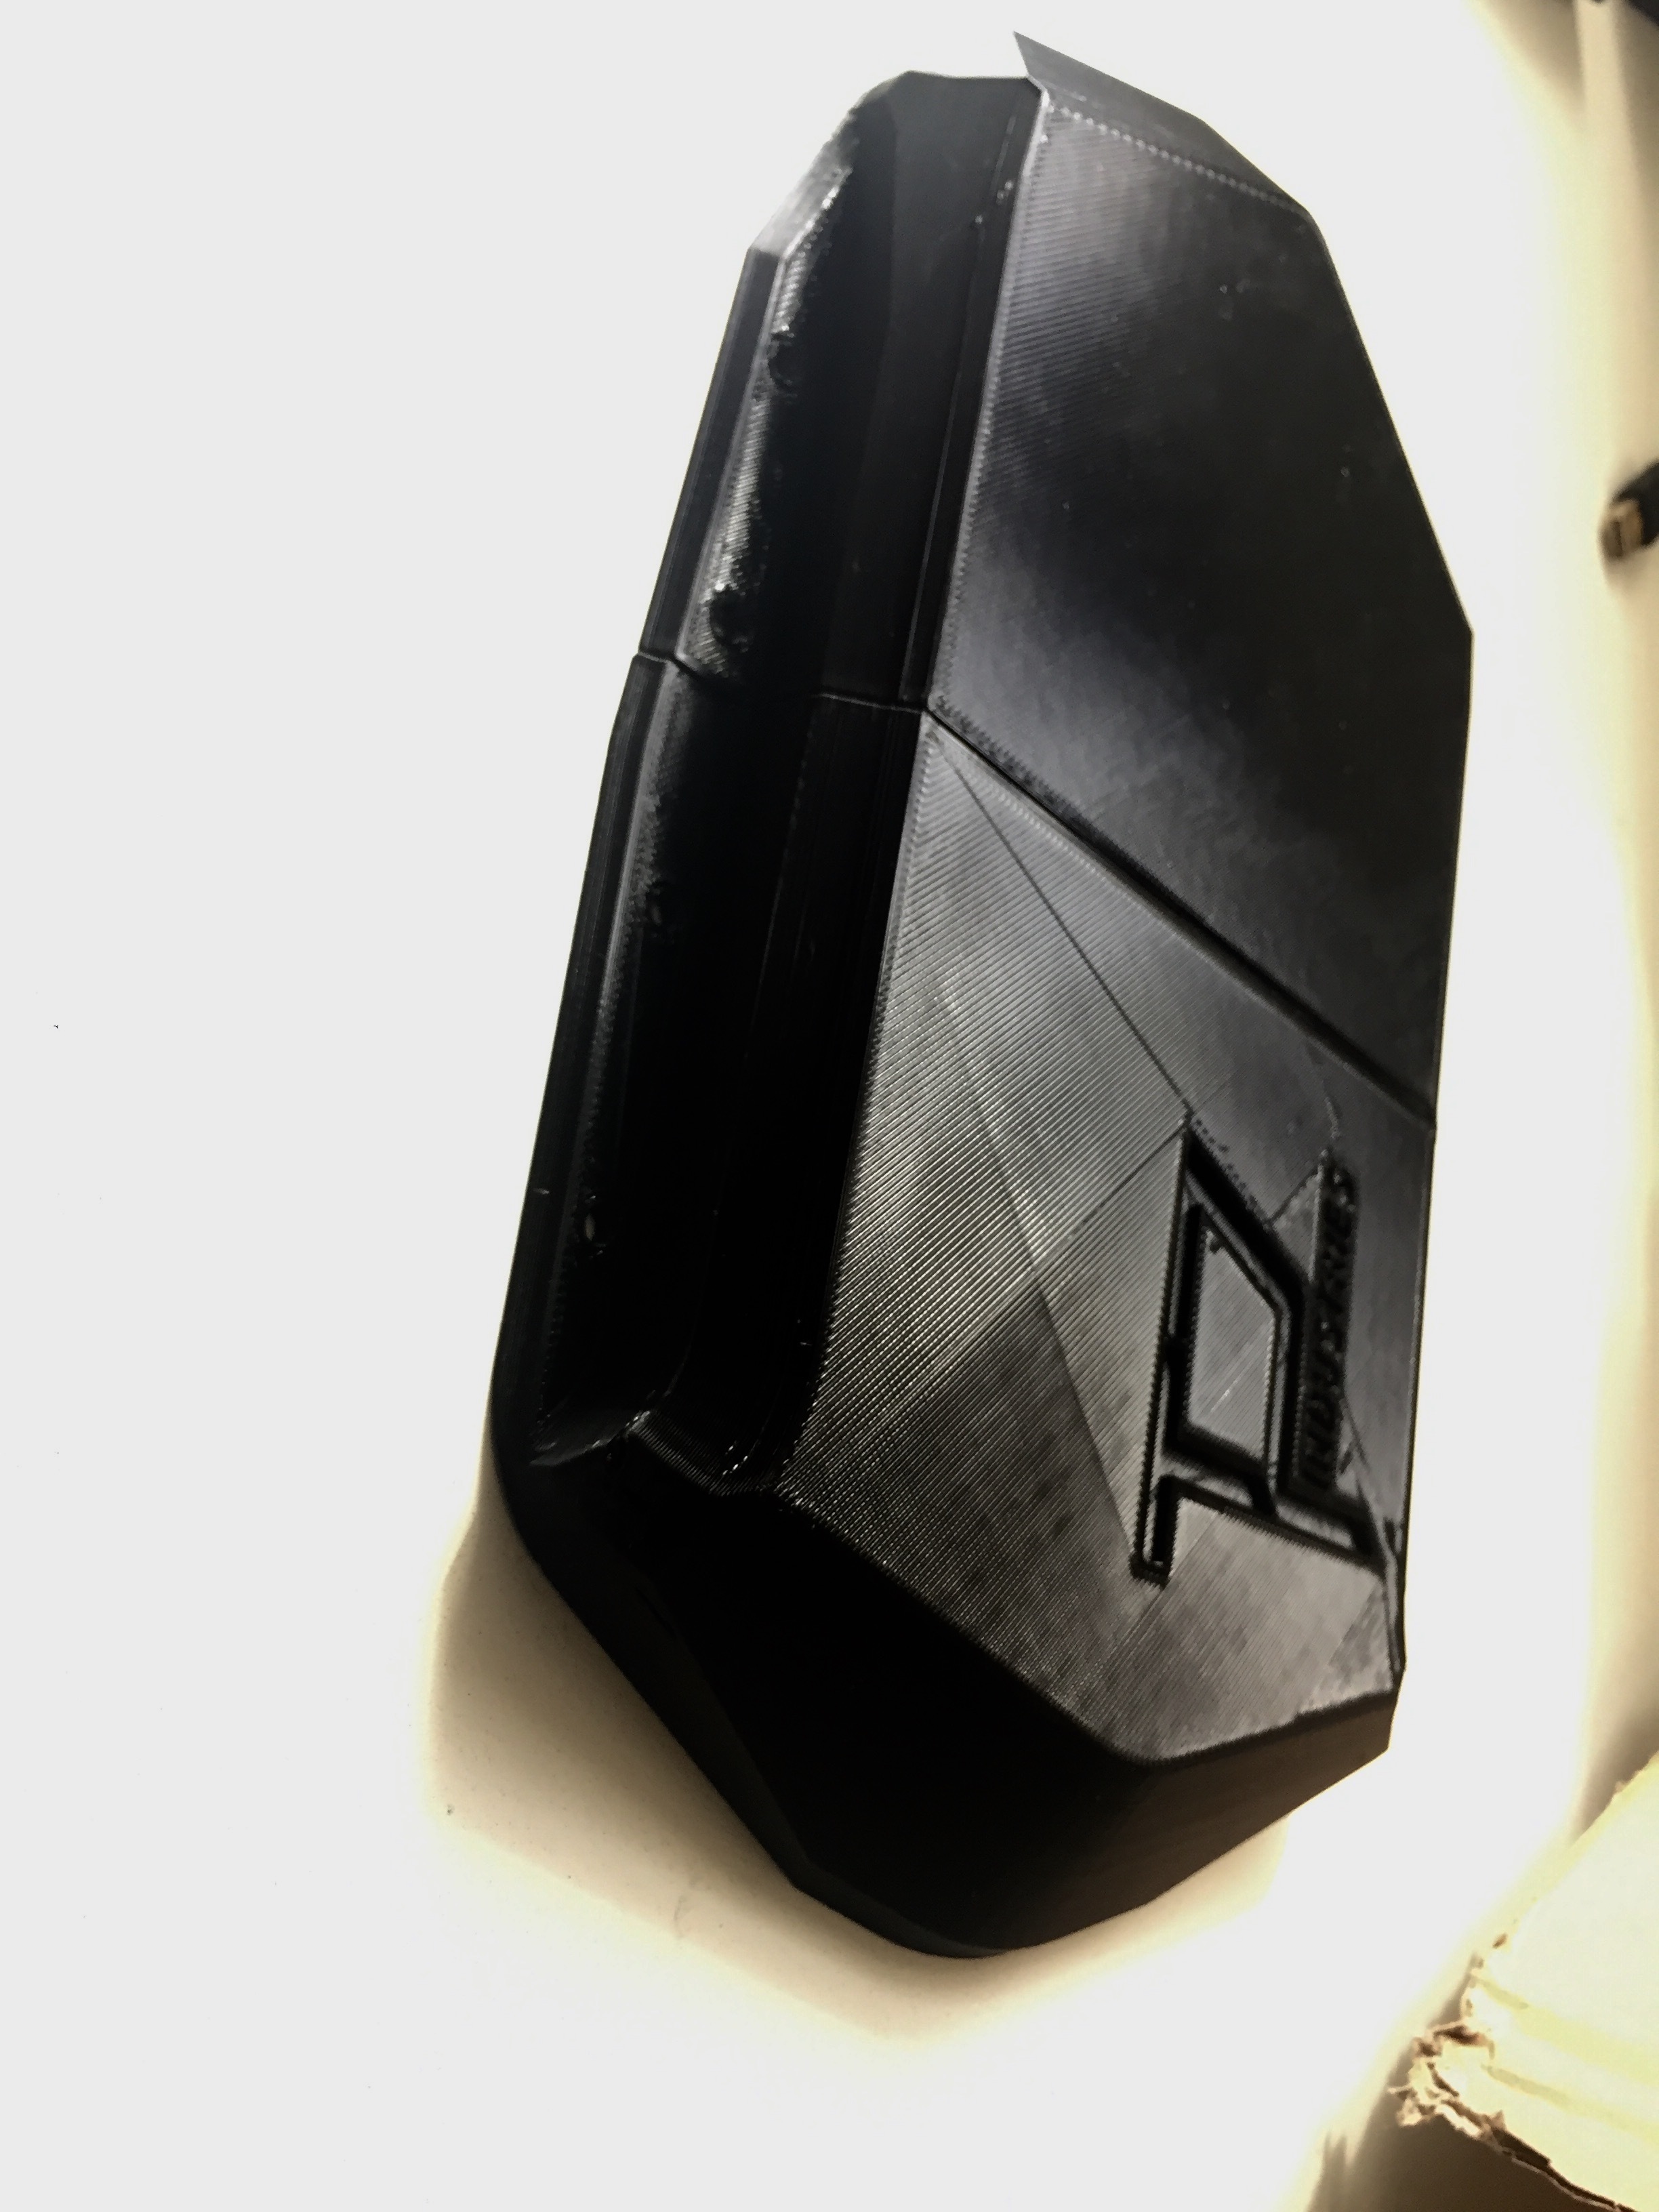
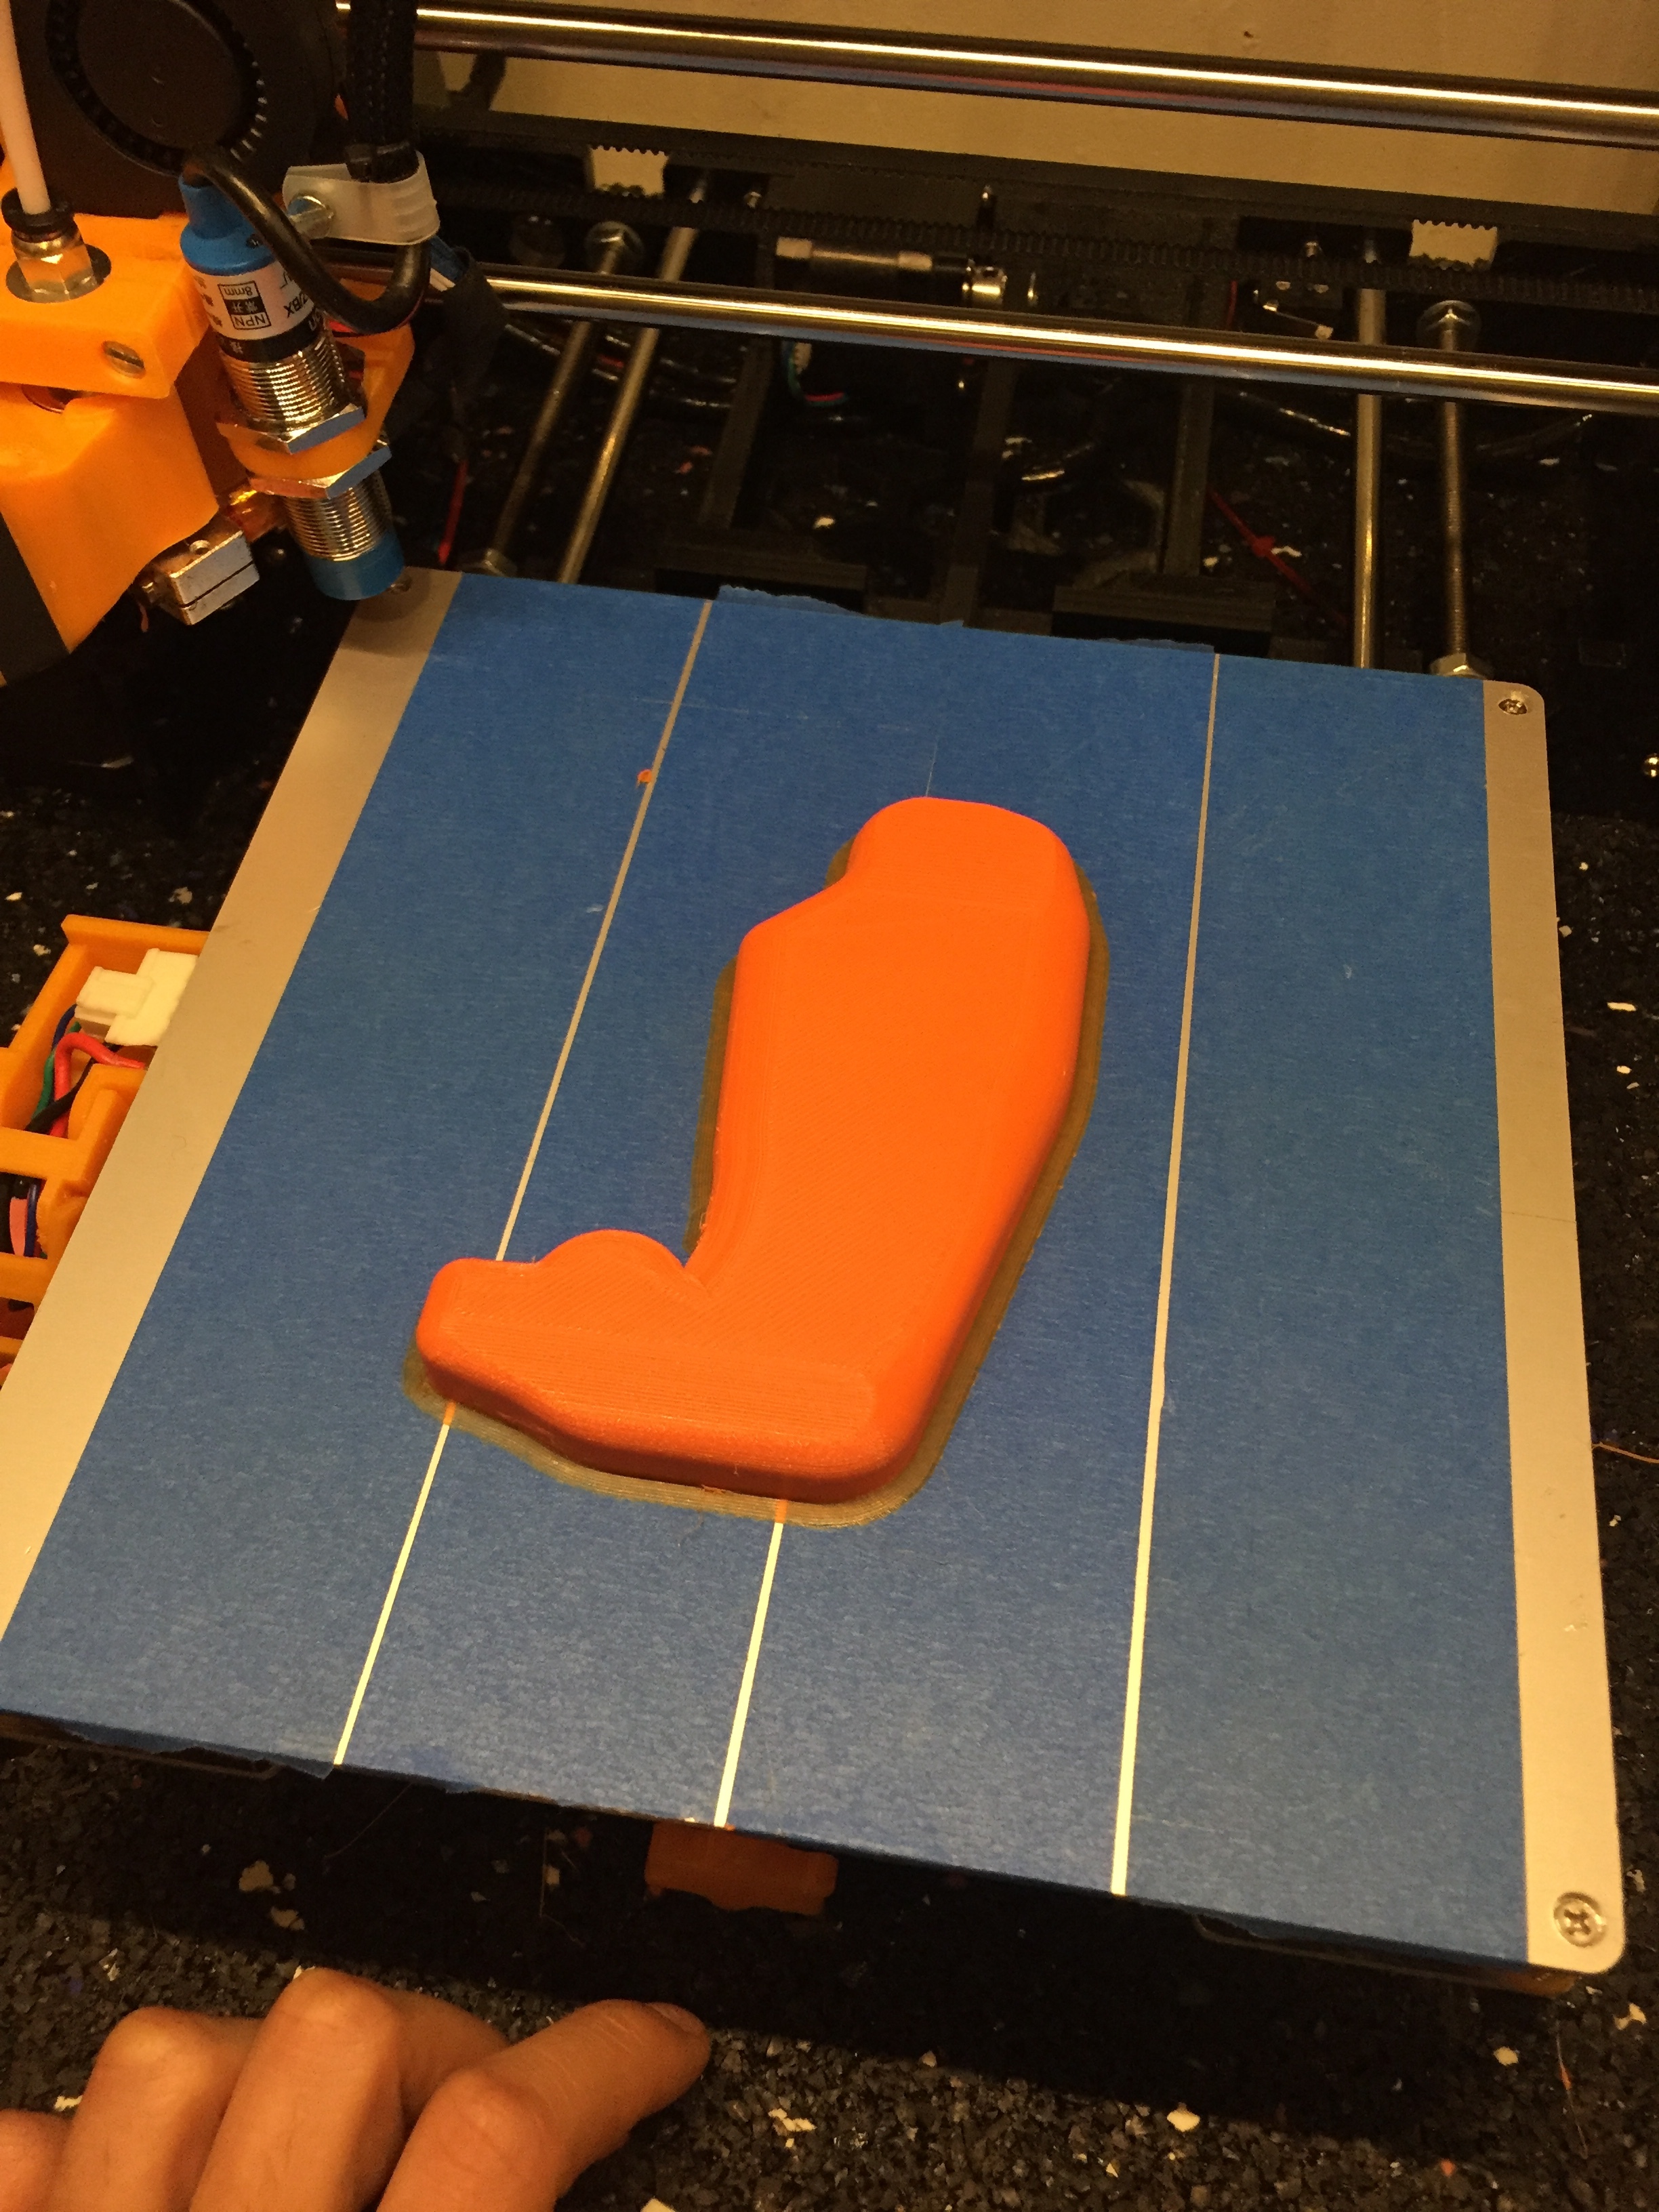
This is one half done ! I think it looks quite sleek Don’t worry about the concave. I can lay the part down on the heat bed at 110° a while to get it flexy and align it to the board.
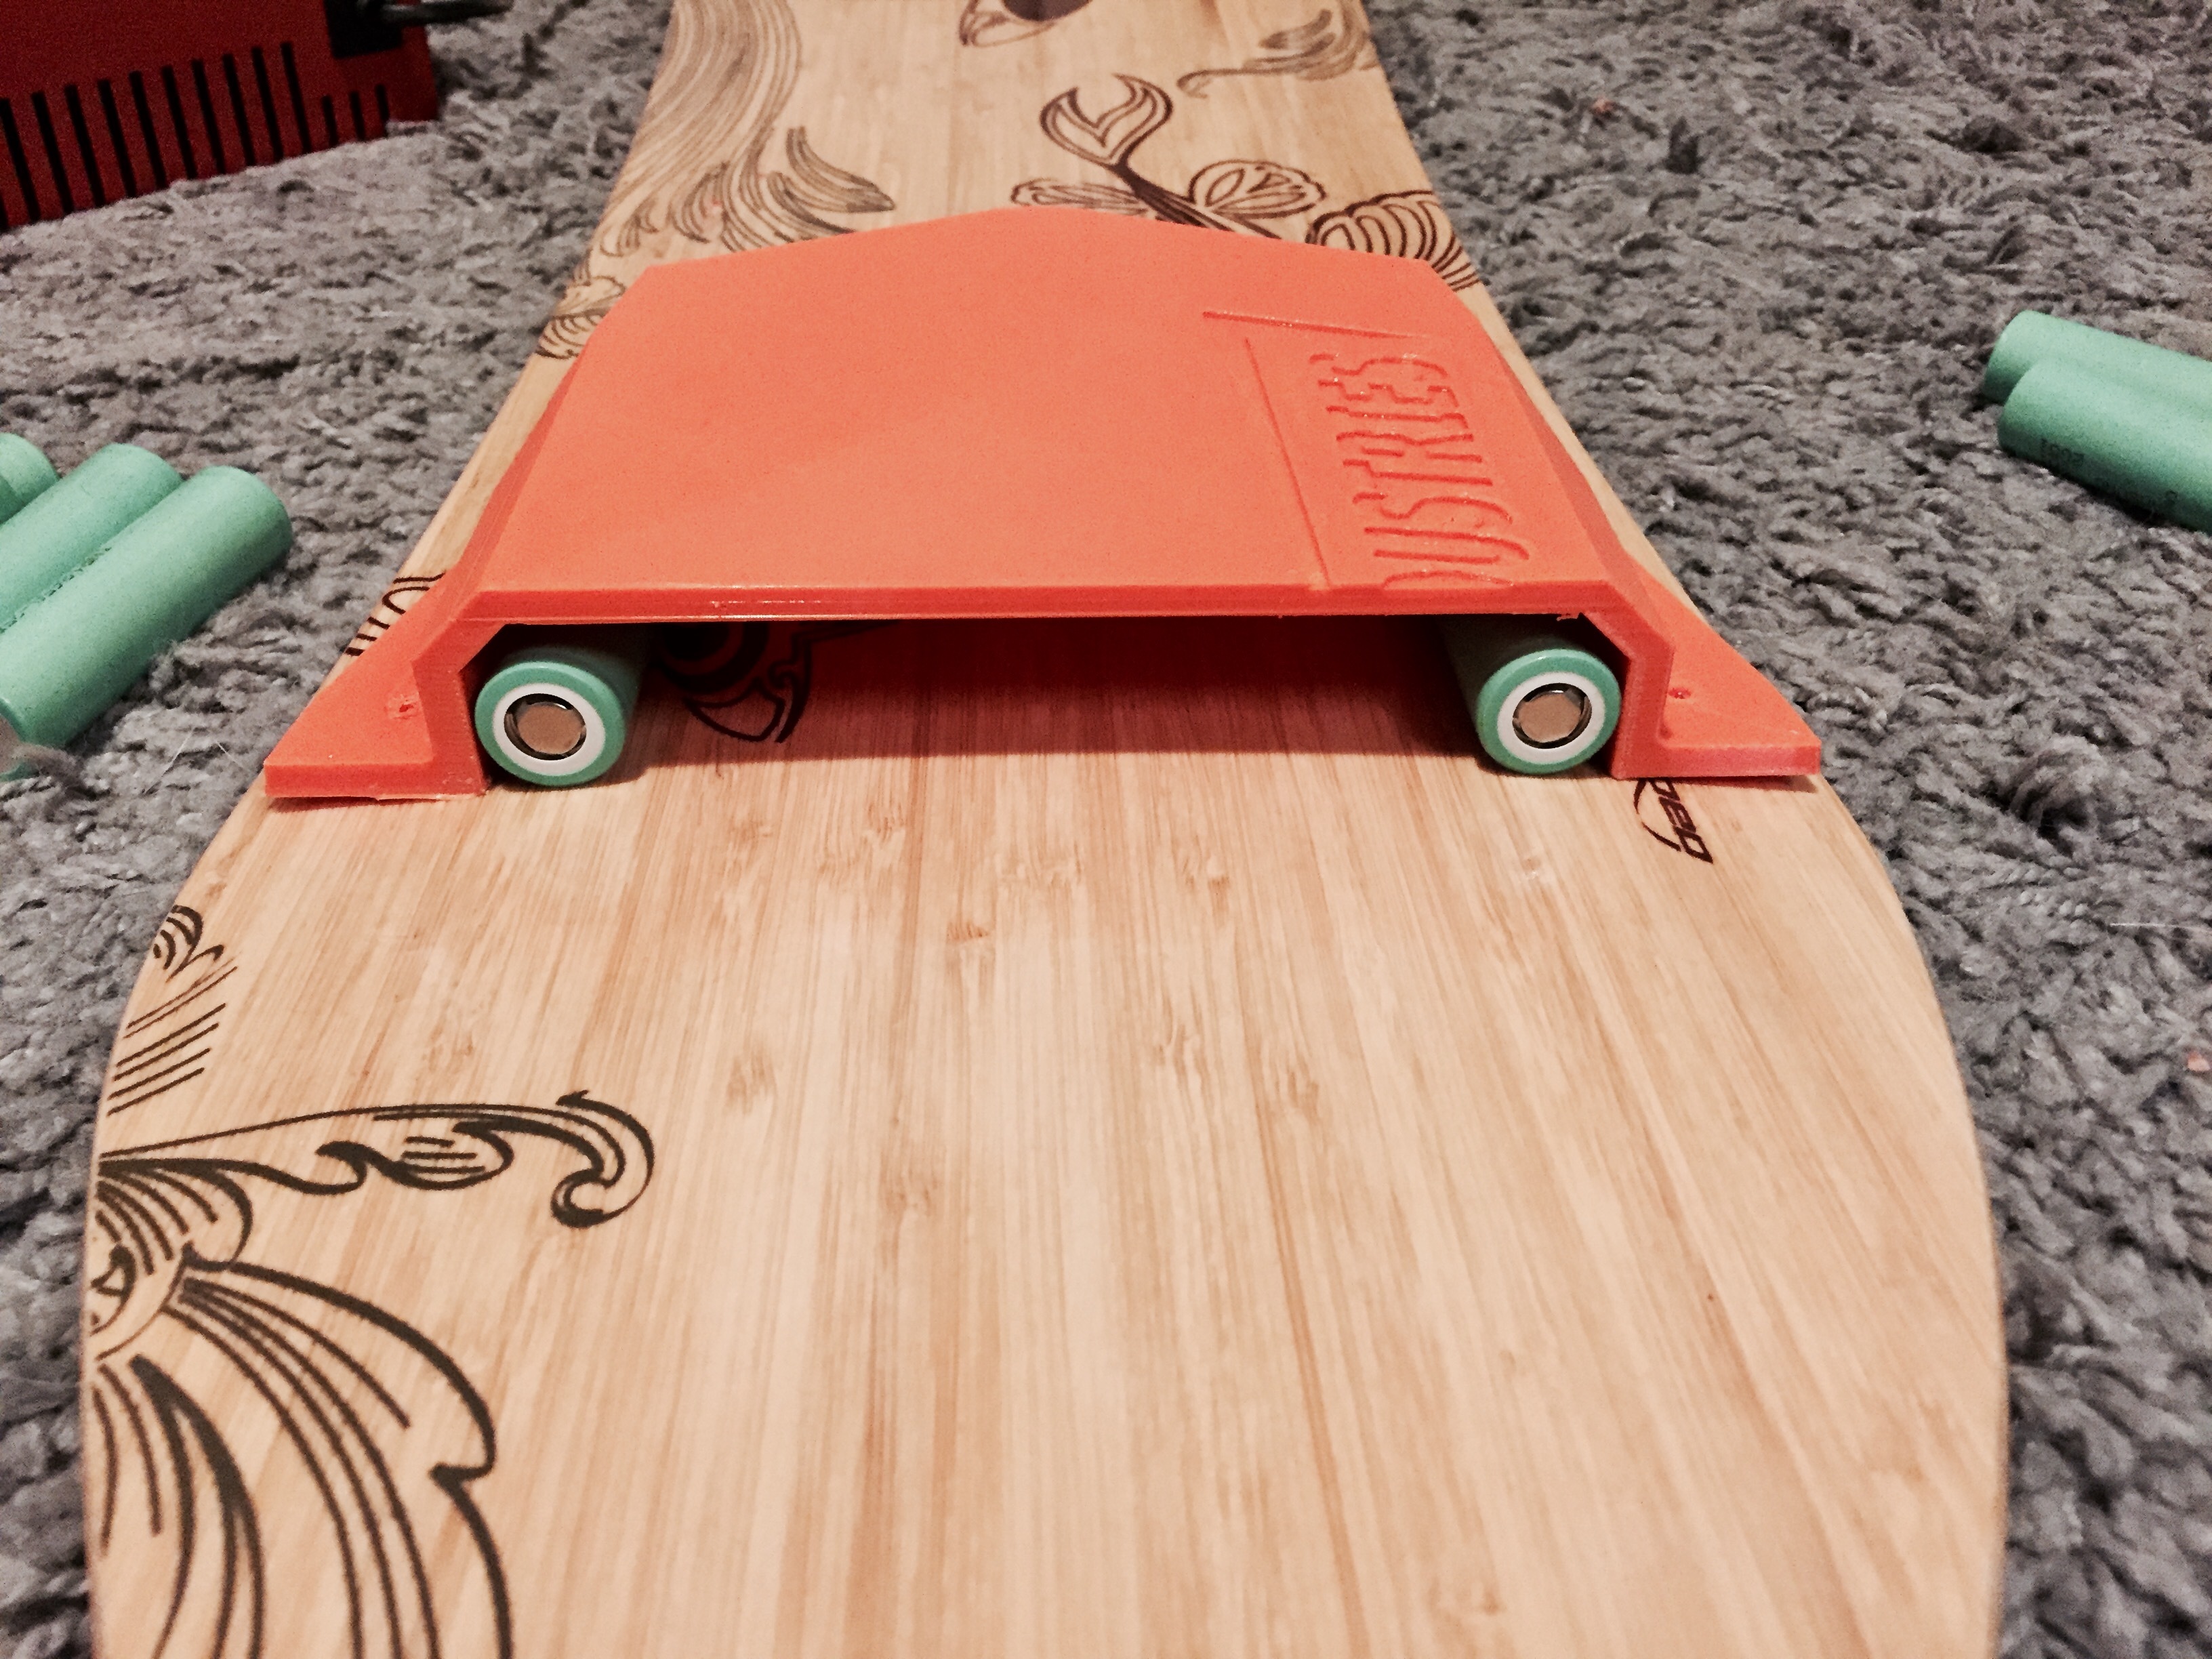
I was not satisfied with the space used. I noticed I can go even slimmer when adding the numbers its 18,3 for the 18650 and I had 25mm of space in there. I trimmed it down to 22mm to leave some space for the heat shrink and some felt. I also tapered the edges so it sits flush with the board. Have a look(left one is remodeled):
Alright the enclosure is done printing. I’ve learned not to cheap out on filament… I just picked the cheapest PETG that was available in Germany at the moment… And it took me half a day to get “decent” results…
Printed with 0.28 Layer height. I’m not fond of the finish. But after post-processing I think it’ll look pretty good
It also is pretty flexible and clamps down really nice to the concave of the board.
Just because I’m lazy I might go for the same look on the VESC enclosure and just size it down a bit.
Height is 26mm - 3.5mm shell. I think it looks super sleek


 … The little resistors took me 20 mins…
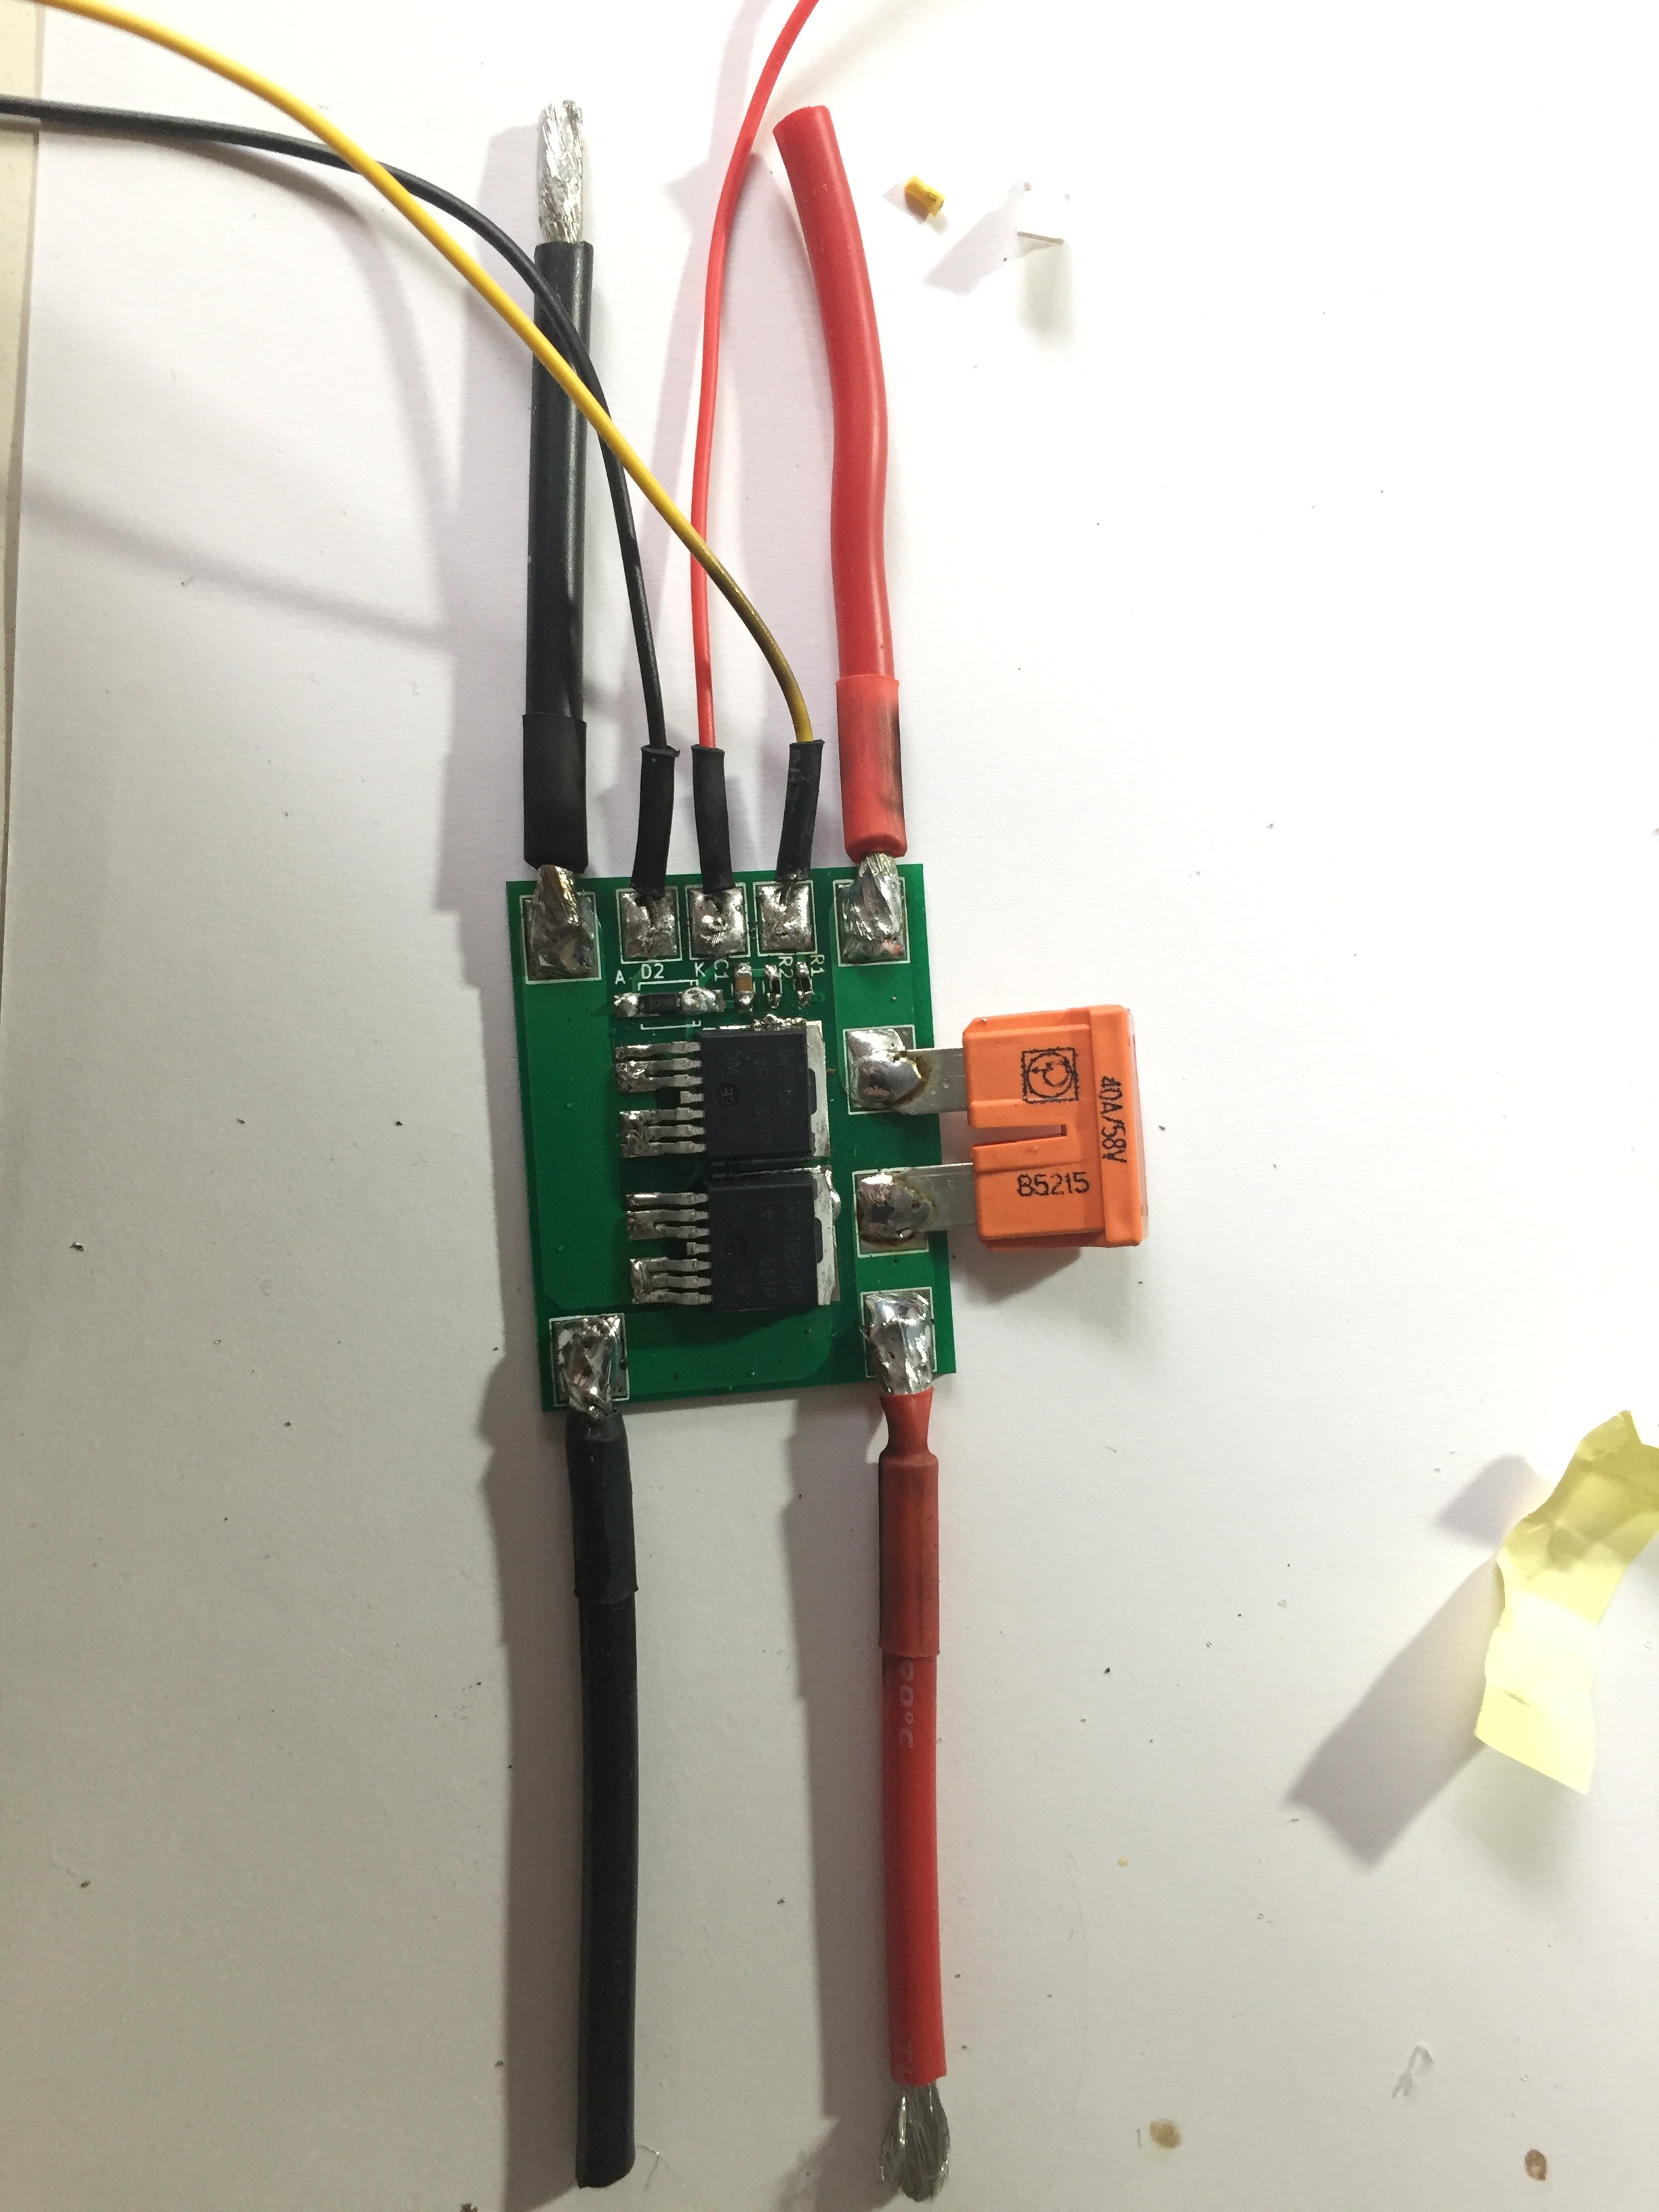


 Edit: did you see the pulleys Cover junior potato did it for 3d print, they look so sweet!!


 Don’t worry about the concave. I can lay the part down on the heat bed at 110° a while to get it flexy and align it to the board.
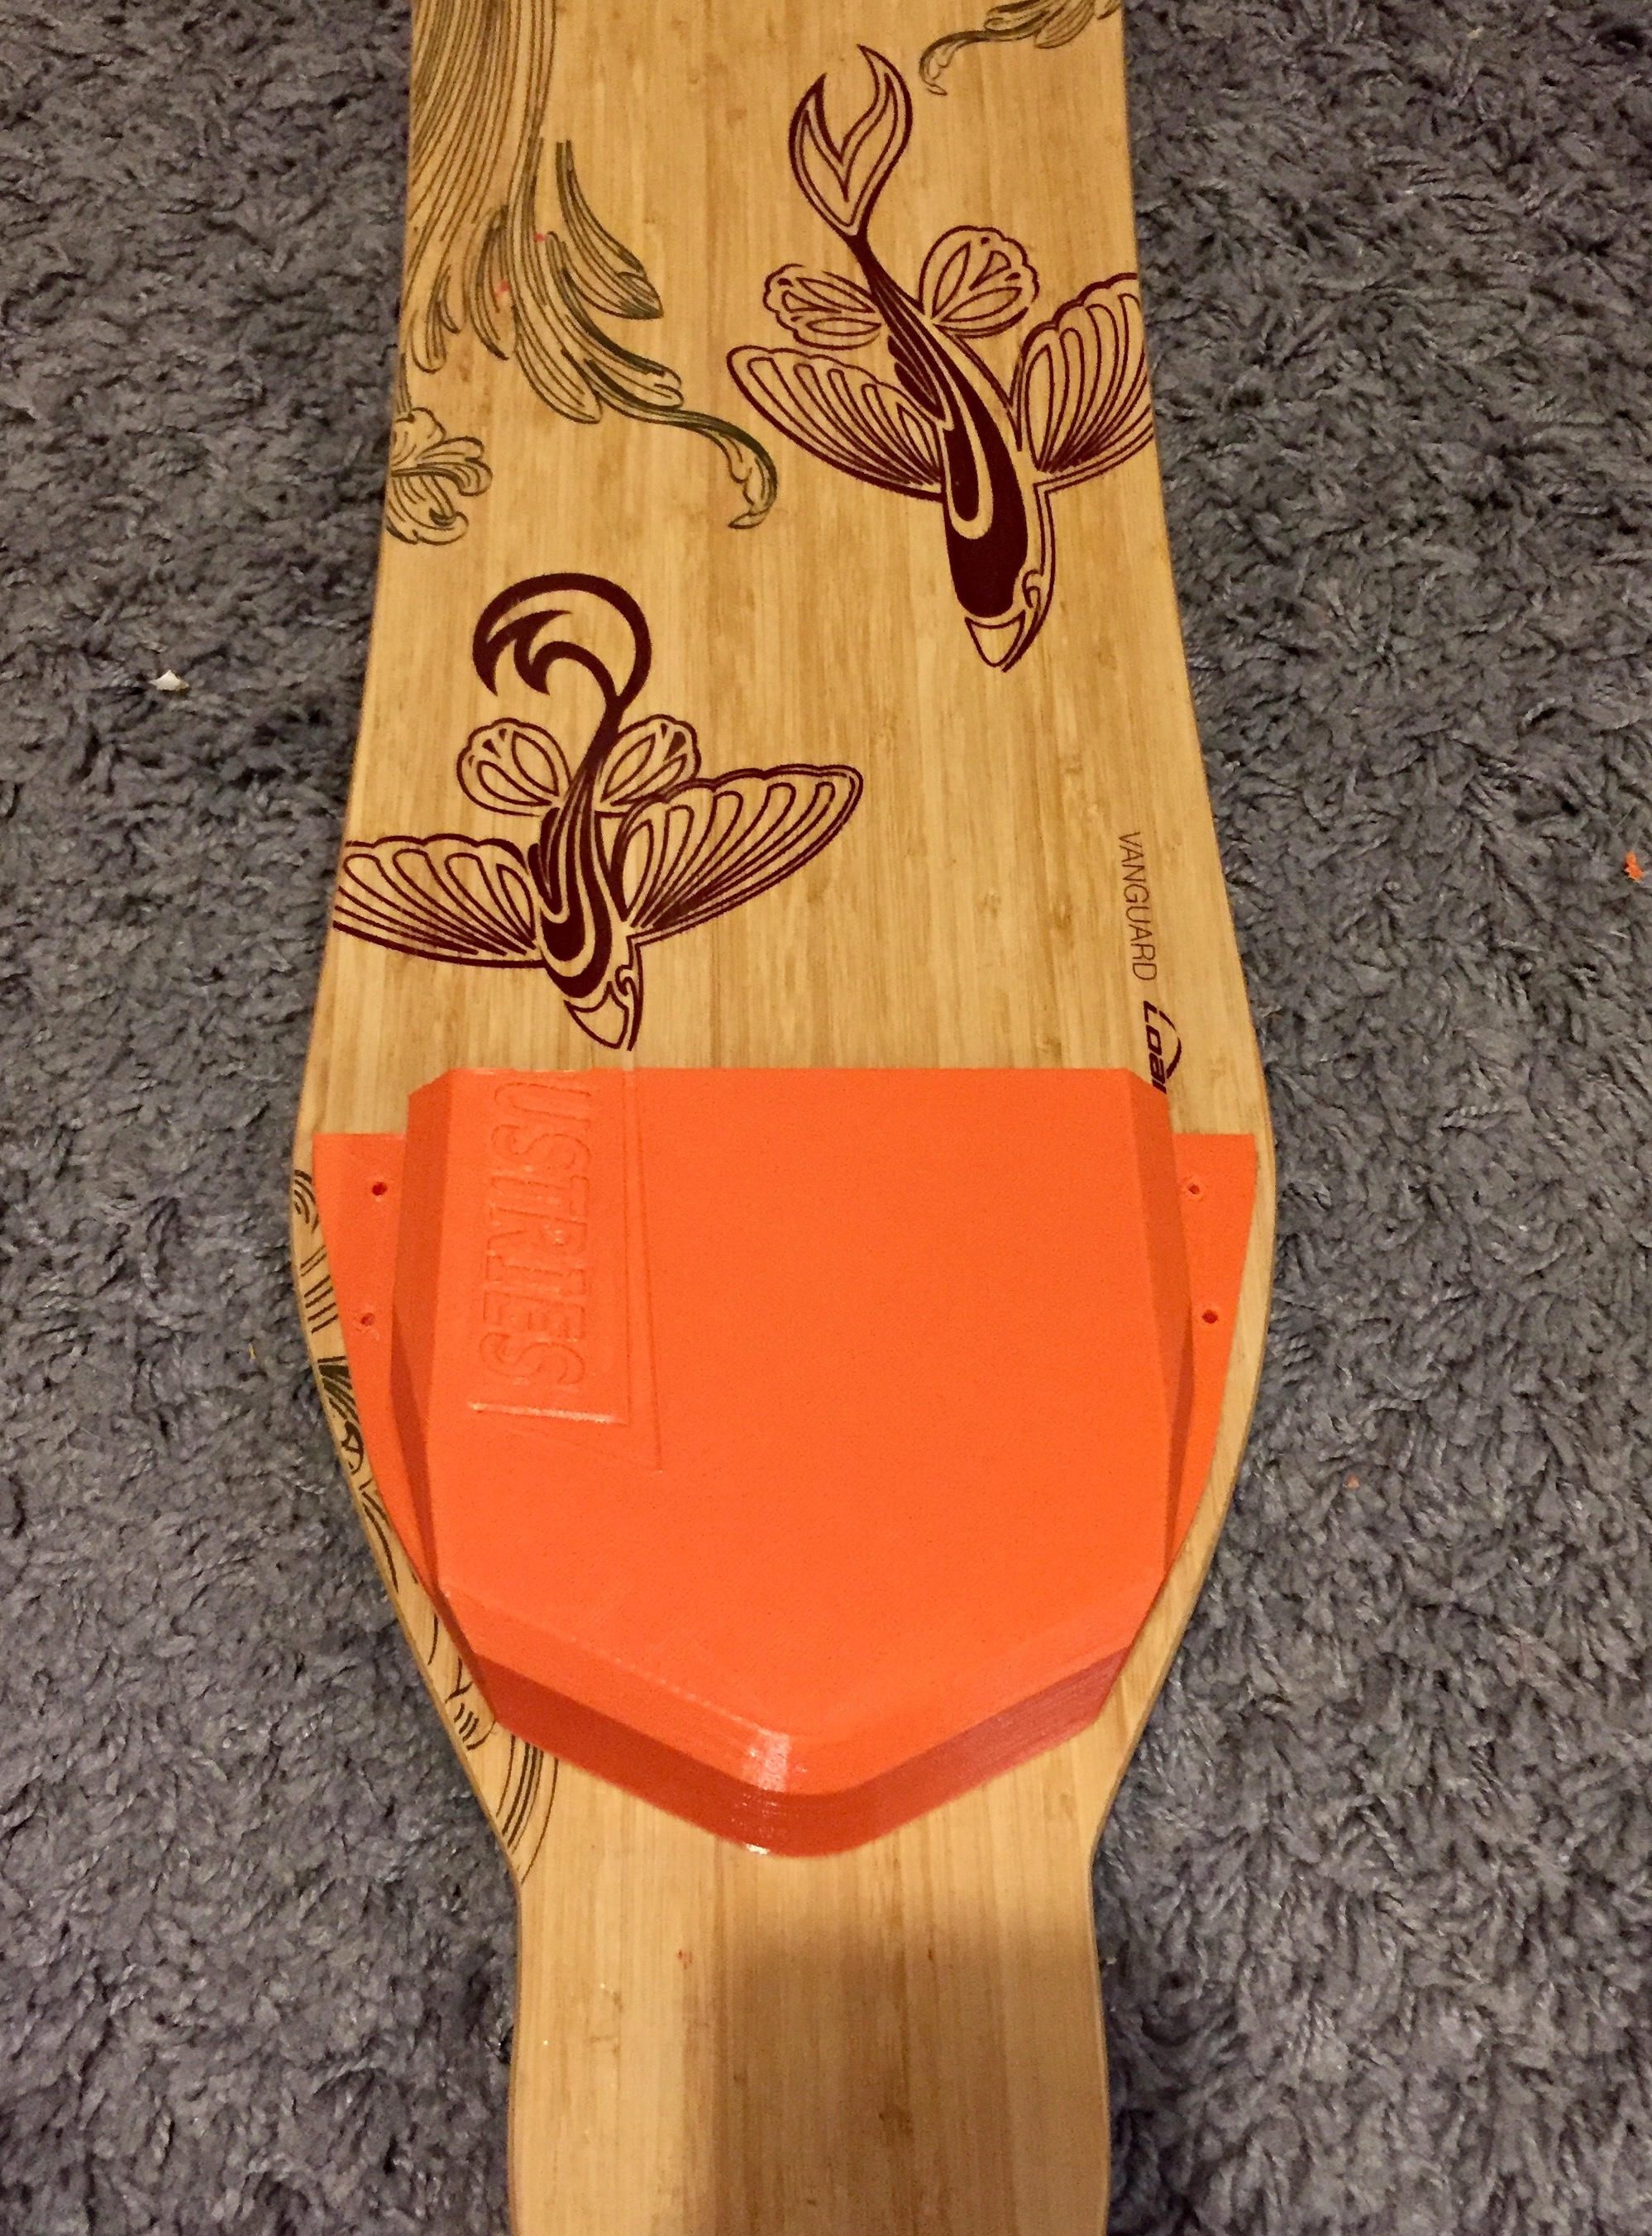


 I’m not satisfied yet… Keep in mind these are made to fit the dimensions of my own pack.