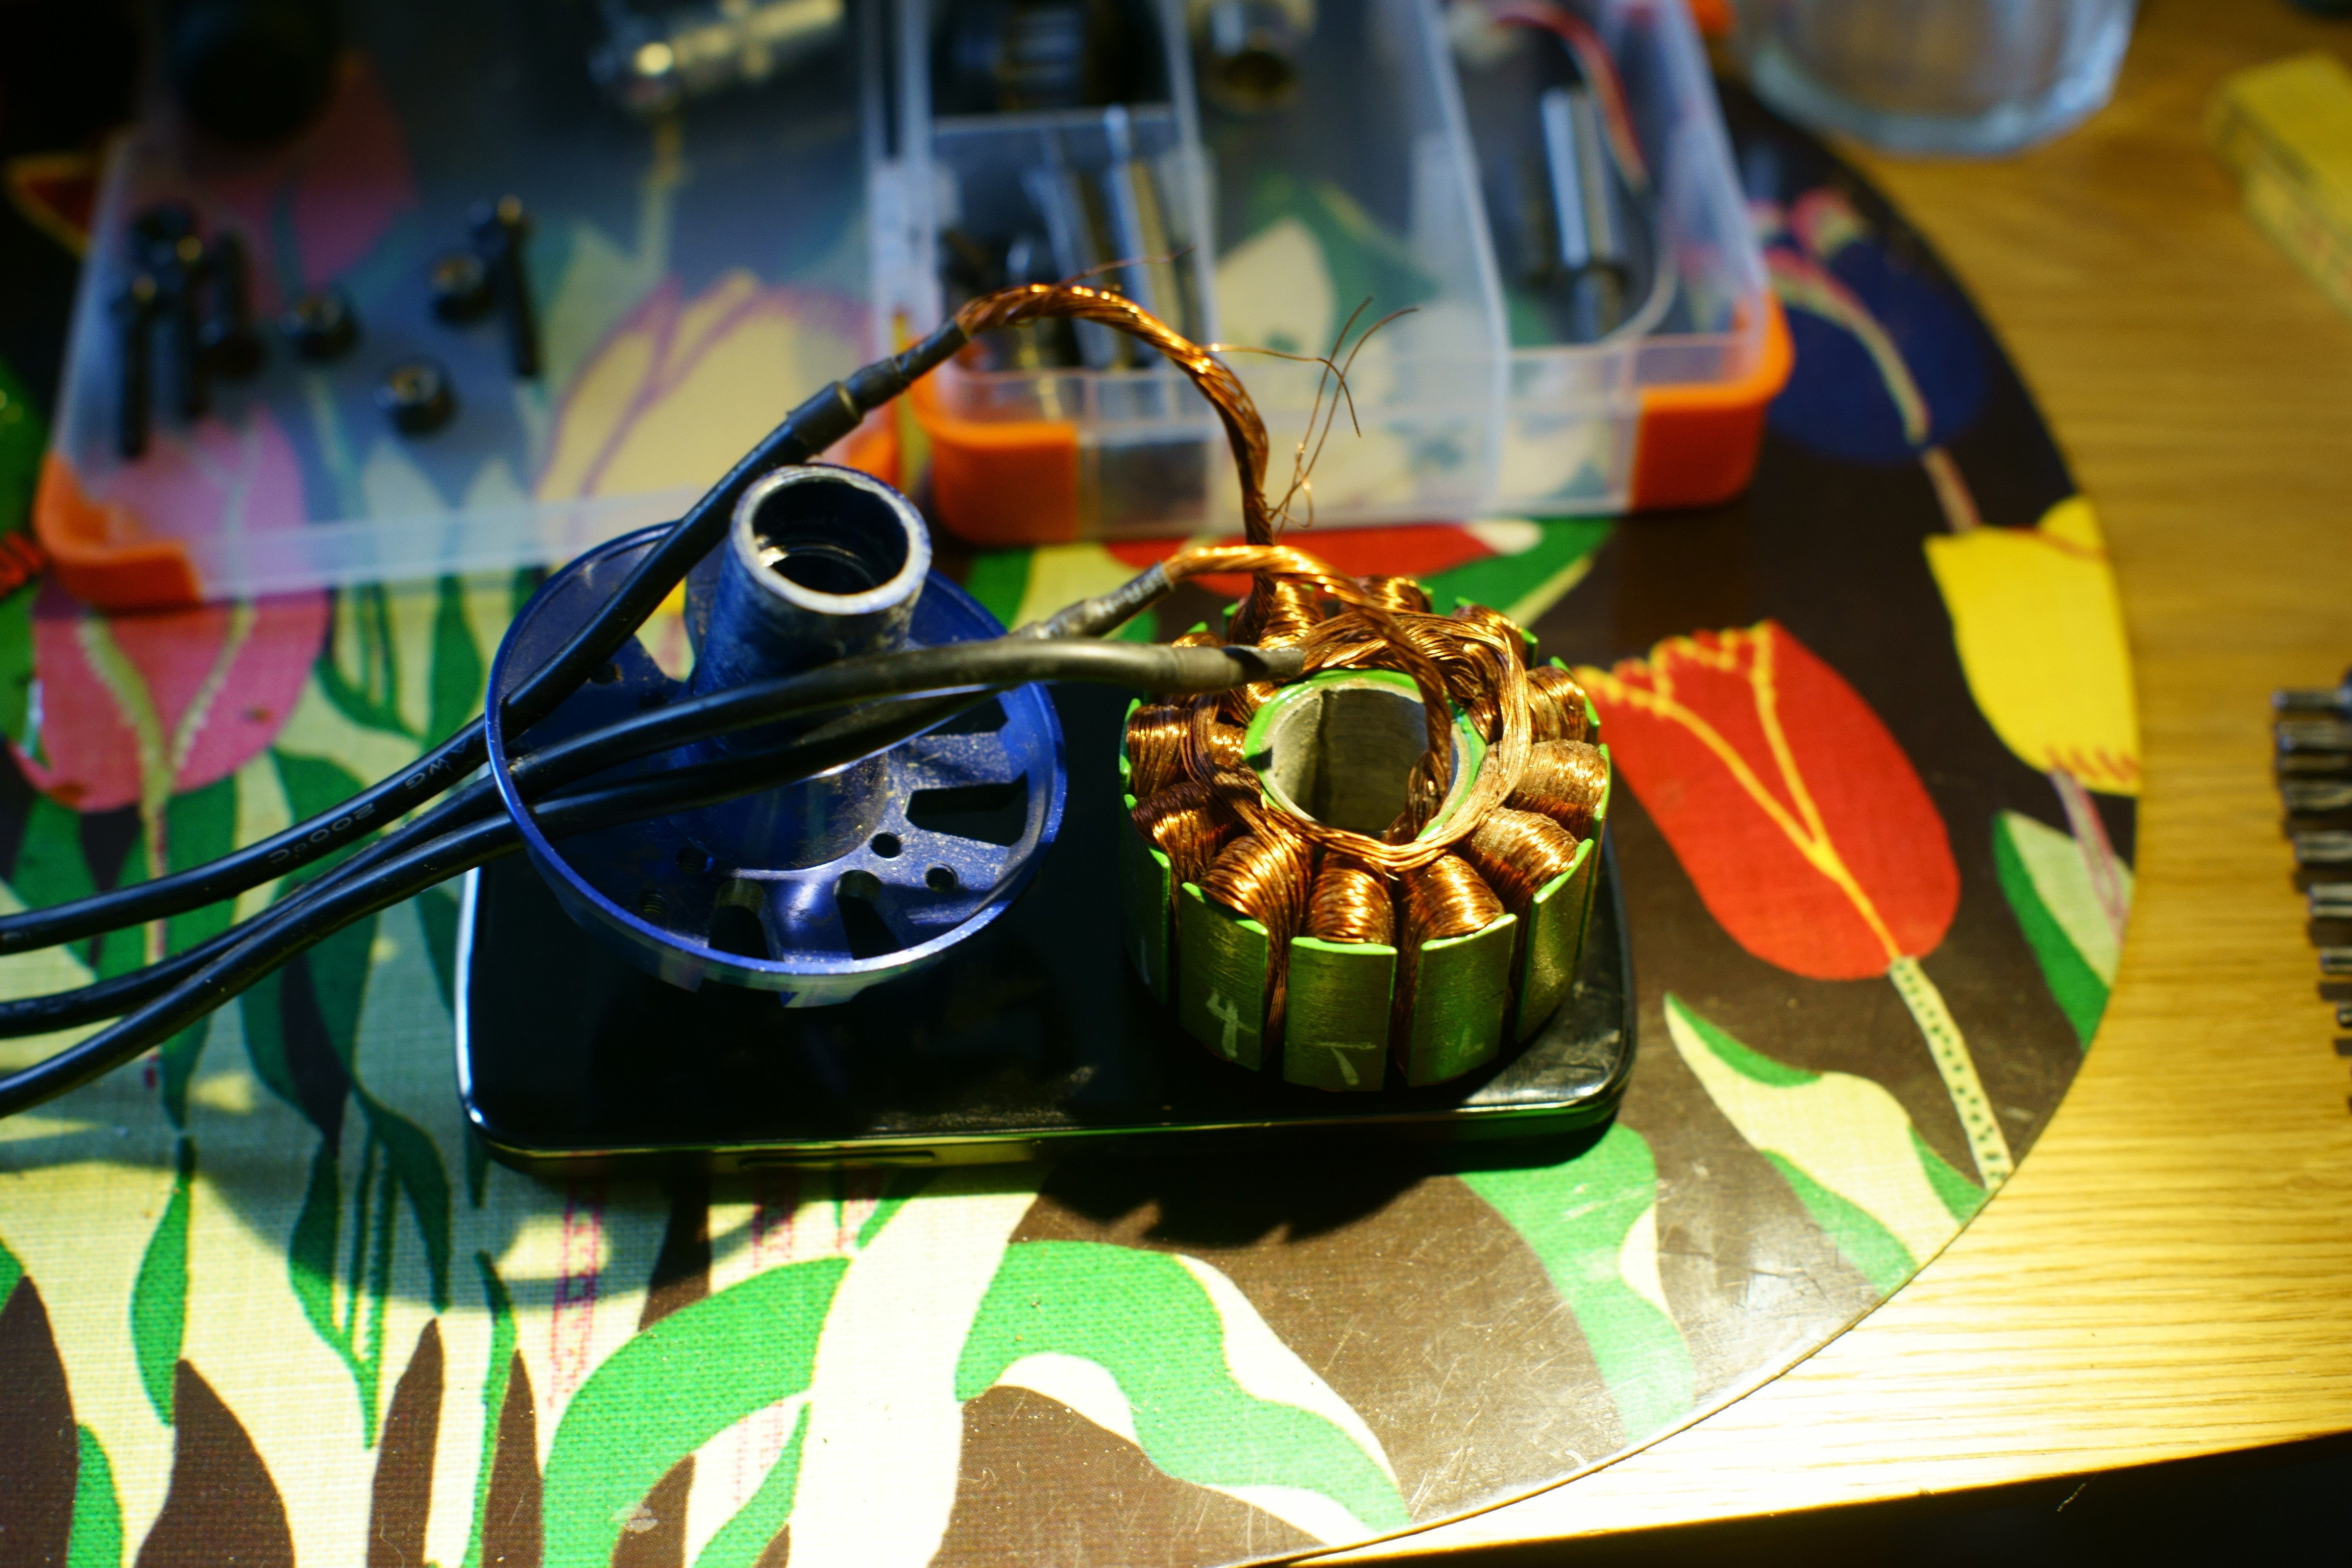
So, time to start rewinding the motor that shorted out.
Removing the stator was pretty straightforward, putting it in the freezer for an hour with a wet piece of paper inside the bearing tube and then hammering it out.
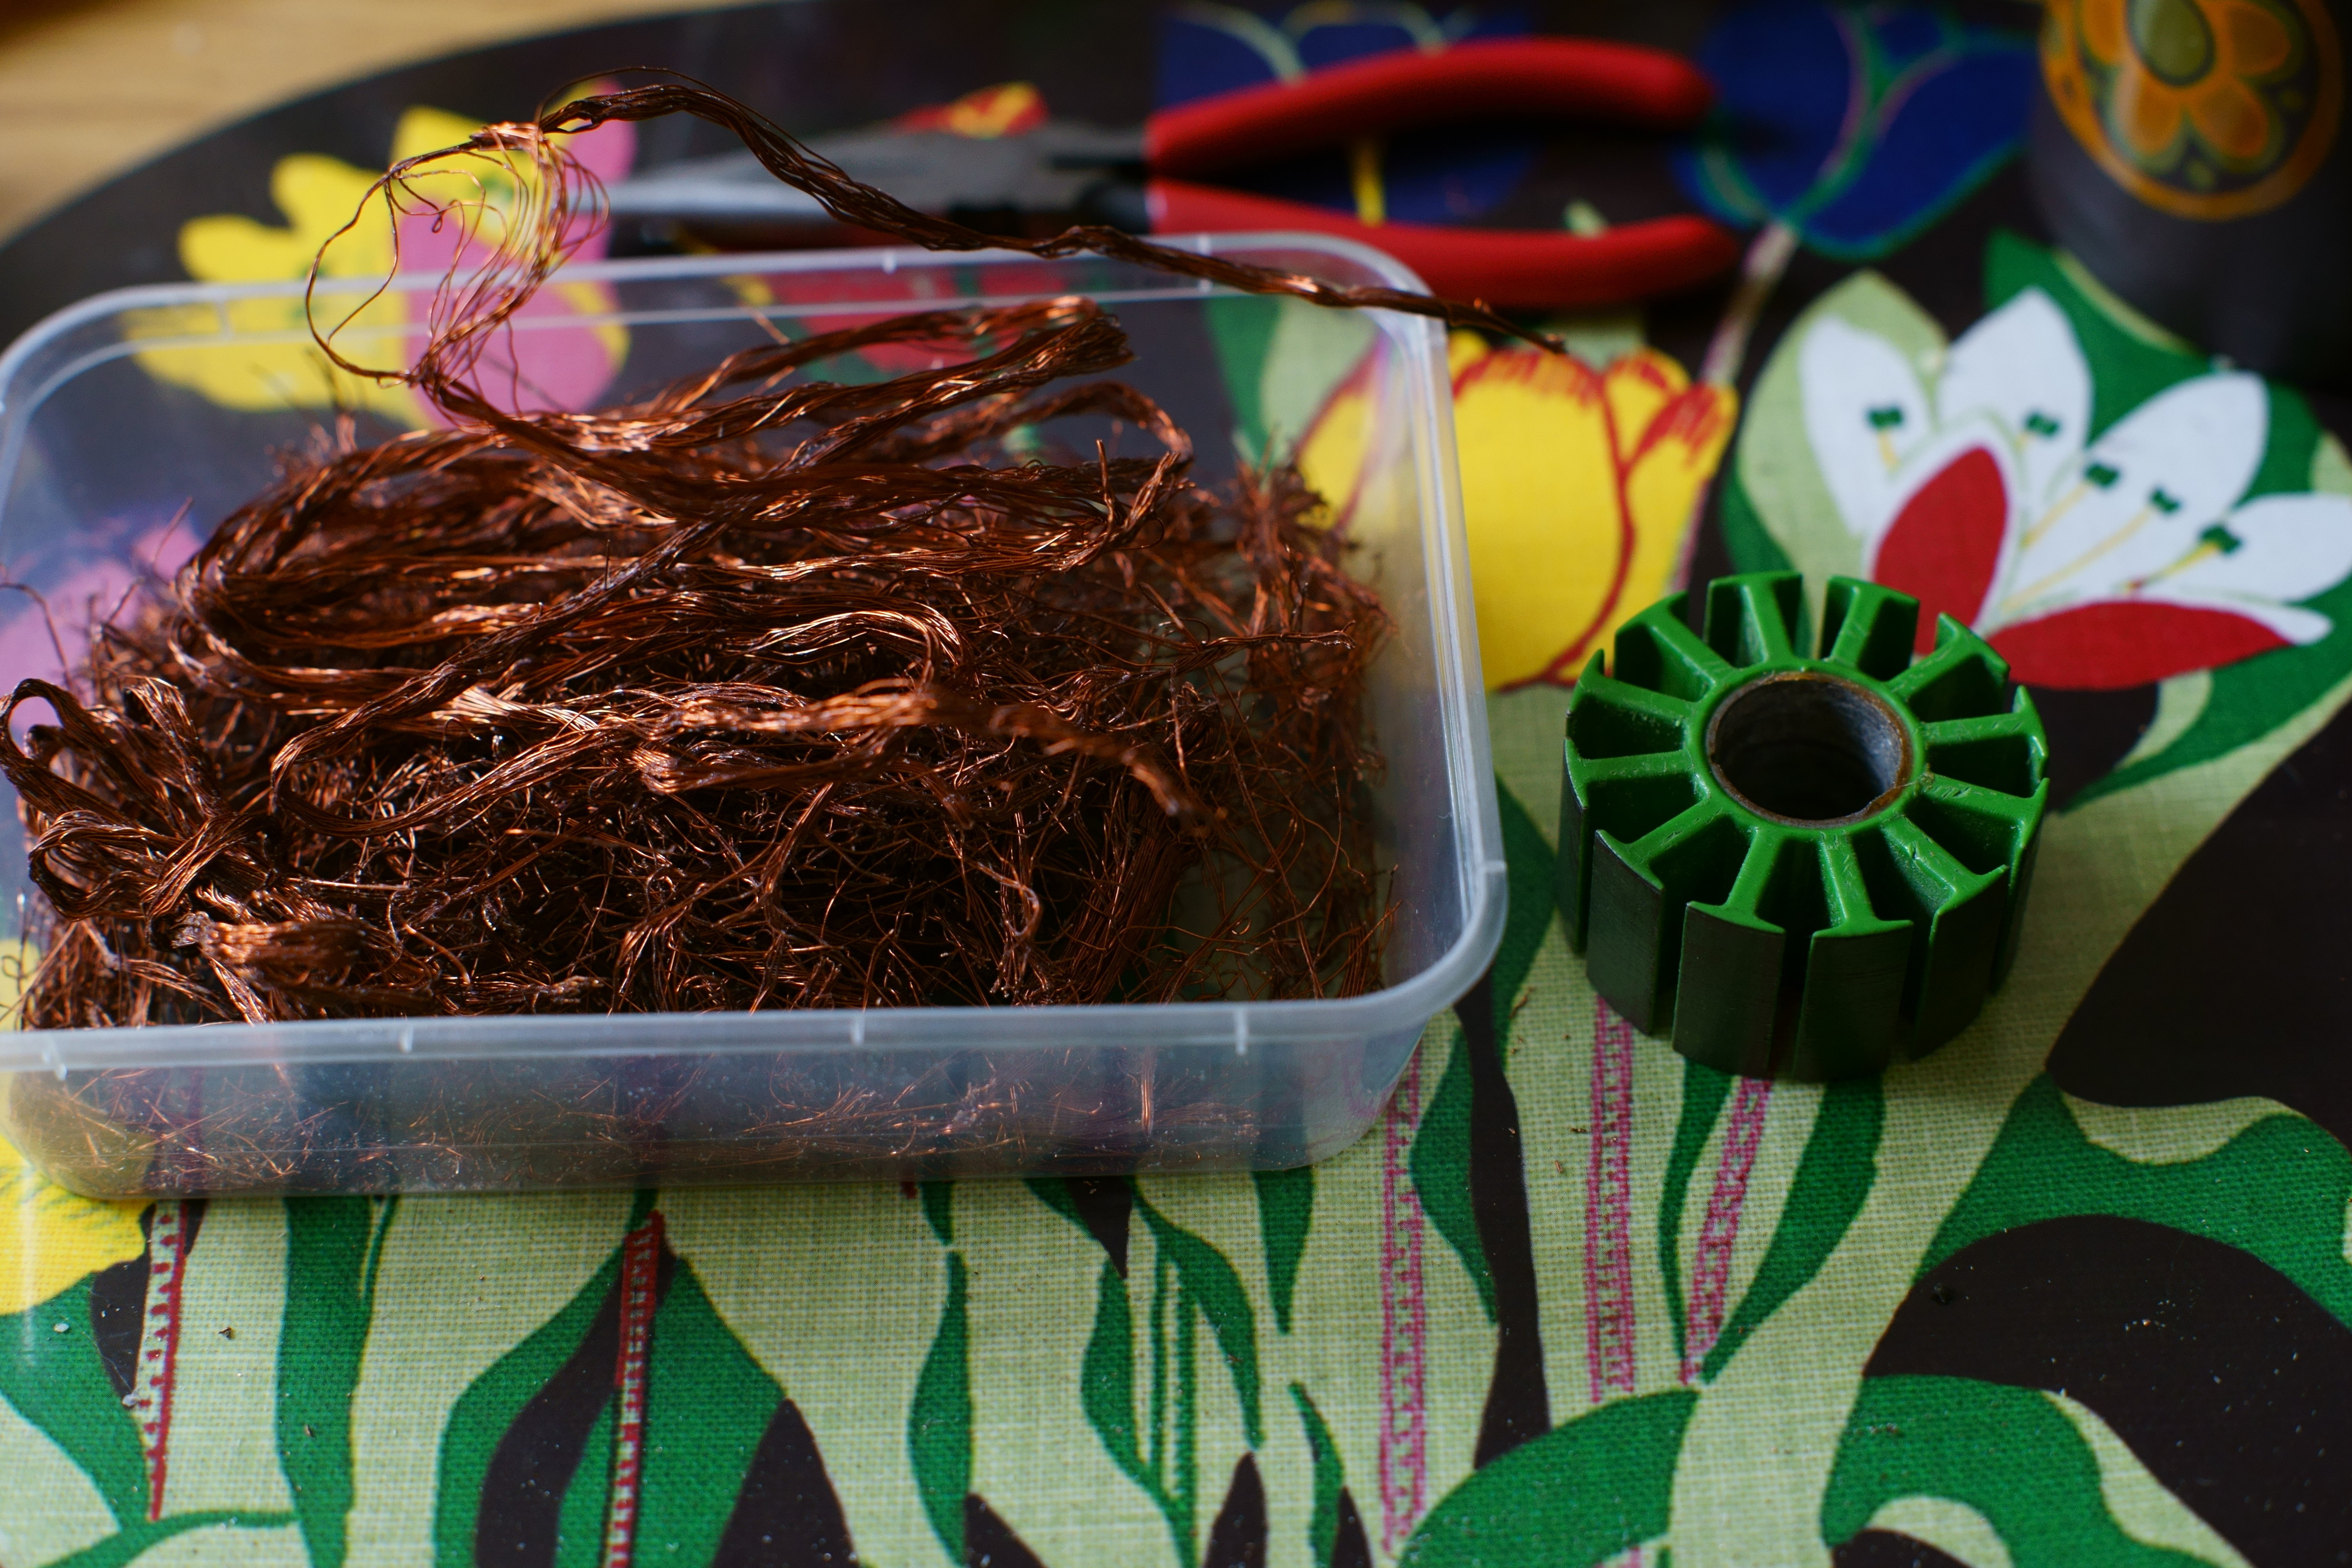
But this thing did not want to part with it’s old widning, took quite a bit of effort to remove it all.
Doing multistrand is a pain. You have to pair all the long wires before winding. I bet you could find an equivalent cross-sectional area that would still be windable with one wire. I’ve got 22 gauge and it’s still very pliable.
I gave up winding my motors because it was very hard to access with the stator permenantly stuck on and found I kept making shorts with the necessary roughness of getting it on. I did learn some things though… and I found an LC meter for measuring the inductance was really helpful in seeing if there were shorts and also how good a winding I was doing. (A multimeter’s resistance measurements were not accurate enough for such small resistance and a short wouldn’t show!) I found if I rushed and ended up with a messy tooth it had much less inductance than consistent loops. You want to end up with them all consistent as well of course.
30 bucks with shipping on eBay!
I spent at least 10 hours unwinding and winding all included…take your time or else it’s a shorting nightmare.
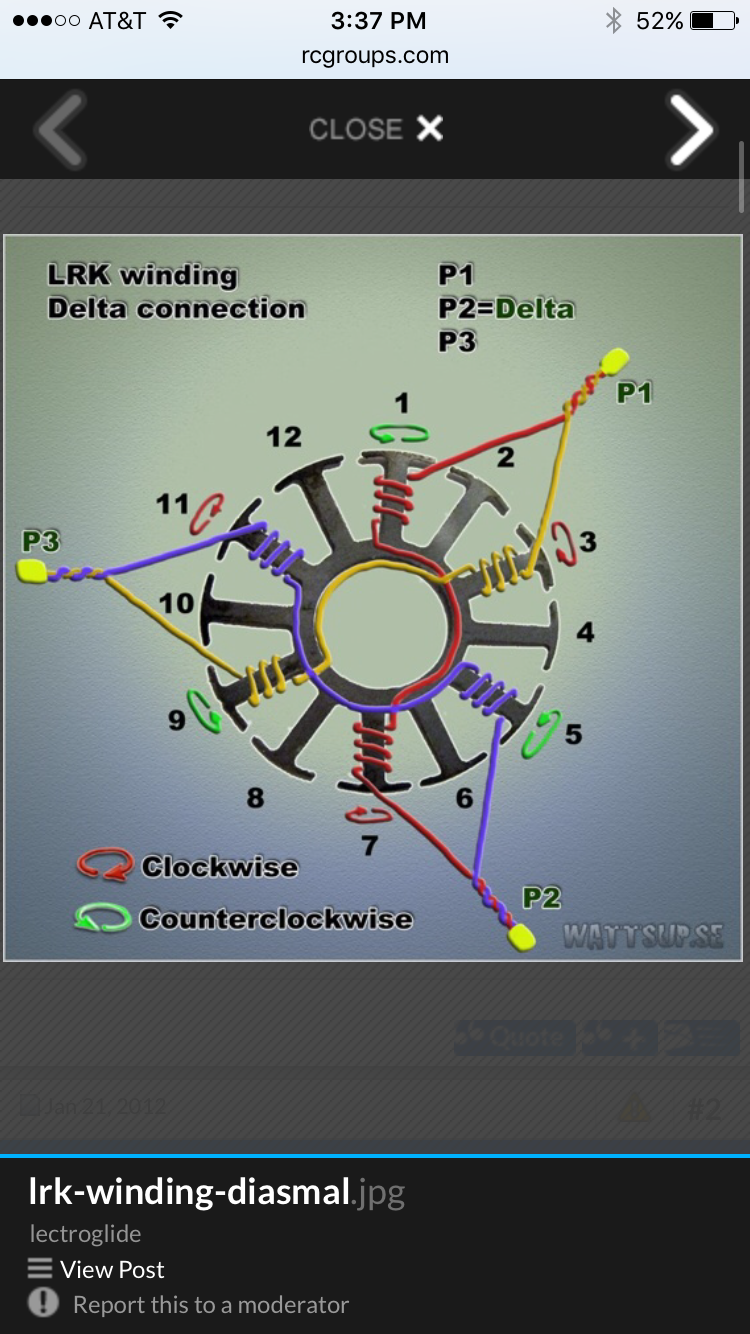
As I wrote the LRK wind makes it much easier.
Don’t try to just put everything deep inside or it will eventually collapse and you won’t get much in. Try to wind the tooth itself from front to back and back to front. Everytime I ended up with space available but I couldn’t get the wire through the shrinking slot between the teeth.
Use a small wooden dowel to push stuff down. Even a destroyed pencil worked for me.
I really wanted to succeed at this myself. I have a lot more respect for the winders of these motors. It takes time
***when u say “20 strands” do you mean 20 small wires, as that would be the nomenclature, or do you mean 20 turns around each tooth? U need to redo the turns around the tooth the same to redo the same kv. Someone above said otherwise. So 20 turns with 8 thin strands or 20 turns with one thick one is the same kv
@Iceni@Hummie I’ve long wondered whether it is worth it to rewind a failed motor. It sounds like a time consuming and difficult process. Does the cost of the copper wired plus all the time end up being worth a repaired motor at the size\cost that we all use? Does it turn out better than it comes from the factory, more performance-tuned?
Normally it’s not that hard. I just screwed it up repeatedly and it’s hard to access my stator with the non-removable aluminum wall beside it.
Taking off the windings takes longer than putting them on for me. And then u can screw up the winding pattern…did that too. take note of the starts and ends and clockwise vs counter. And then after finding repeated shorts I gave up.
With the LRK wind terminated delta it’s likely much easier to rewind than any other wind and this pic is the best explanation I’ve found. The LRK is a great torque wind to, the longer the stator the better. Some of the diagrams are missing info. Once you visualize it in your head it’s a simple wind really. Each strand does a clockwise and a counter clockwise opposite itself.
If u do a rewind ur likely to have a much better motor. It’s all about getting neat windings for inductance and better copper fill. The thicker the wire generally the better too although that’s a bit controversial and sometimes it’s easier to fit thinner wires.
Would’ve been cool if lceni had been able to test it before and after the rewind
I really like the idea of doing it…just haven’t succeeded yet! Respect to whoever is doing them for me
I’m gonna run some tests side-by-side with the other motor i have, so ill have something to gauge the performance when finished.
@treenutter It is a pretty time consuming task to do it, but the copper is about 1/10th the price of a new motor, so it’s not that expensive on the material end.
I do it in my spare time in front of the TV so, no lost time there really
have you ever watched the videos of the Chinese girls in the factory winding the motors?
I suggest watching it its quite amazing to watch. they have the technique down pat.
So after a bit of testing with different wires i first settled on two strands of 0.95mm thick wires, was a pain in the ass to get it to lay neatly, but i managed to get it fairly nice.
Only problem was i managed to kinda ruin it when putting it all back together, scraped off the insulation at the base of it, oops >>
Then i thought, screw multistrand and ordered some 1.45mm thick wire and did single strand wind, that was a heck of a lot easier.
And looks about a gajillion times better.
Though with that winding it ended up with 11 turns per tooth instead of the stock 14, so it’s a little faster.
According to a turncalculator i found it should theoretically end up at 250-ish Kv.
Gotta make some comparisons to the other motor i have that’s still got it’s original winding.
The interesting thing is there’s 20 grams more copper in it now than it’s stock counterpart.
Beautiful winding. Nice job. Probably will perform much better. Too late now I guess but it looks like u could’ve squeezed in another wind or two. Maybe glue it down.
Ca glue will eat the enamel off the windings! I’ve seen it.
I use stycast by loctite but it’s a pain. I’m looking for a good drip “conformal” coating. I’m not sure what’s acceptable though and if an epoxy is high enough heat and a similar thermal expansion as the windings I think it’s ok but don’t know and they probably use special stuff for a reason. If u search conformal coating ull find something.
The magnets in the motor are probably standard and not high heat and only good to 80c anyway so u don’t need the resin to get too hot.
While u have it open can u get a pic of the stator laminate thickness since no one seems to know it and it would reveal a lot about how good the motors are.
Hmm, interesting, i though ca was inert once it cured, good thing i didn’t put it on then.
Will see if i can find some epoxy that’s rated higher than the general type i see everywhere, the enamel on the wires i used is rated for 200’c so might wanna match that just keep it overengineered, just in case.
Though if the motor ever reach 200’c I’d guess something is very very wrong
I’ll open it up tomorrow and check the stator, already put all the tools away for the night.
In a way it’s better to have a low temp wire if u have regular low temp magnets otherwise u can cook the magnets and really ruin the motor as Rewinding will be pointless.
I was just looking up ca glue and magnet wire. Some people use it. Some people say it will eat it. It ate mine. Think it depends on which enamel the wires use