Im re-assembling the gear boxes tomorrow. I have a few options. Got any suggestions/recommendations?

1 Like
Haha I thought @DanSkates is a thread locker adddict but you raise the bar.
Loctite 263 is permanent! The winner is IC-LOC Blue, found this description: “Once the IC-LOC Blue™ is cured, the fasteners can be disassembled with standard hand tools if required”
Yes he did. Otherwise it’s not possible to get it flexing
2 Likes
Haha thanks @Andy87 for the quote  @12meterkuk I’ll post the details and pics very soon, promised. It was a lot of work, I think I would choose @Eboosted enclosure instead of Trampa’s if I would do it again.
My problem right now is that I have 45 minutes of video footage to edit for a crazy video, it takes forever…
Furthermore I crashed 2 days ago and my elbow and one hand hurt a bit but no problem. I didn’t see the wet sticky mud on asphalt which was like ice, too fast and no traction with gummies so I met the wall and fell backward.


7 Likes
the material of the trampa under board tray is definitely not a pleasure to work with, especially if you don’t have the right tools.
Would definitely go with @Eboosted enclosure next time too.
If to compair the price it’s also not that much more and no dirt and no hassle 
1 Like
Even if you have the right tools… ![]()
Waterproofing is also not easy.
Sad that they don’t sell it pre cut for the deck you need. I covered the inside with electric tape and from outside sealed the cuts with silicon. Needed two or three layers of silicon as it didn’t sealed fully when dry but than it was fine. Did you get the original end covers or did you print your own?
Are you using threaded inserts for mounting the enclosure on the deck? I want to mount mine and don’t know what would be the best for the trampa…
Guess you found a place where the Gummies don’t work
1 Like
M4 does the job perfectly
No and no ![]() Reveal it soon
Reveal it soon
Yes M4 but better use stainless steel, mine are standard and kinda soft, one broke during turning in. It is important to pre-drill the exact needed size for the threaded inserts (which is mostly not a standard size). Before drilling holes in the deck try it with hard wood e.g. MDF and find the perfect diameter of the hole. If the hole is too small you’ll get a small hill around the insert. If it’s too big the insert won’t hold well. Search for charts in the internet for pre-drilling diameters for hard materials to get an idea which drill bit(s) to try.
Search and find ![]()
After over 100km on this board I have some feedback. The Gummies have nice grip and feel good beside the fact that you feel and hear every crack but very smooth on nice concrete. I’m so used to pneumatics that it needs some time but I like them. Especially I like the double range, was riding 4 hours non-stop (OK 1 stop), great!
The first damages appear

I really have to change the new maytech remote due to heavy interference problems. I like the shape and the 2 modes but safety first. Abroad I have perfect connection for at least 10 meters distance from the board (didn’t try more) but in the city it frequently shrinks to 0.2 meter. That’s ridiculous.
I have very very very loose belts and still no skipping, I didn’t expect that but I guess that will change with bigger pulleys on 7” wheels and less teeth in mesh. The APS motors are very silent in FOC as long as I don’t accelerate, then they start to scream.
I have springs with yellow dampas in inner position, without dampas it feels shaky. The carver carves well but not at (very) low speed. I have better turning radius with my MTB, waiting for the elastomere dampers to be back in stock, hail @Nowind and @Duffman for this mod!
I stepped on the connected charger cable and the charging port is loose now, need to dismount the enclosure and secure the nut with threadlocker (if there is still a plastic thread), damn. Lesson of the day: “Don’t charge your board in the middle of the room”
Got the M4 rubber washers today, seems much better than o-rings for the tray.

Recorded some telemetry data of a ride (both vecs) on smooth tarmac without any inclination:
Motor Max: 94A
Motor Min: -48A
Batt Max: 50A
Batt Min: -15A
Max speed: 35 km/h
My settings for each vesc are:
Motor Max: 55A
Motor Min: -30A
Batt Max: 45A
Batt Min: -10A
4 Likes
It the best feeling when you find a silk smooth road with urethane wheels, everything gets silent
How’s the consumption?
And I will see if I can find these rubber washer, the oring deform and expand when you tight everything down, sometimes go out of the screw
2 Likes
Bought mine as set Repair threads, drill and drill to precut the thread (sorry don’t know the English word for it) With it you definitely have the right size. Usually it’s also written on the thread itself as d=1.5 or 2.5 thats how much more thick the insert is from the original hole. Like for m4 and d=1.5 you need a drill with the size 4.1mm
I would also add some epoxy or any other kind of glue to save the threads stronger in the trampa deck material. I opened mine every time for charging and with time they will become lose if not glued.
1 Like
Parts are in production, but will take around 4 weeks with anadozising
2 Likes
That’s what I wanted to hear  Hold a set in blue back for me
1 Like
Not sure yet, need to test it with GPS, too but with Gummies about 30-40 km (19-25miles).
Installed the rubber washers and they are much better (not that soft) and bigger than o-rings, highly recommended!

Size compared to o-rings

Ah OK repair threads are different, I was talking about standard threaded inserts for wood.
I hope not, I didn’t use glue ![]()
Today I met @slick for a pair ride in vienna, after some time we discovered another pair and boom, suddenly this was a original group ride! We had a lot of fun and looking forward to meet again.

10 Likes
booya! how did i miss this thread!? nevermind, i got to see your board for real - thats even better 

yeah, cool ride today rich. still kicking myself cause i screwed up and didnt get a footage of you riding your board through grass. i’ll make sure i get a footage next time.
1 Like
Finally as promised here more details about this build, feel free to ask for further information.
ENCLOSURE
The Trampa tray is very pleasing to the eye, same look, same material but it was a long journey and ordeal to finish. You saw and saw and saw and saw and saw and saw and saw and saw and saw and saw and saw and saw and saw and saw and saw and saw and saw. Then you fall asleep and your arm hurts the next morning.
First I cut both sides to desired width and shortened the length. Then drilled the holes to prevent cracking and cut the tray in 7 segments to allow flexing.


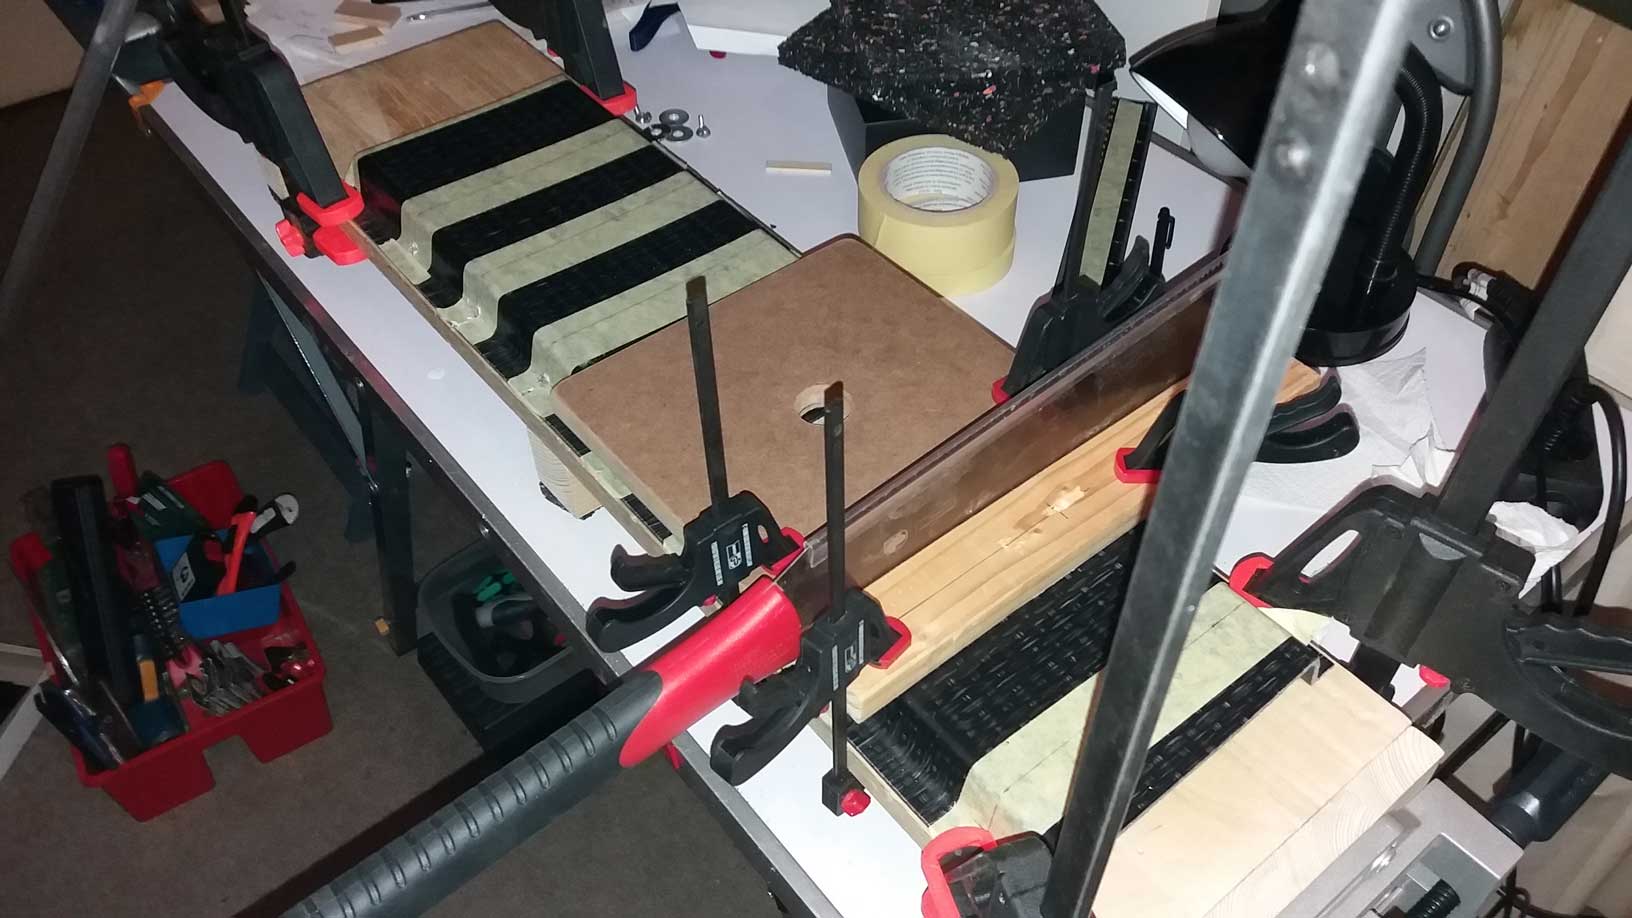


I thought I’m clever when using a japanese saw to get tiny slices but I forgot that it needs more space when bending it upward in shape of the deck. So I sanded down all slices until they were big enough.


If I would do it again (which I don’t) I would make bigger slices that there is enough room to seal it with black silicone. I also saw pics of beautiful CNC machined trays.
Drilled some holes for threaded inserts (M4 OD 6.5mm). Pre-drilled with 2mm drill bit first. The trampa material is special, the difference between drill bits must be at least 2mm otherwise the drill bit gets stuck. No problem to drill with 5 or 6mm after 2mm pre-drilling.


As end pieces I use 8mmx25mm wood, same shape as tray machined with a coping saw and painted in black later. The same wood is used as support (for impacts) in the middle of the tray.

I wanted to mount the electronics to the deck and had already mount the end pieces to the deck. In the end I did id the opposite way and glued the end pieces in the tray.


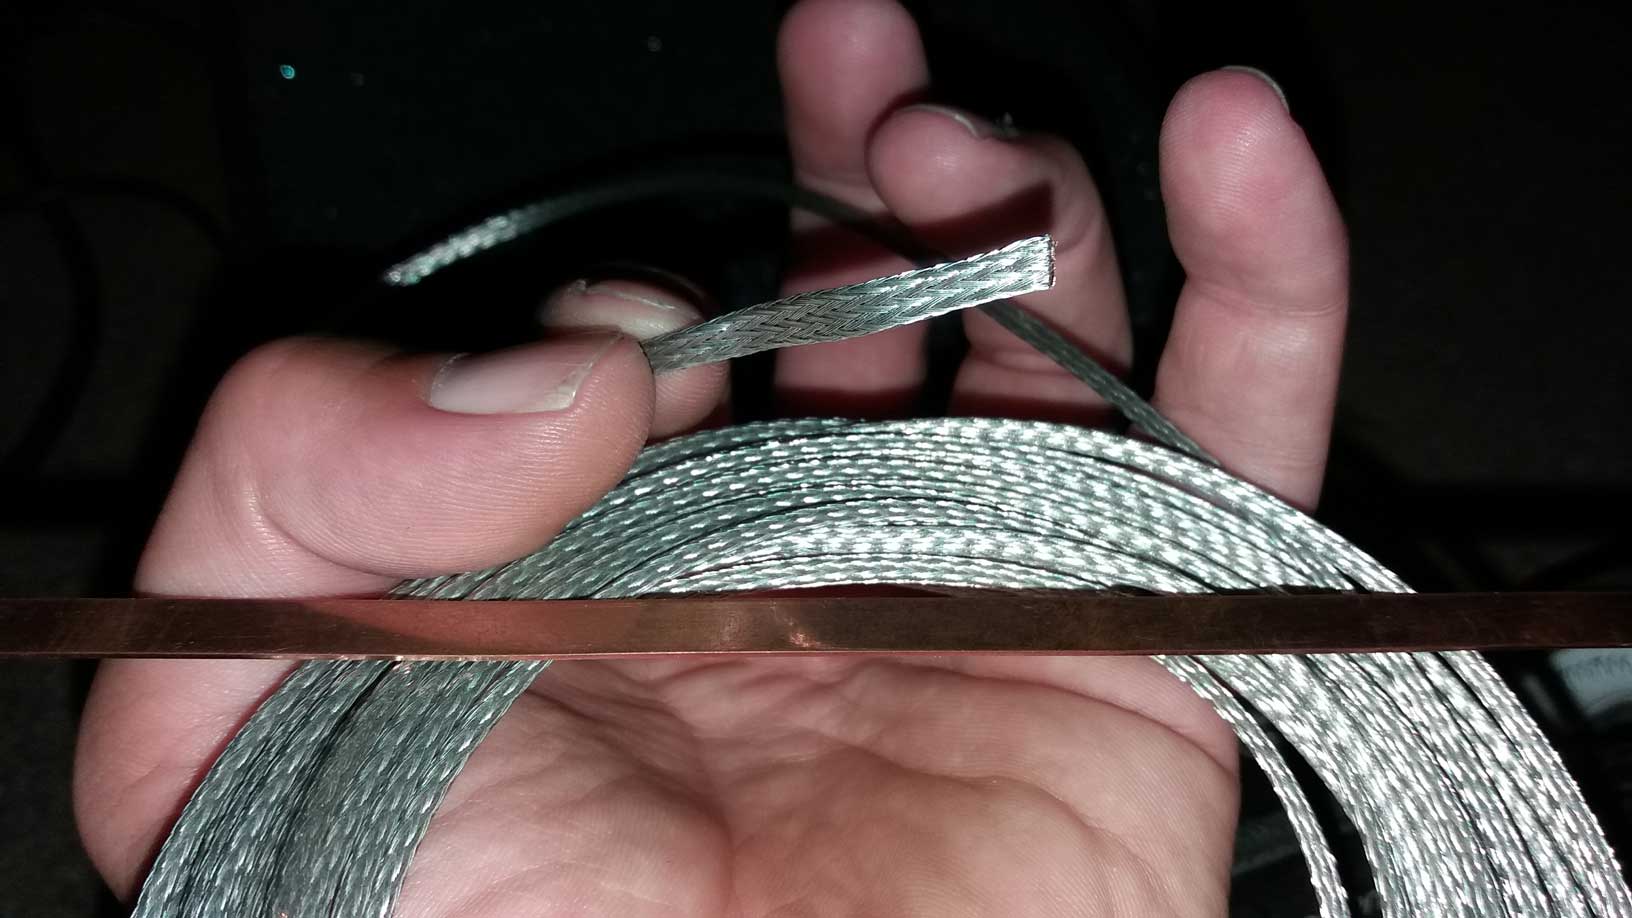
BATTERY
I soldered 10x 4p packs with 1mm flat copper wires (equal 3mm²) and angled copper bar for serial connections (equal 4mm²) with 80-100W iron and flux. First I wanted to use copper bar only but that didn’t work well because it’s so rigid and I damaged 2 cells (which I replaced).


Underneath the angled copper bars and all positive connections is fishpaper. I ordered the insulation rings at nkon.nl and they have it in sheets as well - the mystic fishpaper
I was very skeptical how a paper could be heat resistant but this material is the shit! Perfect safety for Li-ion cells.
I also used it as underlayment for pre-tinning the flat wires and copper bars. First I used a 1mm silicone mat to protect the table from heat but after a while soldering with 480°C the silicone melted. The insulation aka fish material gets a bit sticky after a while but never really damaged, it’s still does the insulation job plus the silicone mat underneath looks good and is not melted.
Heat shrinked all 4p packs and glued them into the enclosure before soldering serial and balance connections. This “glue” is soft, flexible and stays flexible and is mouldable, also used it to cover all slices and holes, it can expand and shrink. Time will tell if it’s long lasting but I can hold the enclosure upside down and nothing moves and it’s kinda shock absorbing.

Soldered all serial connections with 2x 14AWG in a curve to allow movement when flexing, same with balance wires (20AWG).


On/off switch and charge port. The third hole is for a switch for lights but had no time to finish it. Better to ride now and finish this feature in winter. Between tray and deck is 3mm neoprene foam.

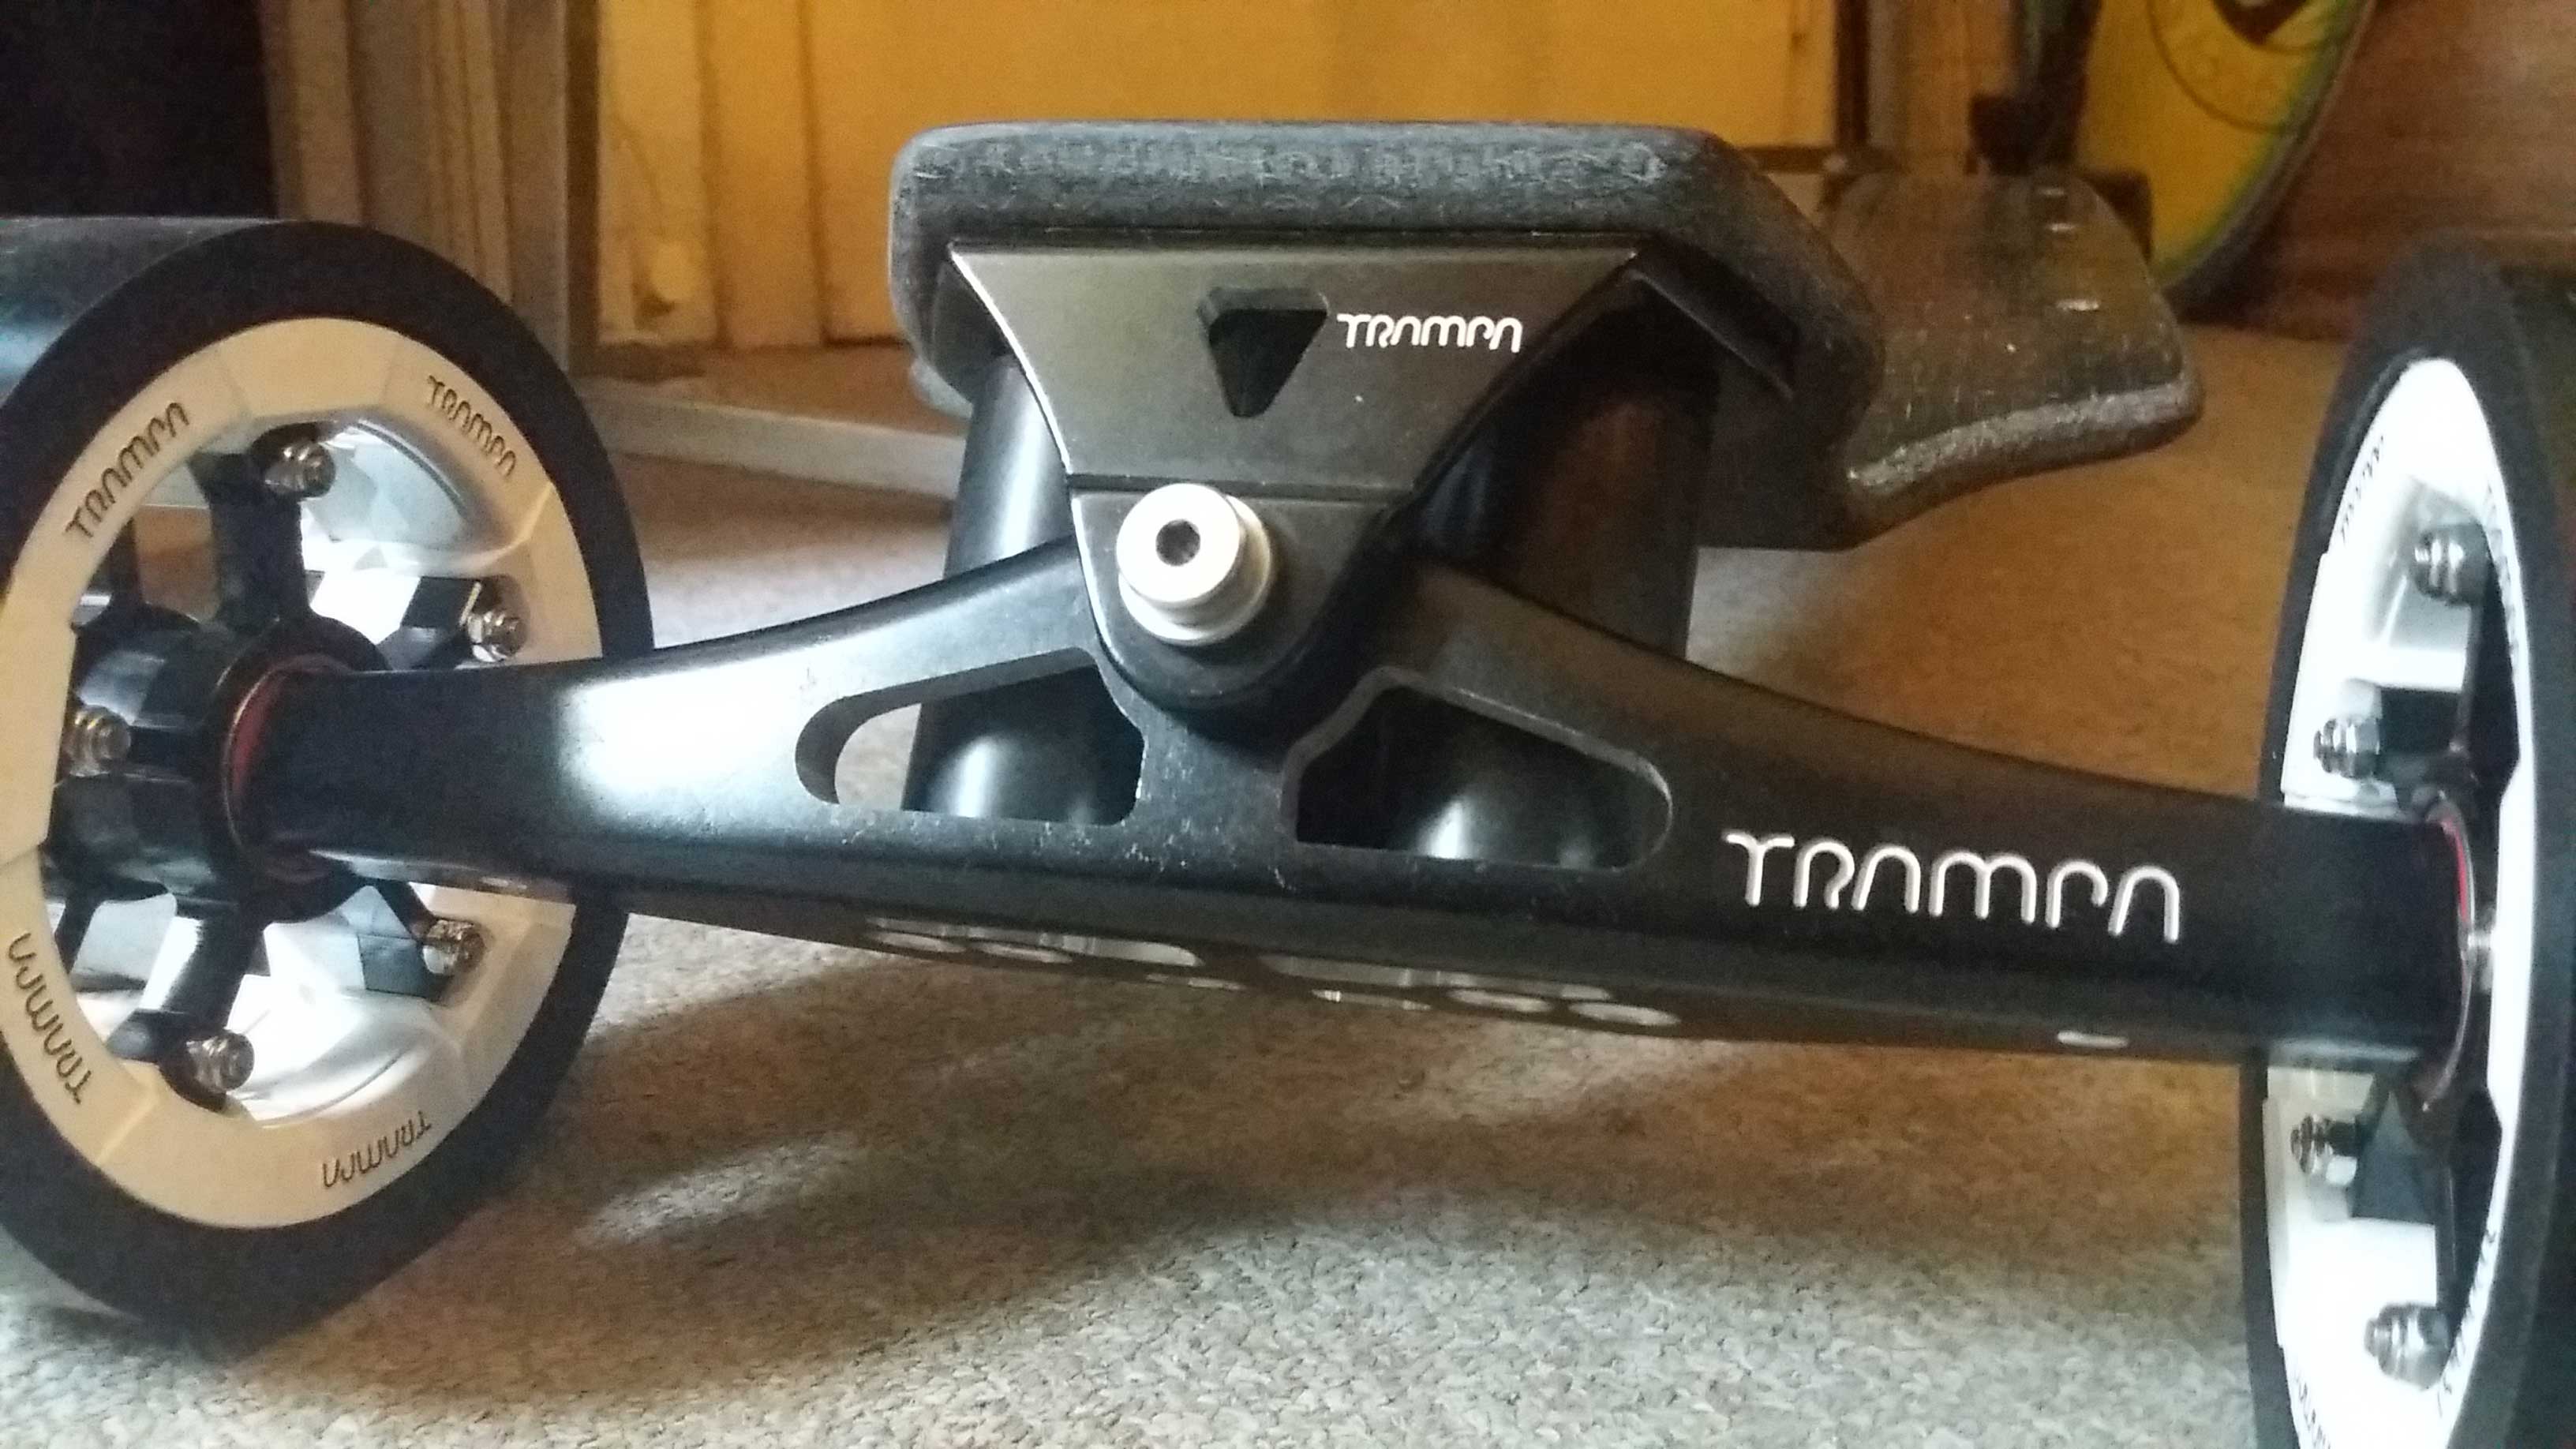
MOTOR MOUNT
I bought an urban carver mount from @Idea last year with steel plates and aluminium rings, it’s a great mount but the plates would bend without crossbar and I don’t like crossbars, also I want it black and that’s difficult with stainless steel. That’s why I ordered the 4.0 mount which can be used without crossbar and it’s aluminium, so black anodizing together with the 60T pulleys was the first step.


Unfortunately the mini vertigo hangers are not that accurate as ATB hangers. The mounts fit much better on the ATB hangers, it’s impossible to mount them with the correct angle to the mini vertigo’s and the contact area is not much.


I ended up with adding stripes of insulation and kapton tape to achieve the proper angle (that took a while), it lasts so far.


STRESS RELIEF CLAMP
I route the motor and balance wires through the hole in the baseplate (inside big shrink tube). For stress relief I machined an aluminium pieces and cut M3 threads. The other piece of the clamp is 2mm ABS with neoprene foam, does the job well.


That’s it for now, I’m sure I forgot something… to be continued
7 Likes