So I have been working on this build for a while so some parts are old. I will walk you though my thinking process.
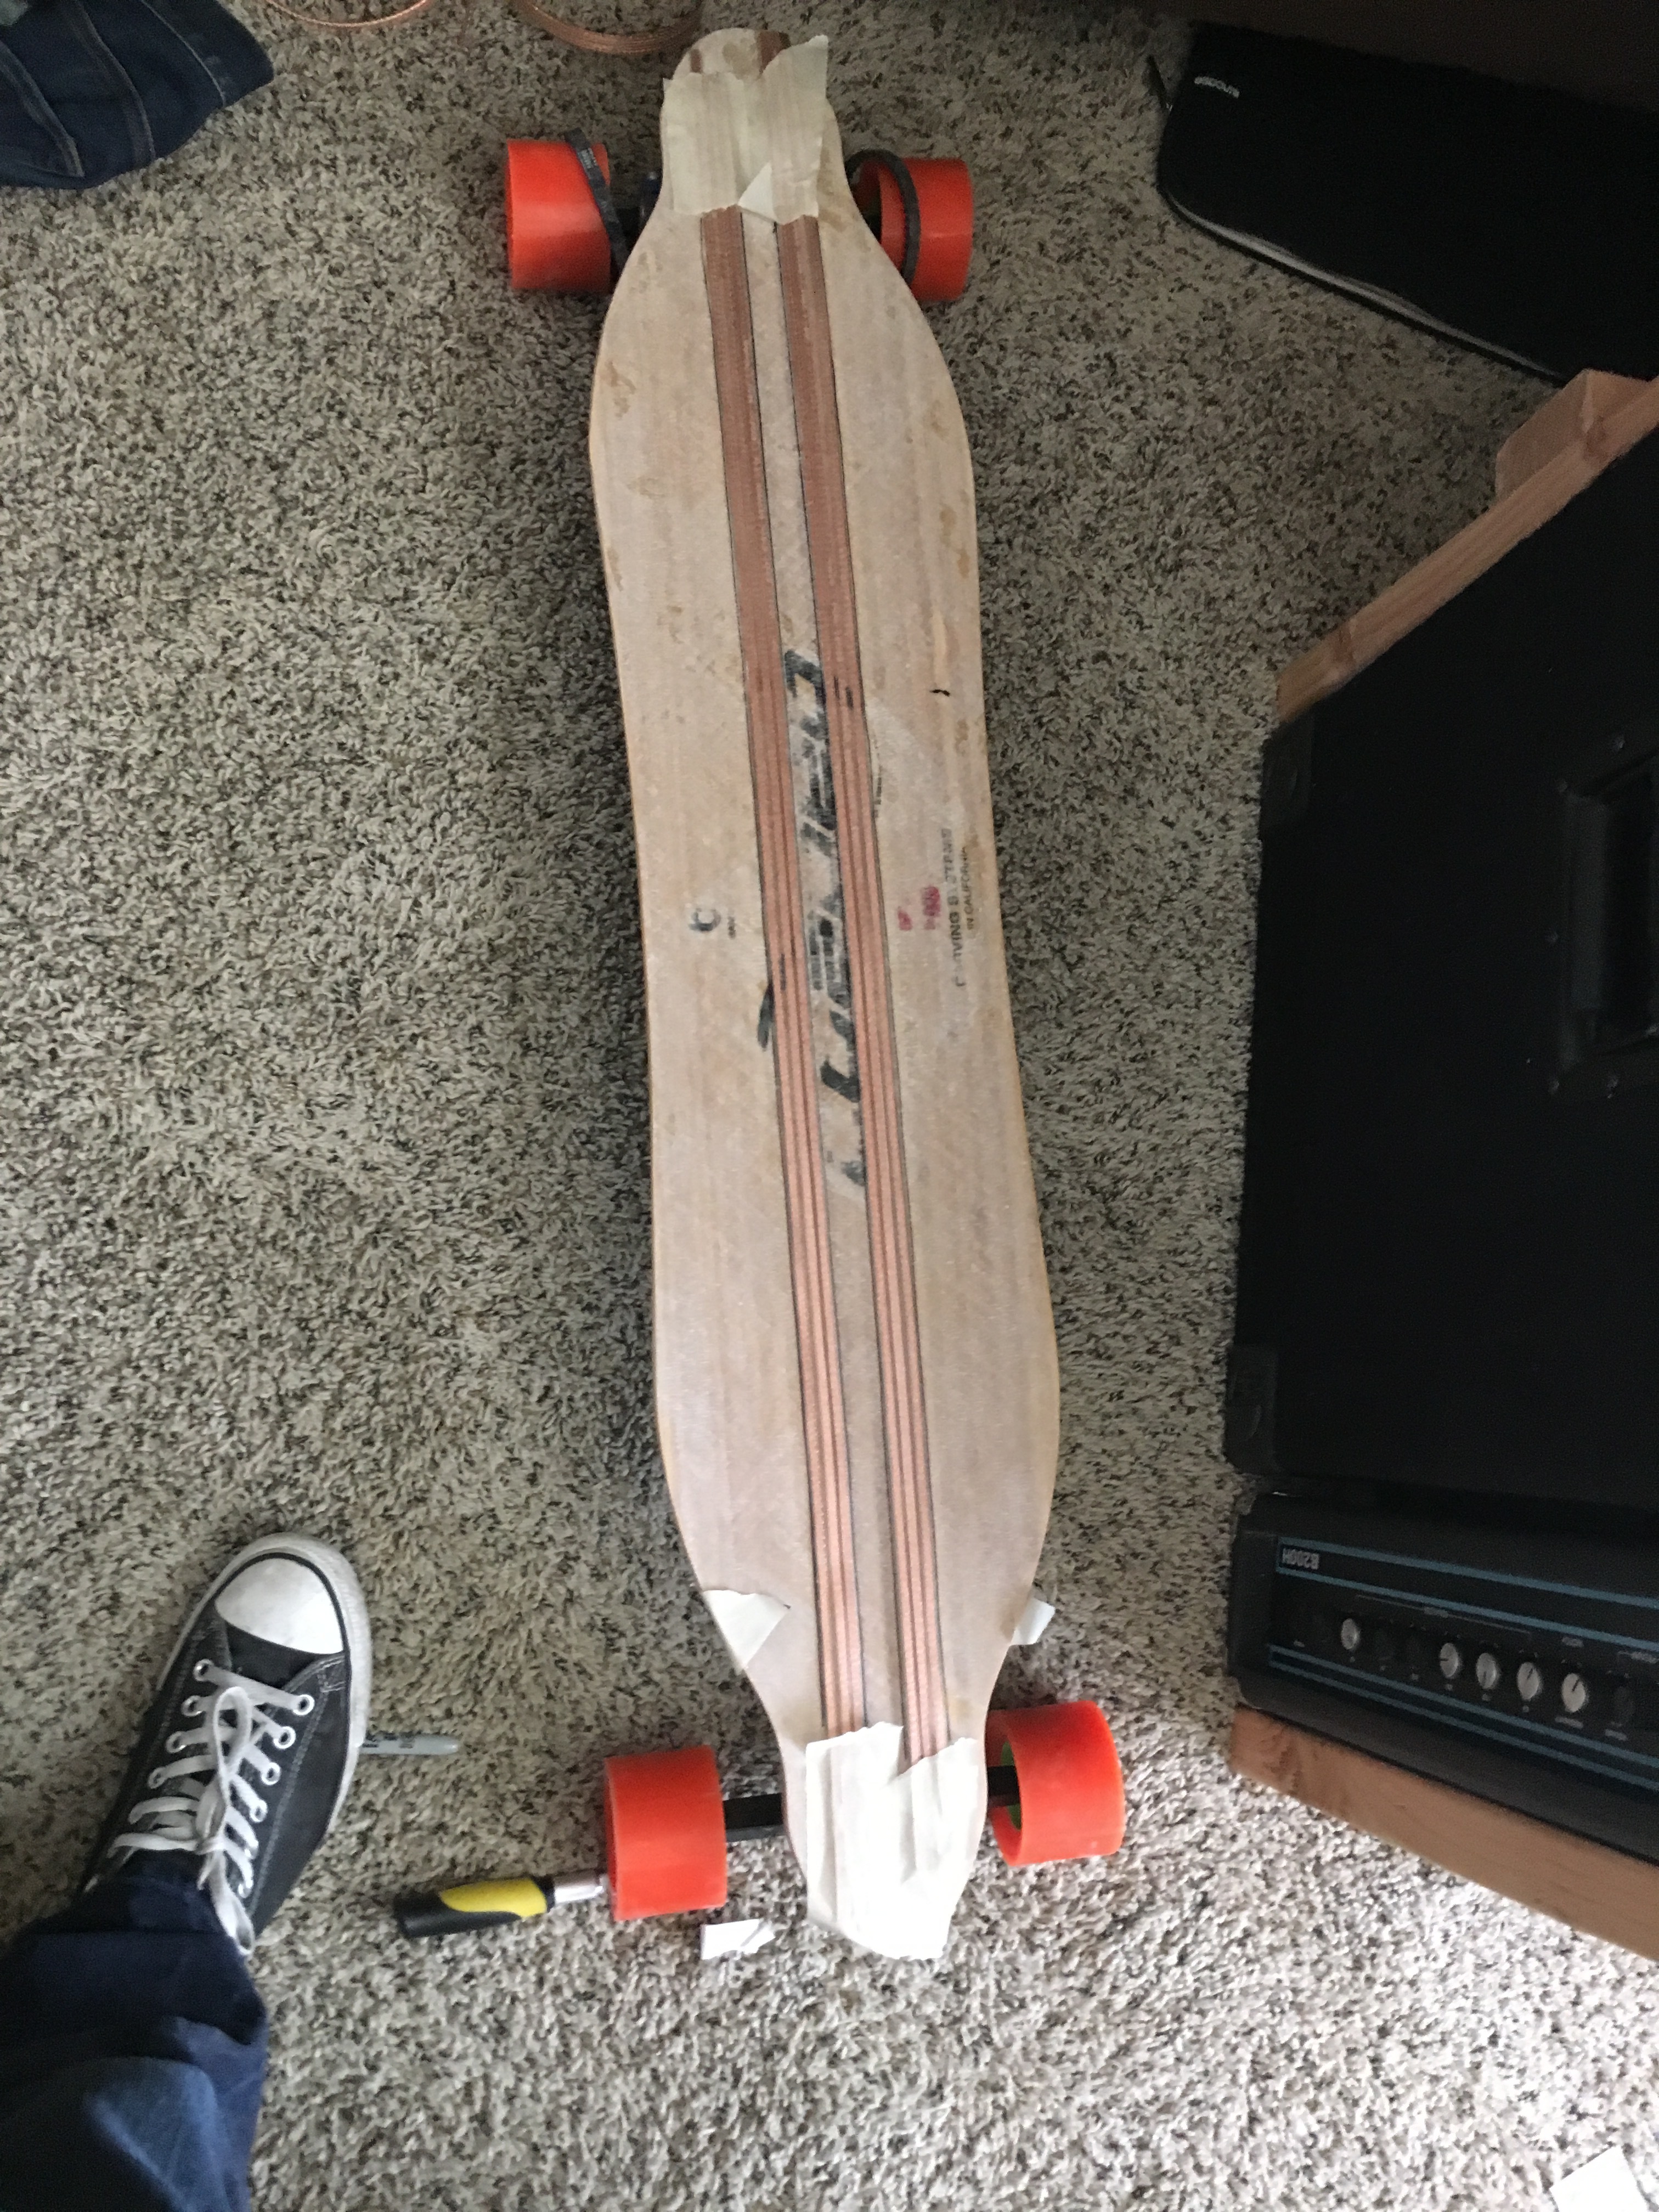
I decide to go with the vanguard because it’s what boosted uses and I figured they put a lot of R&D into why they chose that deck. So I used it too. Probably not the best deck and I may swap my parts to another deck in the future if I wanna mess with things. Anyway on with the build.
Originally I was thinking I would make my batteries swappable. The hard part about that was trying to find a quick release connectors for electrical and something that could handle the vibrations. I was looking into aircraft grade cam locks but the electrical connectors were not working for me.
I built my battery housing out of foam originally and it locked into place and worked great with just foam. I ended up using guitar strap lock quick release and they worked GREAT!
However the electrical didn’t go so well and when I fiberglassed the first run of this it turned out to be a steaming turd. I am awful at fiberglass turns out. So I needed a new plan.
Next I needed to figure something else out with my housing. So while I gave myself a few weeks to think about it. I wired up my board. I ran these flat gauge wires over the top and sanded down the grooves in the deck to hold the cables.
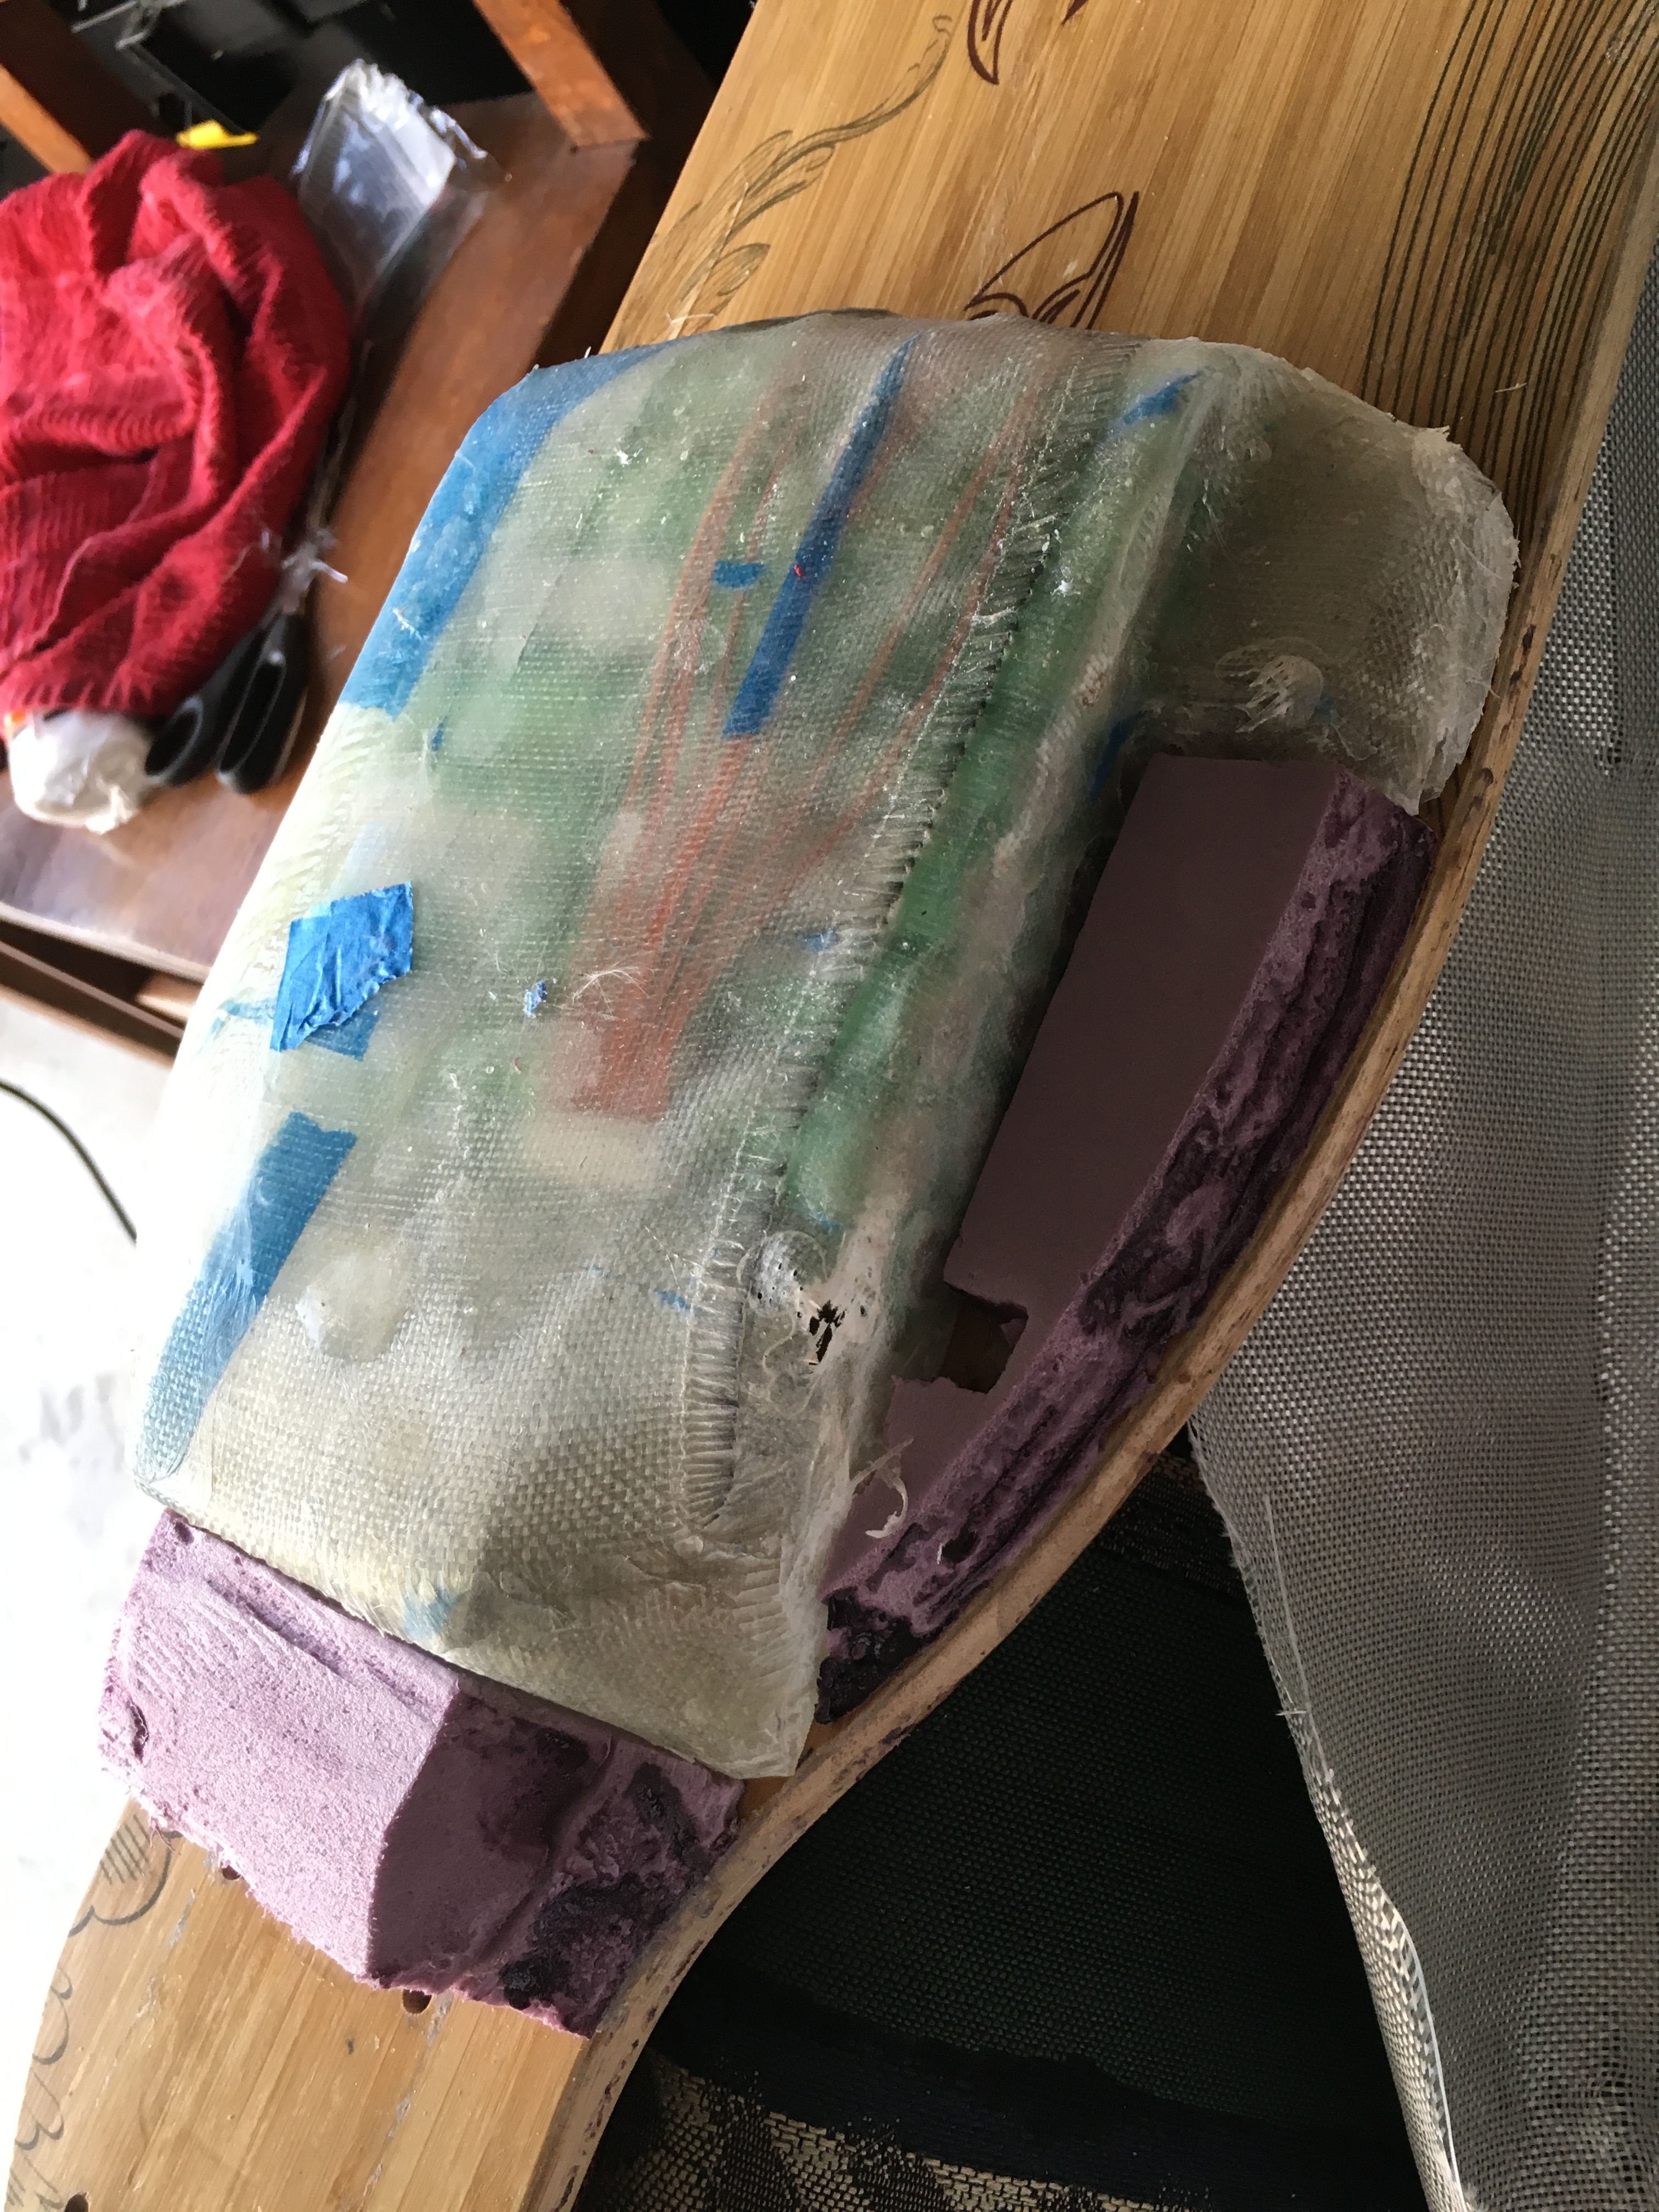
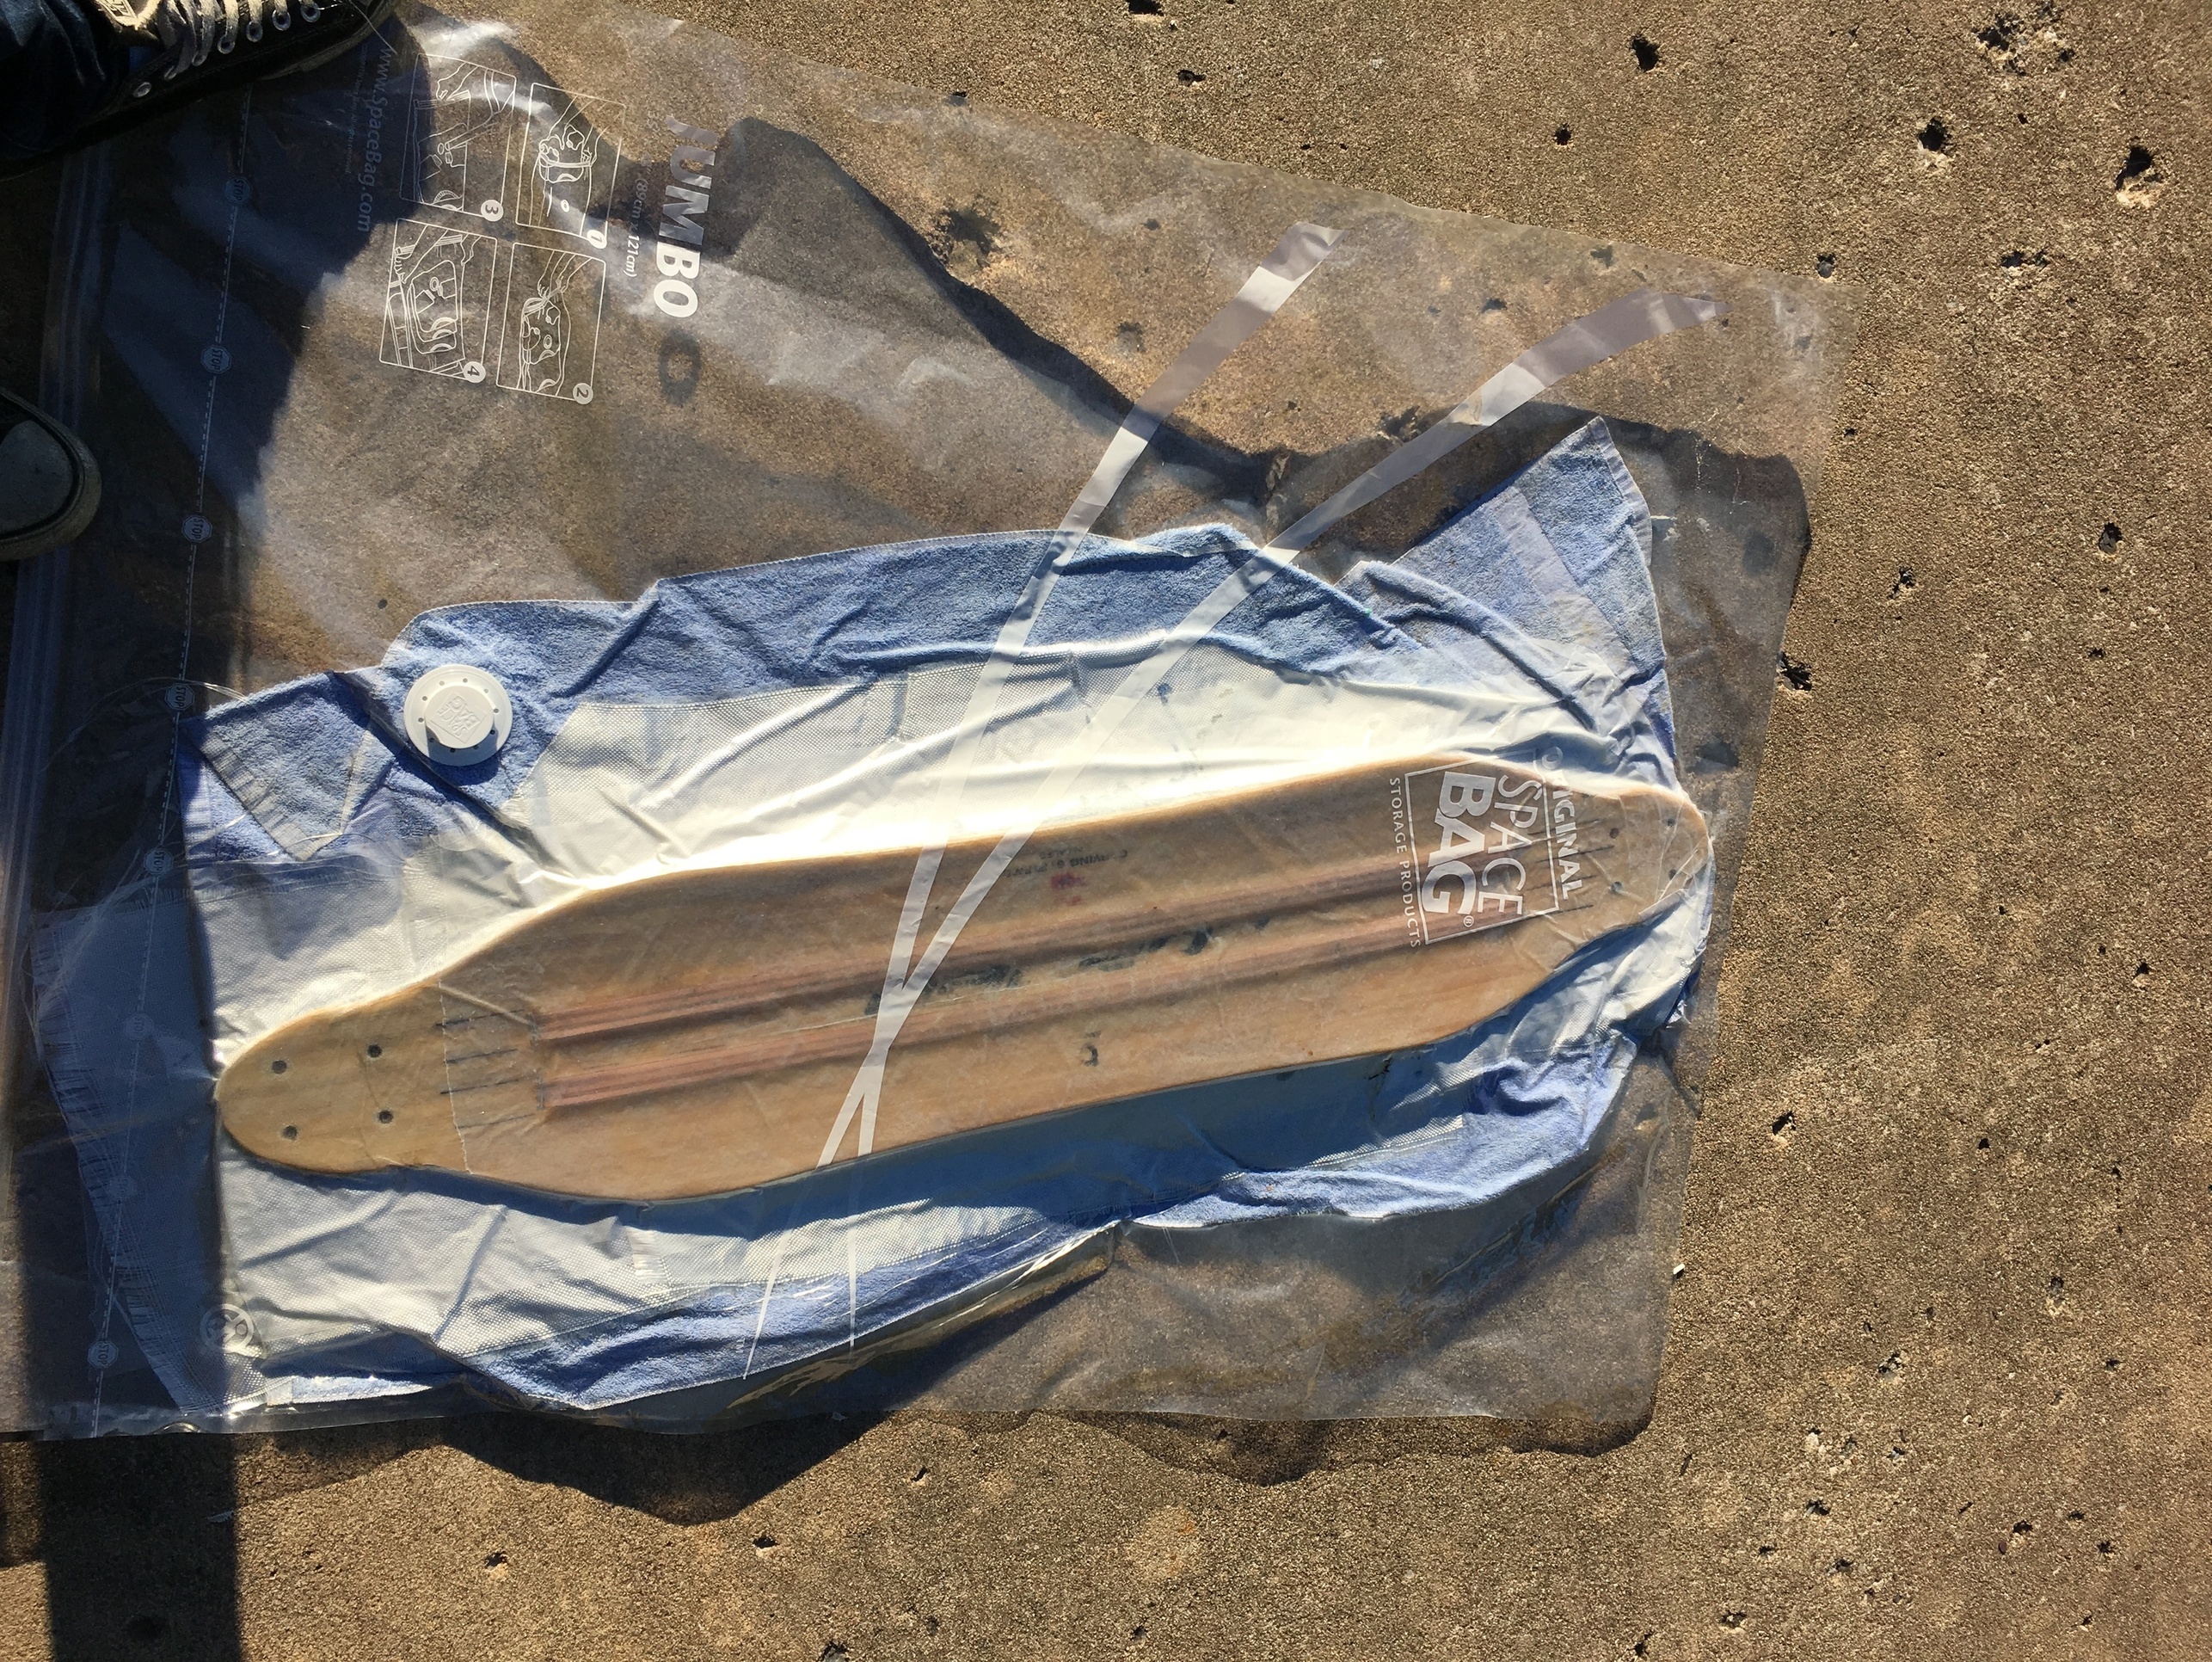
I fiberglassed over the top with a few layers of glass. I also used the UV activated solar power resin and a space saver vacuum bag to adhere it to the deck, which I thought was a great idea.
I had to redo my first layer because I didn’t bag it. I jumped on it to test it and the whole middle of the board became delaminated. So this next set is vacuum bagged and it worked perfect!
I tried to top the whole thing off with a strip of carbon fiber. But that is black and the UV light from the sun didn’t make it through to the resin under the carbon fiber. So it never adhered and I ruined my only sheet of carbon fiber… Great job ya dingus.So I will have to try again with the old fashion two part.
Every time I started I realized I needed more parts…
Work has been crazy so I haven’t touched this board in 2 months.
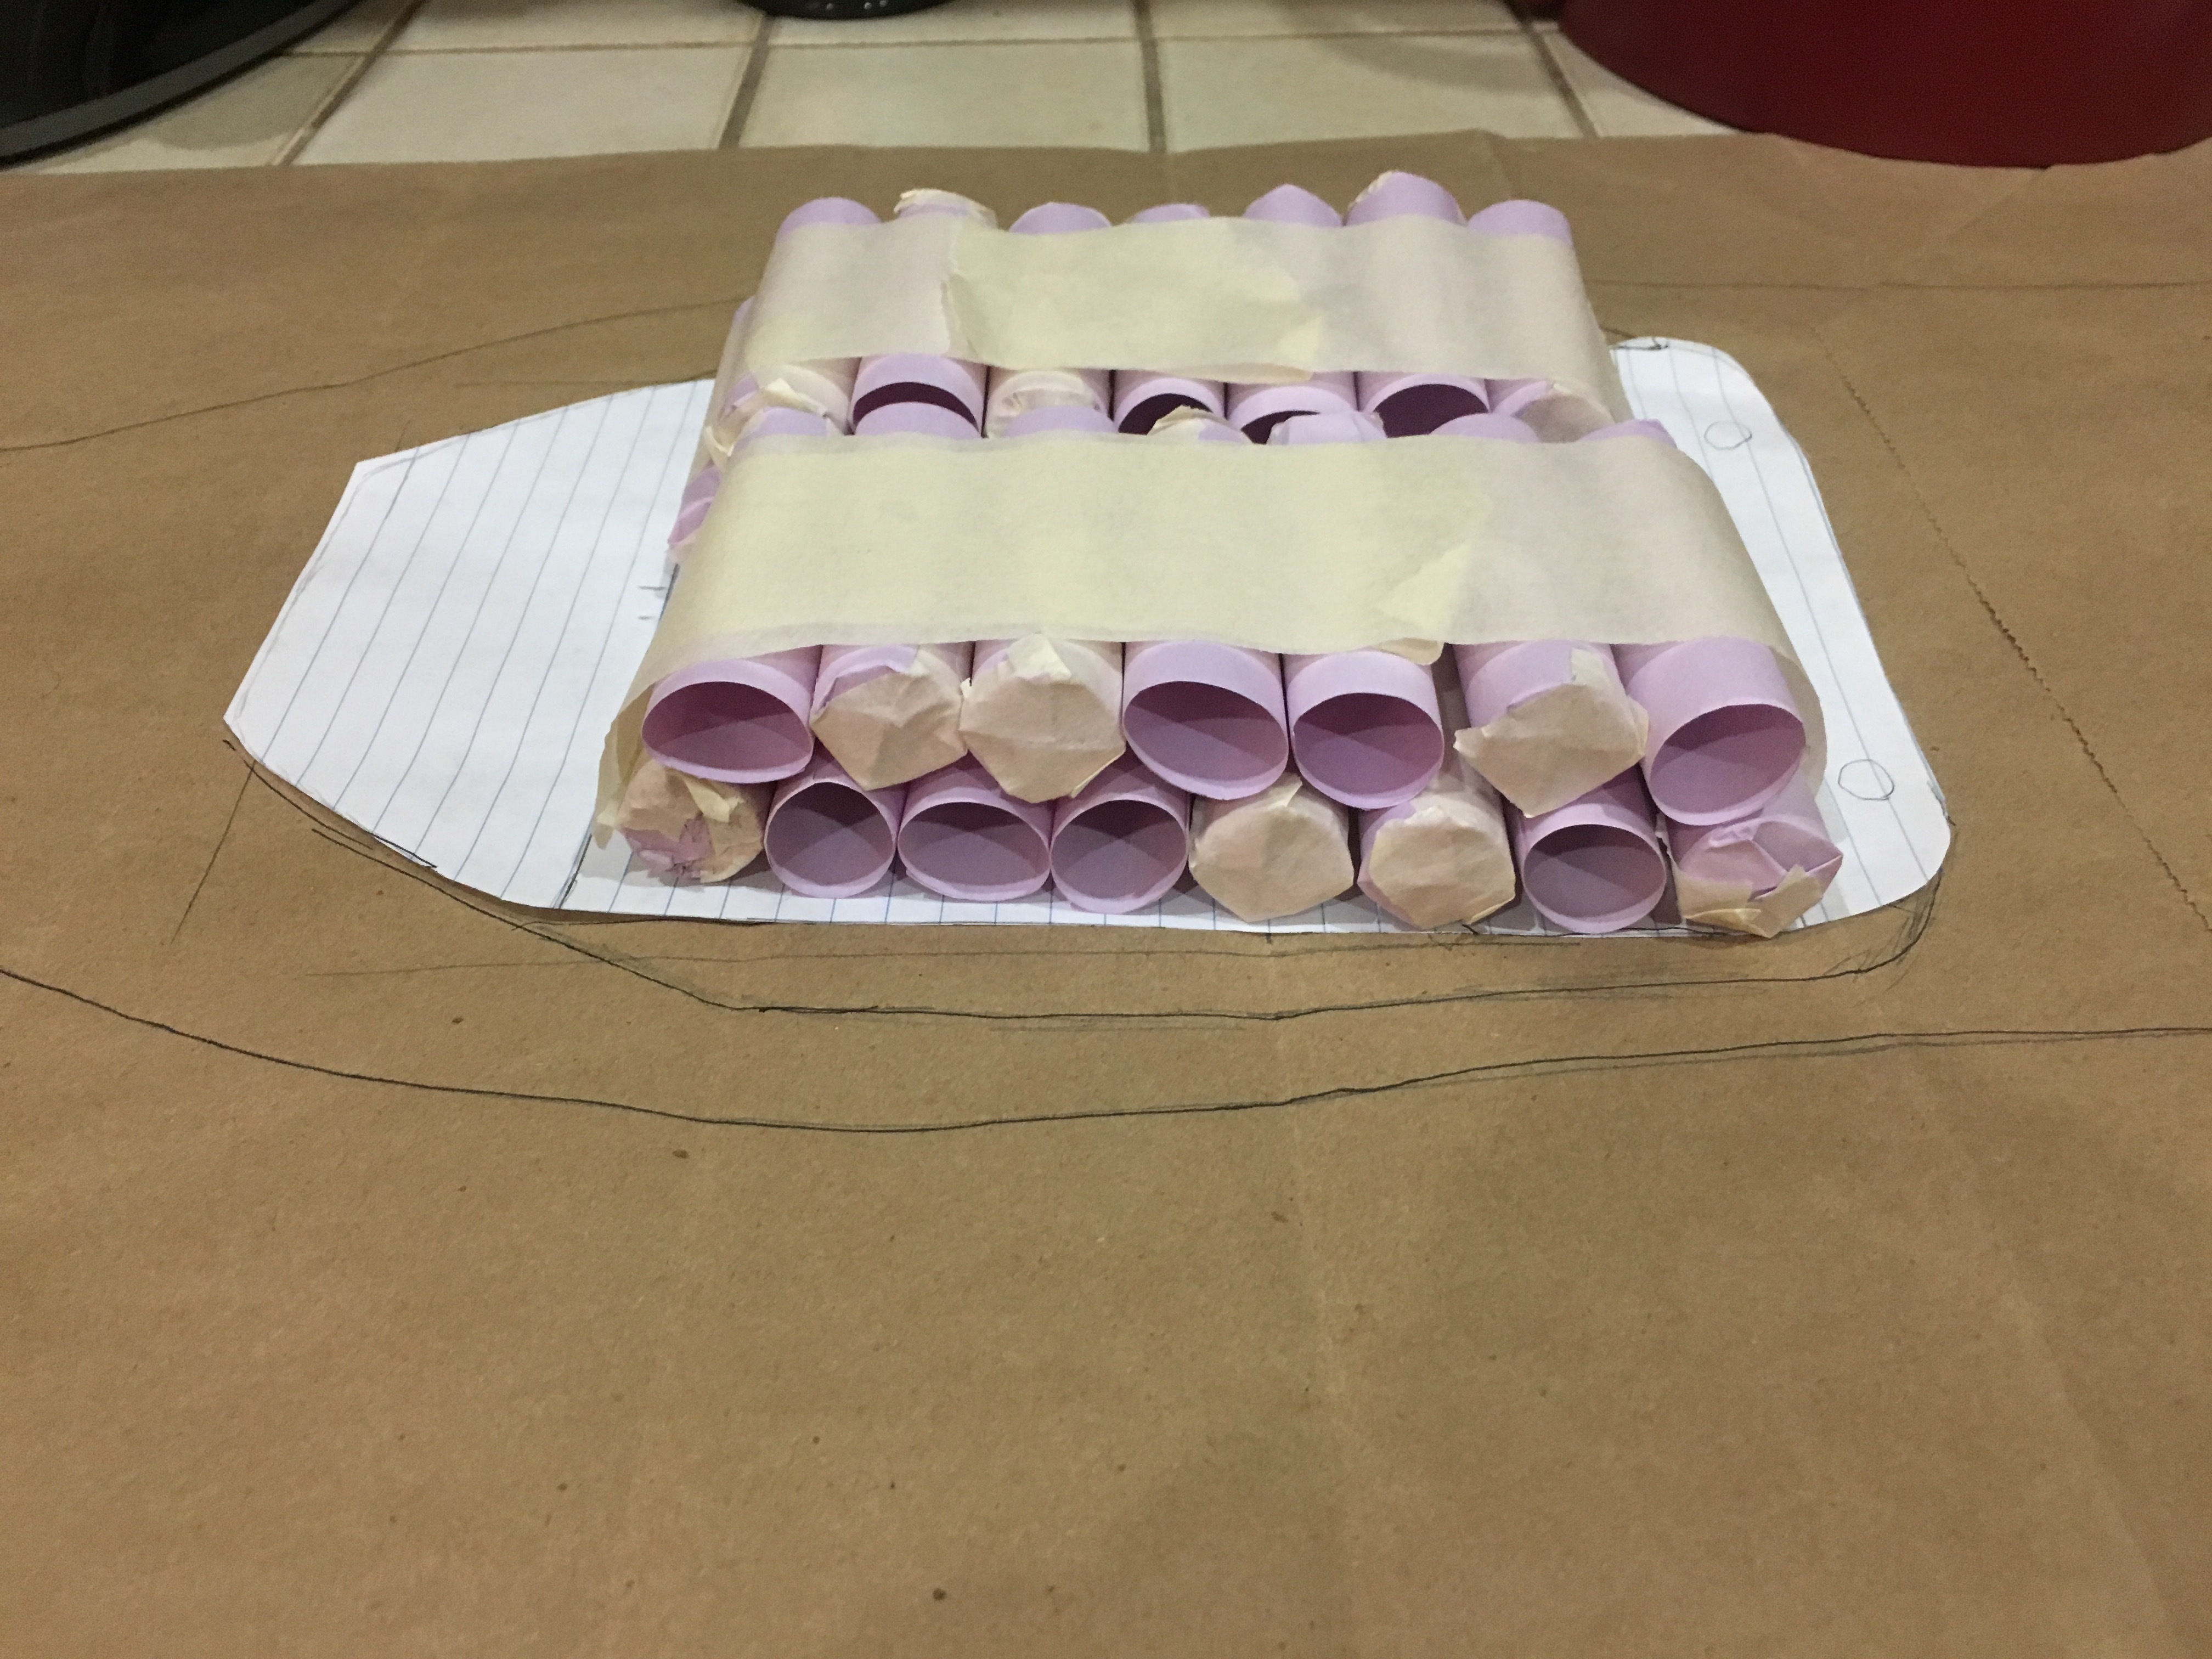
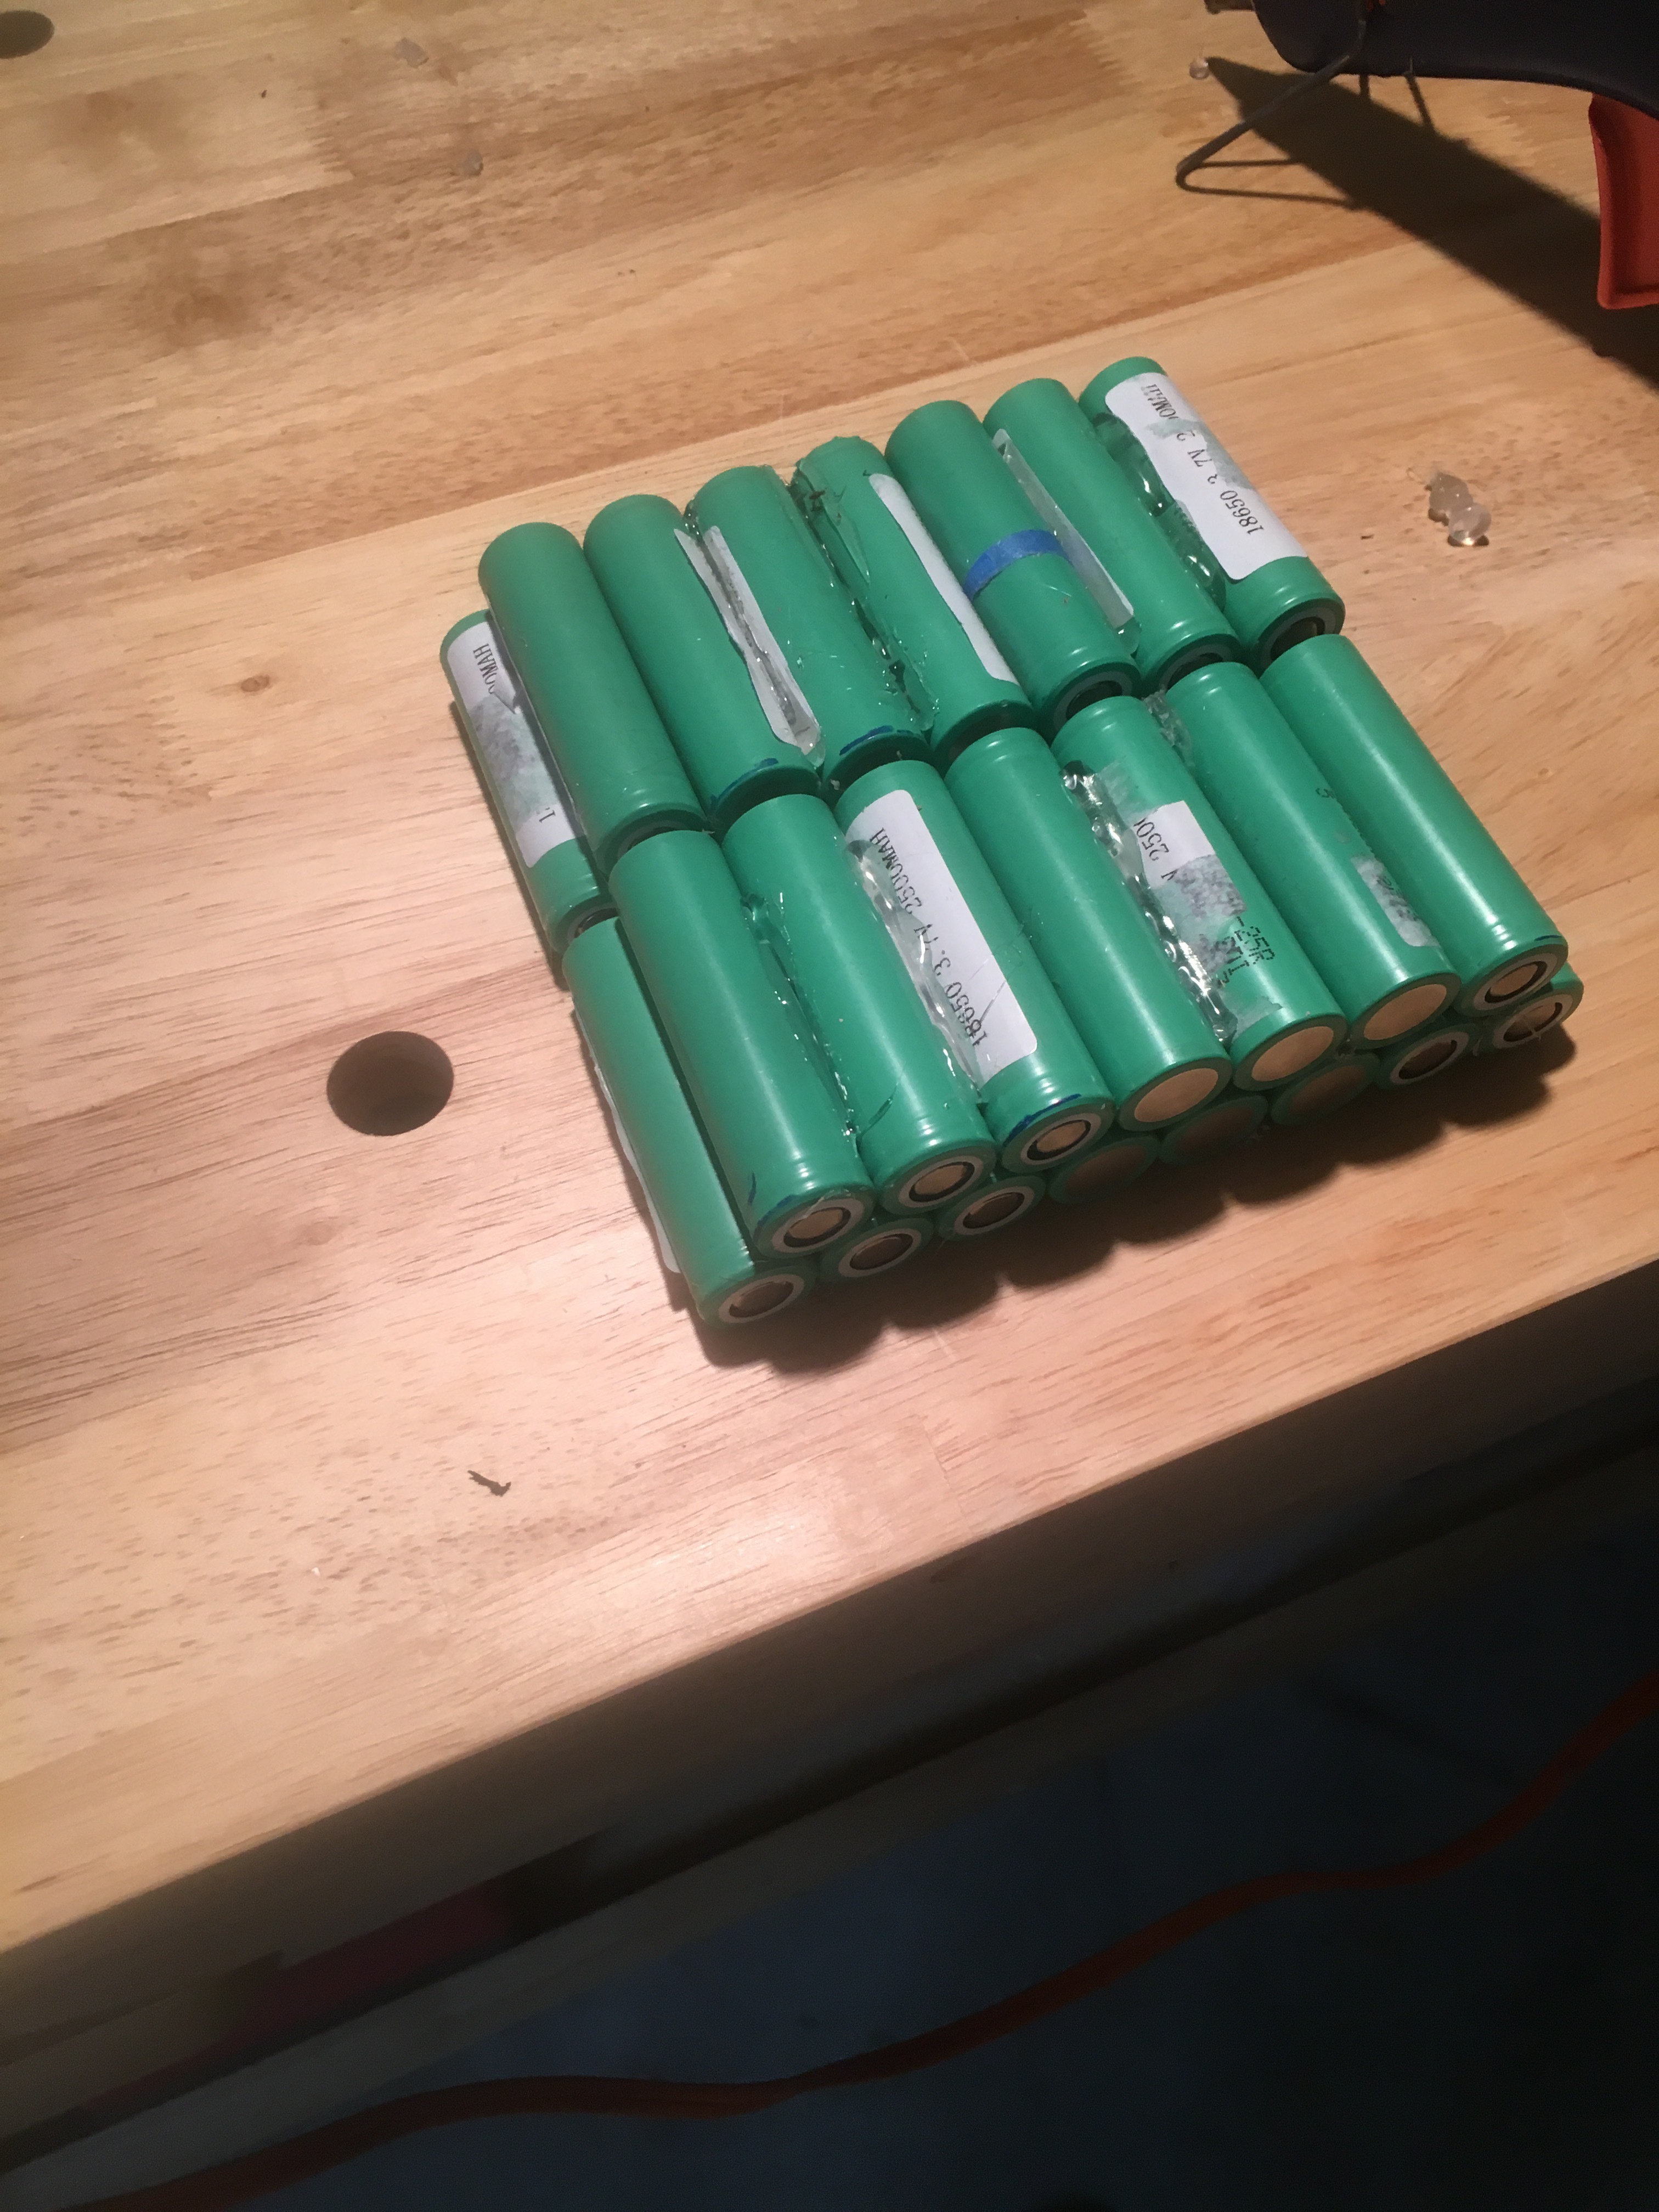
Here is my layout trying to fit 30 batteries into as small of space as possible. Should be easy right?
Anything is easy if you use a liberal amount of hot glue!
So it isn’t pretty, I should have laid it all out. I should have waited to bridge the two sides together because it was starting to work harden every time I flipped it over to attach the lead wires. Things learned for next time I guess.
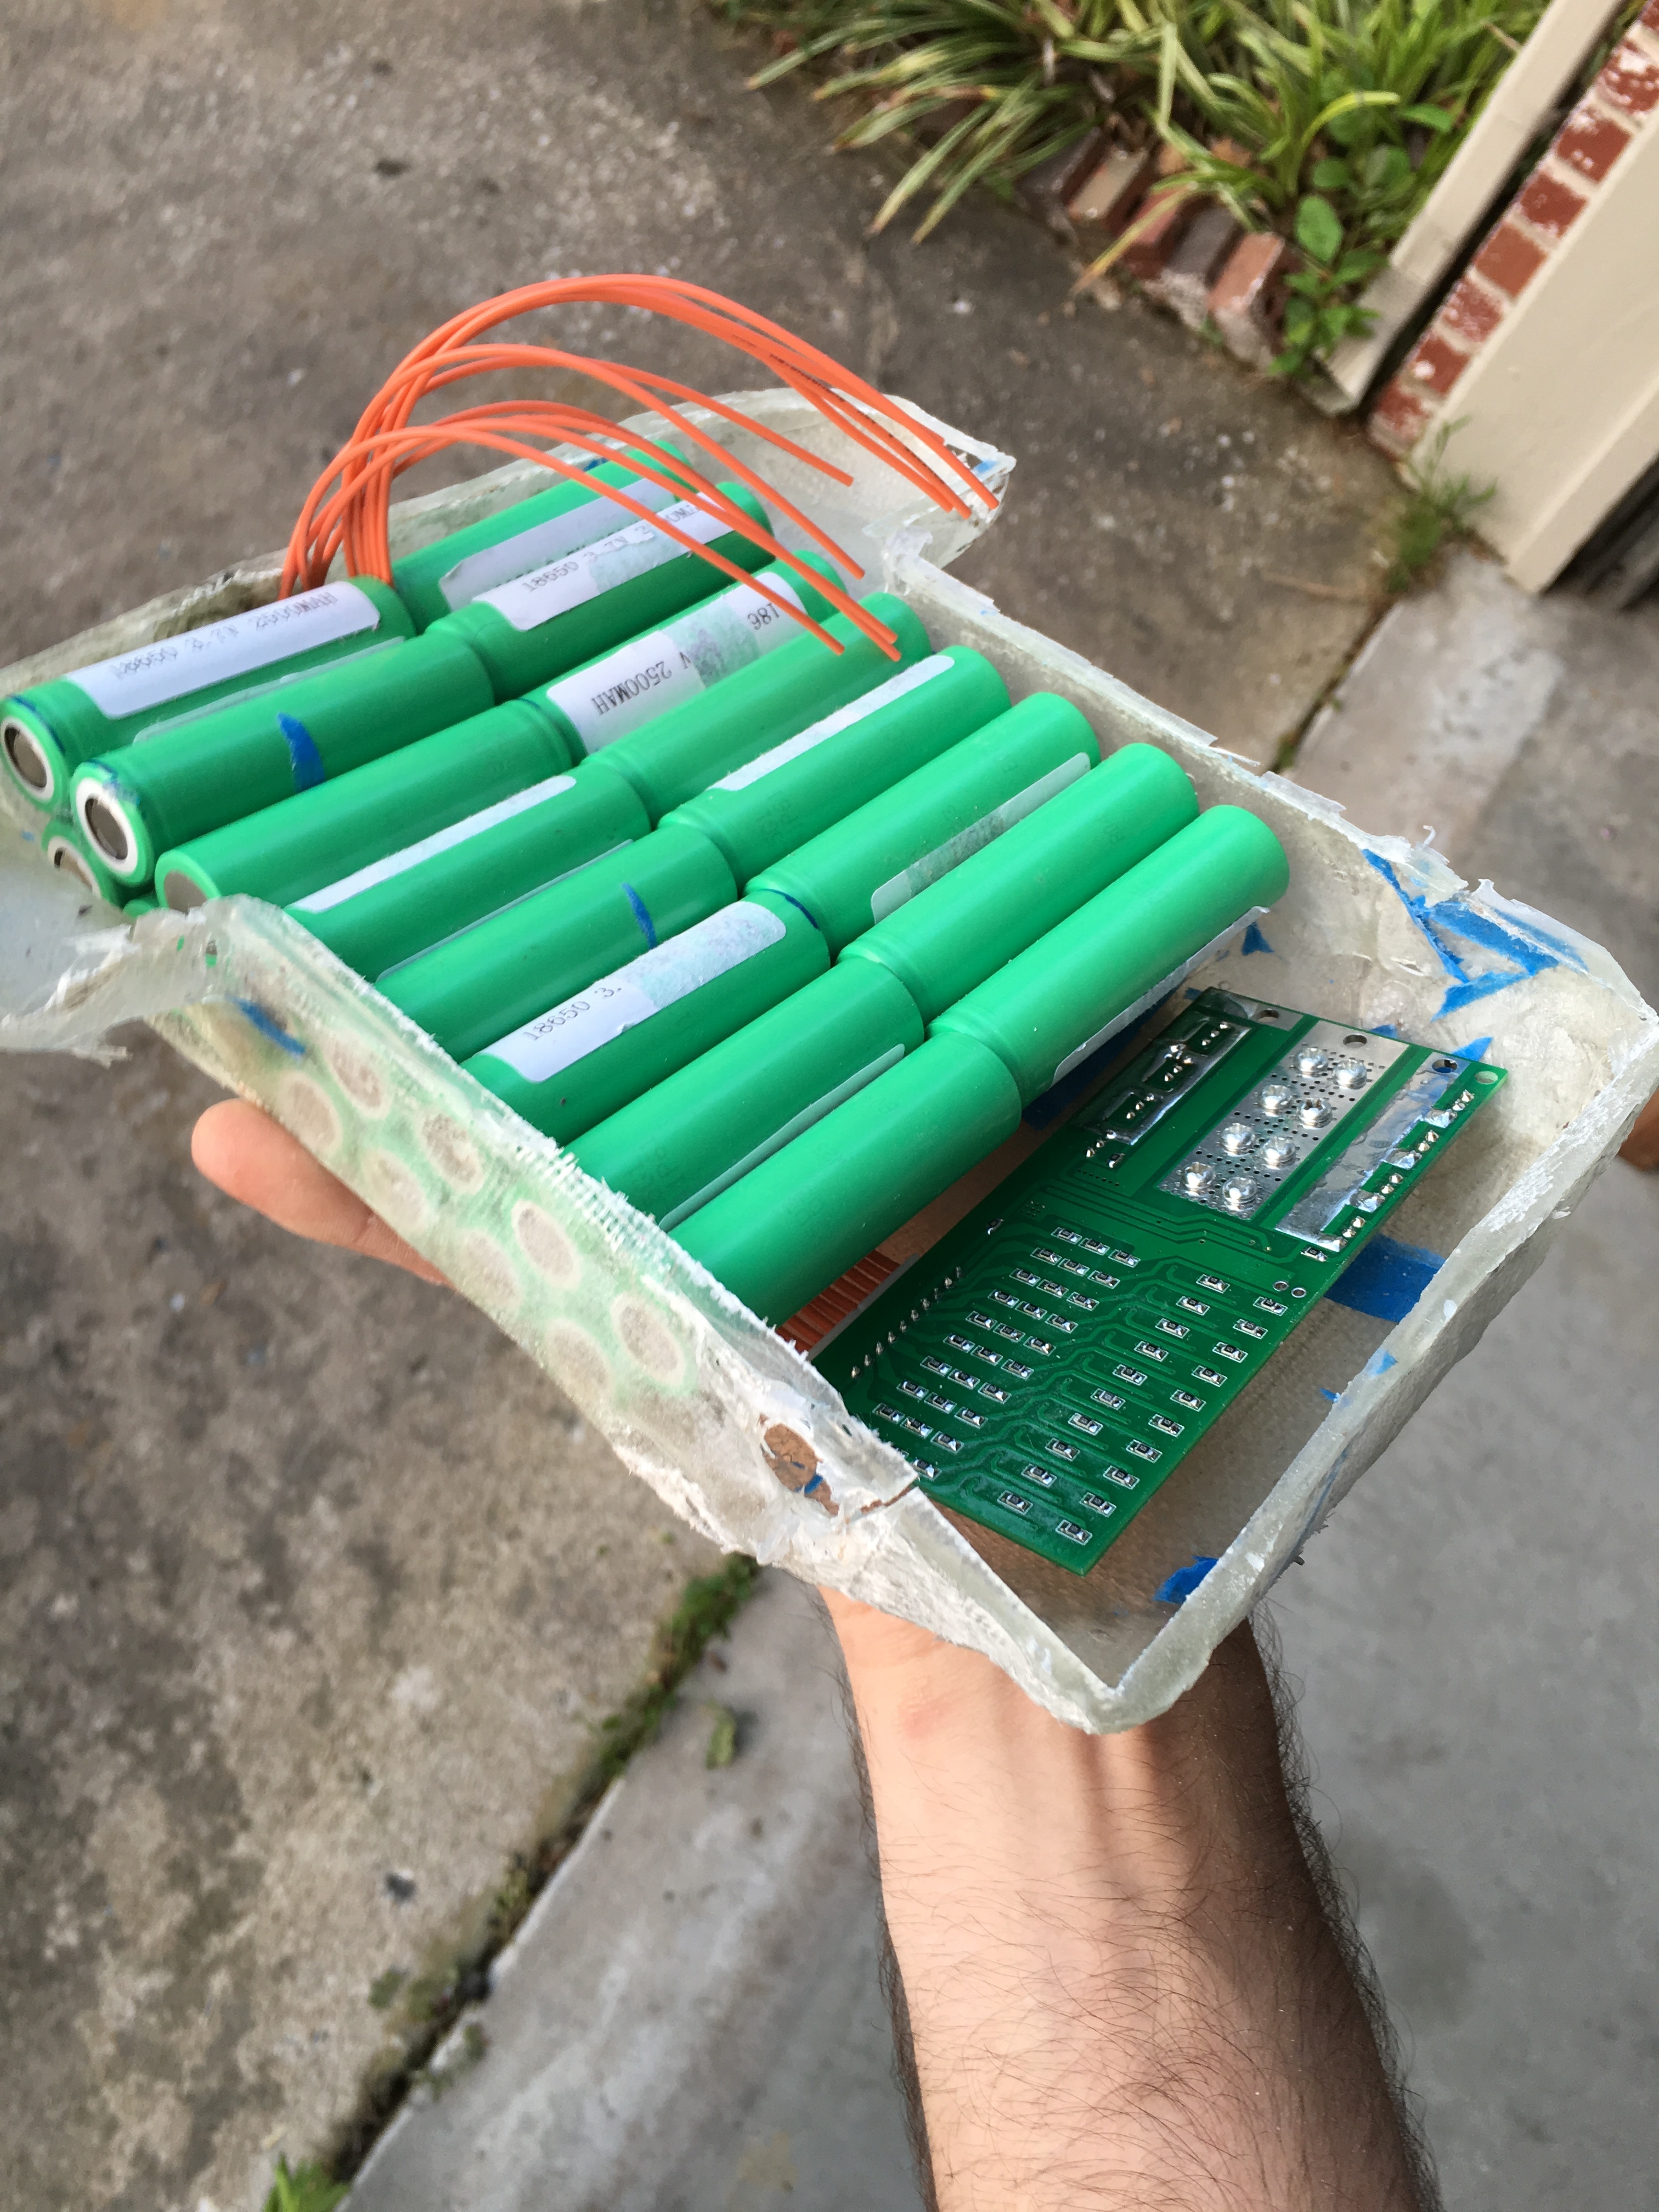
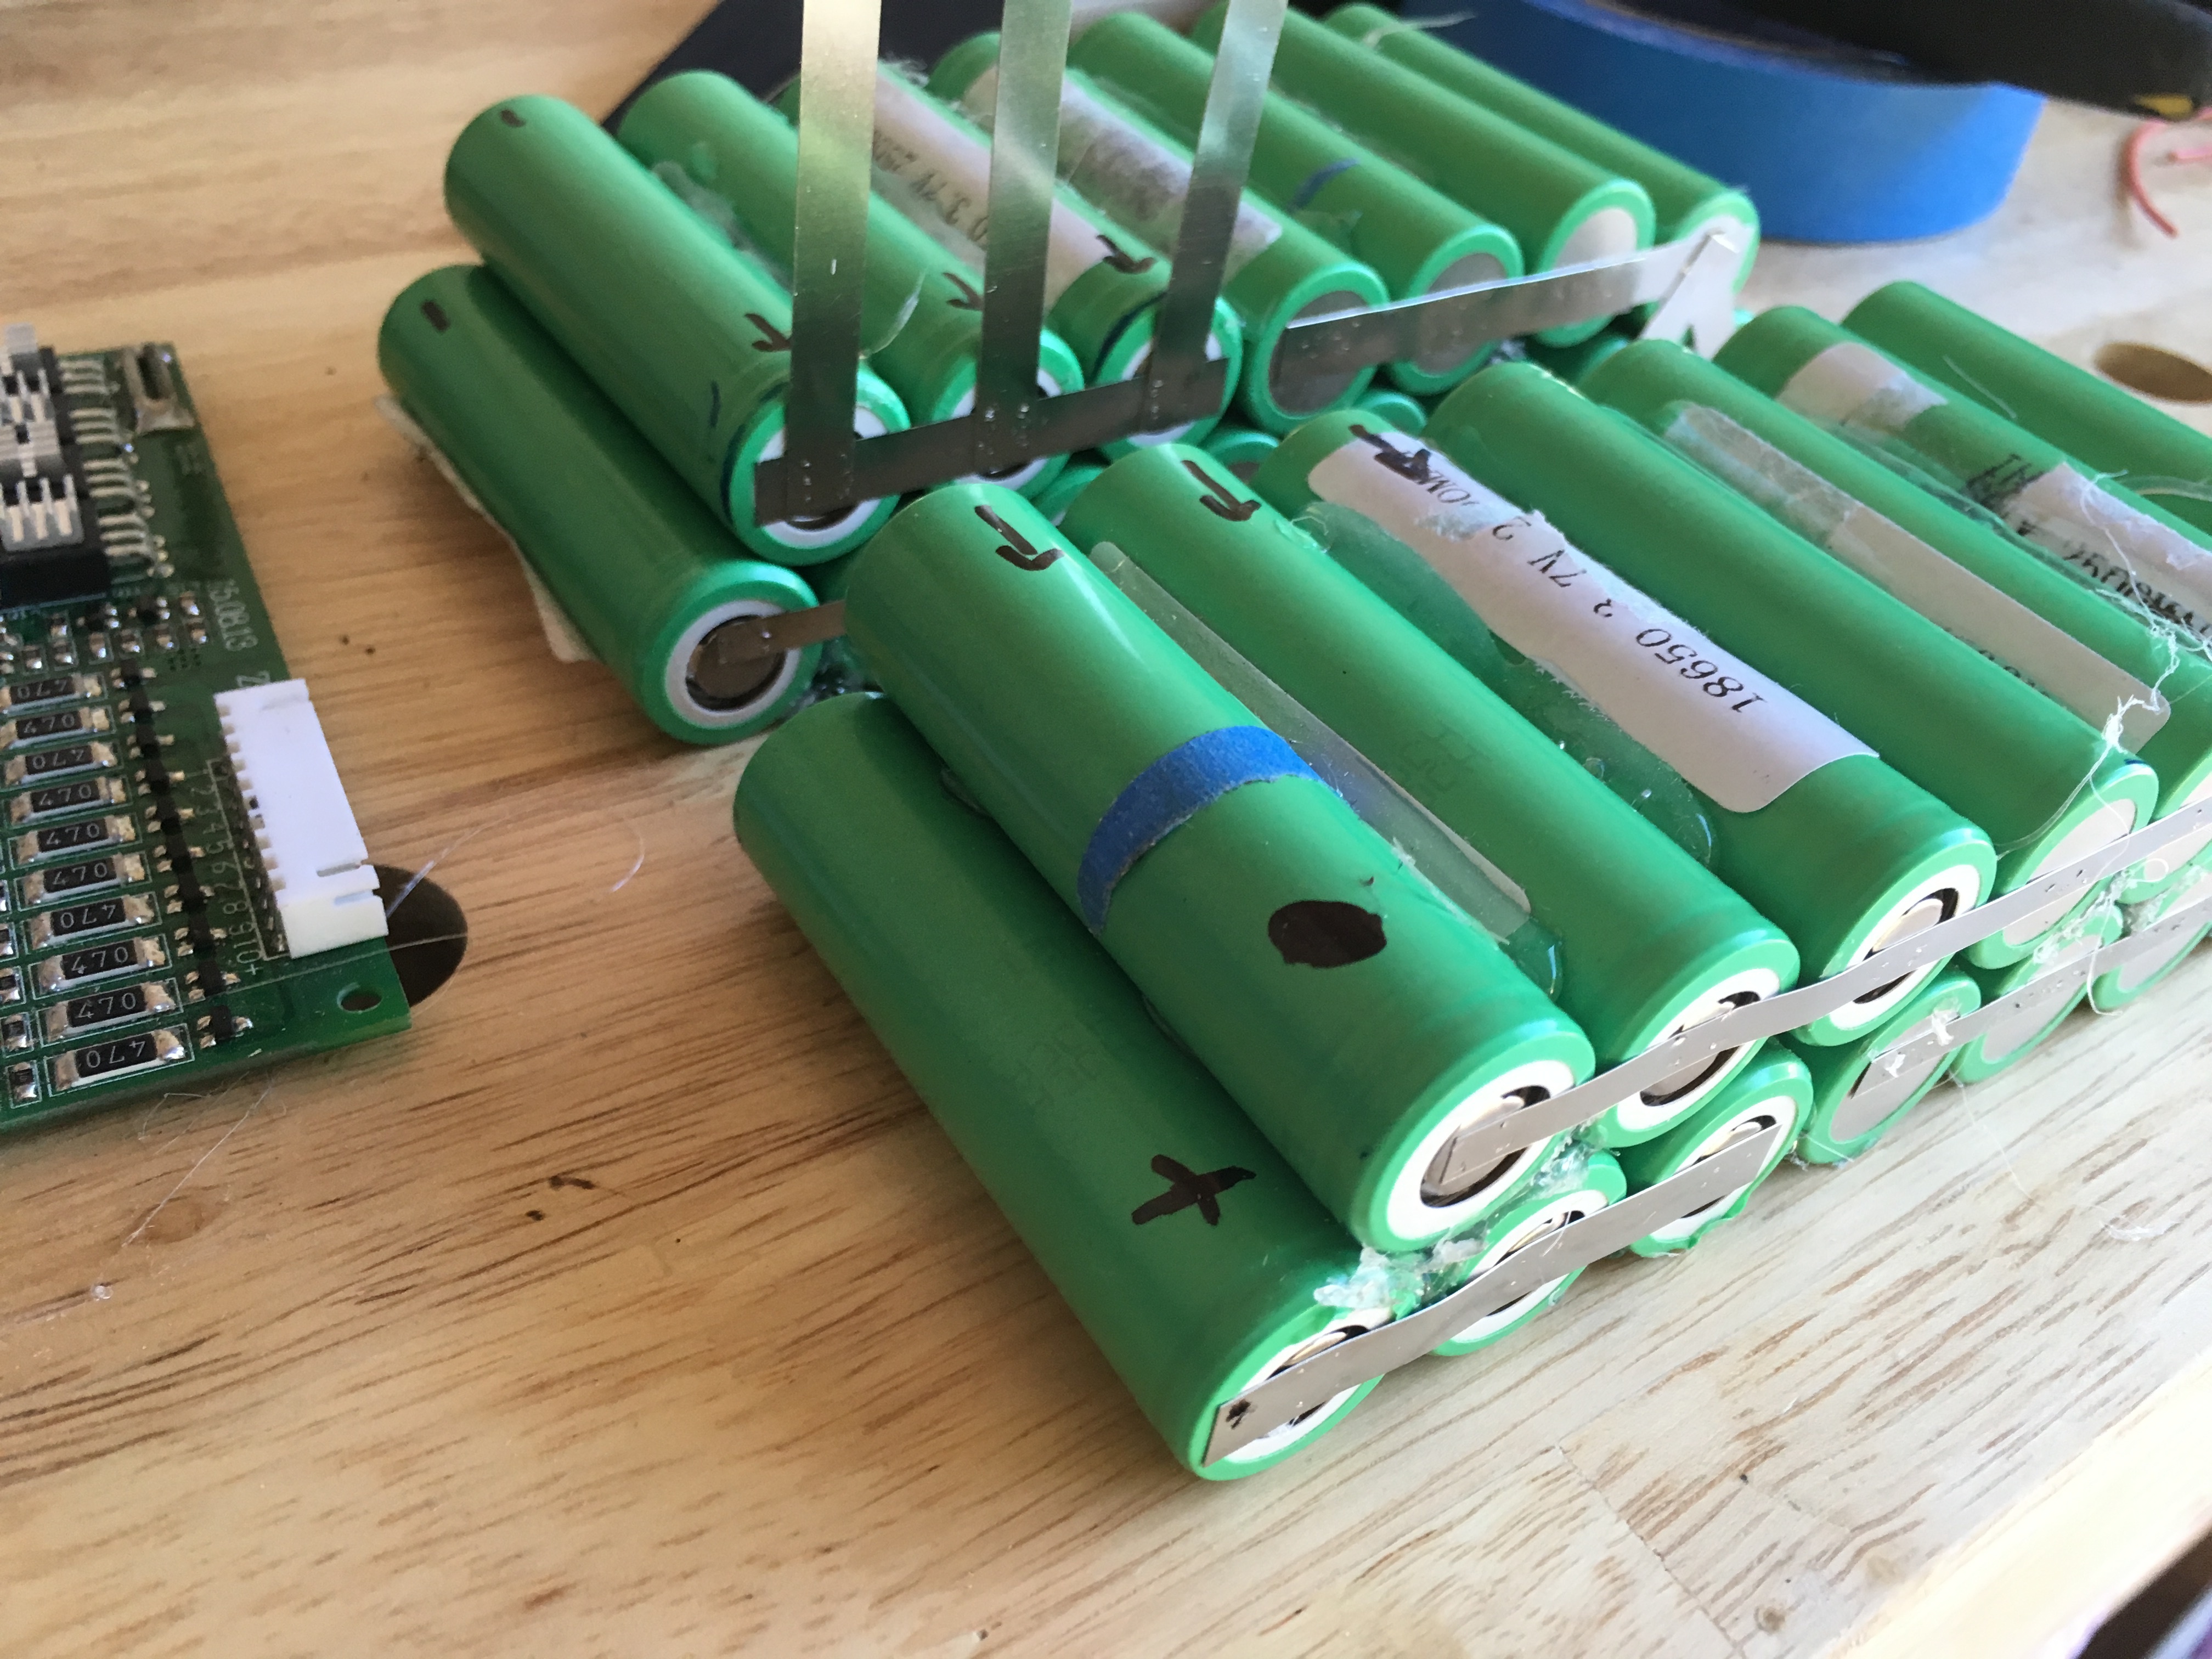
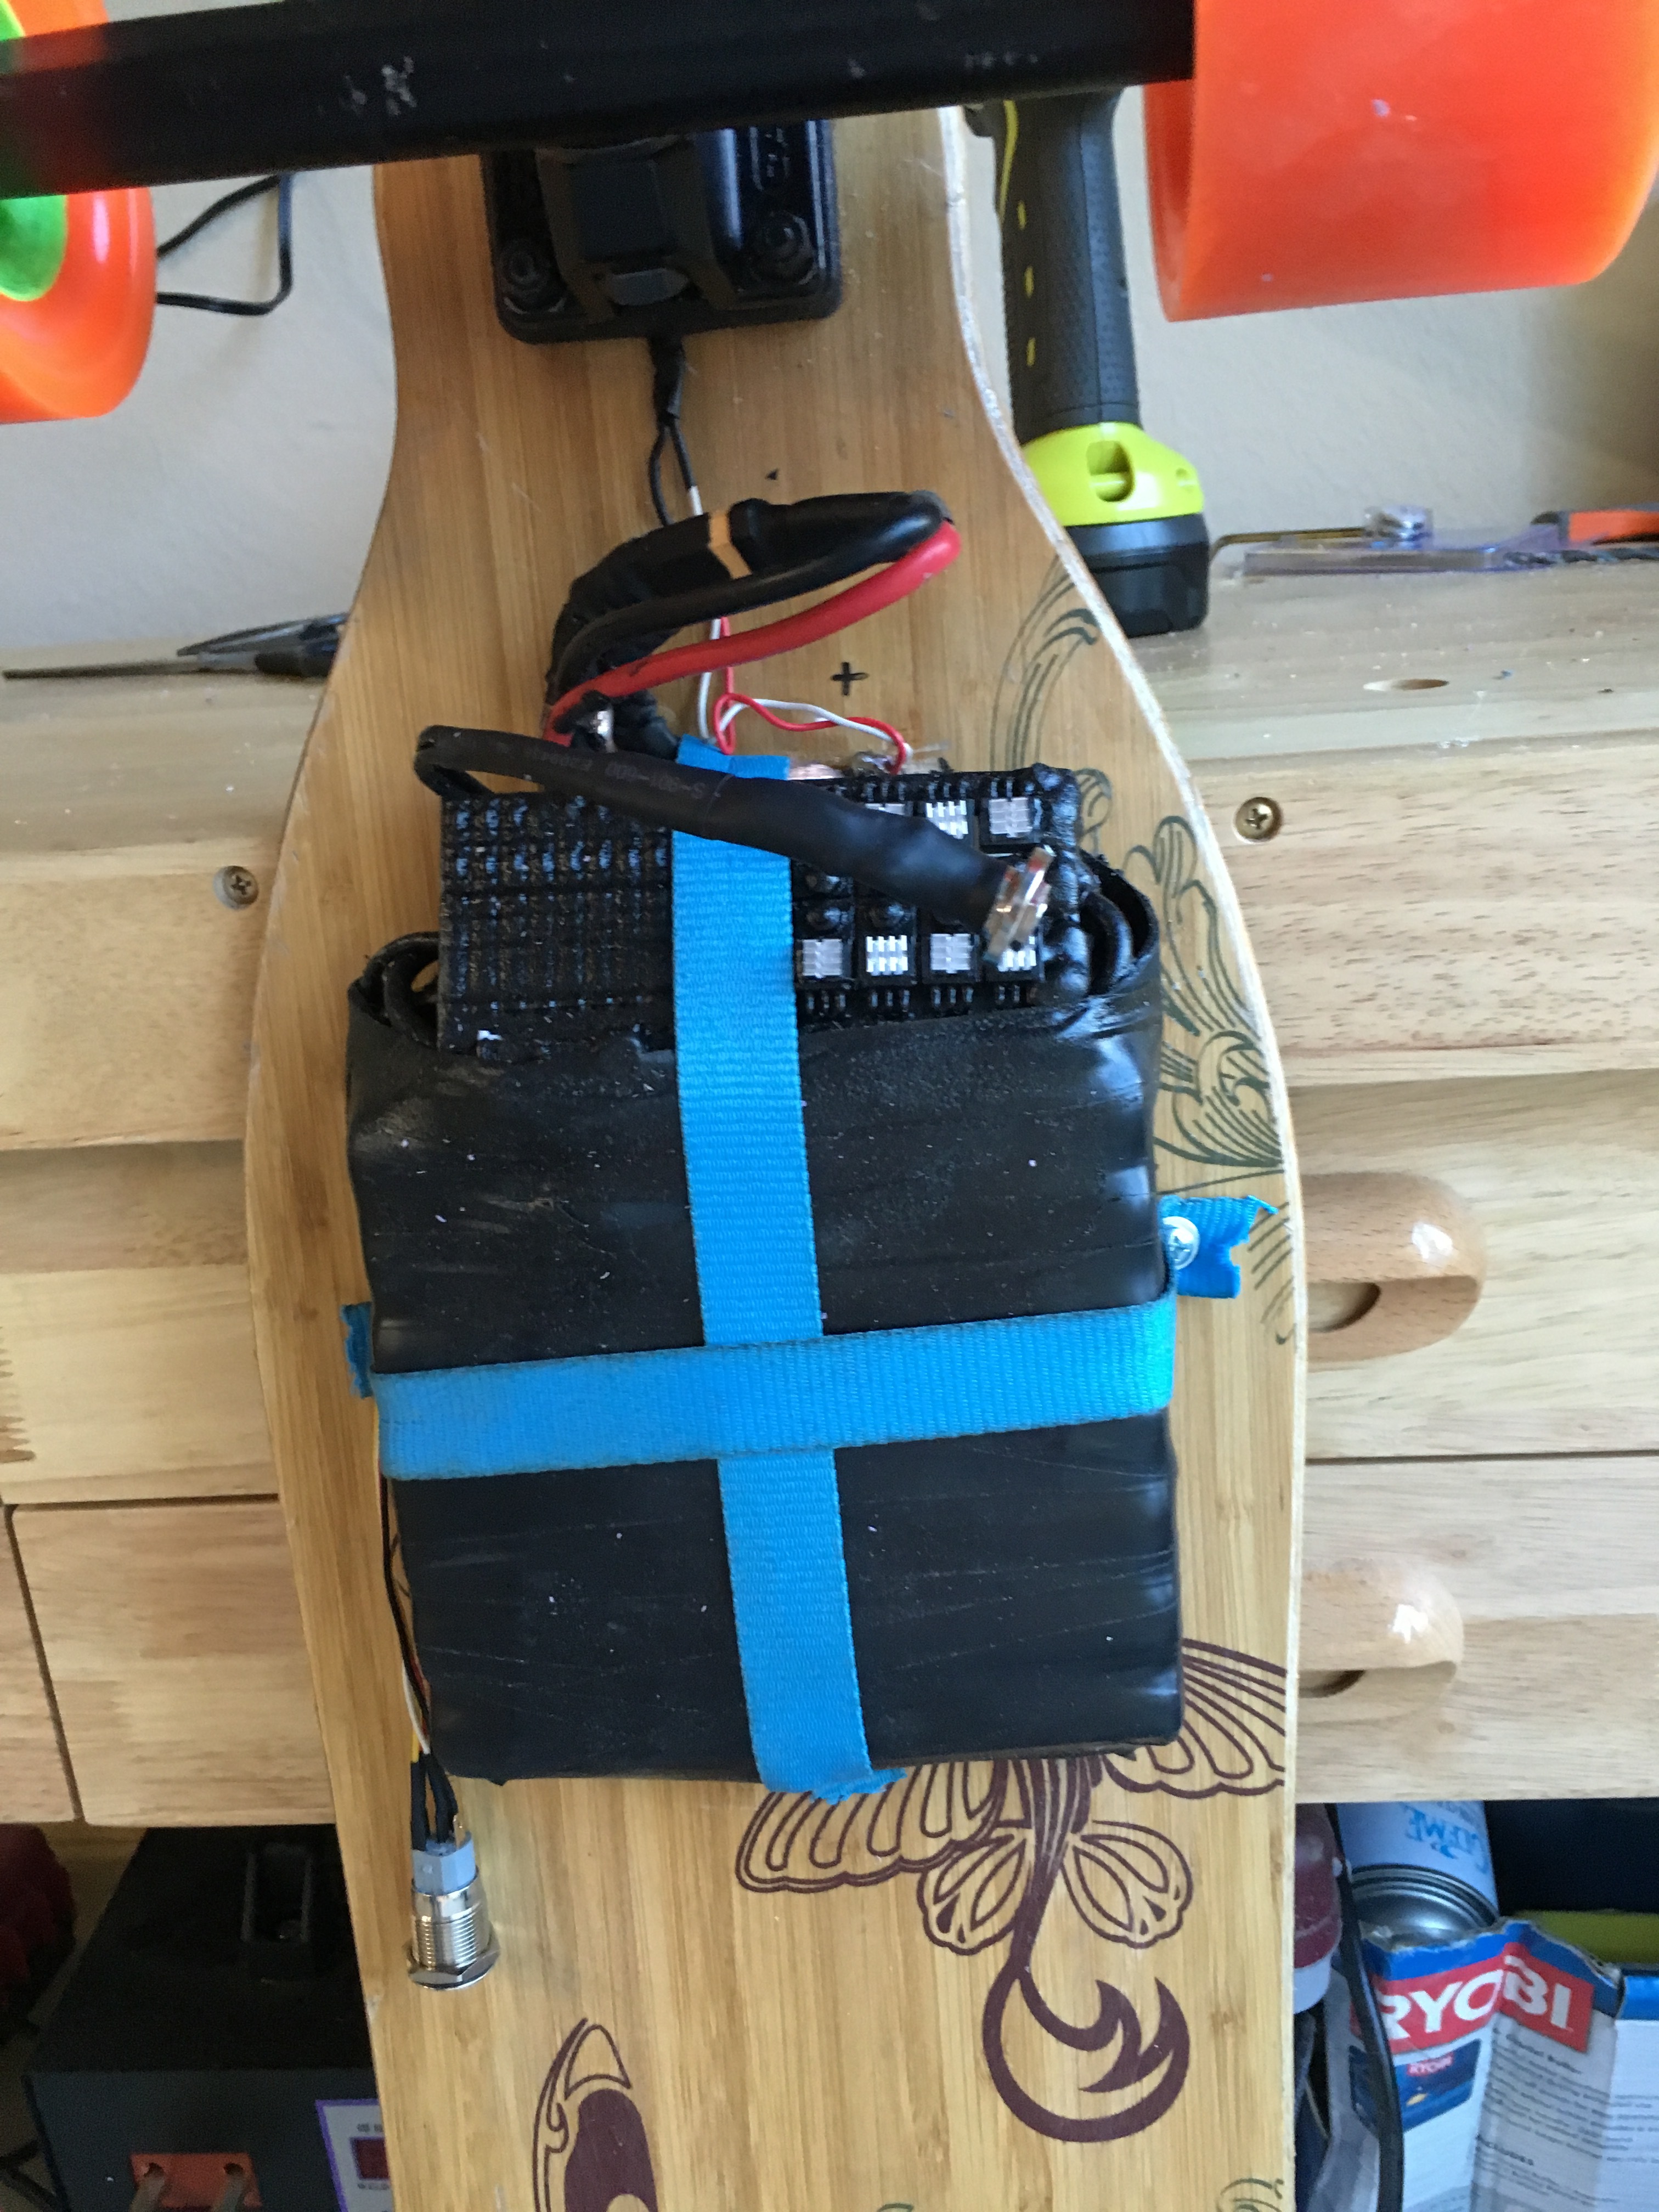
I decided to pack my switch into the battery itself so that I wouldn’t risk sparking out while building the battery. Now all my leads come out of it real pretty like. Well… Maybe 6/10 which is good enough for me.
I took some liquid electrical tape and sprayed down any open connections because I want to try to make this as water resistant as possible. I also found some heat sinks to put on the BMS and masked them off so that whole part has the best heat transfer. It gets hot in the summer here in Oklahoma so I wanted some sort of help on that.
With my inability to build a paperkura type enclosure then fiberglassing that turned into a pile of bondo (I will upload pics later) it looked great on the outside but it ended up being a mess on the inside and couldn’t hold a thing.
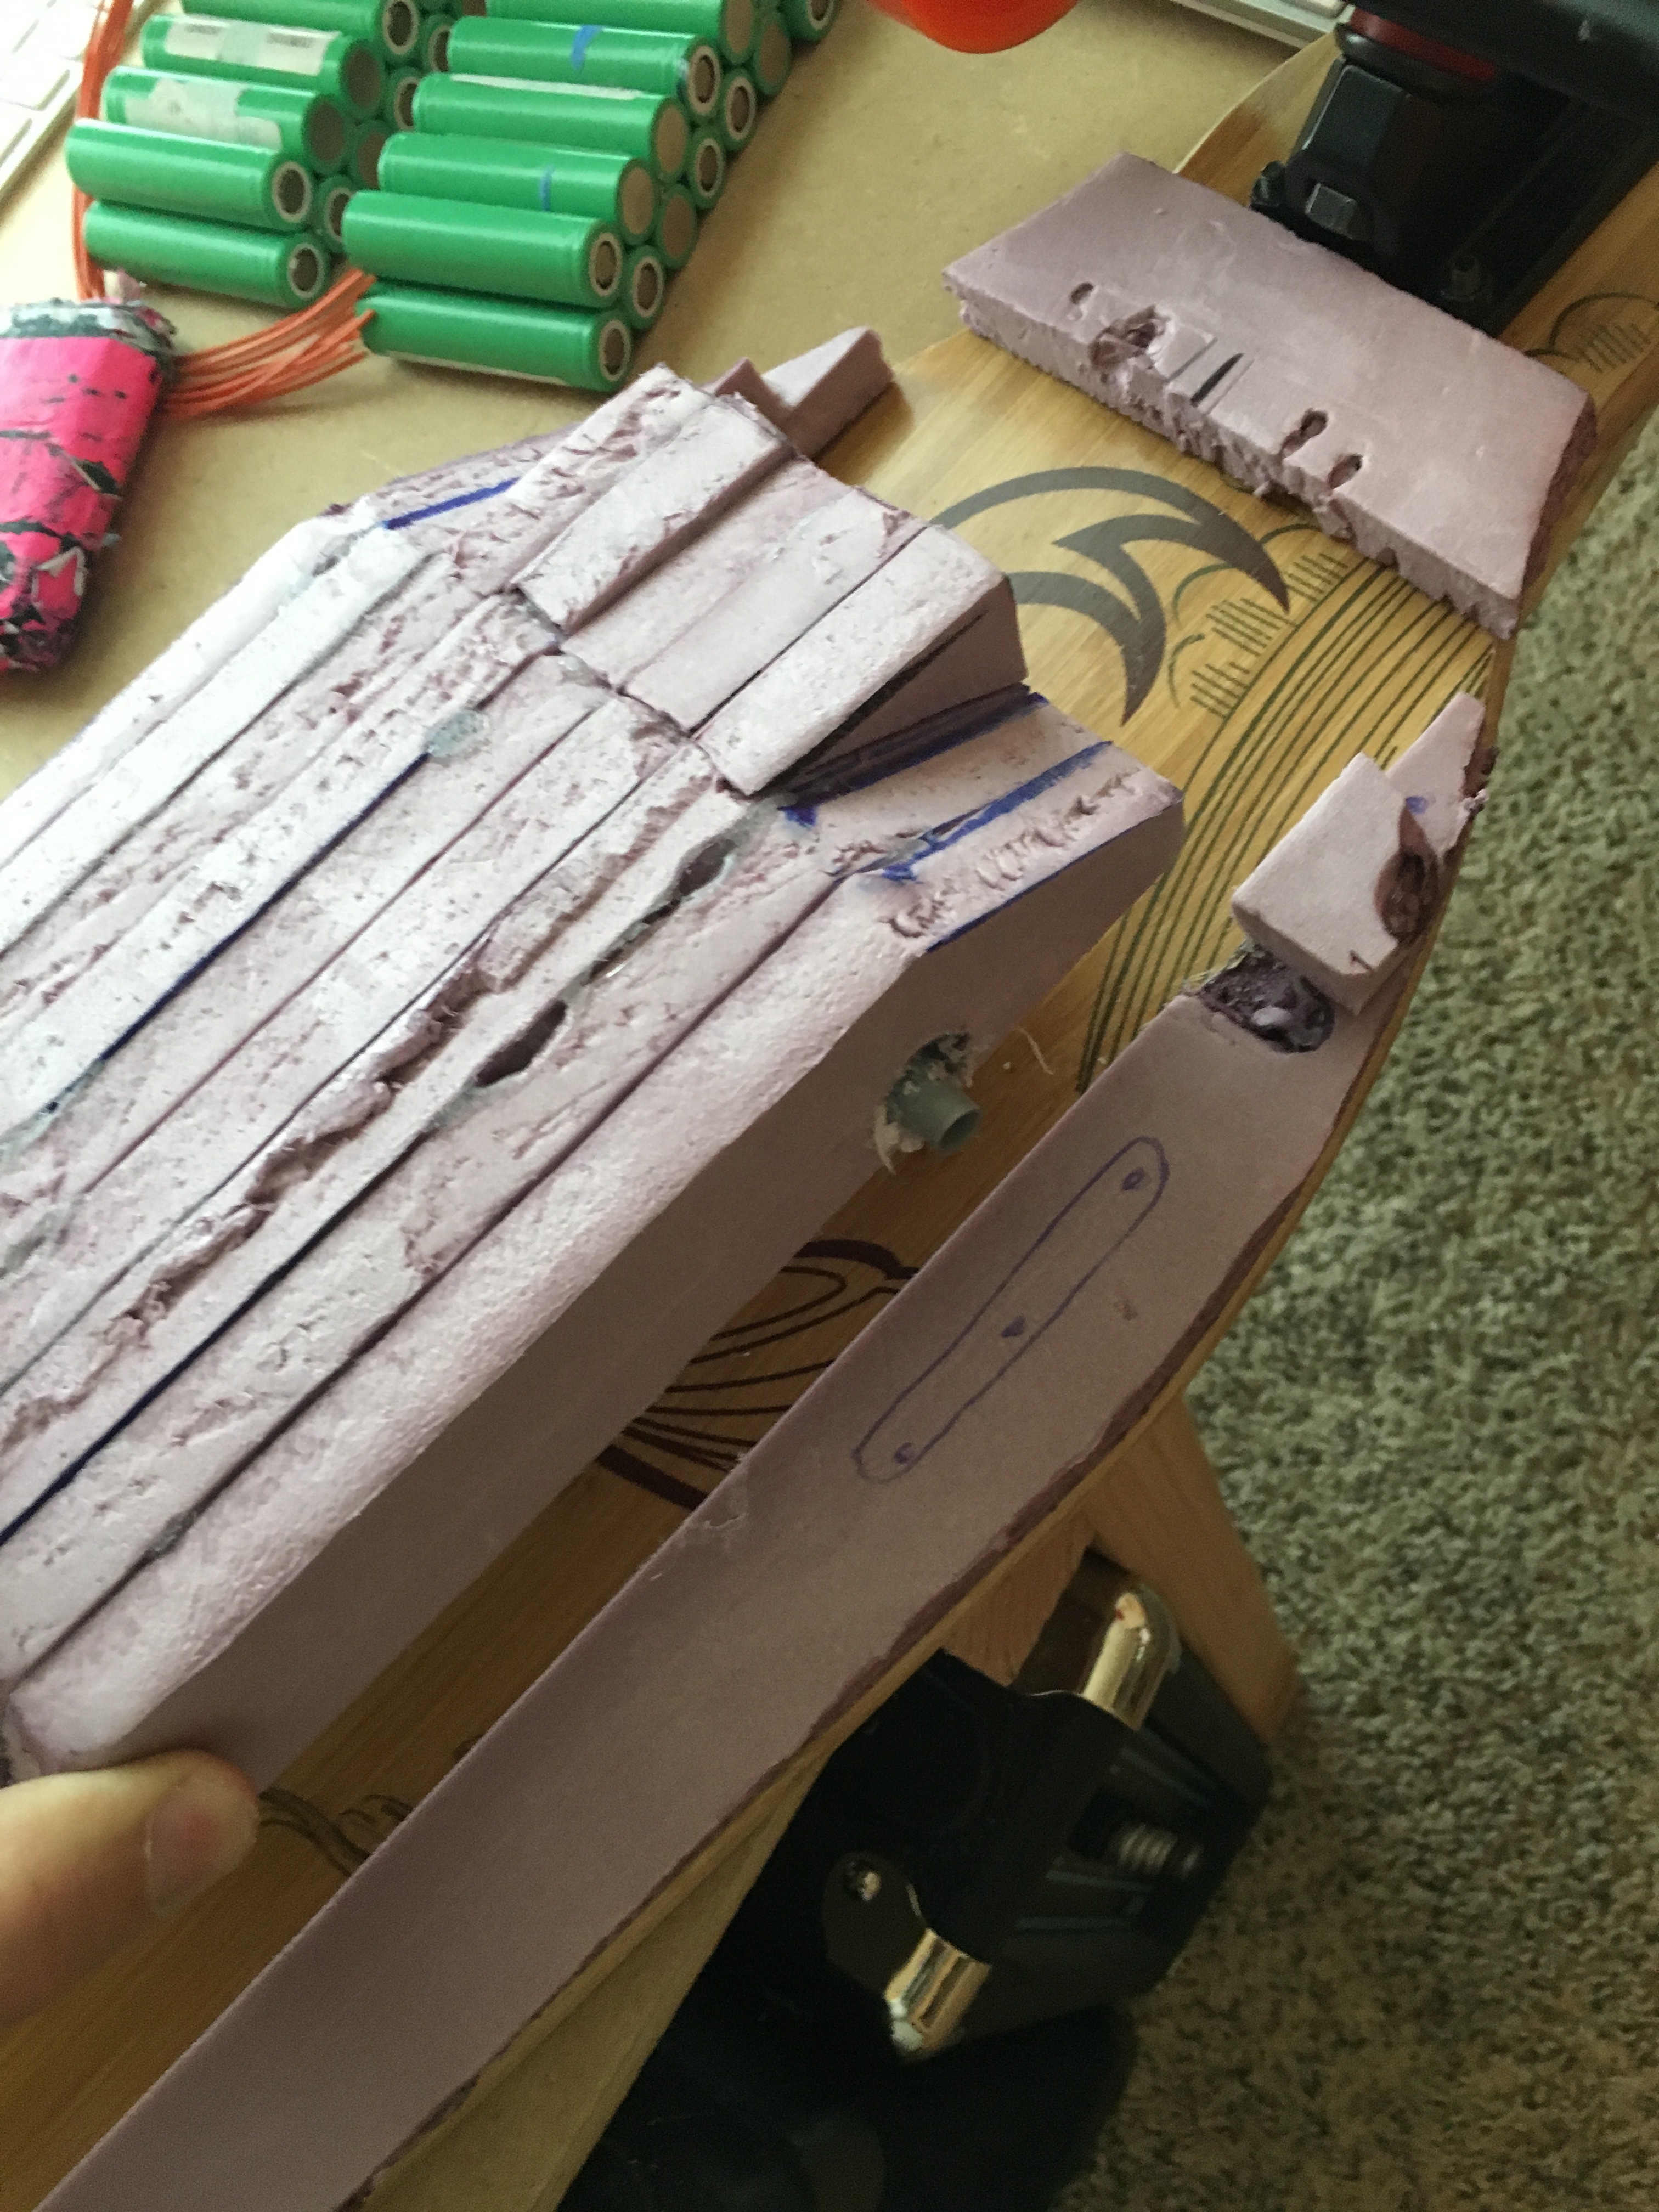
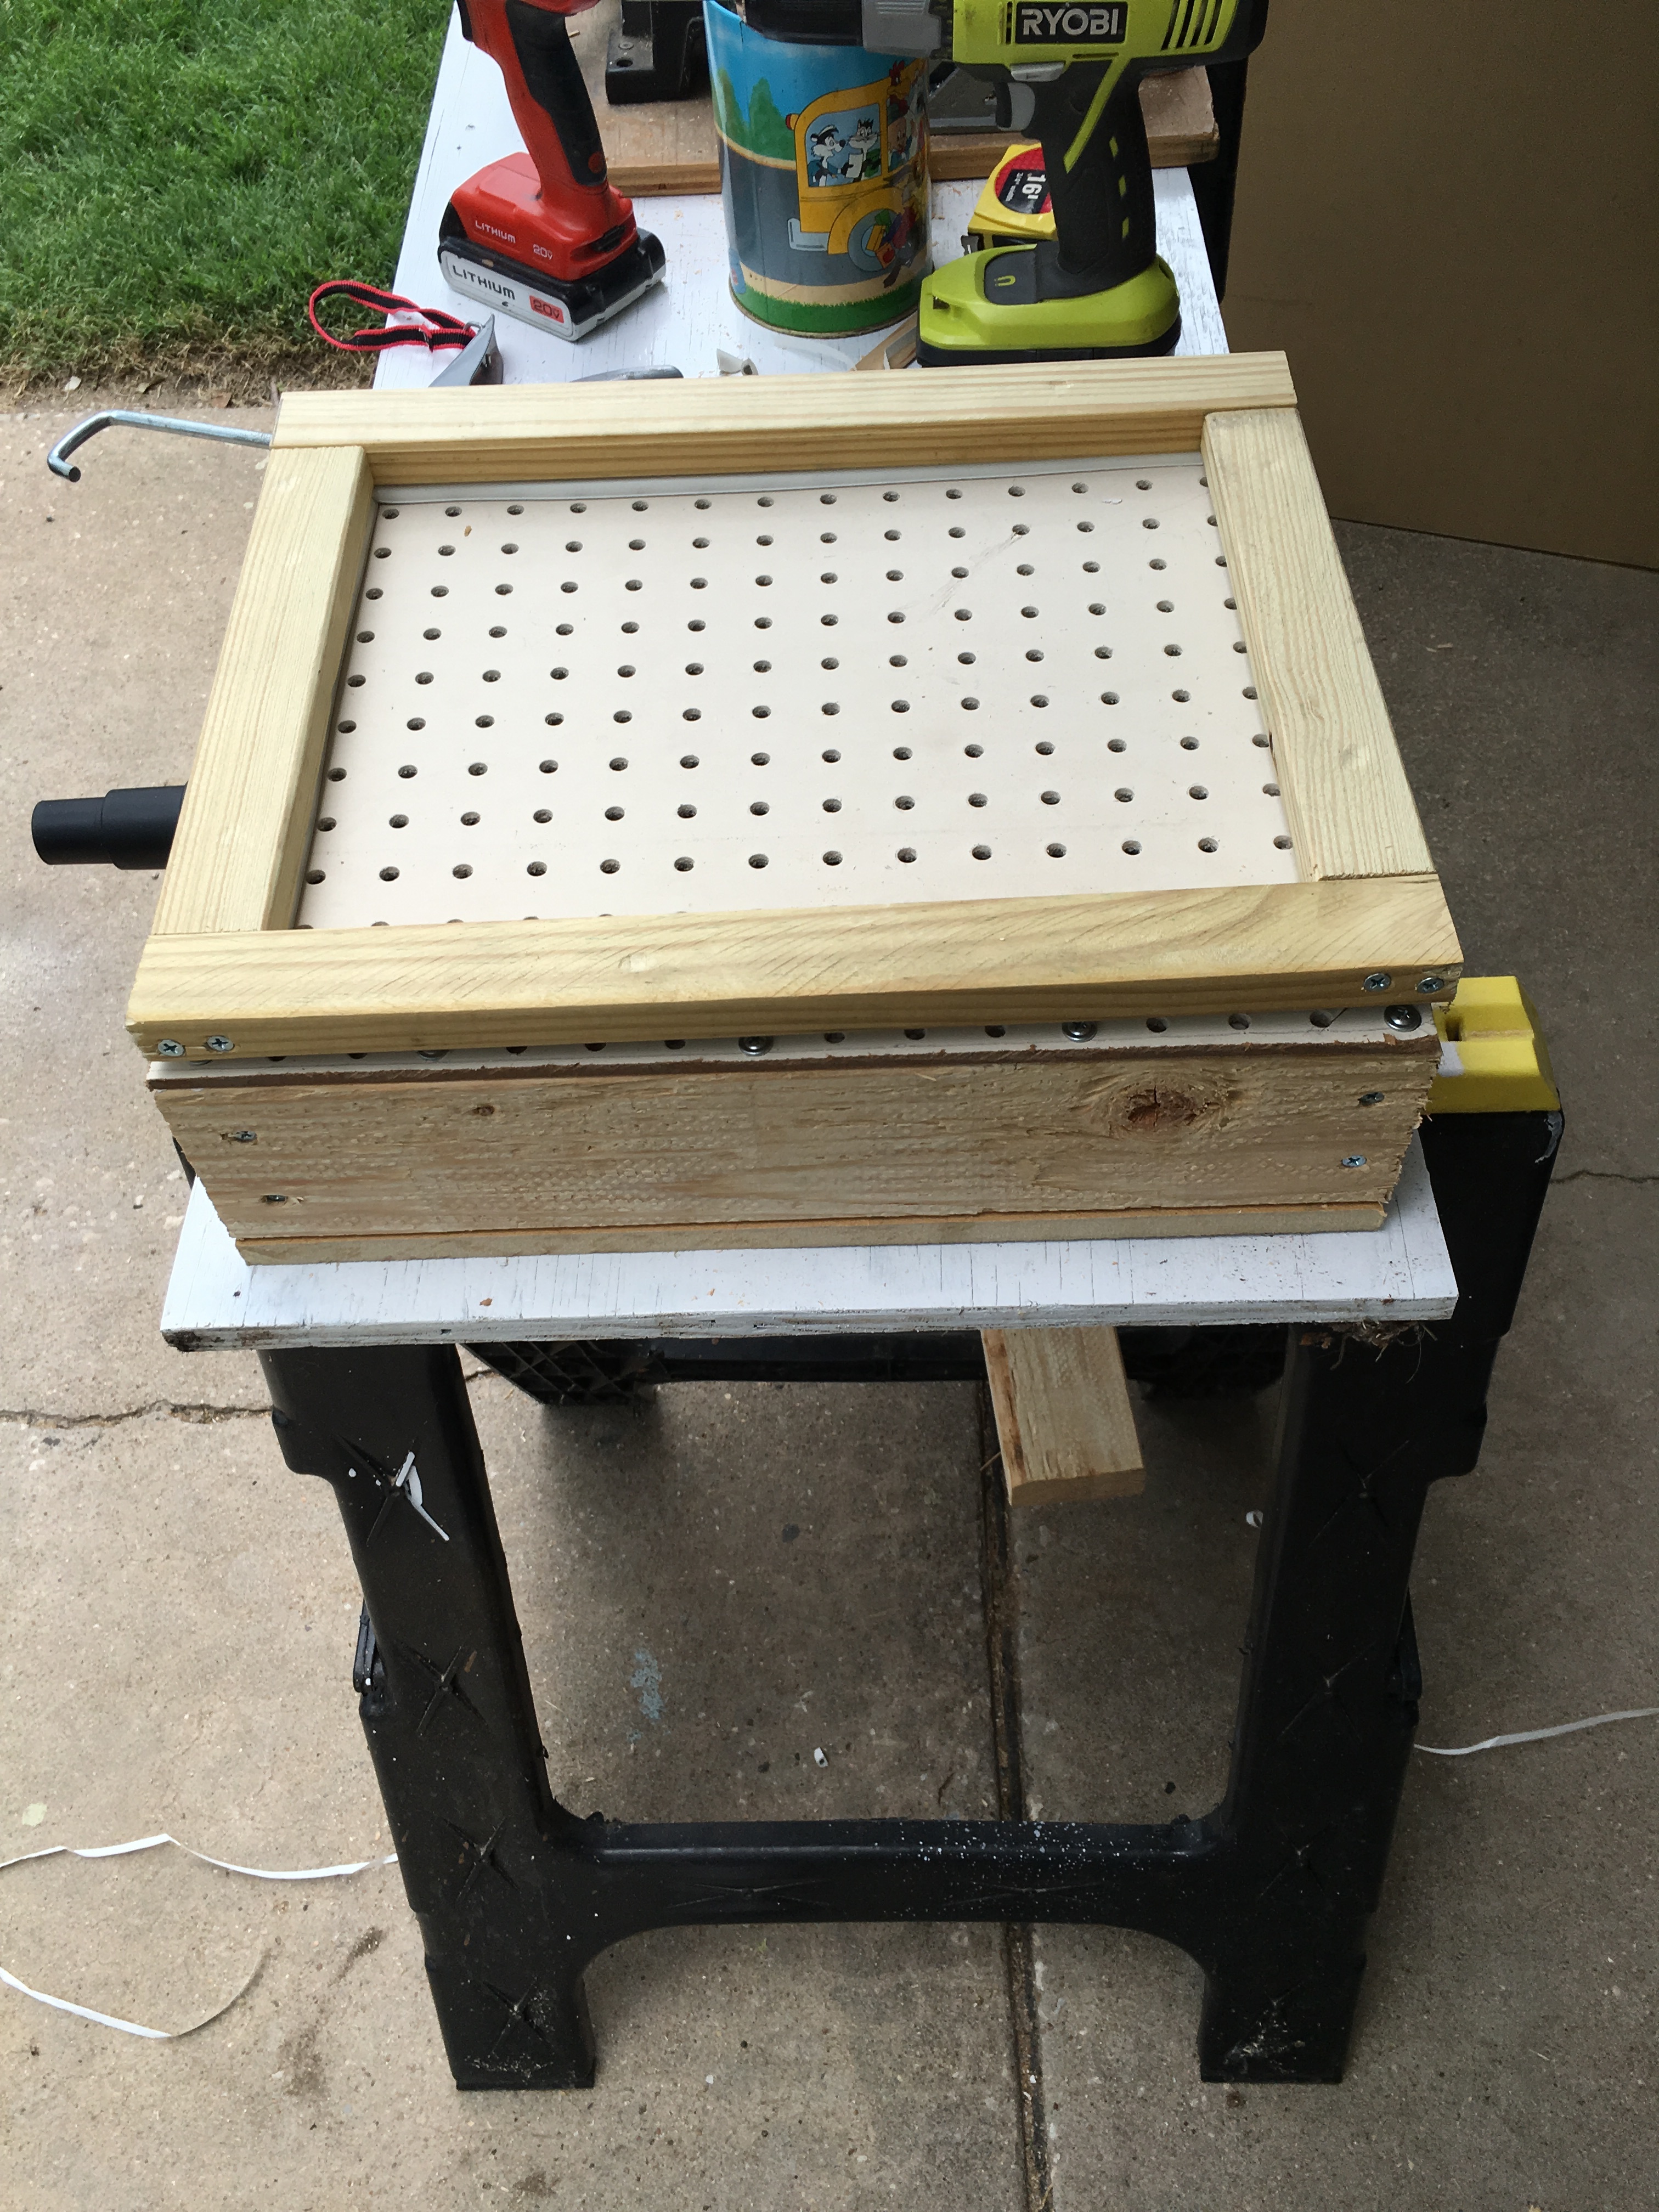
So I turned towards vacuum forming some plastic. I need to build another mold out of more pink foam… So that will be exciting… not really.
Here is my vacuum forming box. It works great and now i just need to make sure my oven is fixed so I can heat up the plastic. (stupid rent house)
So I have my motors laid out and ready to install. Having these was probably what made my wait for vescs worse because I had to just look at them on my desk for two months with nothing I could do about it.
I have these angled risers to give my motor more clearance without actually giving that more height. I also decide it was a great place to just mount my LEDs for the front and the back. They don’t light up or change when I switch but they work for marker lights and that’s all I wanted.
Now I am kind of playing with the bldc tool to see what I like or don’t like. I’ll probably keep playing with that for a while.
Next I need to get this all attached to the board and make my enclosures. It’s sooooooooo nice to see it run though. I just sat there running it for probably a good 45min because I liked the sound.
Uploading…
Nice build and appreciate the walk through in it. Looks like a fun build, even with some challenges and re-do’s! That’s almost as fun as the end result - learning and improving!
I’ve not tried the UV cure epoxy - just the simple old 2 part. Surprised a bit at the delam, wonder if not fully cured, or did you not sand to the wood to give good adhesion? My first try at some GF with poly resin SUCKED - i pulled it off w/ my bare hands afterwards and it stunk up the garage for weeks! Started over and used epoxy next - no problems!
I’ve tried the pink foam too… simple in theory, but actually pretty hard to get it just right for me it seems. I’m playing with some MDF currently and going to try CF hand layup for my enclosure.
The delamination happened because it was just one layer and I didn’t vacuum bag it. I don’t think it got a good grip on the wood.
Also one of the things I learned with the UV curing stuff is that if the sun is your only source of UV light, that last hour of light before sunset also known as golden hour makes great photos but does not have any UV light in it at all.
It never really sets up then smells bad and makes your house smell worse when you put it next to your AC inlet. (Long story)
Also it probably delaminated because I put the trucks on it then jumped on the middle of the board like a good 20 times like it was a trampoline. Glad I did that because I was just going to use one layer and when it came apart I sanded the middle down And the final version has like 5 layers in the middle. Now when I jump on it there is not the same amount of flex.
Also in bagging it holds the glass and resin up against the wood and there is less of a chance for air bubbles. So it has a better adhesion. Especially when the stuff sets up in 3 min out in the mid day sun. I had plenty of time to work it as long as I wanted with minimal fumes then open the garage door, slide it outside, and wash your hands. When you come back you are ready for the next step. This stuff is awesome!
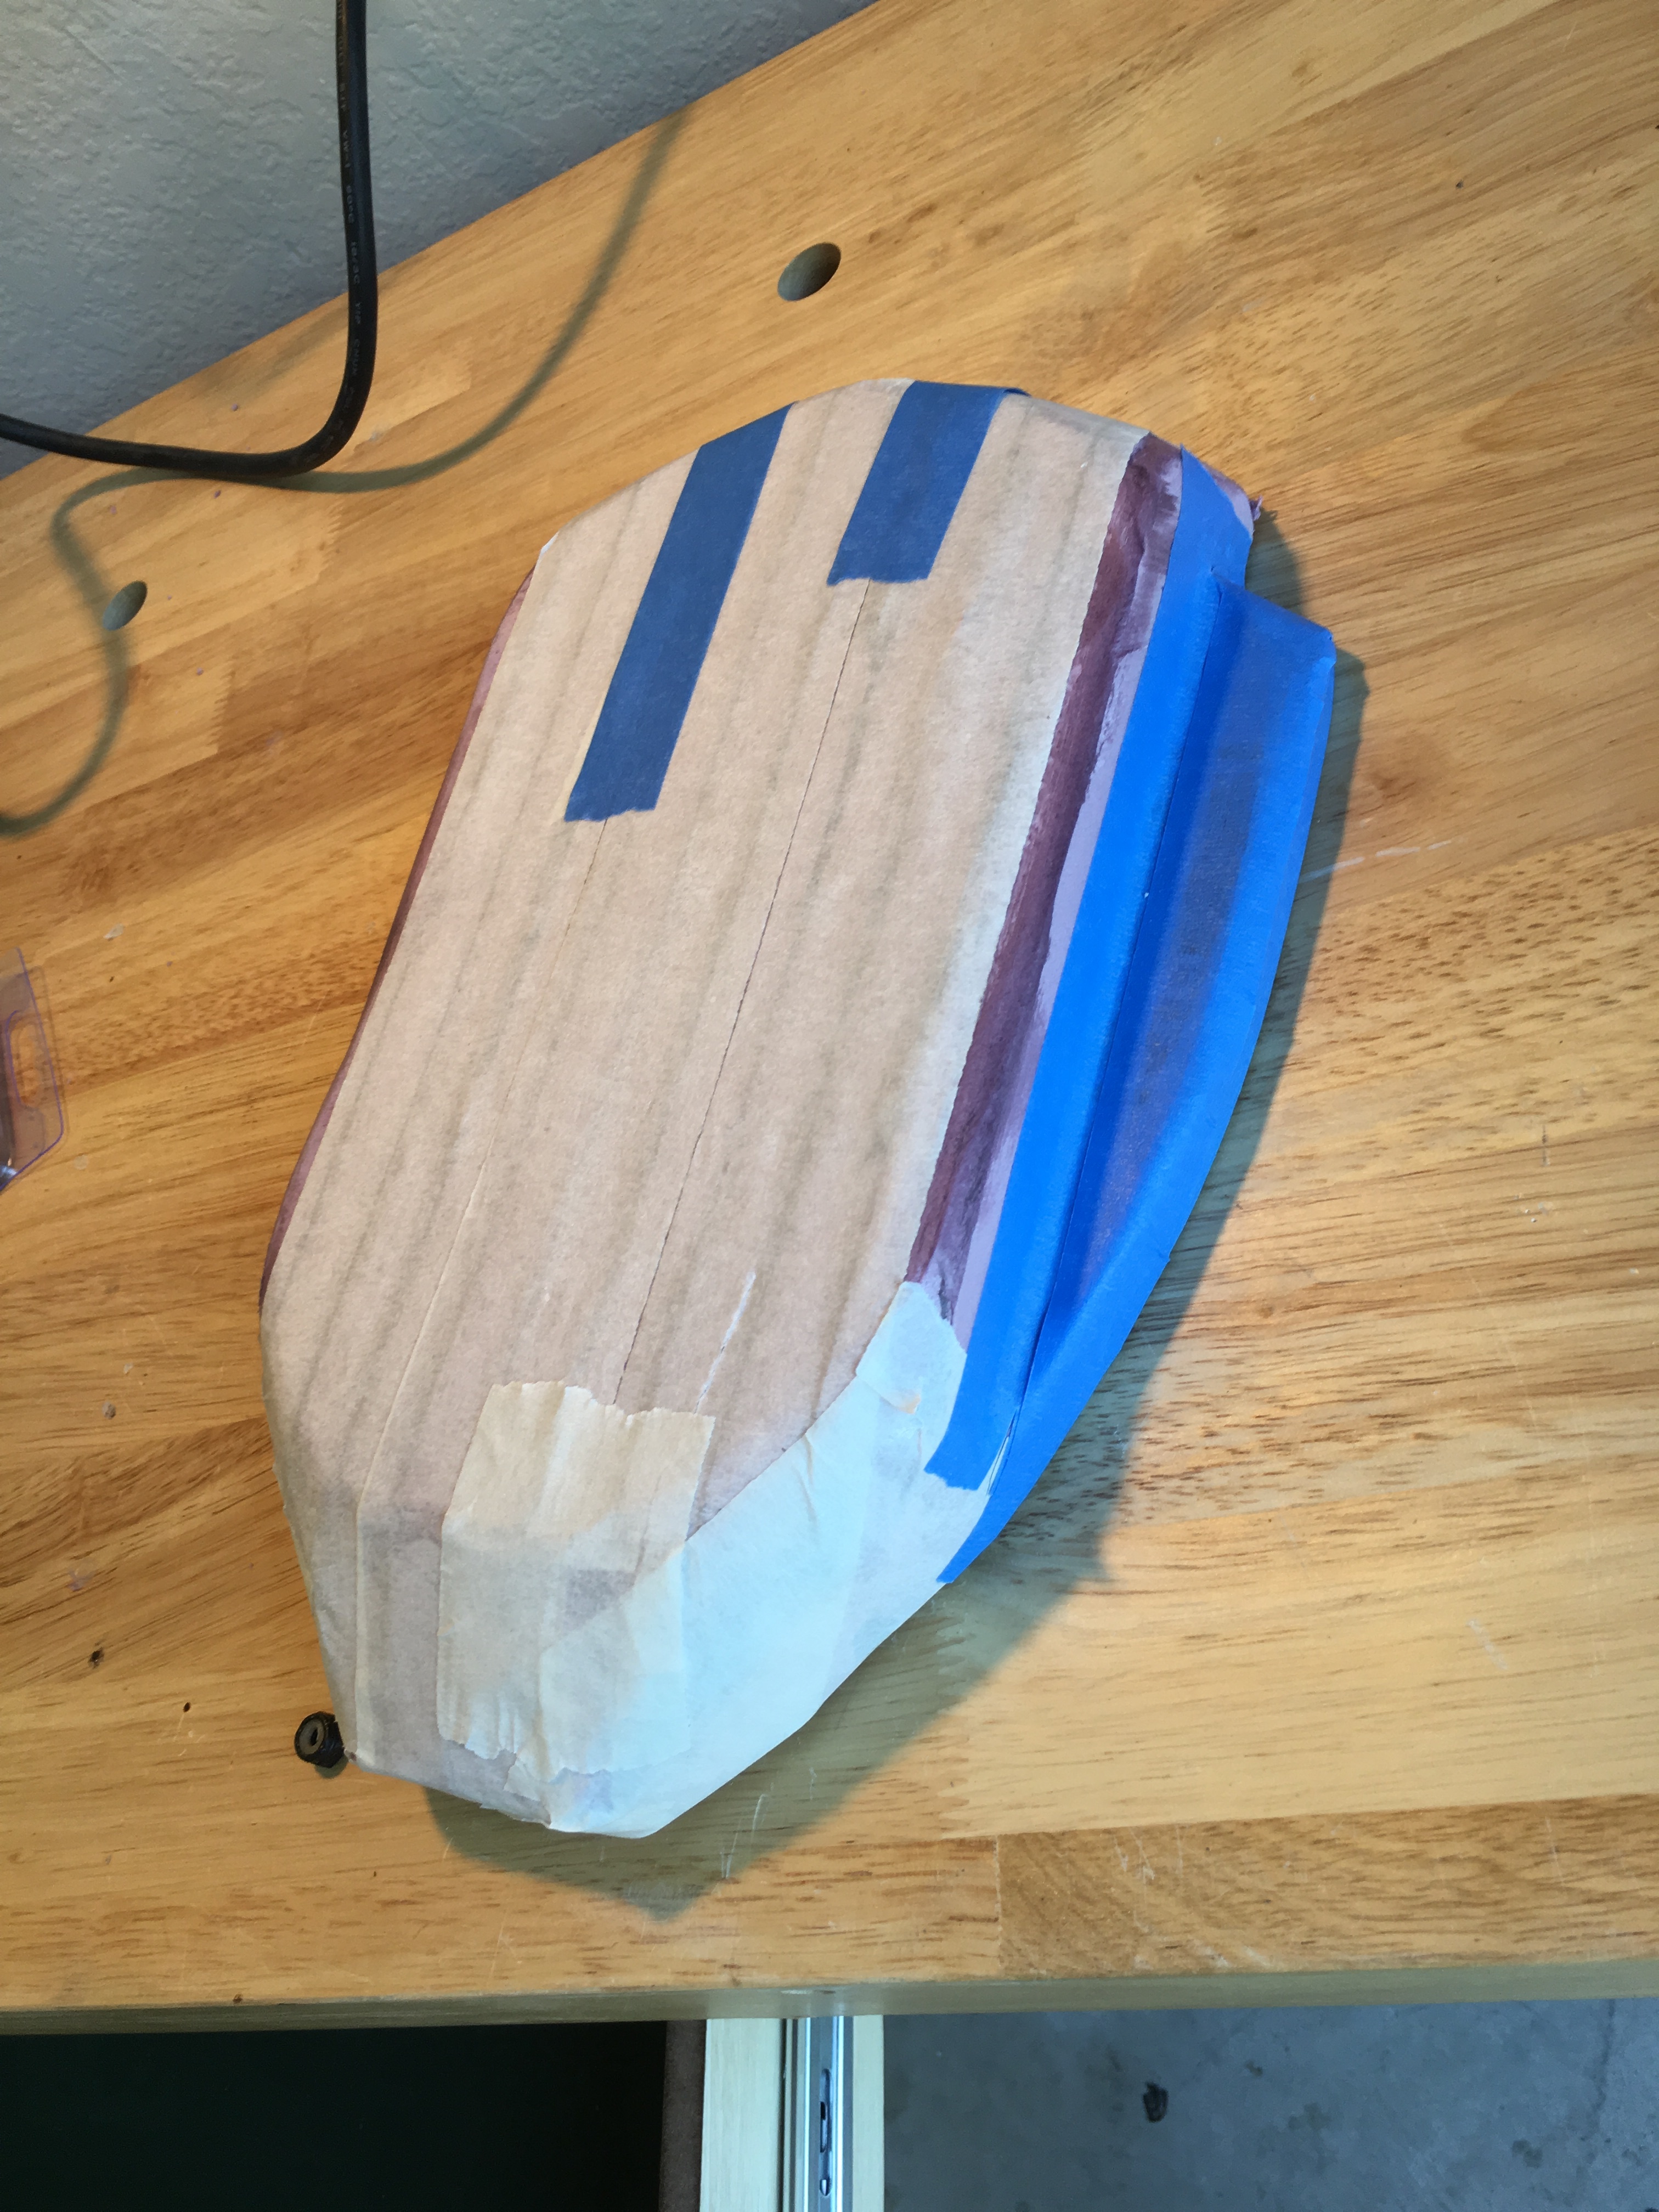
As promised earlier I dug up my second attempt at an enclosure. I made this out of cardstock and fiverglass but it started to droop in the middle under the weight of the resin and I evened it all out with bonsi after and it looks okay on the outside. But the bottom looks like hammered shiz and it can’t fit anything in it due to how misshapen it is.
Also as a side note. My roommates found this letter stuffed in my mail box some time when I was out of town and I thought you guys would get a kick out of it.
Idea for your enclosure… instead of scrapping it - because the outside does look really good - how about you carve/sand/dremel out the interior to even it out? You can then gel coat it to seal it up, or even a very light single layer of GF? As long as you don’t burn through it should clean up ok?
That note is priceless! Spread the stoke!! I love building and have helped build a few now for buddies. It’s fun building, and even more fun when you aren’t spending the money on it!
I thought about it but it ended up being too small anyway with the final size of my battery. I even tried using it as a mold for my vacuum forming. But it is still too small. But it was good for testing my vacuum box.
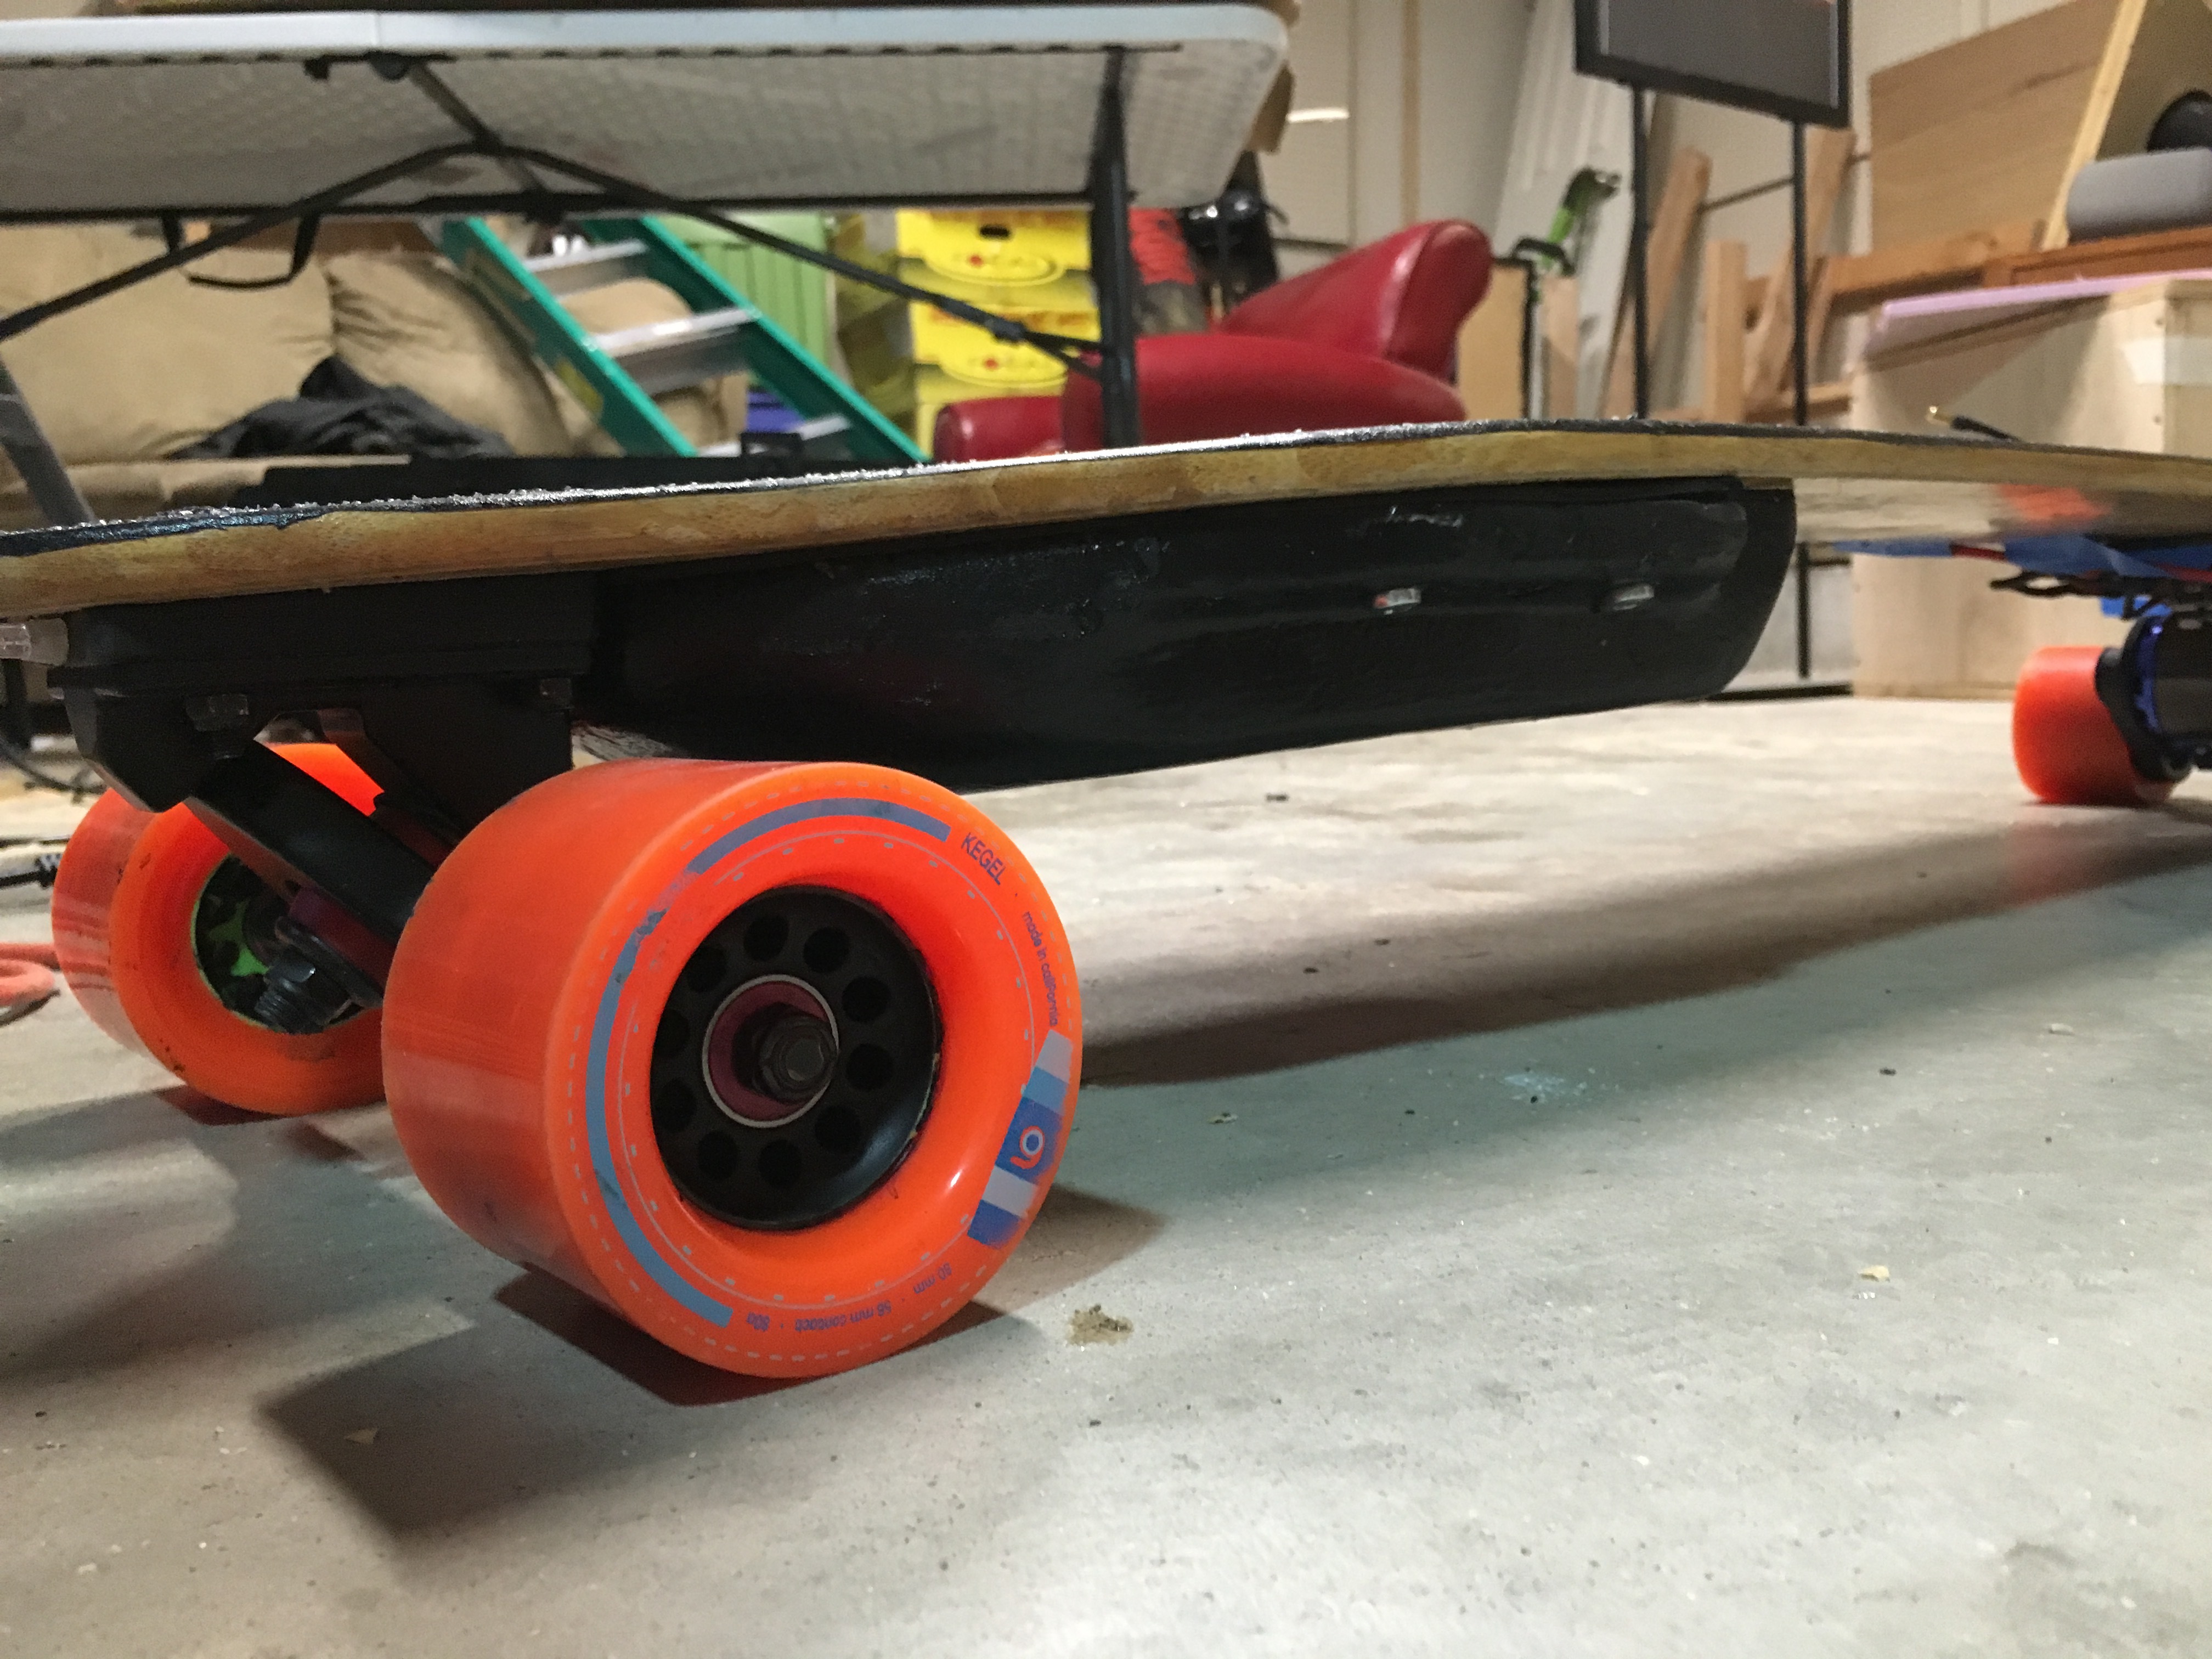
So I finally finished up the battery enclosure. I still have to make the one for the speed controllers. But I had to send my speed controller back to enertion because of a blinking red led.
This is the spot welder I picked up off amazon and it worked fine for me. I wasn’t expecting it to last the whole pack but it totally did! I bet it could do more and I may end up selling it. I haven’t decided if I want to make a real electric penny board next.
And I guess I probably could, I want to make a better fiberglass molding setup first I think. I still don’t feel comfortable selling this to anyone, it isn’t quite to the standard I would like to see from what I make to sell it.
Maybe soon, my brother and I still haven’t given up on the 3D printed enclosures.
I am waiting on my VESC to be repaired from Enertion for the last month so I decided while I wait and never hear a word from them no mater how many emails I send, I will build a better mold for my Fiberglass enclosure.
I made this one out of MDF instead of the pink foam insulation because the resin would melt the foam when it hardened. Also I decided to break out the graph paper and do this right instead of eyeballing it like I did on the last 5 enclosures…
Basically I had been thinking on what @Pantologist had mentioned about making a good enough mold for my vacuum bagging setup. Hopefully I will try it out tonight and it will be better, faster, and a much more accurate fit.