DIY Trampa long 35 E-MTB | Dual VESC SIX | Sensored EMAX GT5345

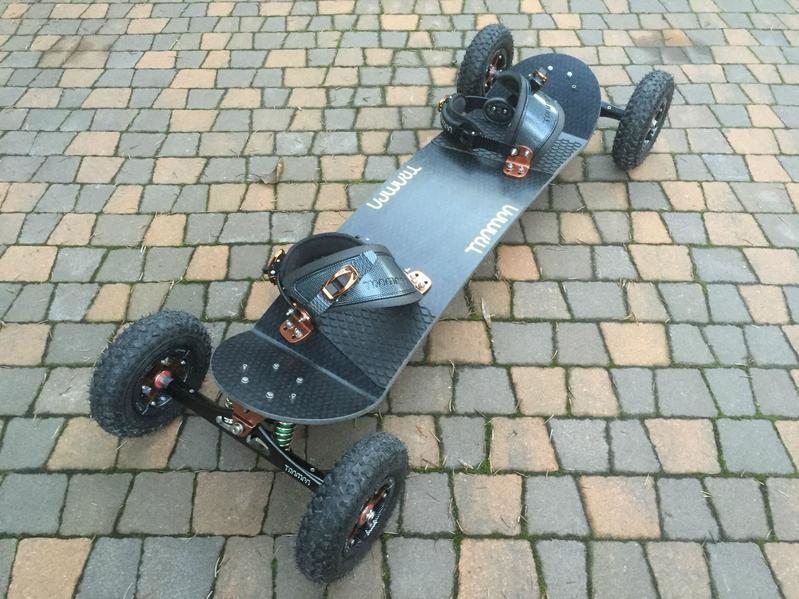
Hi, I run a build thread on endless-sphere (https://endless-sphere.com/forums/viewtopic.php?f=35&t=79241) and decided to show my finished build also here. I started gathering parts for this build in December but did not have enough time to push it forward till easter, I spent them in my workshop and have done most of the work. Here are technical details of this build: 2x EMAX 5345 170 KV 63mm outrunner motors 2x Ollin board company VESC Trampa long 35 with vertigo trucks, superstar wheels and ratchet bindings Underwater Kinetics 206 Ultrabox and 309 Drybox So lets start with the photos:

Bare board :smiley:

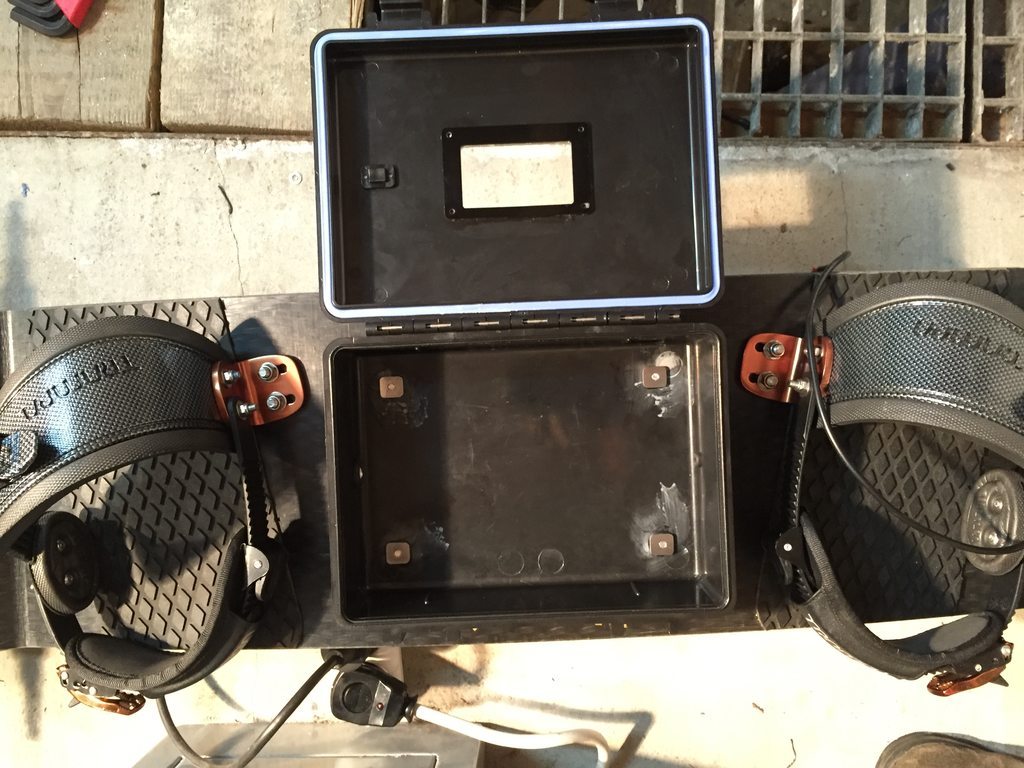
As You can see 4 5000 mAh 6S turnigy lipos fit nicely in 309 Drybox case.

The problem with the motors was that stator and rotor was held by this round piece of aluminium with set screw, I did not like the look of it, and it would interfere with motor mount not allowing to tension the chain properly so I decided to turn new shafts, with grooves for circlips.

Here You can see the shaft getting keyway milled, I don’t trust small set screws enough :wink:

And final product:

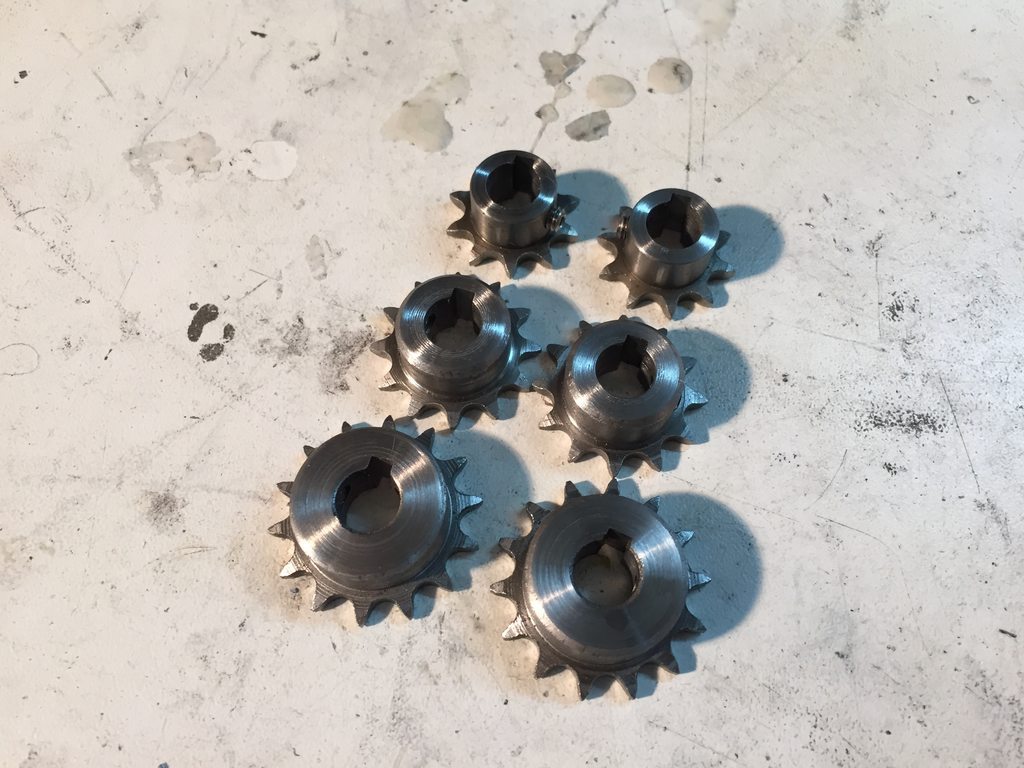
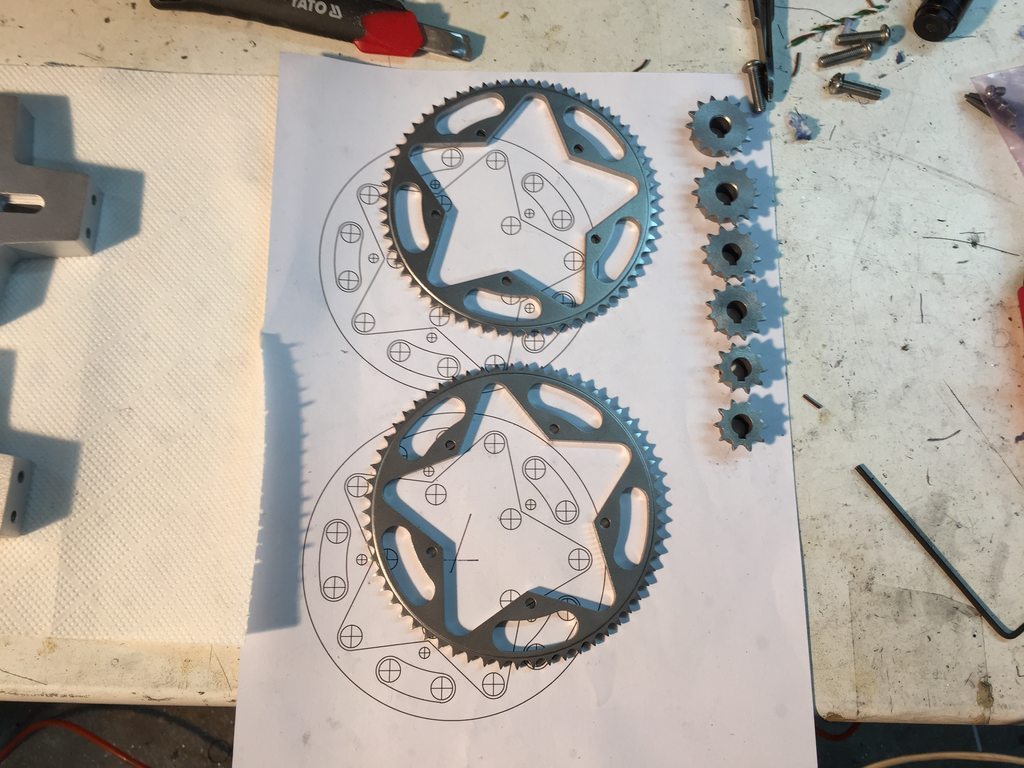
Then I bored, keywayed, drilled and tapped sprockets to fit nicely on the motor shafts

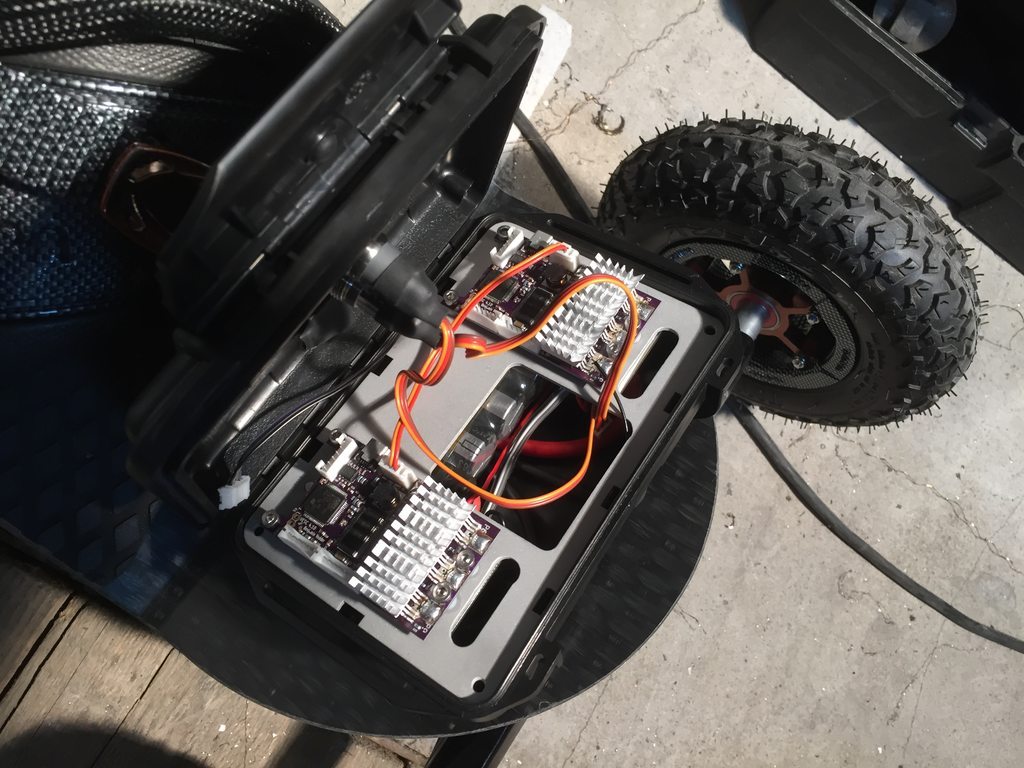
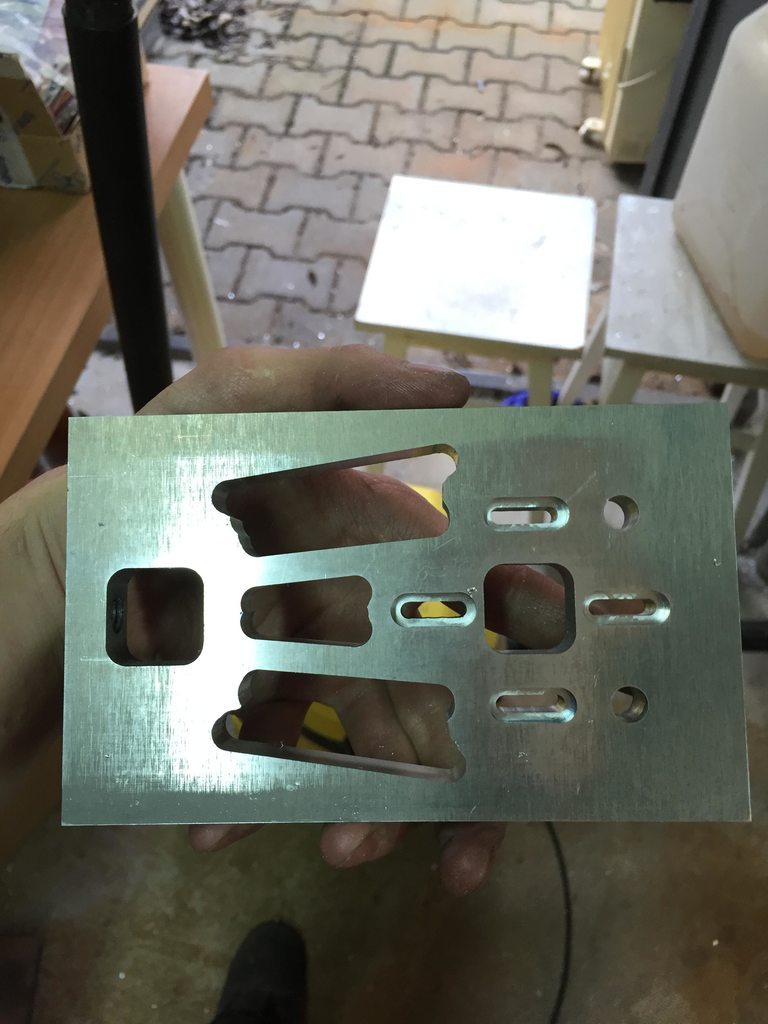
After that I had to deal with how to fit all of this electronics and other stuff in this small 206 Ultrabox, it’s easy to fit 2 VESCs in there, but 2x VESC + 4x 2200 uF caps + IXFN200 N07 MOSFET + 200A shunt for ampmeter circuitboard + 200A fuse + circuitboard mosfet switch for front LED light it’s a bit more challenging, so I decided to mill aluminum mounting plate for all of this, which acts a radiator for VESCs lower mosfets.

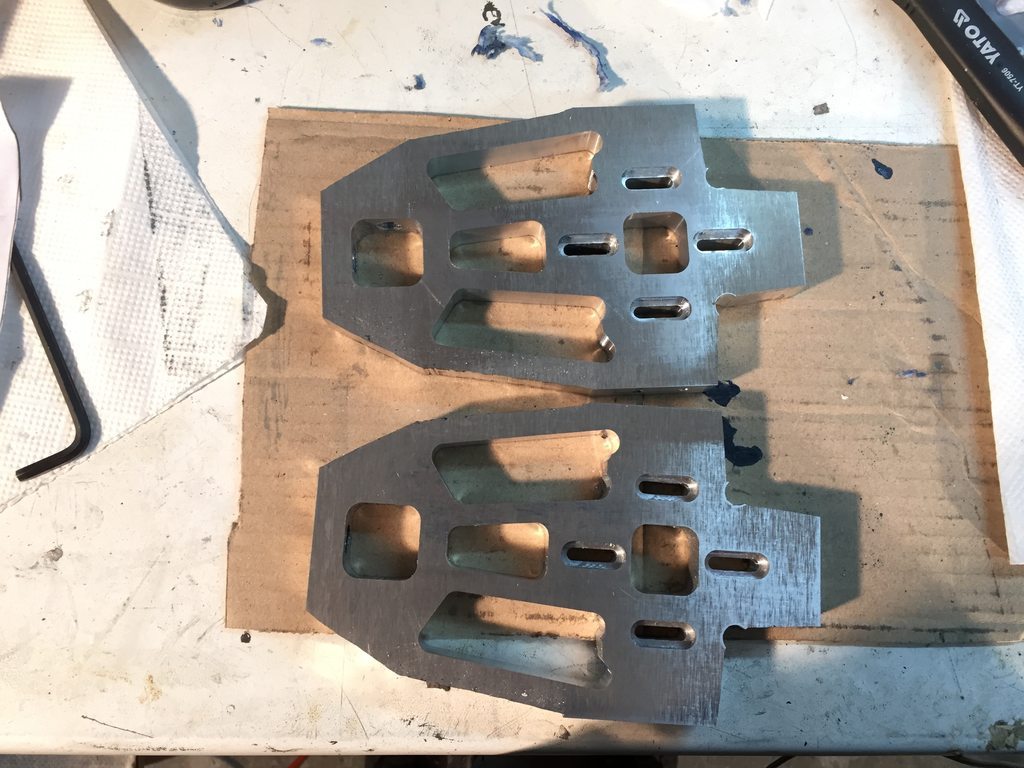
And the last, most challenging part was to mill motor mounts, I had few attempts since January, but failed every time… until this weekend. I hope Jenso from E-TOXX does not mind my strong inspiration with his design, but… It’s just the best solution for this task :smiley: Aluminum I used is 15mm thick 7075 grade, I guess it’s strong enough :stuck_out_tongue:

Here are photos from manual machining process in chronological order:

I’m not a machinist and the milling process took me about 20 hours…

I still have to mill 3 support braces for motor mounts. Unfortunately I trashed 2 sprockets which I planned to use for rear wheels during machining, have ordered new ones, I need them to measure the lenght of support braces for motor mounts.

And here is front light, It’s super bright and has long range, I made special mounting plate for it to not have to drill in the deck.

Oh, and I would forget, my friend wanted to have some fun with borrowed camera so he came to my workshop and interfered in my work, wanting me to do unnecessary things, to record them (burning titanium chips was not the part of eMTB build :smiley: ) [youtube]x0Zoch6Y9Sg[/youtube]

Update, today I installed hall sensors and termistors in both motors, had to mill stator a little to fit SS411A sensors. They’re spaced 120 degrees apart. Width of sensors is 4.05 mm and the milled gap is 4 mm wide, pretty tight fit, they’re glued with epoxy and secured by kapton tape, termistors are glued with thermally conductive glue, nothing should get in rotors way.

Milled stator

Termistor (left) and one of hall sensors (right) in place, secured by kapton.

One more hall sensor

Additional material from inside of sprockets was cut with jigsaw. Here is milling process in few photos:

I’ll bead blast sprockets and hot blue them to prevent from rusting (motor sprockets too).

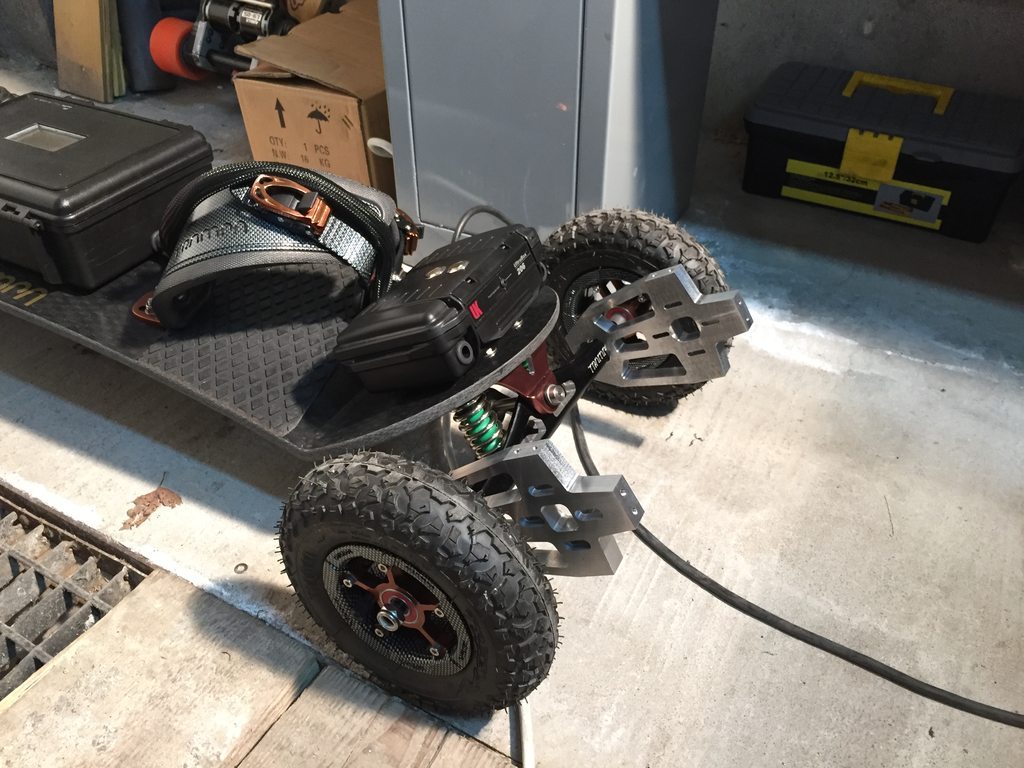
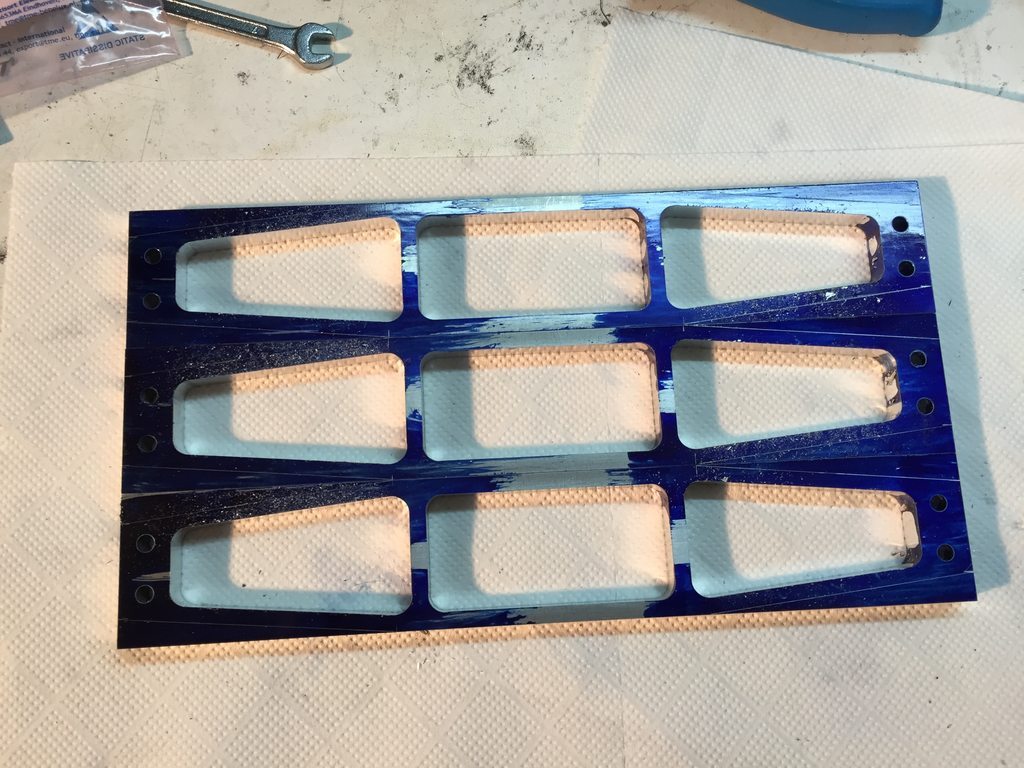
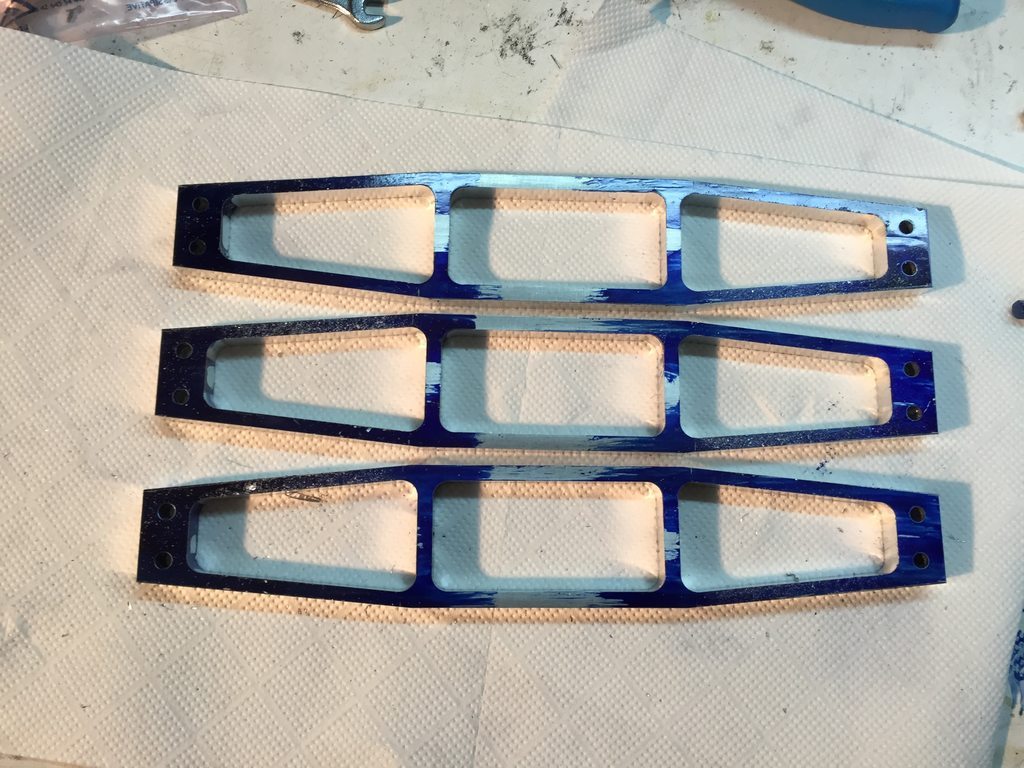
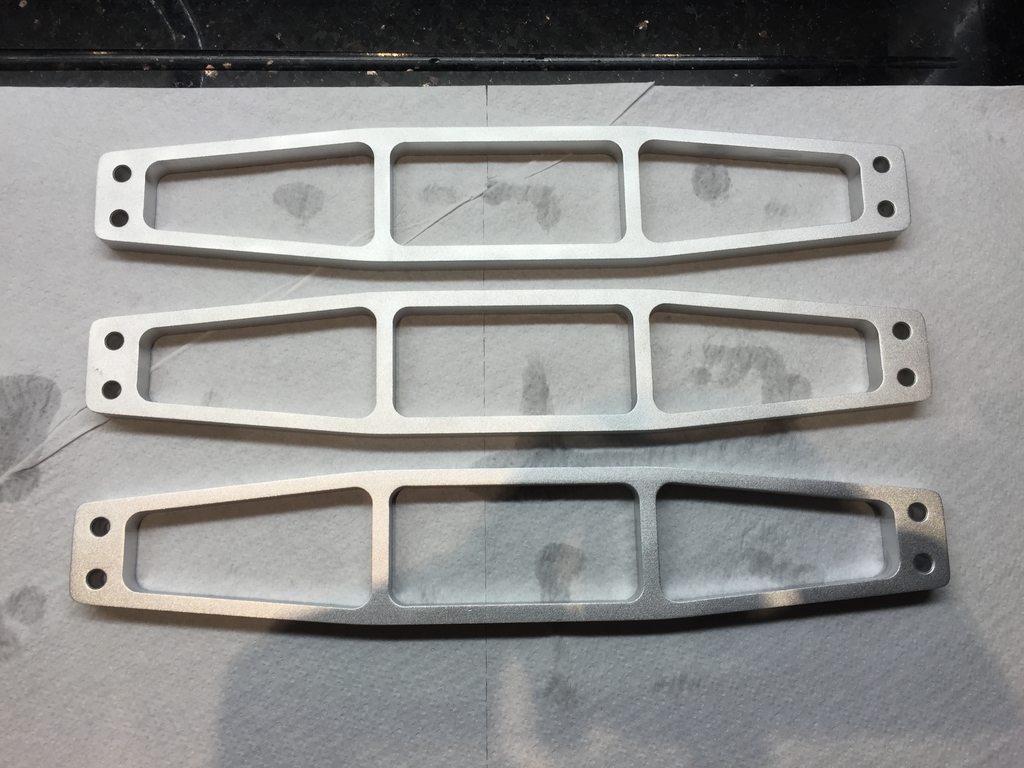
Motor mounts finally finished! I milled support braces today, bead blasted everything and will give it to get anodized. Sprockets will be chemically hot blued (and be black as a result).

Picked up motor mounts from anodizing, they look AWESOME! Did hot black oxide on the sprockets in workshop tonight, again, success :smiley:

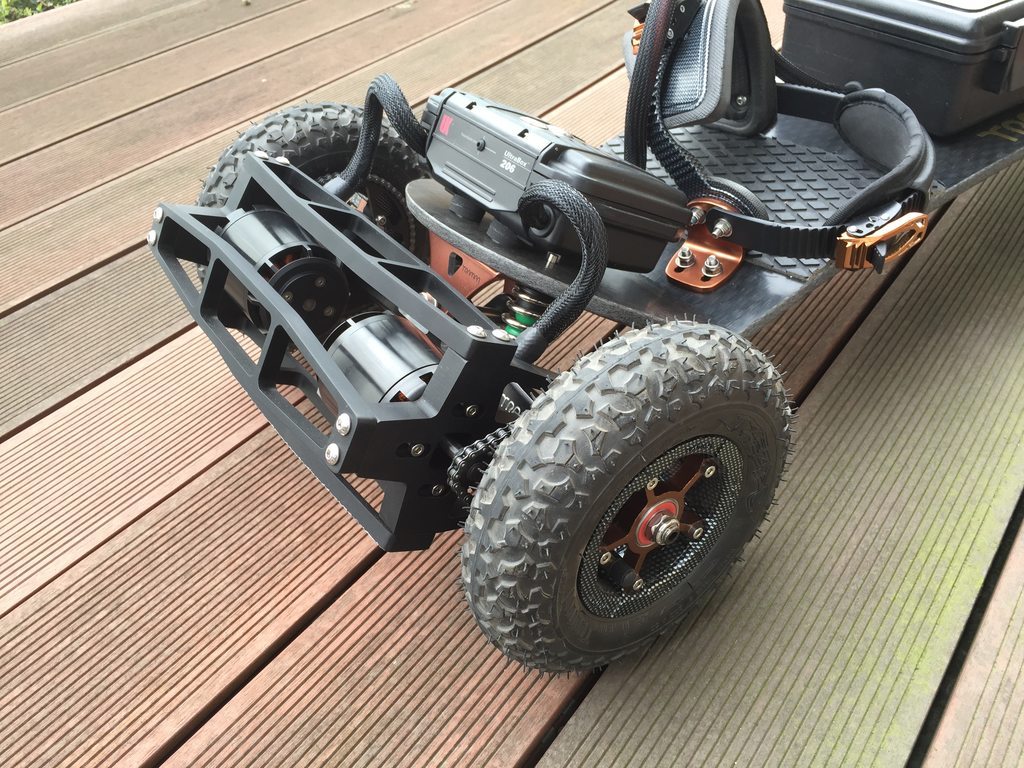
Managed to finish this beast today! It’s AWESOME, love VESC and BLDC tool for programming, it’s not so difficult as it looked at the beginning. Speed, power and handling, really impressive. As it was already dark when I was ready to test it, for now are only pics in artificial light, it does not show the beauty of this black anodized mounts. I’m really happy how it turned out, and I learned a lot!

And now of course some pics :stuck_out_tongue:

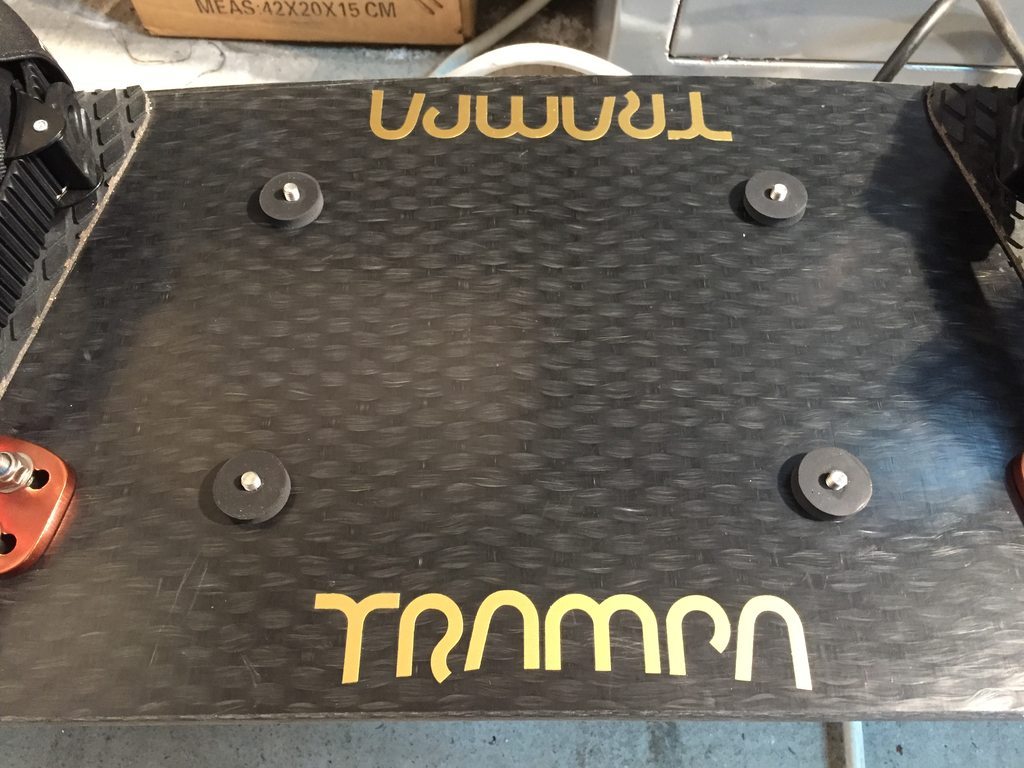
Here is how I mounted battery case to the deck, I cut rubber spacers out of 5mm thick rubber, and made special treaded plates out of steel, protruding nut could damage battery. Rubber allows deck to flex and dampens vibrations.

Here is ampmeter screen, it uses 200A shunt to measure current, it’s mounted in electronics case. Nice feature.

And final product of over 4 months of reaserch and development :smiley:

And the rig itself in natural light:

And I already scratched one of the support braces on asphalt trying wheelie, too much throttle…

Thanks for watching!

49 Likes

I have to say, your builds are always so professional. I think it inspires everyone to make their boards look nicer. Not everyone has access to some of the tools you have but as long as we make our boards to the best we can with our tools at hand, esk8 builds will continue to look better and better. Good on you, continue making awesome boards.

that’s fucking beautiful brother… love it…

what does it weigh?

SO what is the final battery configuration? 12S 10AH? so 440WH?

what is the average power consumption on this beast?

1 Like

Thanks! This thing is heavy, I don’t have currently any weight to measure, as I’m in Cracow where I study, but I suppose it’s arround 16 kg, I’ll check that on weekend. Final battery configuration is 12S 10AH, so yeah, 440 Wh. Again, I didn’t have chance yet to measure exactly power consumption, it’s my first day with this beast :smiley:
what is the theoretical top speed with this gearing?

1 Like

I have 3 sets of motor sprockets, right now with the 12 teeth sprocket arround 58 km/h, two other I have are 10 teeth and 14 teeth, but I’ll have to change chain also for the larger one, there’s not enough tension range. 14 teeth is calculated for 67 km/h, yeah, I’m nuts! :smiley: I must say that with hall sensors the breakes are unbelievable, I had to break really hard during my second commute today and wheels stopped, lost traction and I crushed on asphalt. Climbing steep hill with sensors is also not a problem.

1 Like

Ok I have first data, distance 13km of REALLY fast riding, 6000 mAh consumed (I charge packs as 4 6S connected in parallel, charger showed 12000 mAh, but on board they’re connected in series by 2 of those 6S 5000 mAh bricks, so in 12S config it’s 6000 mAh as I wrote).

Great build!! Do you mind sharing where you got the Ampmeter from?

Such a sweet build! Really looking forward to hearing what you think of those motors. I have a stack of 200kv models I will be testing soon.

@chaka Those motors are really nice, only thing I found as a problem was this piece holding the motor together, circlip works better and is smaller. I read at ES somewhere that one of users had a problem with those motors cogging, that’s why I added hall sensors.

@MasterCho Aliexpress, this model was sold as capable of measuring current up to 500A, the shunt that came with it was HUGE, I replaced it with smaller 200A one, there is a lot of current/voltage versions of this. http://www.aliexpress.com/item/Battery-Indicator-Tester-Battery-Voltage-Current-Power-Capacity-Charging-time-Digital-Monitor-Meter-Coulometer/32461792151.html

Anyways, I was just playing arround and riding board forward and backward with no load in my flat when all of a sudden sometning blew up inside electronics case and smoke showed up. Inspection showed that my super high current rated (200A) mosfet IXFN200N07 blew up, VESCs and everything else look fine, even 200A fuse is intact. Damn, this scared me… I guess it’s because of regen breaking, I left it as default at 20A… :worried:

Is it your switch/in-rush controller that blew? If it was, I have some kicad files I have been working on for a mountainboard switch with 4 mosfets that uses EV grade fuses, the bolt on type. I plan on incorporating an sbec/ubec into the switch at a later date with a separate fuse for aux systems. I will be looking for testers once I get the gerbers sent to oshpark for fabrication.

@chaka Yup, my diy sparkless switch. I used 4 mosfets in my longboard, but I doubt It had regen breaking (flier ESC) and they’re fine there, but wanted something more durable, able to disspat more heat and with bolt on connectors. So I’ve chosen this IXFN200N07 mosfet. I guess if I’ve turned off regen in BLDC tool it wouldn’t happen, I would like to replace it with something in the same SOT227B package, as I have already all wiring and holes in my support plate redy for that. I’m analysing datasheet now, it looks like 2 source connection terminals blew up, I think that’s regen breaking fault. here’s datasheet if anyone feels like could help. http://www.tme.eu/pl/Document/6197ecd2deae49b4f3bb7f7d09c15392/97533.pdf

1 Like

@squad Damn, that is a beautful board. Looks like a getaway vehicle for the Zombie Apocalypse. So clean and compact. You’ve got some serious millling skills. I’d love to see a video of that beast in action, if you’ve got any.

1 Like

Thanks! I’ll record something with my friend when we’ll both have time, probably this or next weekend, stay tuned :smiley:

1 Like

Just quick thought: If I would connect diode capable of conducting this 20A (dual VESC so 40A regen) from drain back to source (opposite to normal conductance direction, which is from source to drain) of this mosfet this should prevent something like this from happening, as this current would bypass this mosfet and flow by diode, which would not conduct in normal conditions because would be placed opposite to conducting direction. If anyone is more familiar with electronics than me, some input would be welcome :wink:

F*** it! I ordered the same mosfet and 40A diode. Gonna give it a try

That’s an amazing build! I’m working on a similar project to yours also using a Trampa board but i’m using a 35° holypro and a 41600 mAh 10S lipo battery

41Ah battery pack?! That thing must be huge and heavy as f***.

1 Like

It will occupy the bottom of my board along side with the ESC, as to the weight it’s 8 kilograms but i don’t think that will affect much the performance of the board

Range is gonna be tremendous with that config, but I’m just not sure if would like to batteries under mountainboard deck. Clereance is what You want in Your E-MTB. Or You would have to protect batteries with some kind of super durable enclosure, there is only one “BUT”, mountain boards are flexy, it makes building firm enclosure impossible as it would just simply break. Wish You very best, I’m just curious how are You gonna solve this.

if you turn the regen current to zero you will not have any brake

1 Like