Looking for some feedback from more experienced people on what they think of method of building a battery pack, as I haven’t seen anyone do this yet.
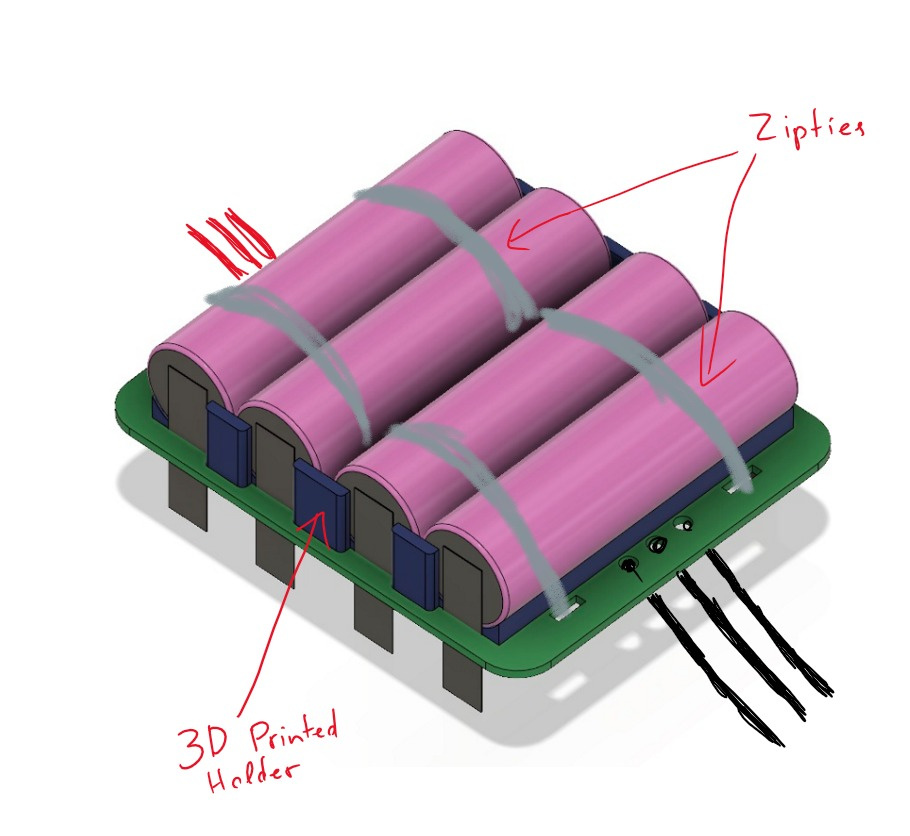
Nkon offers welded solder tags on cells for pretty cheap (0.55€ per cell). I thought of using these cells on a PCB by soldering these tags. To hold them in place, a 3d printed support can be used, together with zipties, like in the following pics.
On the PCB, it is easy to add SMD fuses for every single cell. To connect each parallel pack together, I would use multiple thinner wires instead of one thick one to make it slightly more flexible. I haven’t done any calculations yet for the wire thickness yet, as it still requires some work.
Here is a very quick rough render (only spend about 5 mins on the design, still needs a lot of polishing) of what I mean:
The extra bits of nickel strips can be cut of after soldering so they don’t protrude.
This is a quick sketch of what the underside would look like:

I forgot to add a place to hook up balance wires in this sketch.
And here is what the 3d printed part would look like (it still needs some way to clip into the PCB so it wouldn’t try to move):

The advantages over NESE modules is the cost, and the cells are fused. These modules also use much less space.
The disadvantage is that it is harder to replace a cell. However people don’t have to replace cells too often, and to do this all you need to do is desolder 2 connections and solder the new cell (and the fuse if it is blown).
The only issue I can think of is that the cells come with 8x0.15 nickel strips, which might not be able to handle the current required.
Using this method, the total cost additional to the cells for something like a 10S4P would be ~£20 for solder tags, £10 for PCBs, ~£3 for filament, and then the cheap consumables like wires, fuses and heat shrink which I guess would add up to about ~£15, so about £40-50 total.