Hi all - I’ve been wanting to build a eskate for a long time and finally got around to doing it. I know I could probably do some things more simply that I will show what I have done here, but I wanted to experiment and try some new things.
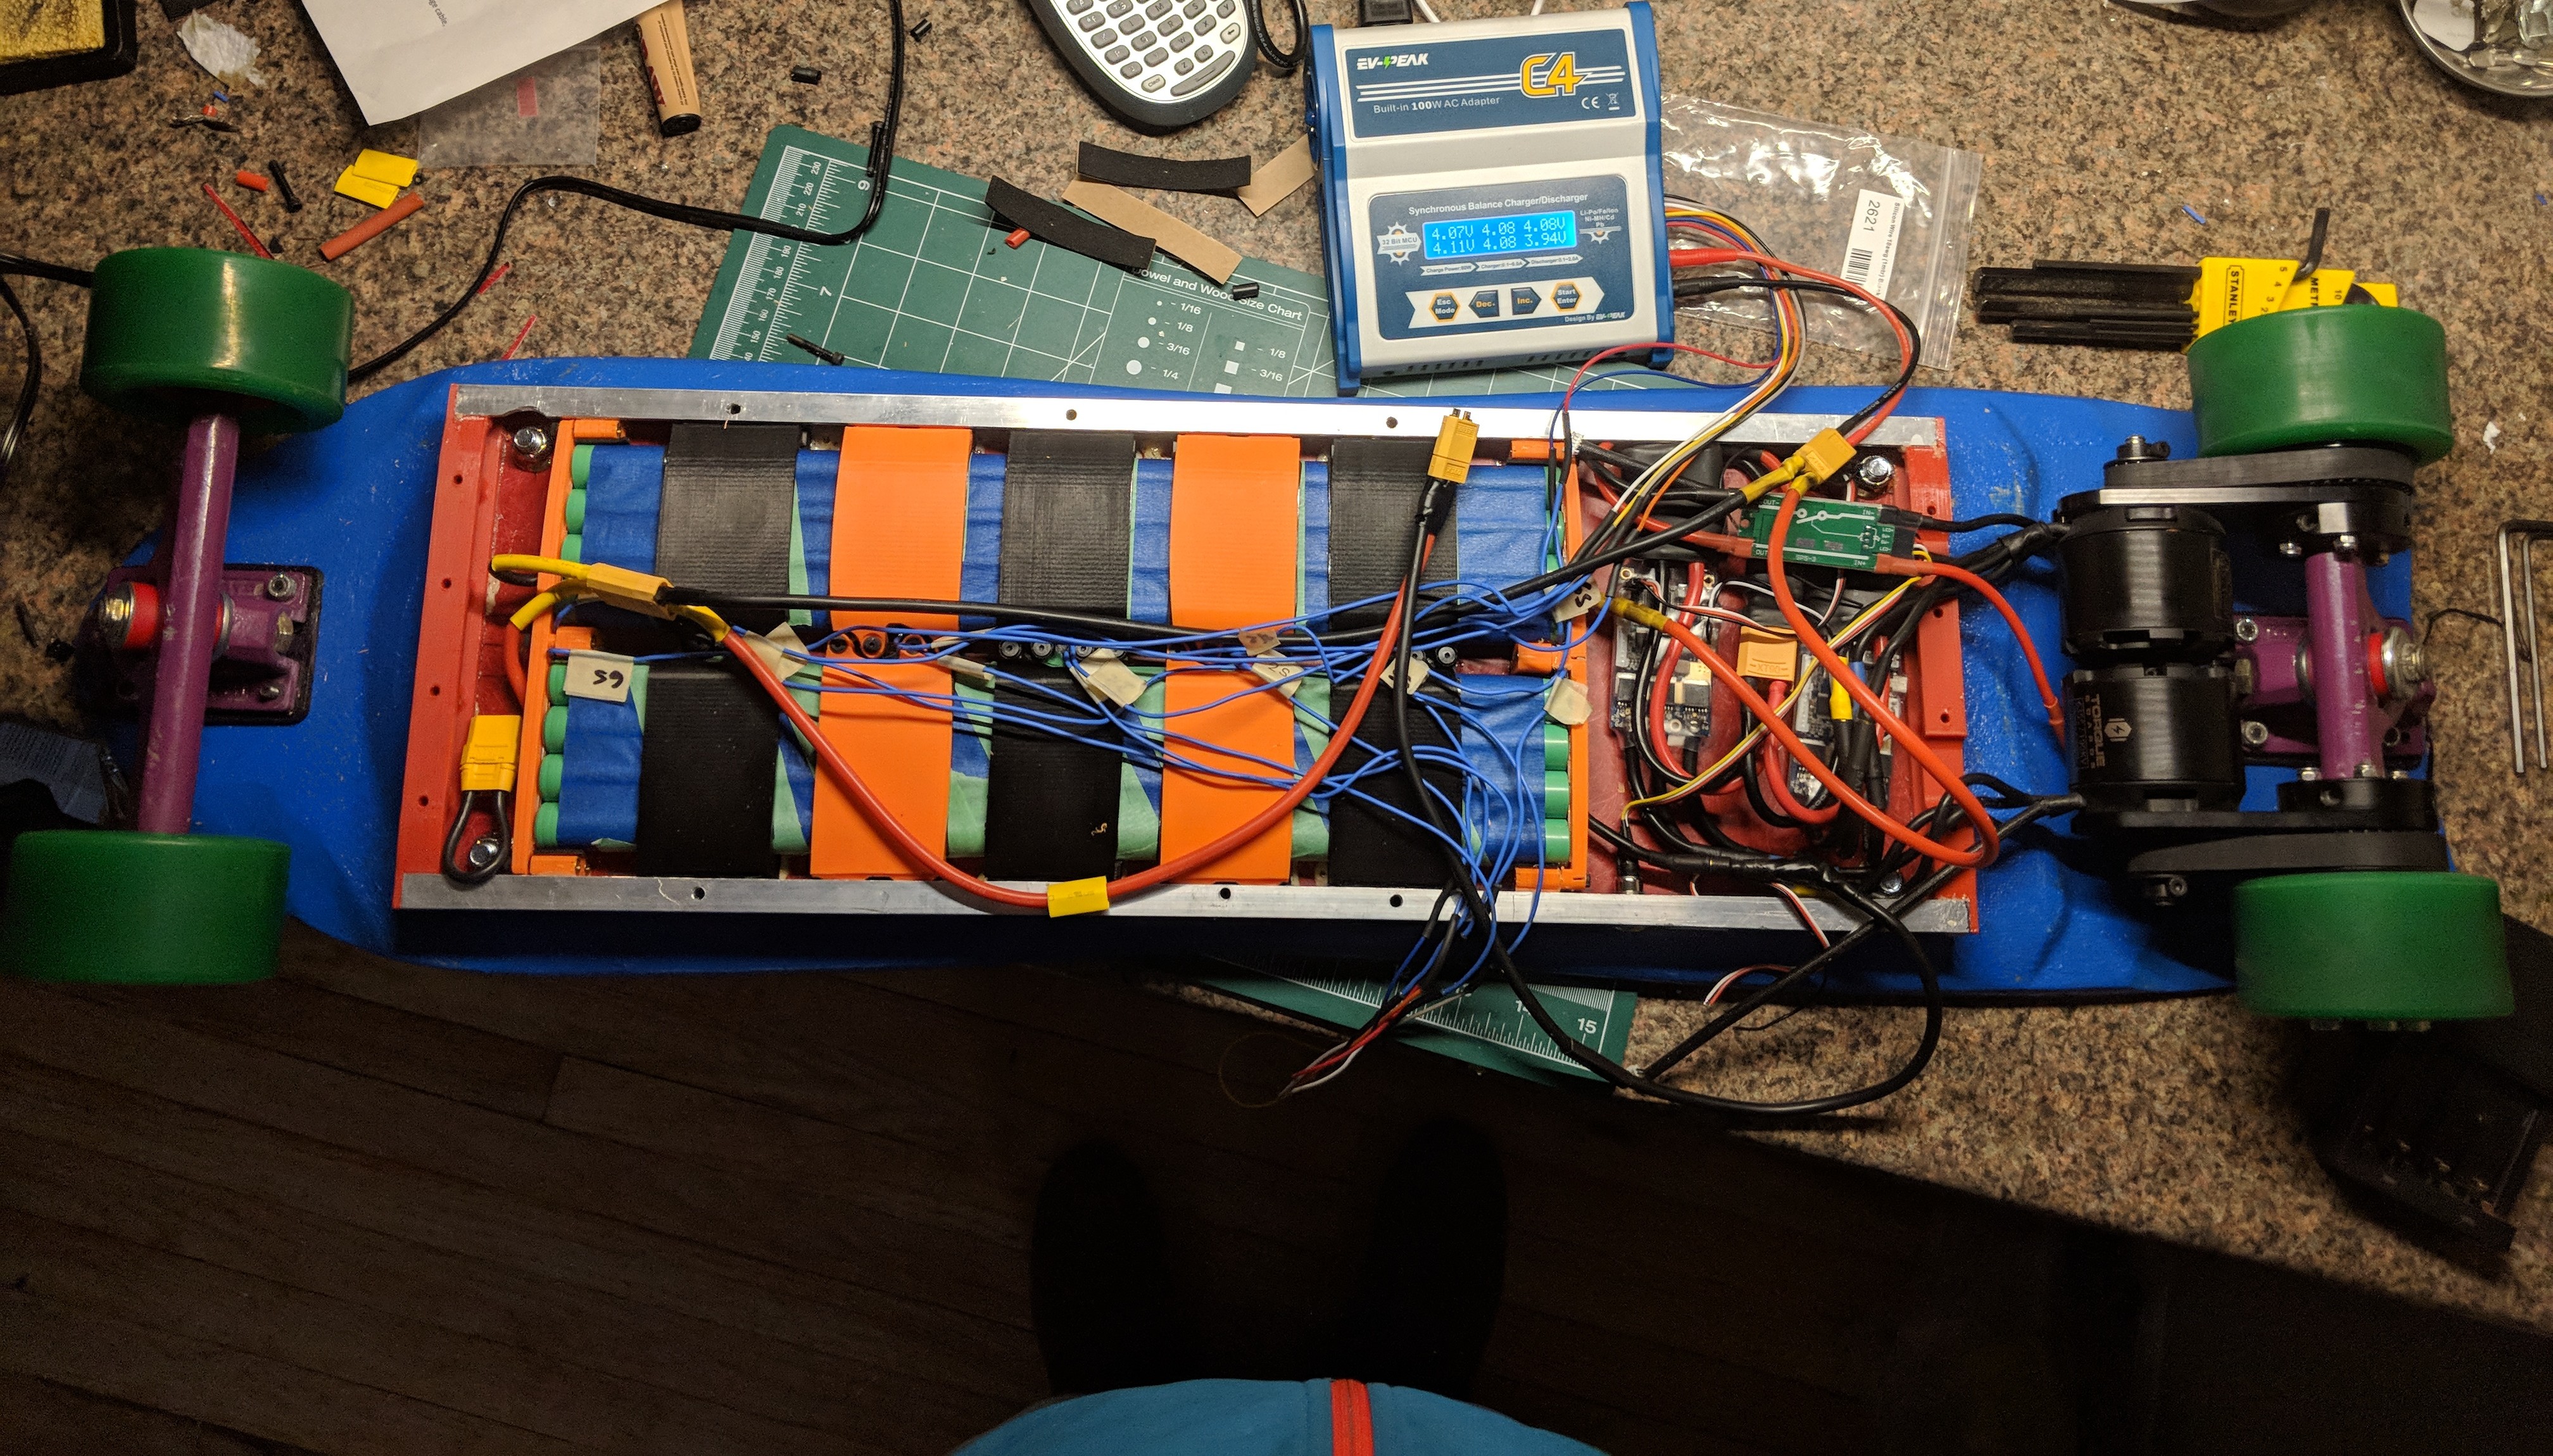
For the build I wanted to size my drive unit to be a bit overkill (for me). I decided to go with a 12s3p config for my battery to deliver a comfortable 60A, or about 3kW peak power. I went with a dual drive since I am on the heavier side (220lbs or 100kg). I also wanted to build a battery that could be reconfigured since I plan on iterating this design and don’t want to buy new cells for each battery design change.
I used to build decks https://imgur.com/a/wPklV
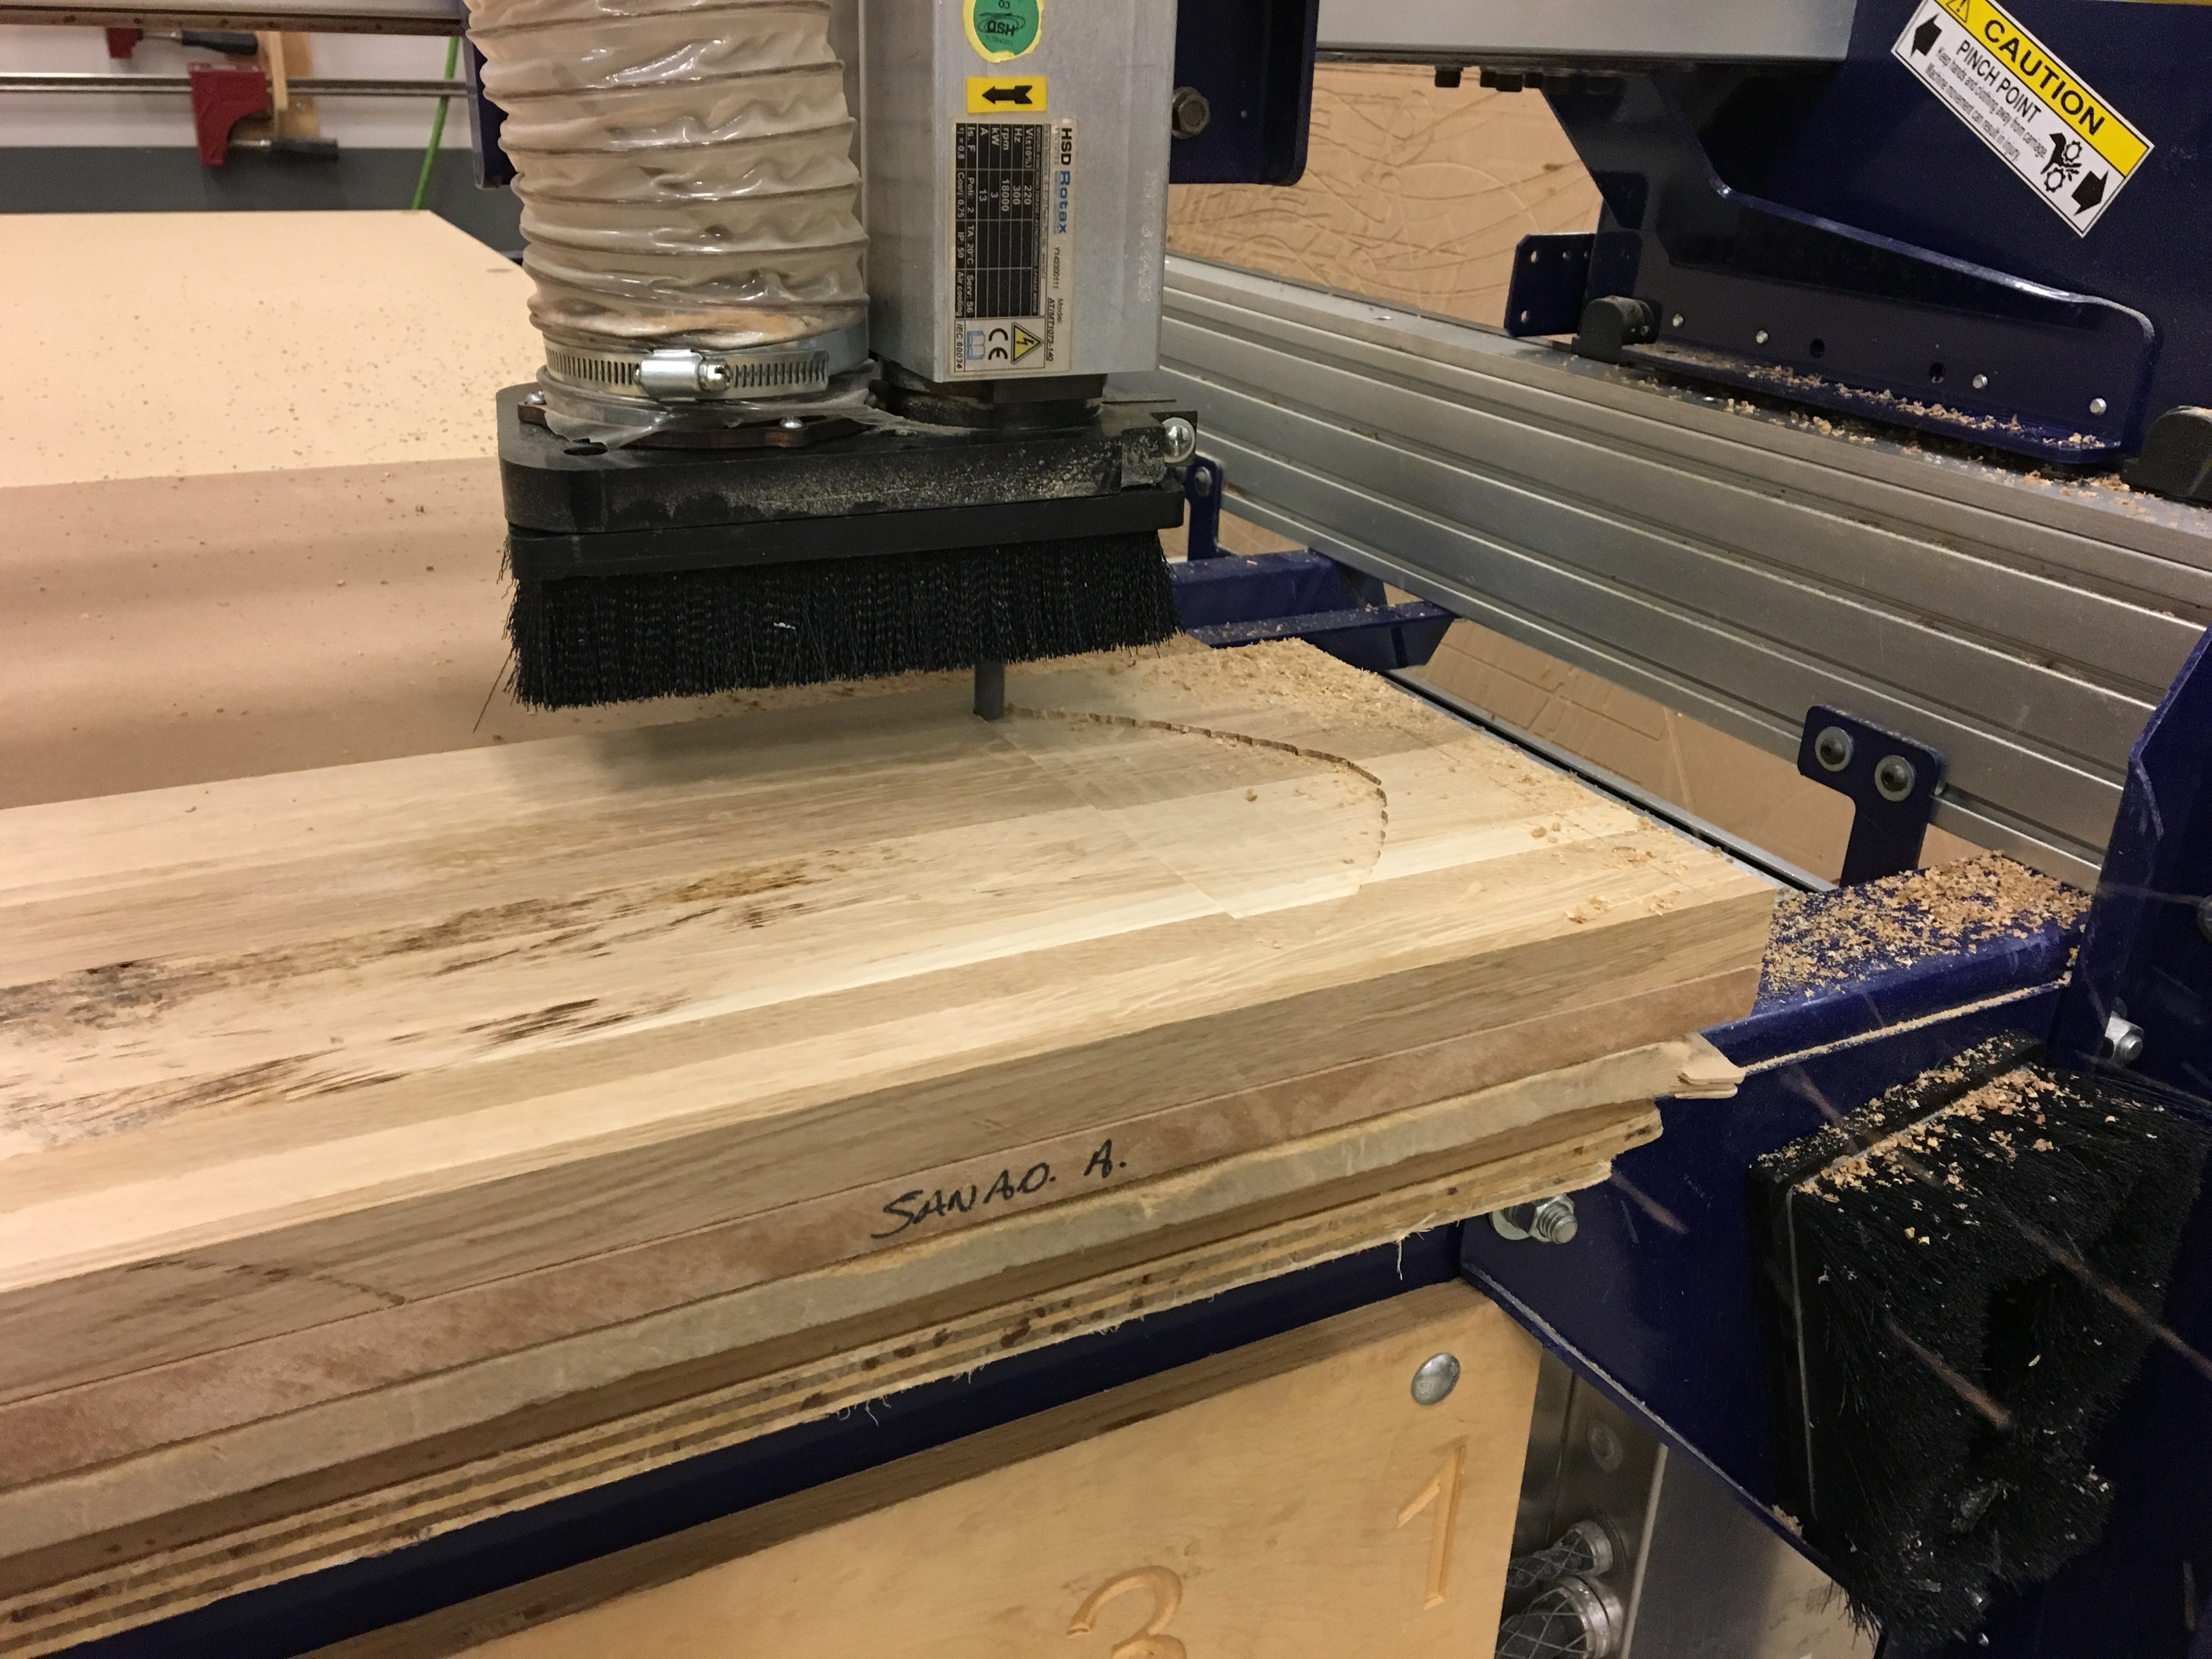
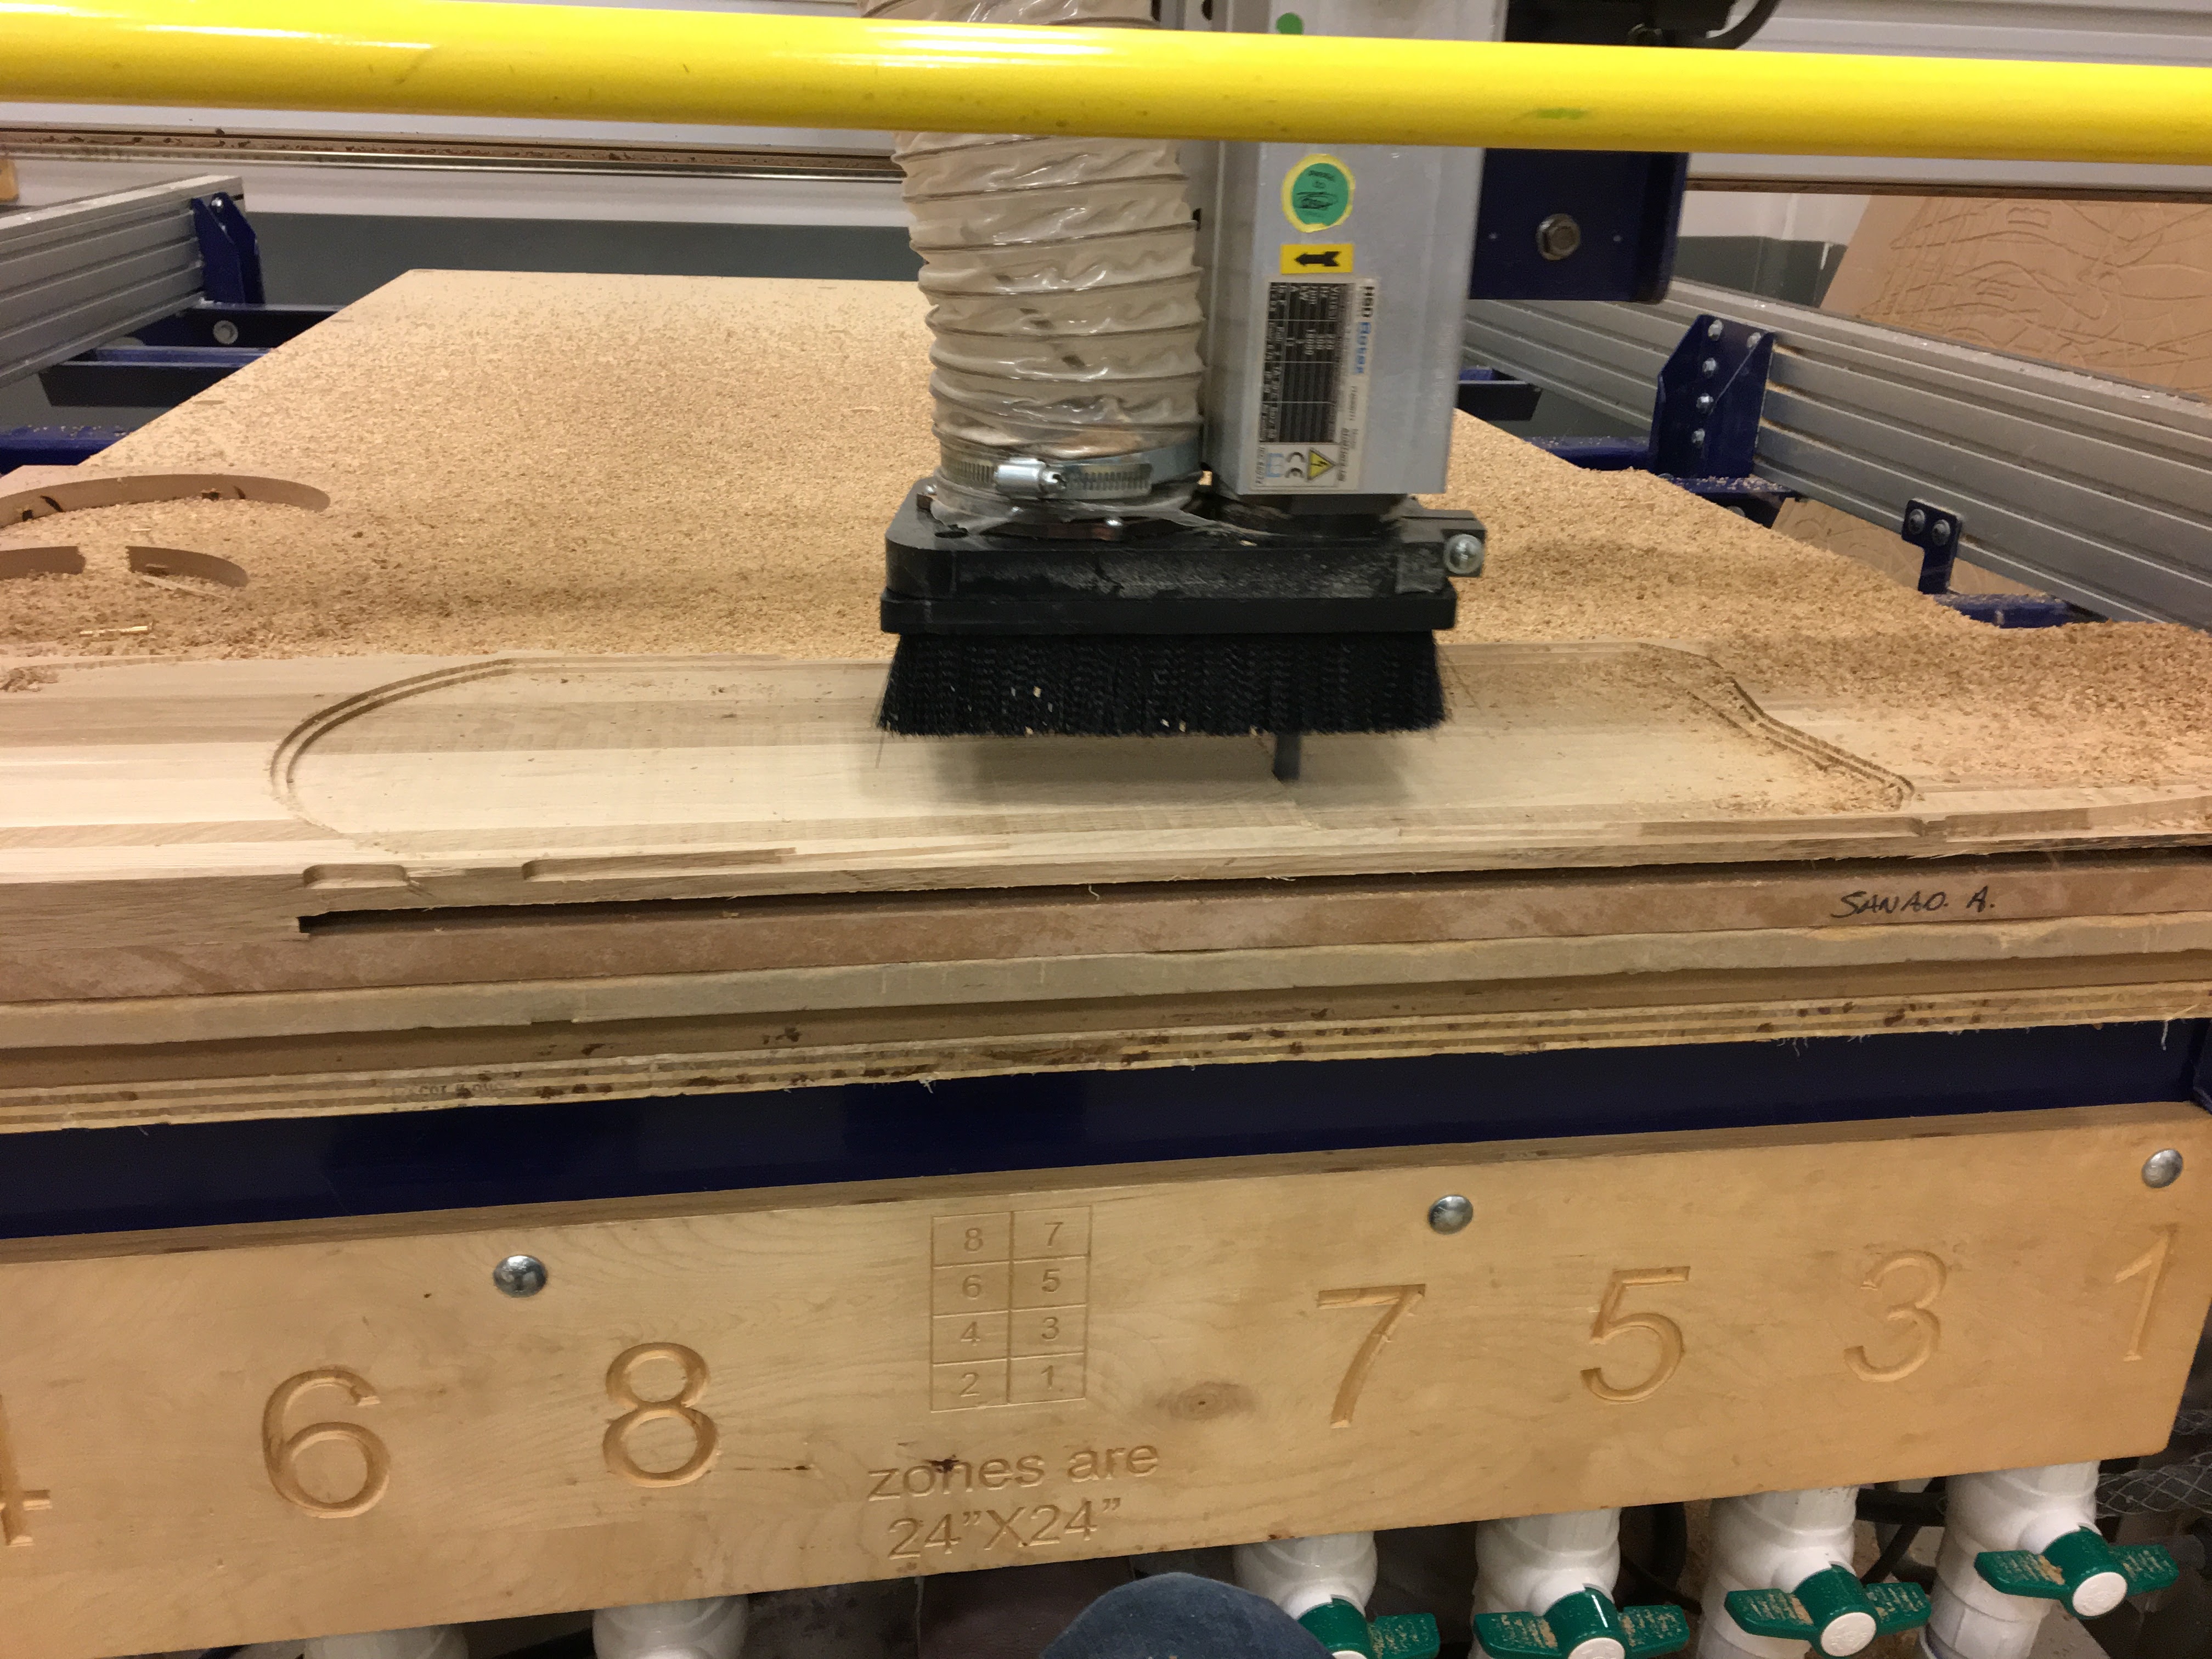
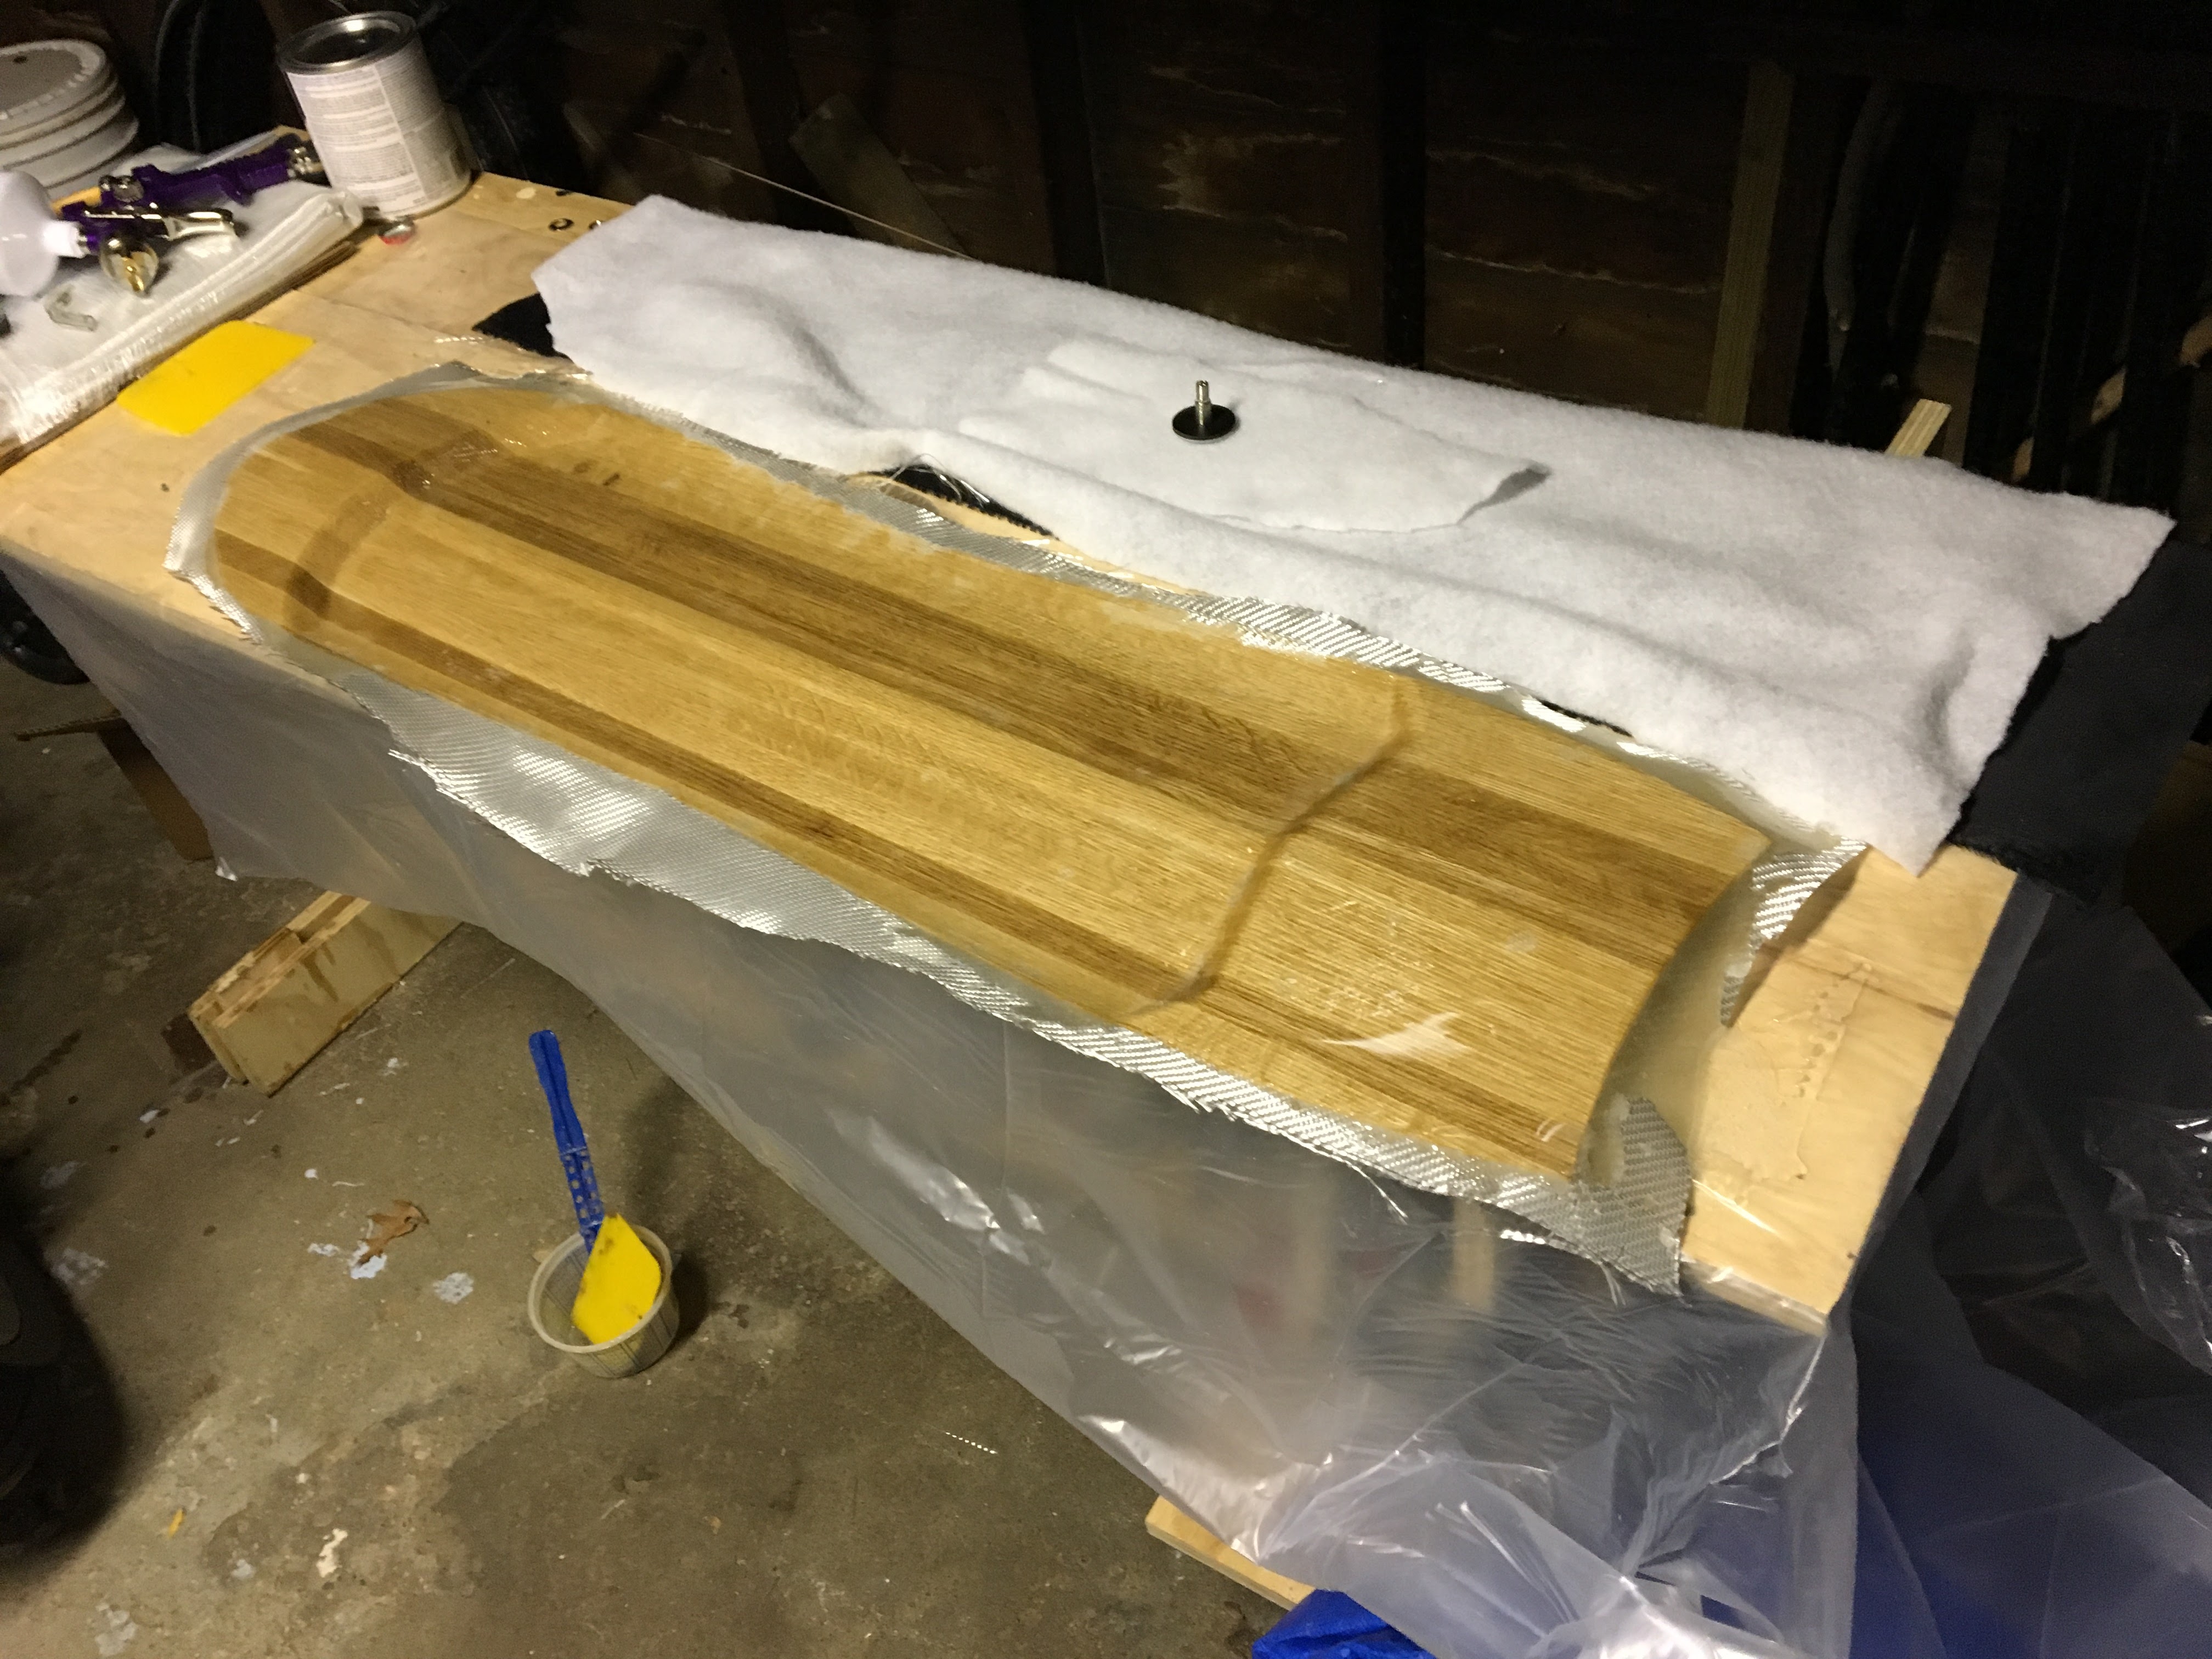
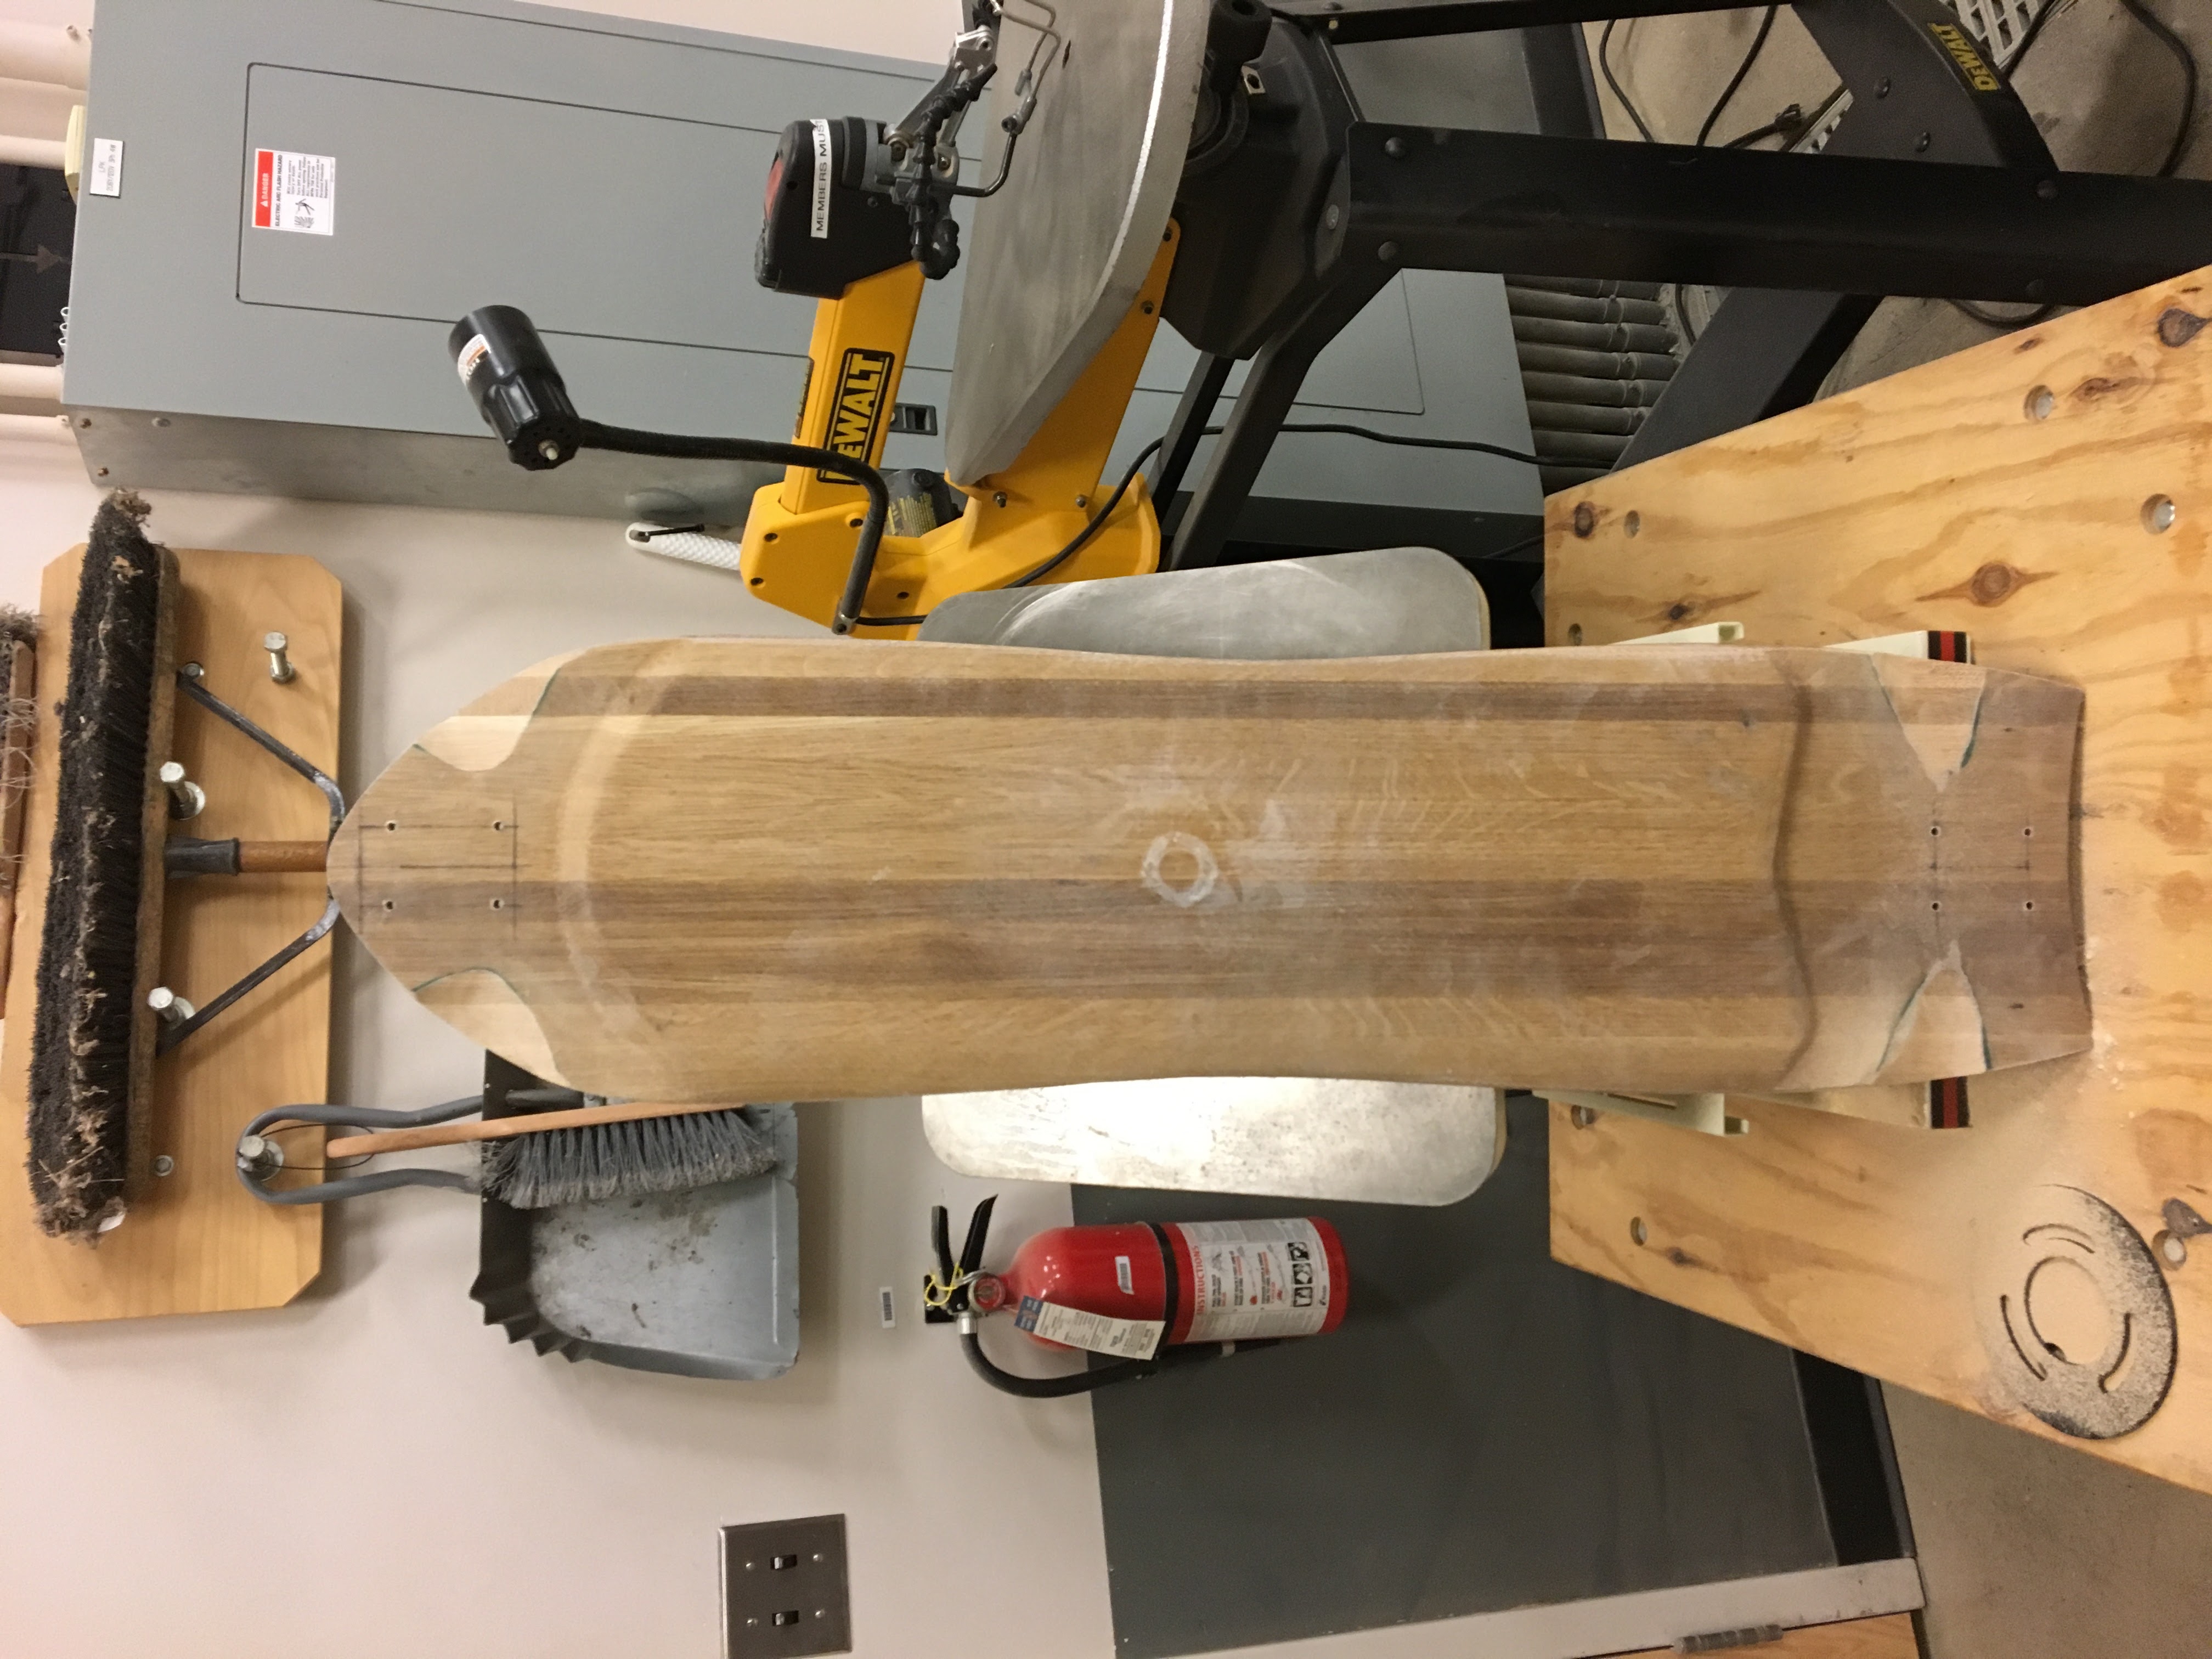
So - I figured I’d build my own deck with some new tool that I have access to through work. I designed my deck in Onshape. I milled it out of a laminated block of white oak and vacuum bagged 7.5oz fiberglass on both sides.


I forgot to take pictures for a while. Here is with the battery assembled with the BMS wired up. Its not pretty and I plan to overhaul the whole thing already. Its functional but it has a ton of room for improvement:
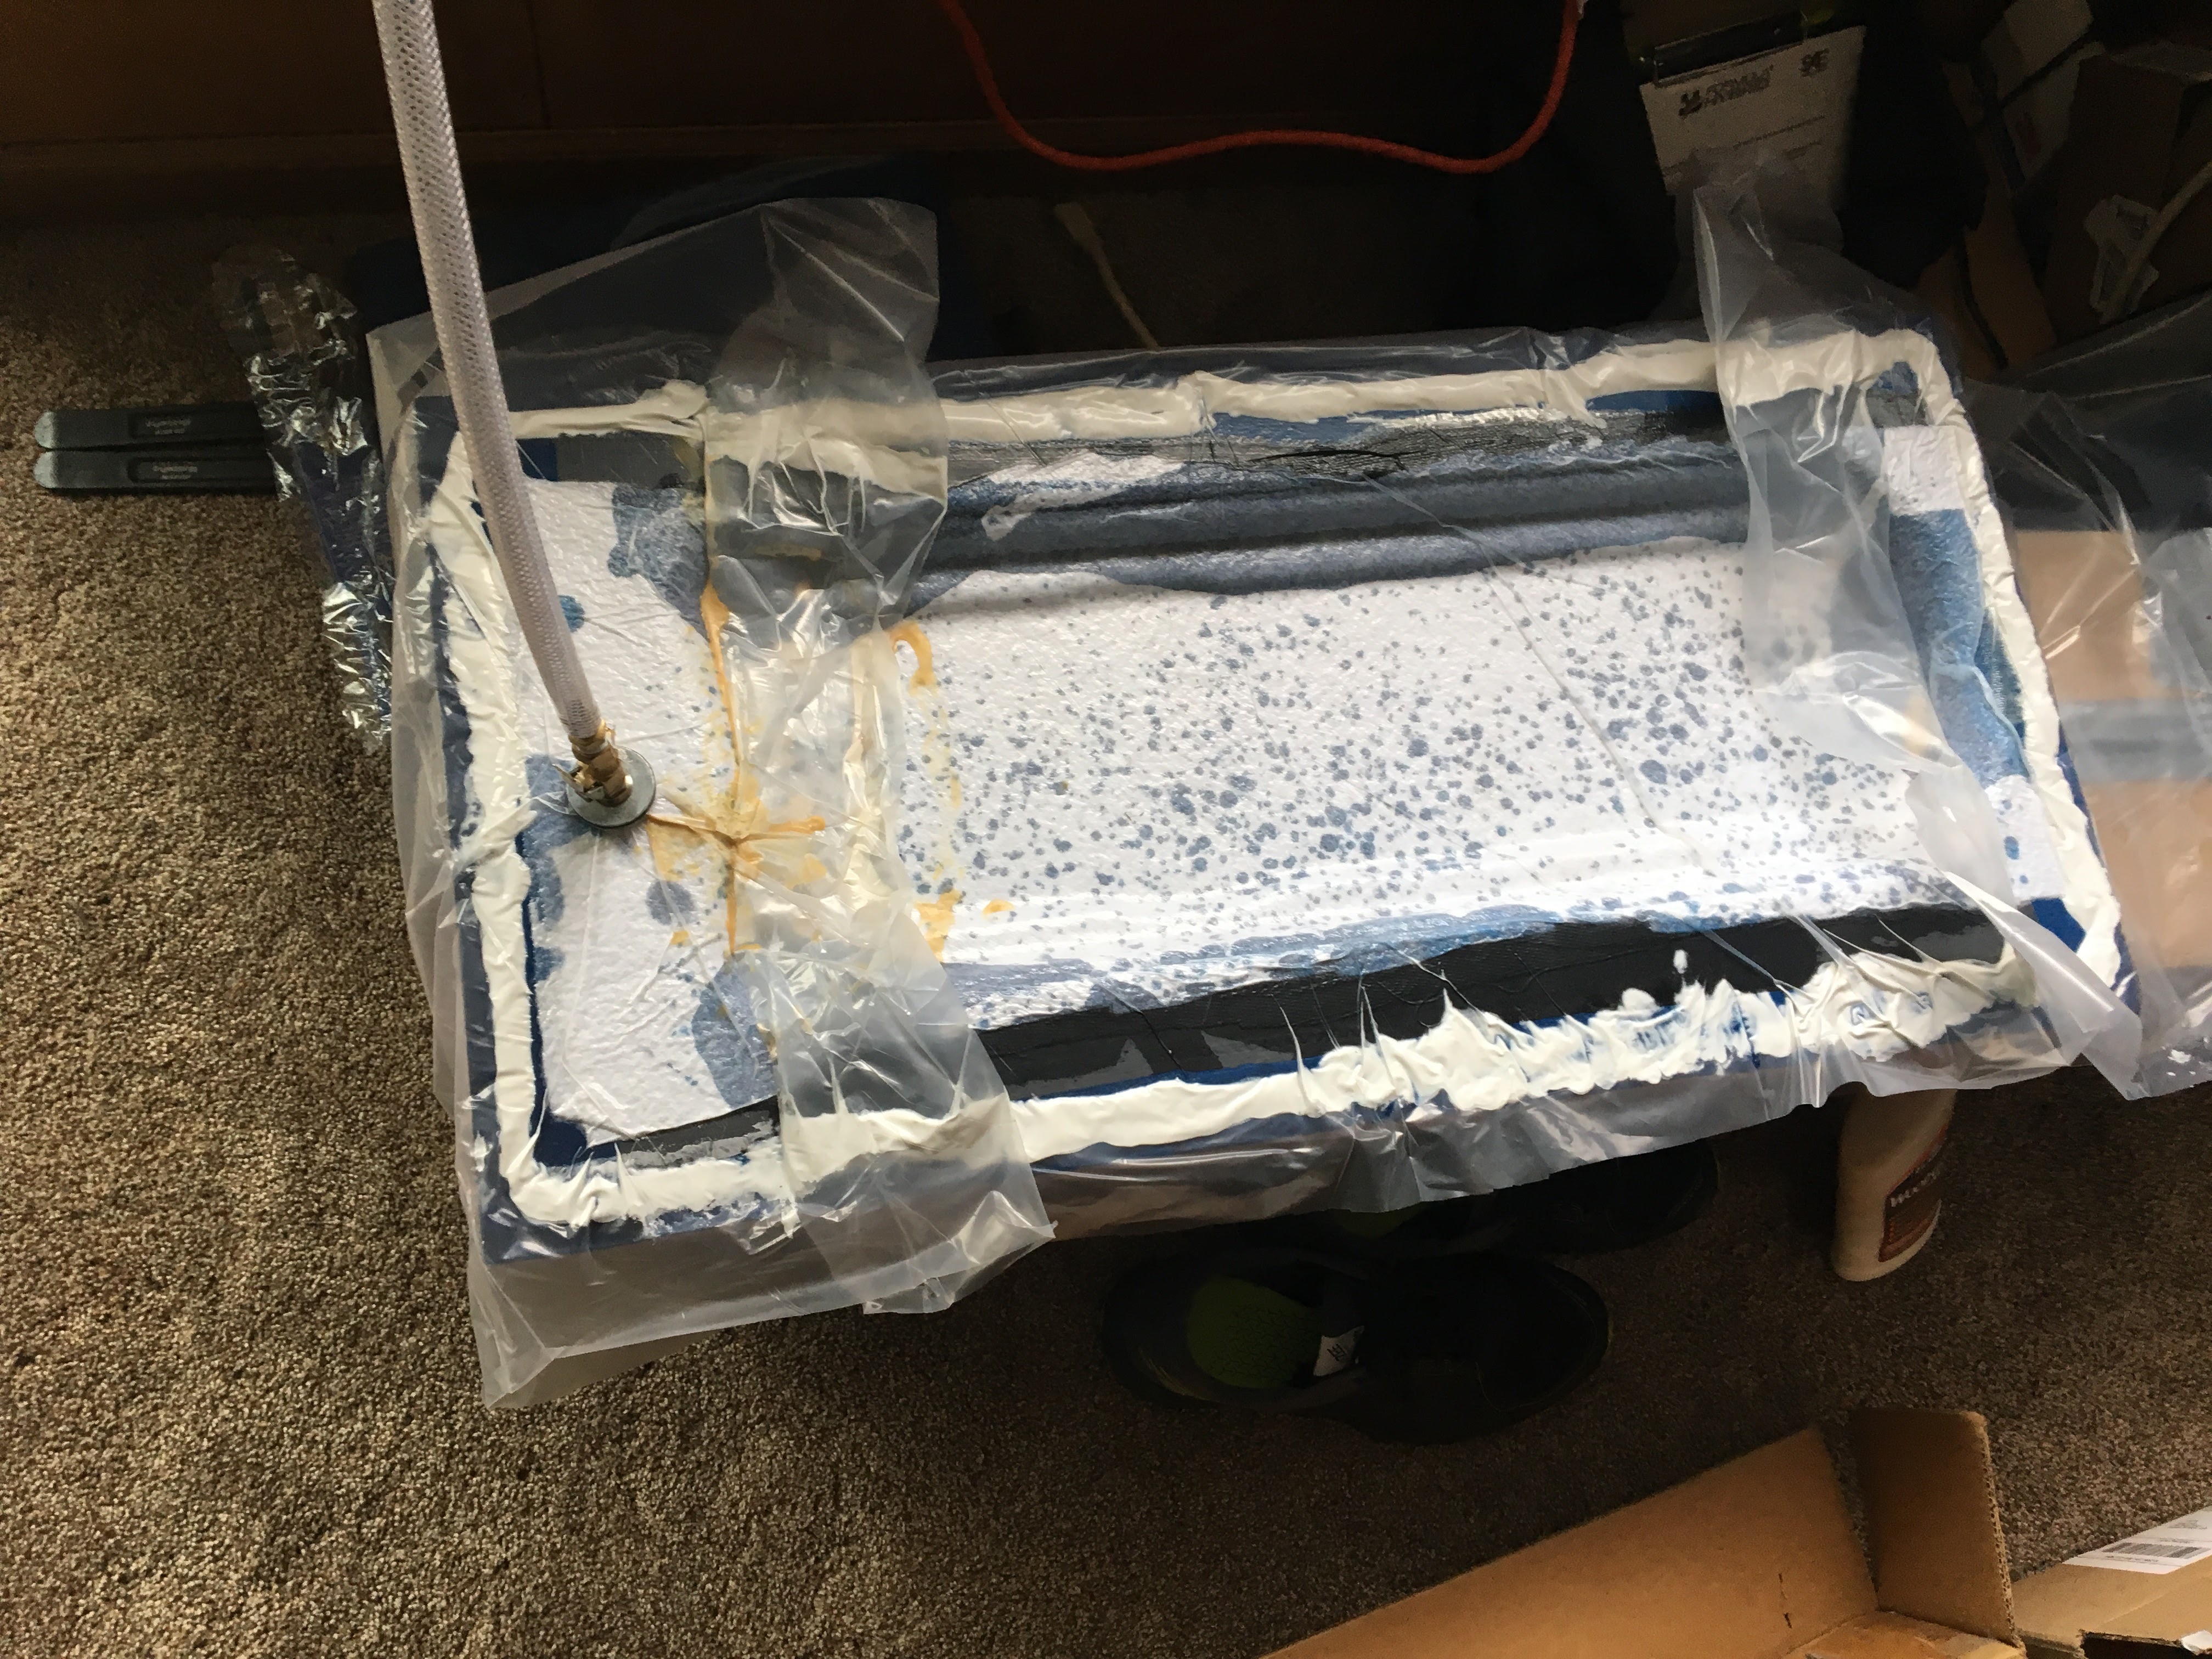
Here is the deck after gel-coat: I only had the blue gelcoat. If I could do it again, I’d go with a clearcoat. Its such a shame that I covered all that beautiful oak up.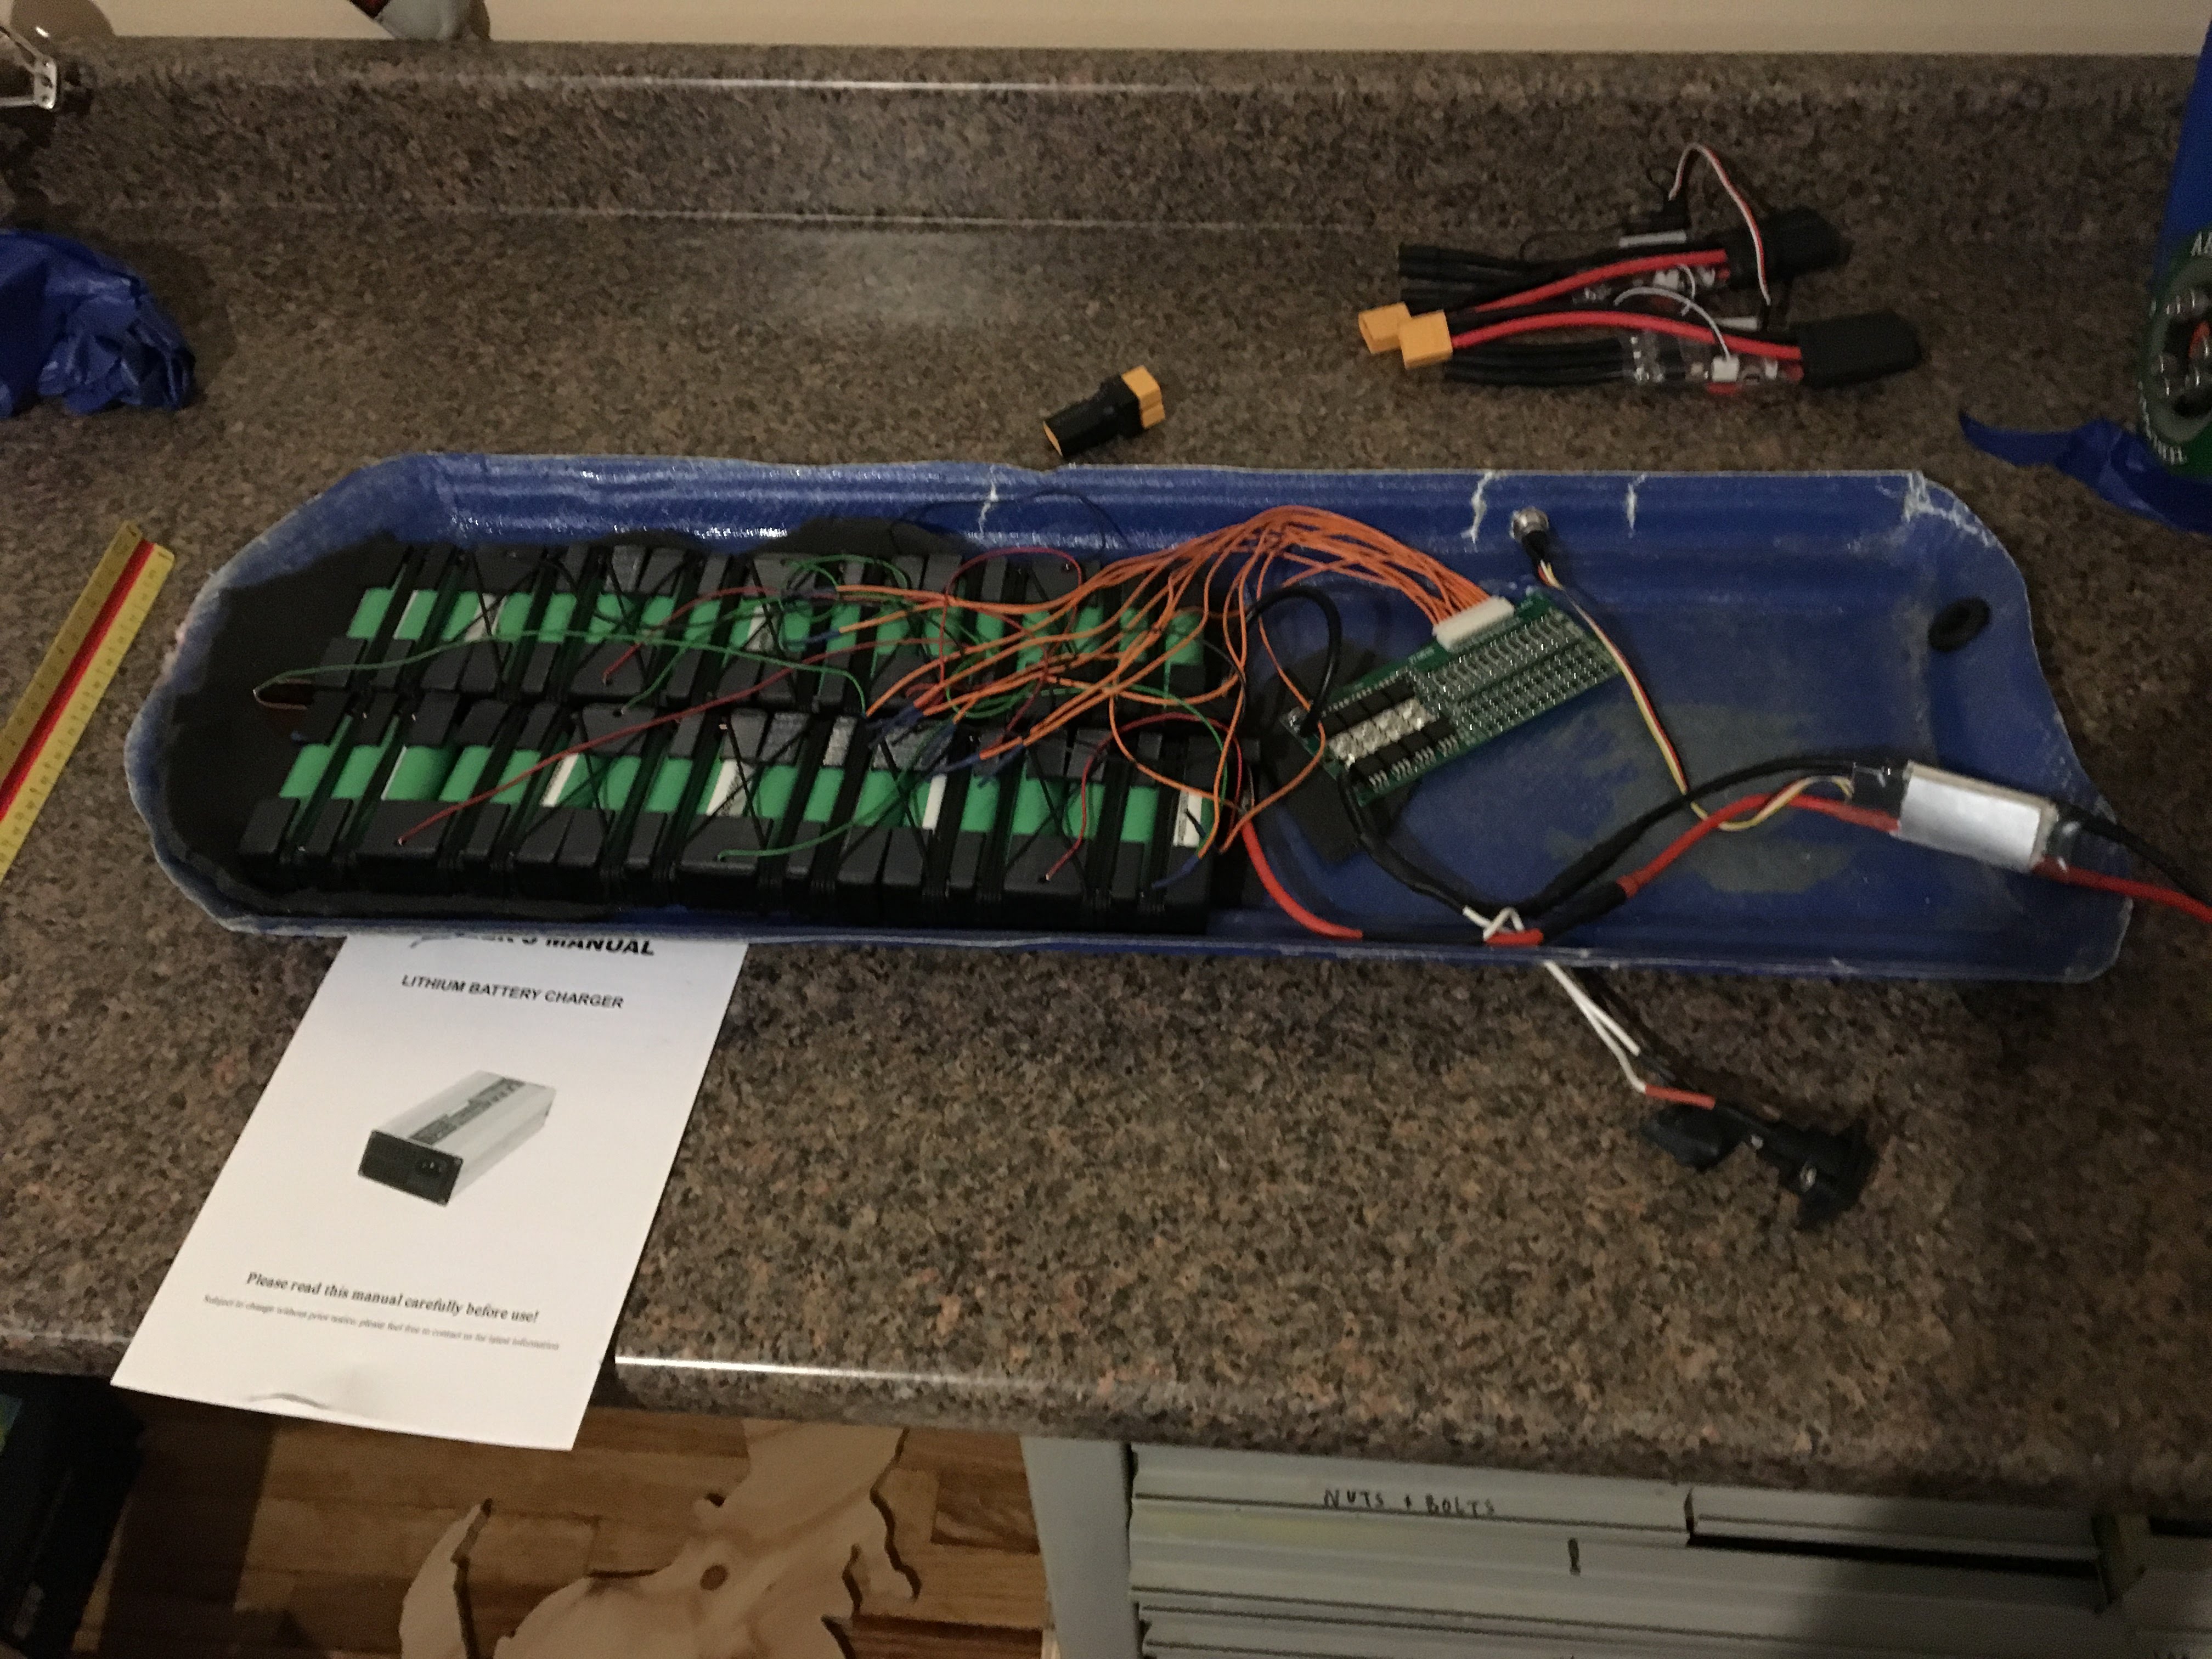

I am currently designing my next iteration of battery. I’m switching to 4P, but limited to 60A so that I can get more longevity from my cells (also my BMS is limited to 60A). Currently the battery uses copper bus bars that are held to keep consistent contact with the cells using epdm o-rings. My next design is going to use screws to apply this force.
I realize that I probably left a lot of information out and it looks rather shoddy at this point. I plan on ‘polishing’ it up over the winter and creating a much more robust enclosure.
What do y’all think?