Hi folks!
Before I present my build I’d like to apologise for how long it is!! I’ve been writing this in bits and pieces over several weeks and had no idea how much I had written. I hope that by sharing this it might help any other potential esk8 builders along in their journey and maybe provide some light entertainment to the veteran builders here!! ![]()
So I love skateboarding, snowboarding, wakeboarding, kiteboarding…basically anything where I can roll or slide sideways!! When I recently discovered how far electric skateboards had come and that the dream was real I knew I needed one in my life! Also, I have a bit of an annoying commute with a lot of walking into and around the city so this would be an awesome way to get my boarding fix in every single day.
Living in Australia I quickly came across Evolve and almost pulled the trigger on a GT Bamboo, but to raise the funds (according to my wife) I’d have to sell some of my other toys which I didn’t really like the idea of! So I tried to find out how hard it would be to build my own and came across @onloop’s video of how to build your own electric skateboard for $450 and was inspired. Following that I came across this glorious forum and have been soaking up information for the last couple of months. I’ve changed my mind a bazillion times on what parts I would use but eventually decided I’d keep cost down by going for a mono drive system but I wanted to ensure that the electric components would future proof me so I could upgrade to dual hub motors once they become more readily available. Also I see this board as an evolution where i can just keep playing with the recipe and always have something that keeps up with the times. Another sneaky thing I’ve found is that buying the board in bits and pieces keeps the cost hidden from my wife!! ![]()
Build list
AWOL Arrow (Deck 1) http://awolsports.com.au/shop/skateboards/complete-longboard-kit-arrow-series-kit-1/
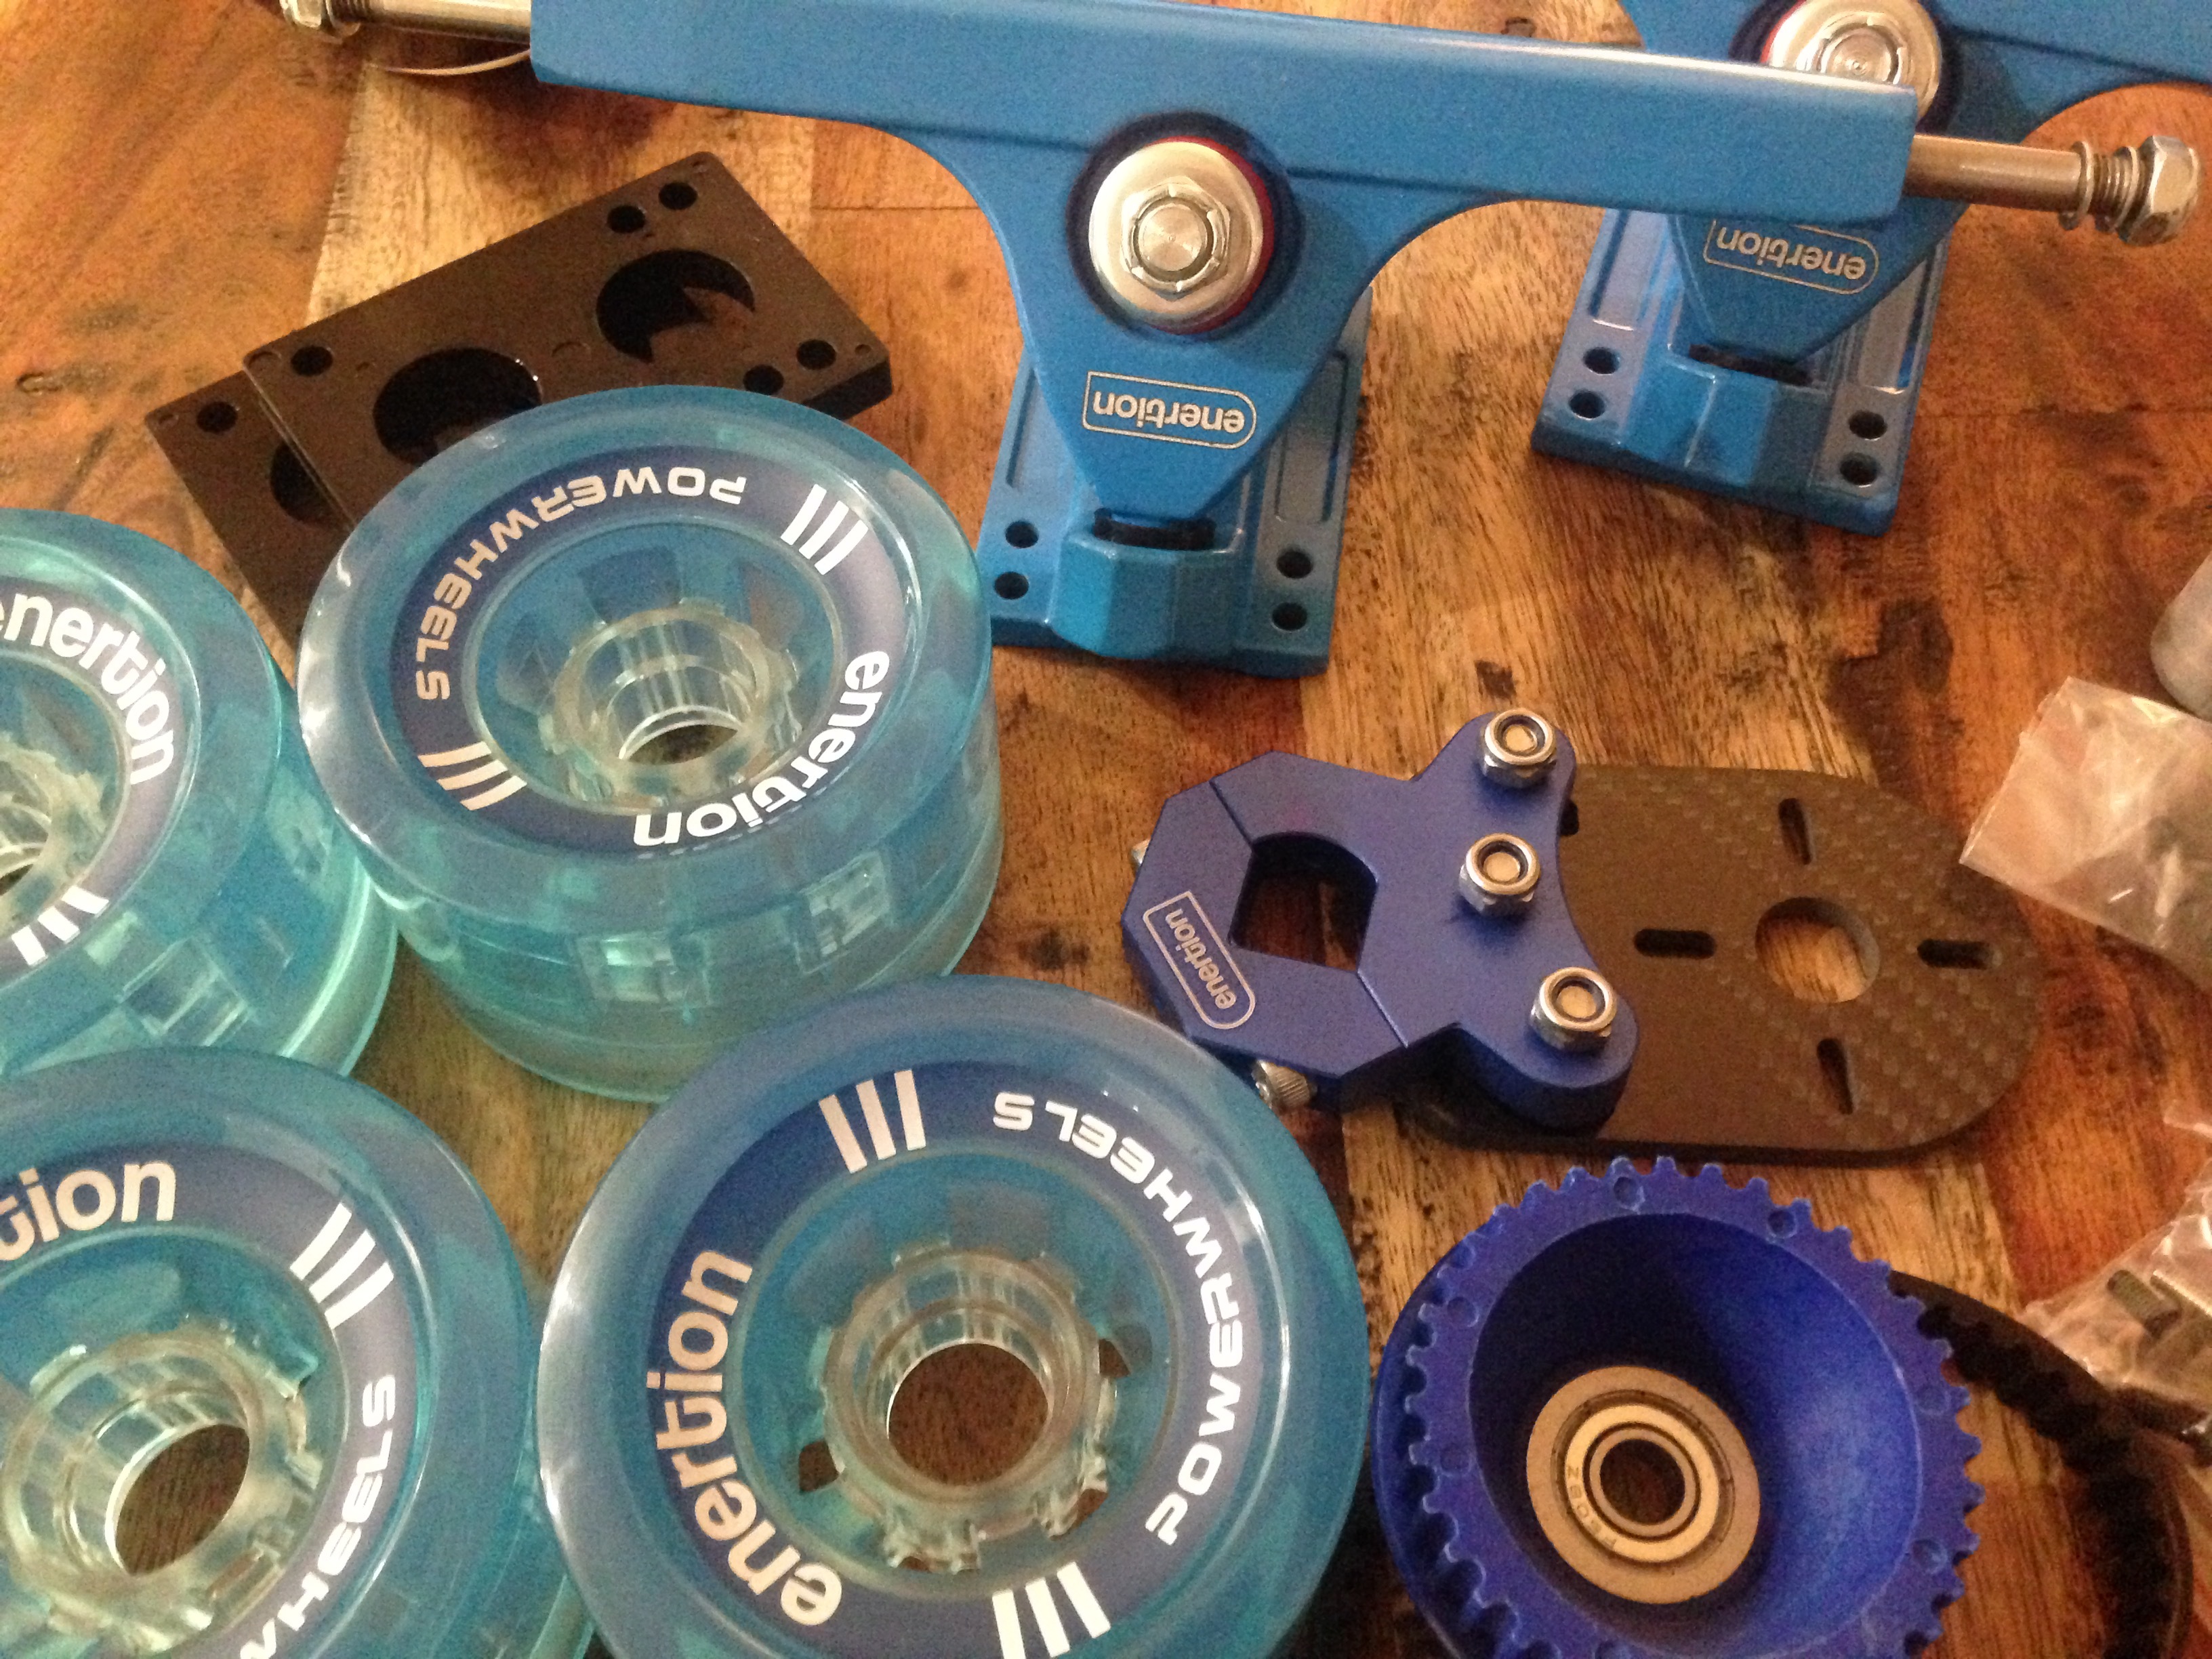
Single R-Spec 6355 Not presently available for sale: Electric Skateboard Motor | Enertion R-SPEC 2.0 190kv 6355 - ESK8 Parts Market - Electric Skateboard Builders Forum | Learn How to Build your own E-board
Enertion Mono Drive Kit Not presently available for sale: NEW: ENERTION 2016 DRIVE KITS | Hot Prices - New Items For Sale - Electric Skateboard Builders Forum | Learn How to Build your own E-board
Enertion SPACE Cell Pro4 http://www.enertionboards.com/on-sale/space-cell-pro4-electric-skateboard-battery-usa/
Winning 2.4Ghz Remote Freebie from Jason
The story so far My first purchase was the Enertion Mono Drive system during their online sale which I bought as it seemed like a pretty good foundation plus it was local to me so I would get it pretty quick. I then figured once I got a deck I’d at least have a longboard to get used to whilst I got my head around out the electrical side of things.
I really liked the idea of a longer double kick board (like a longboard version of a trick skateboard) and LOVE the look of the Loaded Tesseract but it was just gonna be way too expensive for my first build. Searching for something with a similar shape I came across a brand called AWOL in Oz and they had a deck for $60 (AUD) and free shipping so I thought I’d take a punt:

http://awolsports.com.au/shop/skateboards/complete-longboard-kit-arrow-series-kit-1/
It turned up and felt like fairly good quality but was clearly a cheap finish, the deck graphic was ugly and poor quality and the routing around the wheel wells was wobbly. It had potential though so I stuck on the hardware and took it for a ride.
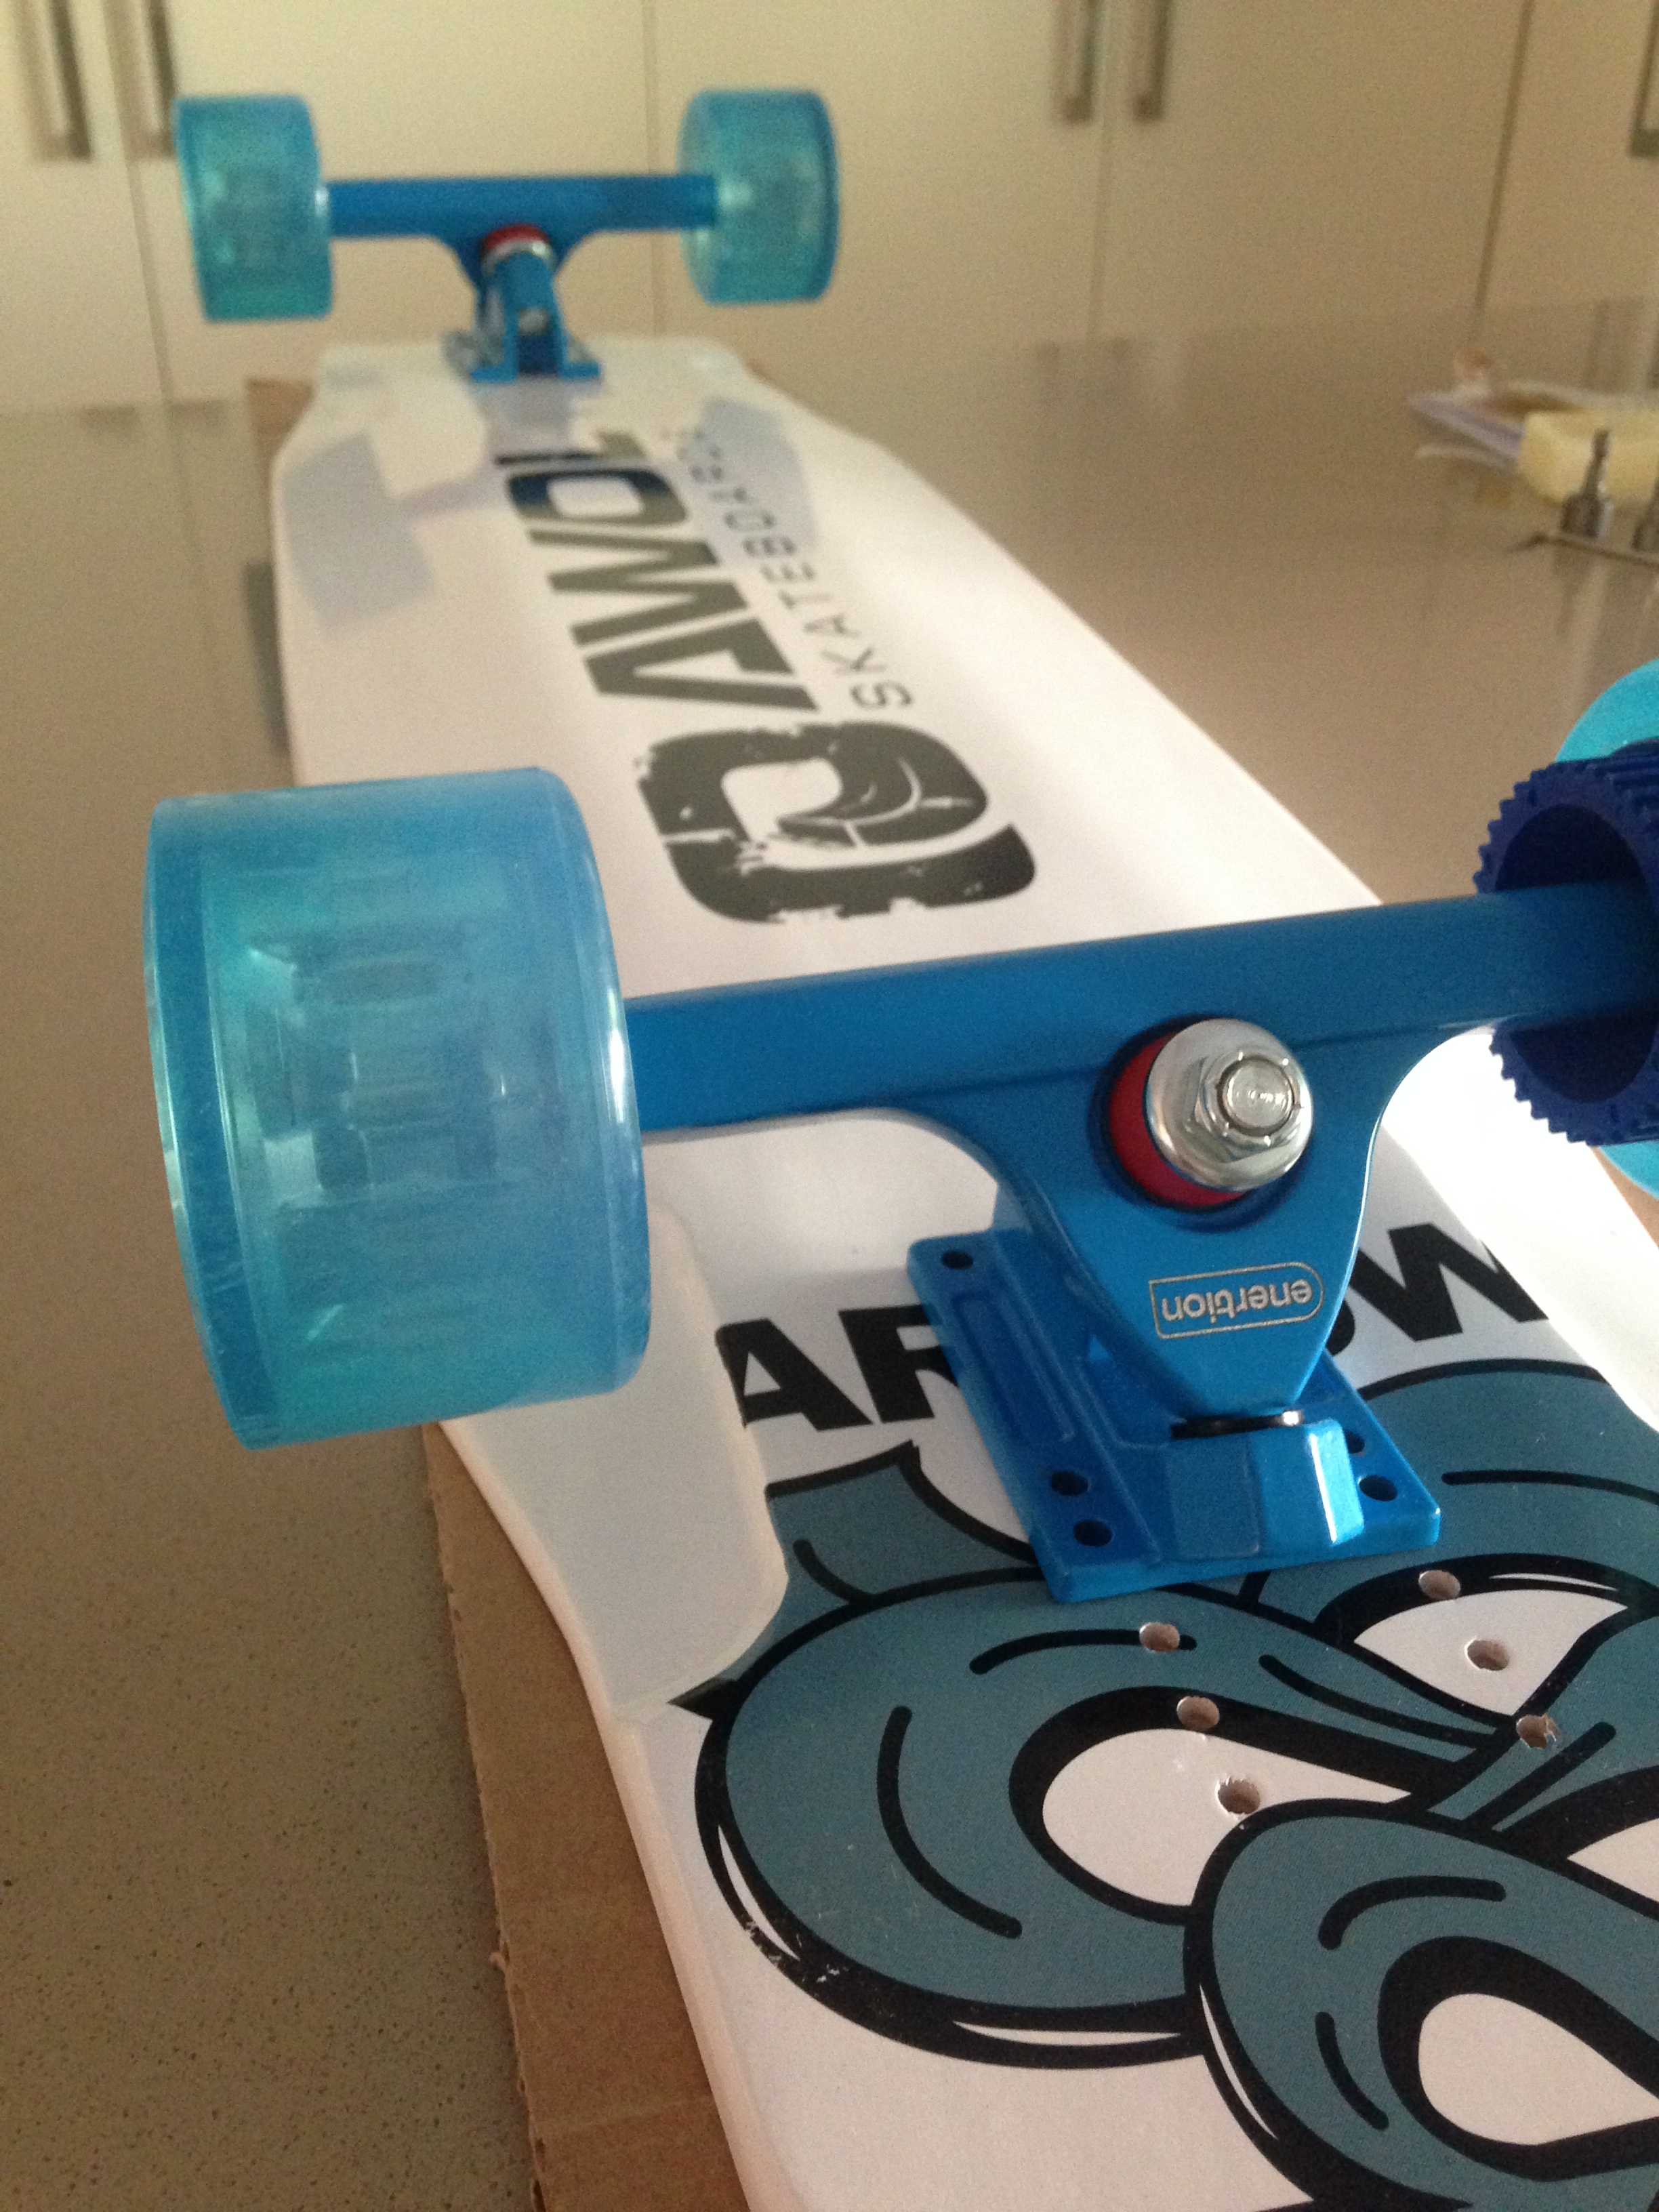
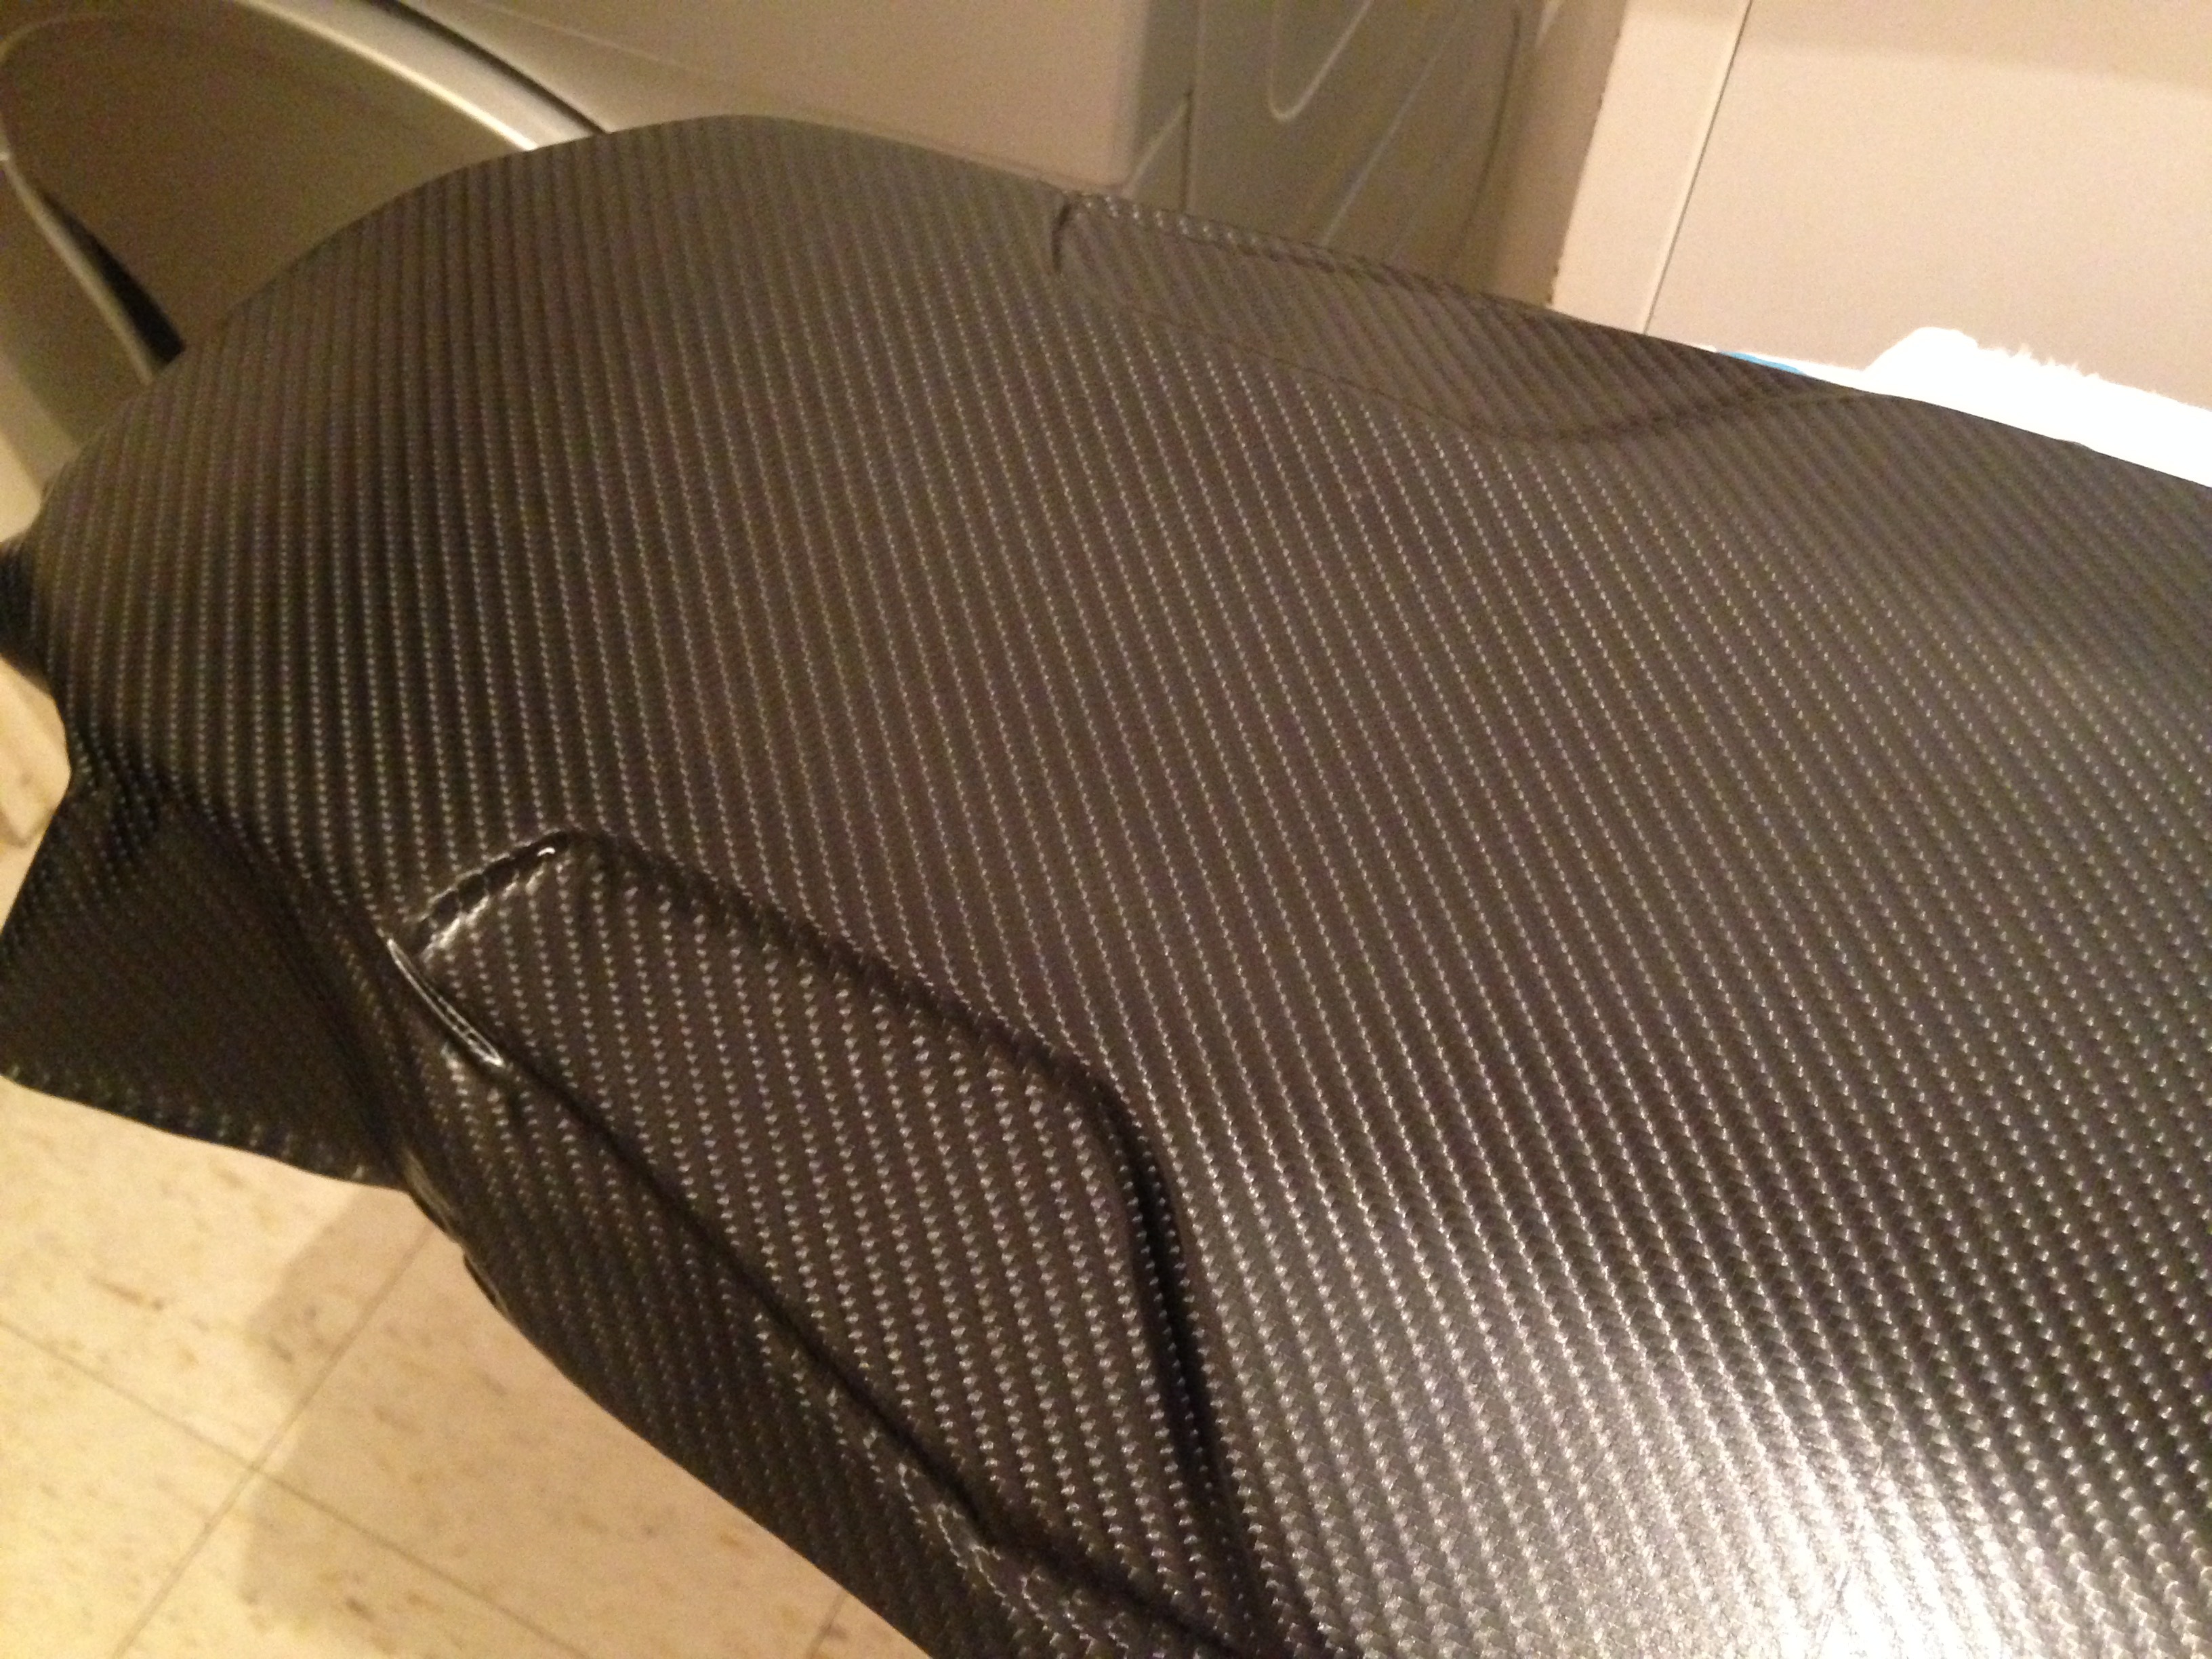
Pushing a longboard was much harder than I imagined compared to my skateboard and I ate sh*t at least 3 times in the first hour learning to ride it! Once I got used to it though it felt great at speed and I knew it would work well once electrified. It was still bloody ugly though so I lightly sanded the deck, tidied up the routing and softened the edges around the grip tape. I liked the look of some of the carbon decks I’d seen so ordered some vinyl sticker:
When it turned up I whacked it on and used the heat gun a little around the edges and to get rid of the fold marks from shipping.

Time for some juice! Having scoured HobbyKing for Lipo deals and comparing various builds I realised that I wanted at least 10s3p to give me the power and range I wanted. Working out the cost of this with the BMS, charger, anti-spark, on/off switch, capacity meter, enclosure I realised that it might be more cost effective to go with a pre-made unit and dropped @onloop a PM about the potential of a SPACE CELL PRO3. As it turns out he only lives 30mins up the beach from me! Unfortunately he didn’t have any in stock (believe it or not it’s bloody expensive to get them shipped to Oz) but he did have a SPACE CELL PRO4 sample he was willing to part with for what it cost him to build plus a slab of beer! ![]() So I arranged a meet up to come have a look.
So I arranged a meet up to come have a look.
The Enertion Magic Man Cave As you might well imagine Jason’s workshop is AWESOME! And he is a super nice guy to boot. Randomly I had my Grandad over visiting from the UK and it was the only day off I had that we could meet up so I took him with me. My GD used to be an engineer and he was like a kid in a candy shop (even worse than me!) and Jason gave him the full guided tour and I’ve never seen him so happy in my whole life! Him and Jason had a proper geek out and in a very short space of time I watched a 78 year old man become hooked on the concept of electric skateboarding. Whilst I was there I asked Jason if he could help out with any of the other parts I needed and I ended up leaving with a goody bag including a VESC-X, R-Spec 6355, Winning remote (which he advised could be crap but more on that later), a new enclosure, all wires, cables, bolts and even some extra risers. A lot of the parts were used for testing so he did me a really cheap price and I left with everything I needed to build my board - AMAZING. @onloop you’re a bloody legend! After a beer and a round of high 5s, me and my ESK8 addict Grandfather headed home to build this beast!
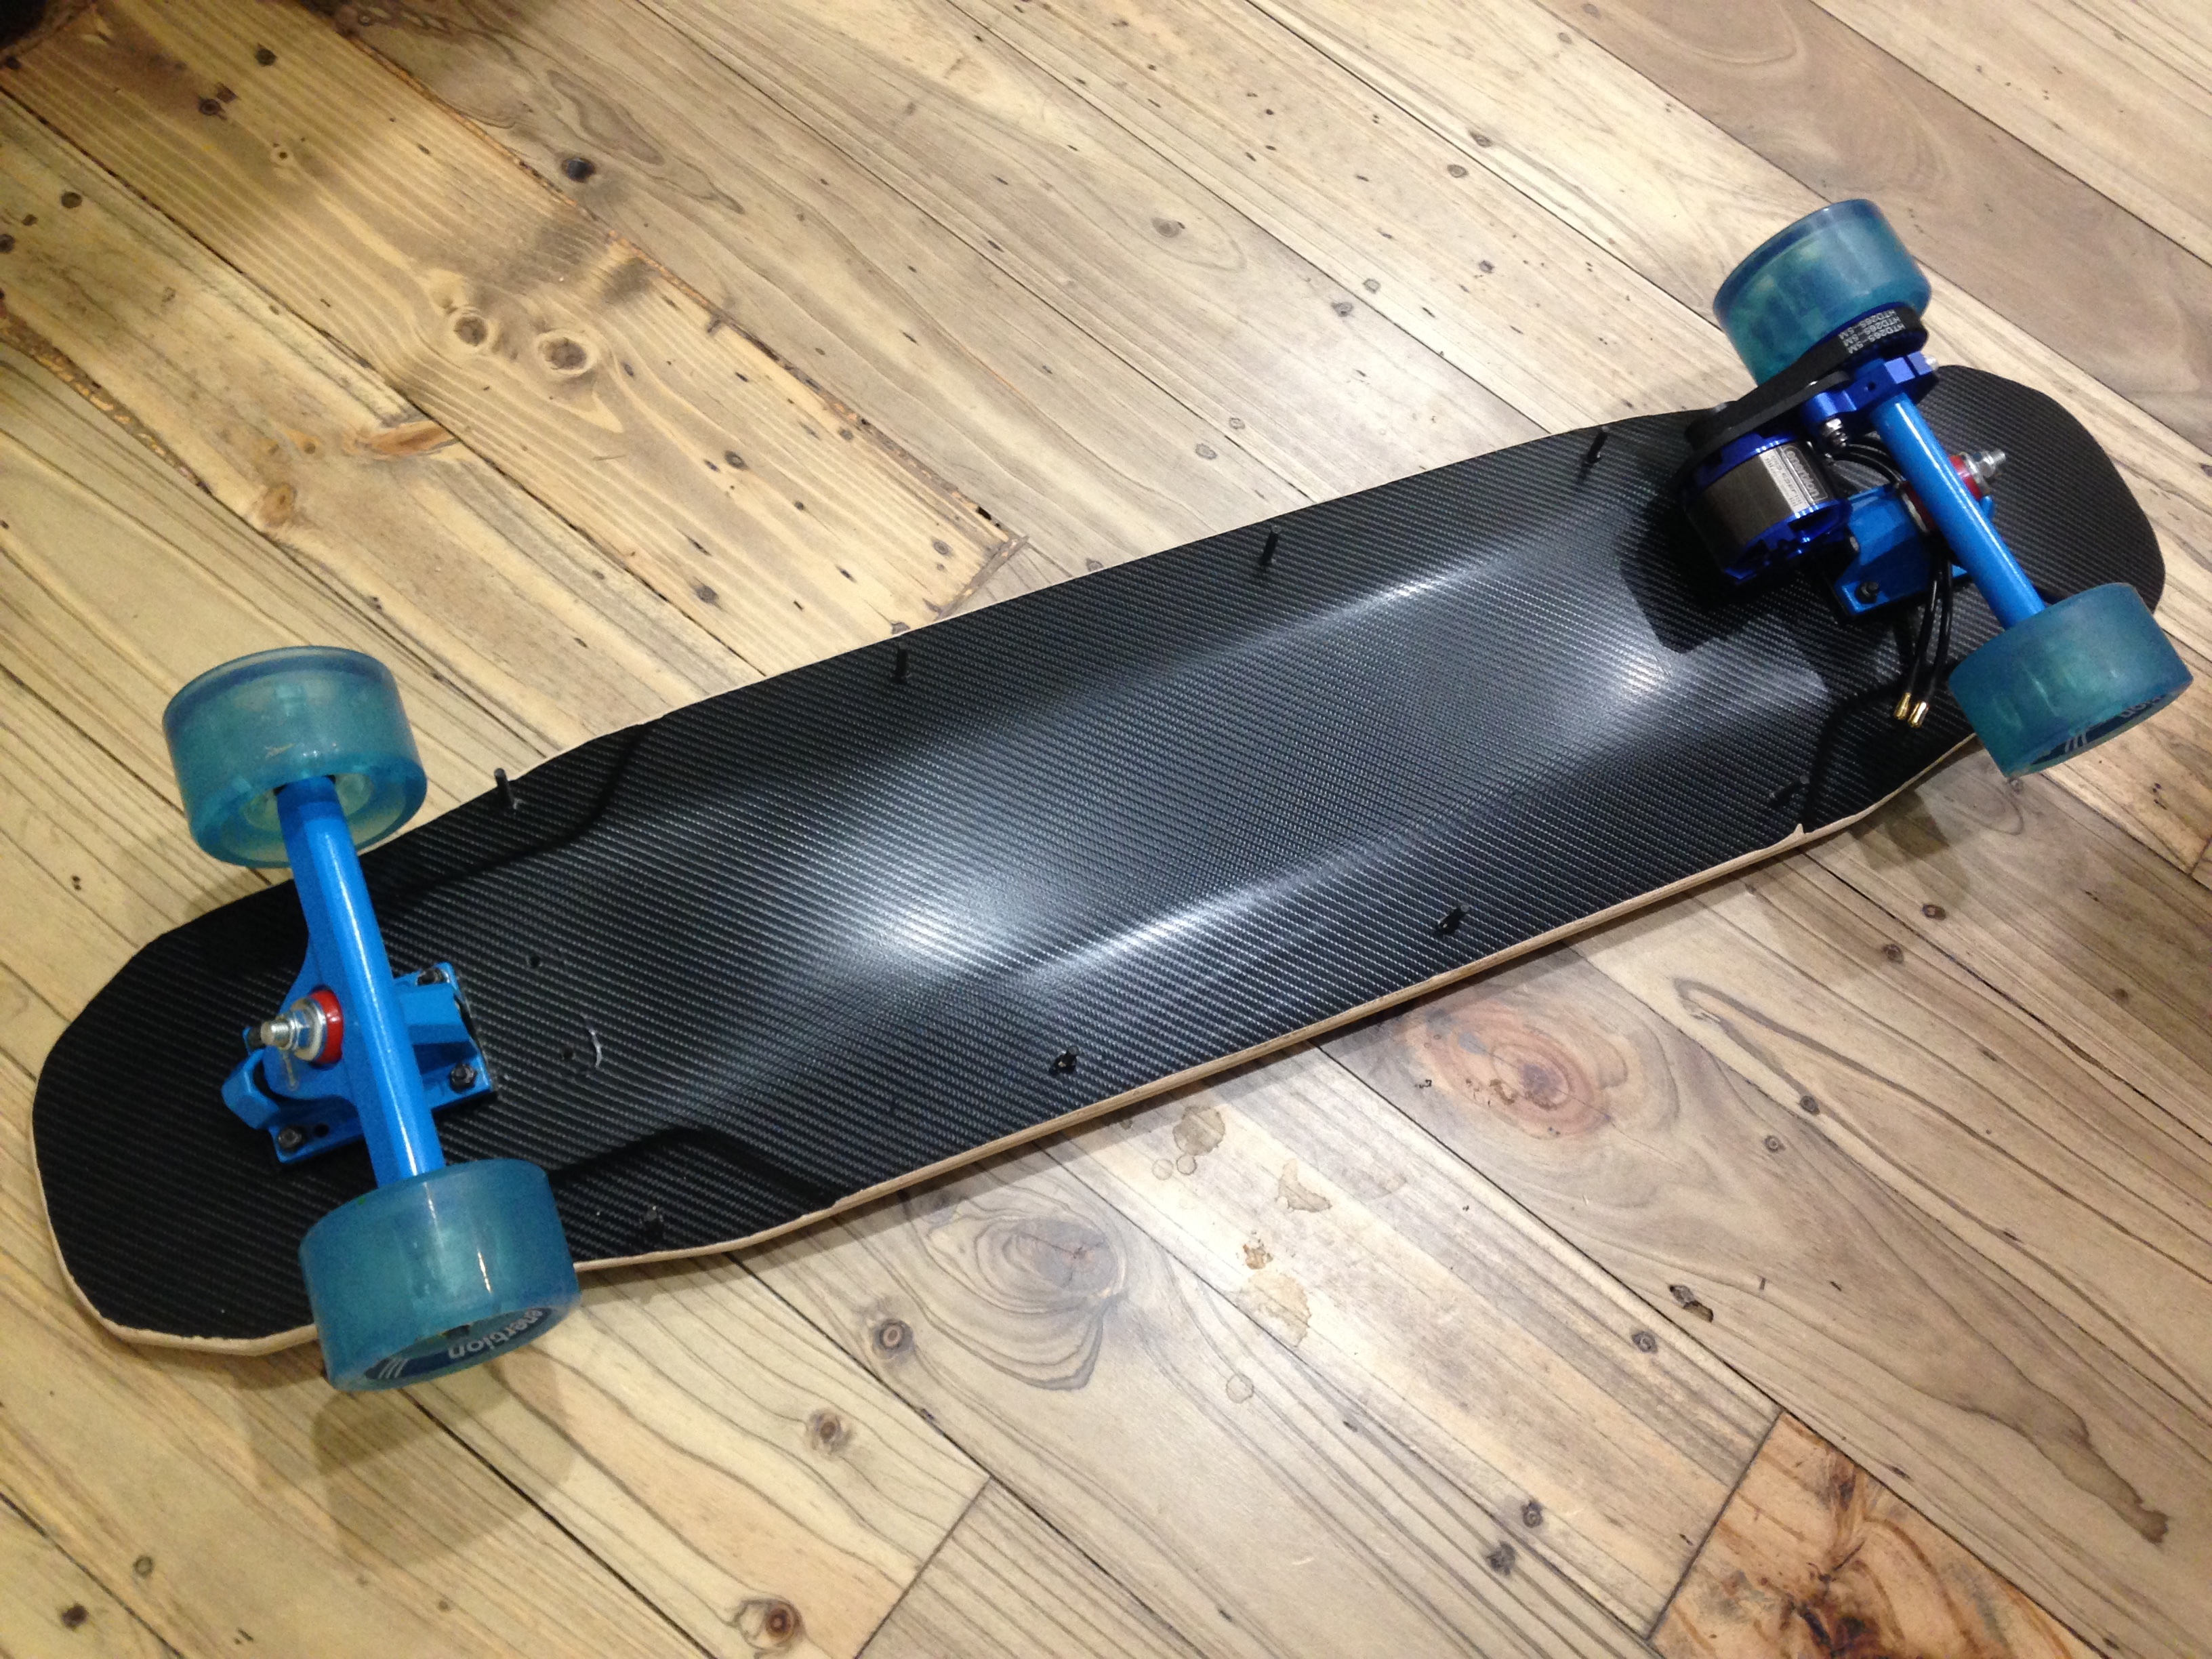
Motor assembly Not too much to say about this really as all the Enertion stuff goes together pretty easily. I did have a bit of a struggle getting the final screw into the motor and bracket however and it has gone in slightly skewiff which is slightly annoying as I’ve likely cross-threaded it but it’s definitely not coming out in a hurry so all good!

Transplanting the battery As I had a shiny new enclosure with weather seal I decided to transplant the electrics straight away. Before I did I thought it would be sensible to buy a multimeter, a new soldering iron and some other bits and pieces. Whilst I’ve used a soldering iron plenty in the past I’ve never really worked with live batteries as and it would be fair to say I almost blew myself up a couple of times!! These things are not to be messed with without knowing exactly what you’re doing and I soon learnt that I didn’t really know what I was doing! Firstly a multimeter is not a toy. I accidently had the wrong setting selected and made my capacity meter go pop! Even though I blew off the solder contacts and charred the board it actually still worked, but I’ve order a new one to be safe. Then there was the incident of re-attaching the laptop style charger port; when doing this I accidently touched both contacts with my soldering iron - BANG! Another scary moment which I luckily got away with all my fingers and no damage to any cells/electronics - well that I know of anyway!
The VESC Whilst I’m apparently incompetent with electronics the software side of things made complete sense to me and creating the settings in the BLDC tool was pretty straight forward. It probably helped that the VESC had already been used before by Jason so fired up straight away with the correct firmware version. I watched Jacobs video on Facebook which was extremely helpful - how you manage to talk and look after a baby is beyond me (hero worship right there!) and once I had all the specs from @onloop for my parts getting the settings right was quite straightforward.
The only thing that did confuse me for a good hour or so was binding the remote. It turns out I had the binding part correct first time but it accelerated hard every time I turned on the remote and only stopped when I pulled back the throttle. After trying to search for a solution, taking apart the remote to look for a loose connection I realised that it was quite simply just the accelerator calibrator that needed backing off:

And we have power!!!

Oh…btw, I didn’t realise the motor was spinning the wrong way until I got it on the tarmac! Obviously switching the wires around did the trick! ![]()
Also, on these little Winning Nano remotes - I have nothing but good things to say about them (so far!). I know they get a bad wrap, and perhaps I’m lucky and got a good one, but it hasn’t dropped out once and has been nothing but super responsive. Fingers crossed it stays that way!! ![]()

Seeing a board move all by itself for the first time is just bizzare!! I don’t think I’ll ever get over that - just surreal! ![]()
Maiden Voyage:

Next morning commute to work:

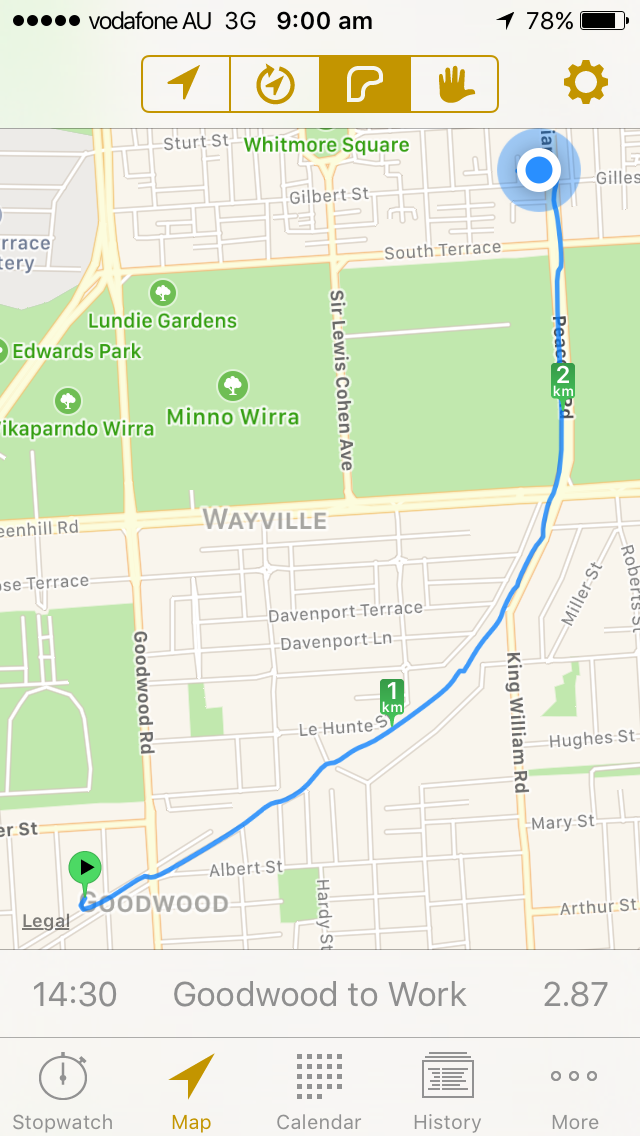
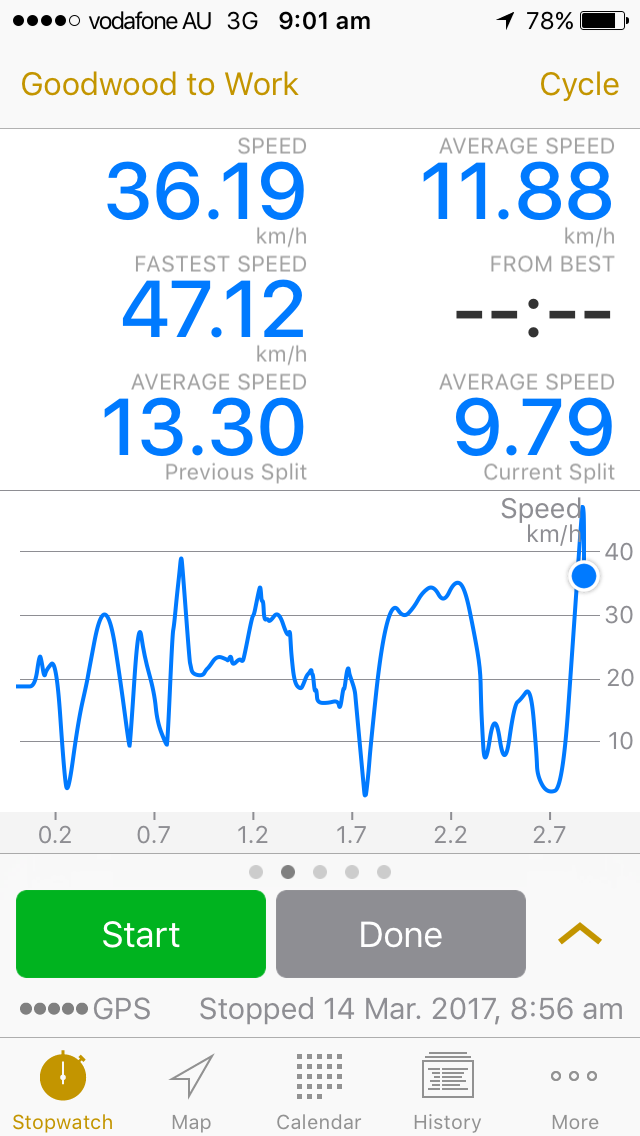
47km/h!!! Boom! Think there may have been a slight tail wind and the tarmac (cycle path) was super smooth but still happy that it can hit that. Not going to be pushing that hard in office clothes though - just got a little curious about what it could do!! ![]()
Cruising the esplanade:

Next steps / things to improve:
So since writing the above build log I’ve been riding the board for about a month and have racked up around 90 - 100km. I’ve now realised a couple of things I like and a couple I don’t, have modified settings, have stripped and broke a belt and generally need to update the board to ensure it lasts!
Enclosure
The SPACE CELL is really good however it’s a little bit oversized for what I need and I think I could get away with moving the truck back to make the board a little bit more nimble. I’d love a crack at making a proper carbon fibre one like the incredible ones @whitepony has been making (dude - seriously beautiful craftsmanship) or I may be a cheap ass and just get some fibreglass fabric and do it that way. OR I may get my ‘ghetto’ on aka @ninja and vac seal bag one! ![]()
Extra motor The mono is great and gives me a super high top end and is pretty good at accelerating too. The only problem is it eats wheels and I’ve already killed a belt. I could back off my brake settings and be a more sensitive lover (not riding that sh*t out of it) but hey, I like to ride hard and fast so there’s no chance of that! I do always push start to be fair and don’t over break down hill hammer it up hills etc. Can’t decide whether it’s worth waiting for decent hubs to come on the market or bite the bullet and invest in another motor/VESC.
All Terrain wheels Change out the wheels to MBS All Terrain longboard wheels - I’m super keen to do this to preserve the life of my wheels. I also travel some pretty cobbly paving in places on the way to work so this might help with the bumps. Could I keep the same gearing with these?

Anyways, I’ll keep updating this thread with any upgrades, thanks for reading, apologies for the poor camera work and poor quality vids - I’ll look to start using my GoPro and a decent SLR in future, and thank you to everyone on the forum for your ideas and innovations as I wouldn’t have had a hope in hell of completing this build without you all!
Keep shredding, Dan

 Been loving your work too! Yeah it’s funny with my Grandad he’s soooooo keen it’s ridiculous and he’s egging me on to make an e-mtb now!!
 As for clearance I doubled up on riser pads and had to buy some longer deck bolts as the standard longboard ones didn’t fit. I’m actually going to order so angled ones soon to see if that works any better but I find the ride really comfortable with the double riser set up and there’s zero wheel bite now.