2020-06-26T05:00:00Z
Electric Skateboard Build Log v1 - June 2020
by jvu2000
Introductions
[Being my first build, I did shop around to a number of different vendors. I was looking for an overall balance across the board of quality, price, selection, and importantly, customer service. Man, the guys at Propulsion Boards are terrific. I first ran into these guys’ works on YouTube where they had created a number of build and information videos. We had a number of e-mail exchanges prior to the order, and these guys were answering their emails within a few hours for me. Anyways, when I received the order, the post-purchase support was awesome. I needed help with a few things and even an exchange for a defective battery - help was prompt. I appreciated that! I also failed to mention that both times when I received the packages, there was a handwritten appreciation note in the box.]
TL;DR: This board took forever and too long to build, but I have really enjoyed the building process along with a healthy dosage of frustrations and prayers. All-in-all, it was worth the investment.
As I mentioned, this was my first DIY build. When I was shopping around to purchase this esk8 kit, I also had a few other design goals in mind:
- Easily Replaceable/Sourceable Parts
- Performance & quality that will be greater than prefab boards, e.g., Boosted, Evolve, Meepo, Ownboard, etc.
- Has to look like it was factory built (or at least close to it; I’ll give it a go)
- Speed of at least 25 mph
- Range of at least 20 miles
Basic Specs:
- Esk8 Board Total Weight w/ “Anker”Lights: 28 lbs
- Esk8 Board w/o Battery & Lights: 20.5 lbs
- Weight of Battery: 6.5 lbs
- Total Length: 43 in
- Wheelbase: 37 in
- Width: 13.5 in
Parts List

| Category | Item |
|---|---|
| Deck | 2014 Bustin Boards Ibach 39" Limited Edition Deck (10” Wide)*** |
| Wheel (x4) | Torqueboards 110mm Arctic Blue Torque Wheels |
| Trucks (x2) | Ownboard Double Kingpin Trucks (Evolve Clones) |
| Battery | 12s3p Samsung 40T 21700 12Ah Battery Pack |
| Motors (x2) | Propulsion Boards/Flipsky 6374 190KV |
| Motor Mounts (x2) | Ownboard Mounts (Belt Covers were 3D printed) |
| Motor Pulley (x2) | Flipsky 16T, 15mm Wide, 8mm Diameter Shaft |
| Wheel Pulley | Evolve 36T Kegel |
| Belt | 15mm Wide; 270mm |
| ESC | Flipsky Dual 6.6 VESC w/ Bluetooth Module |
| Remote | Flipsky VX2 Pro (Vesc6) |
| Enclosure | West Coast Standard Fishbone Enclosure |
| Lights | 3D Printed Picatinny Rails, 1” Scope Mounts, 1” dia. Anker Flashlights |
***The Bustin Ibach boards are long discontinued, but Skateshred makes a similar board: https://www.skateshred.com/wholesale-blank-longboard-decks/40-x-10-drop-through-blank-deck.html
Deck and Truck/Wheel Assembly (and Checking Out Battery)
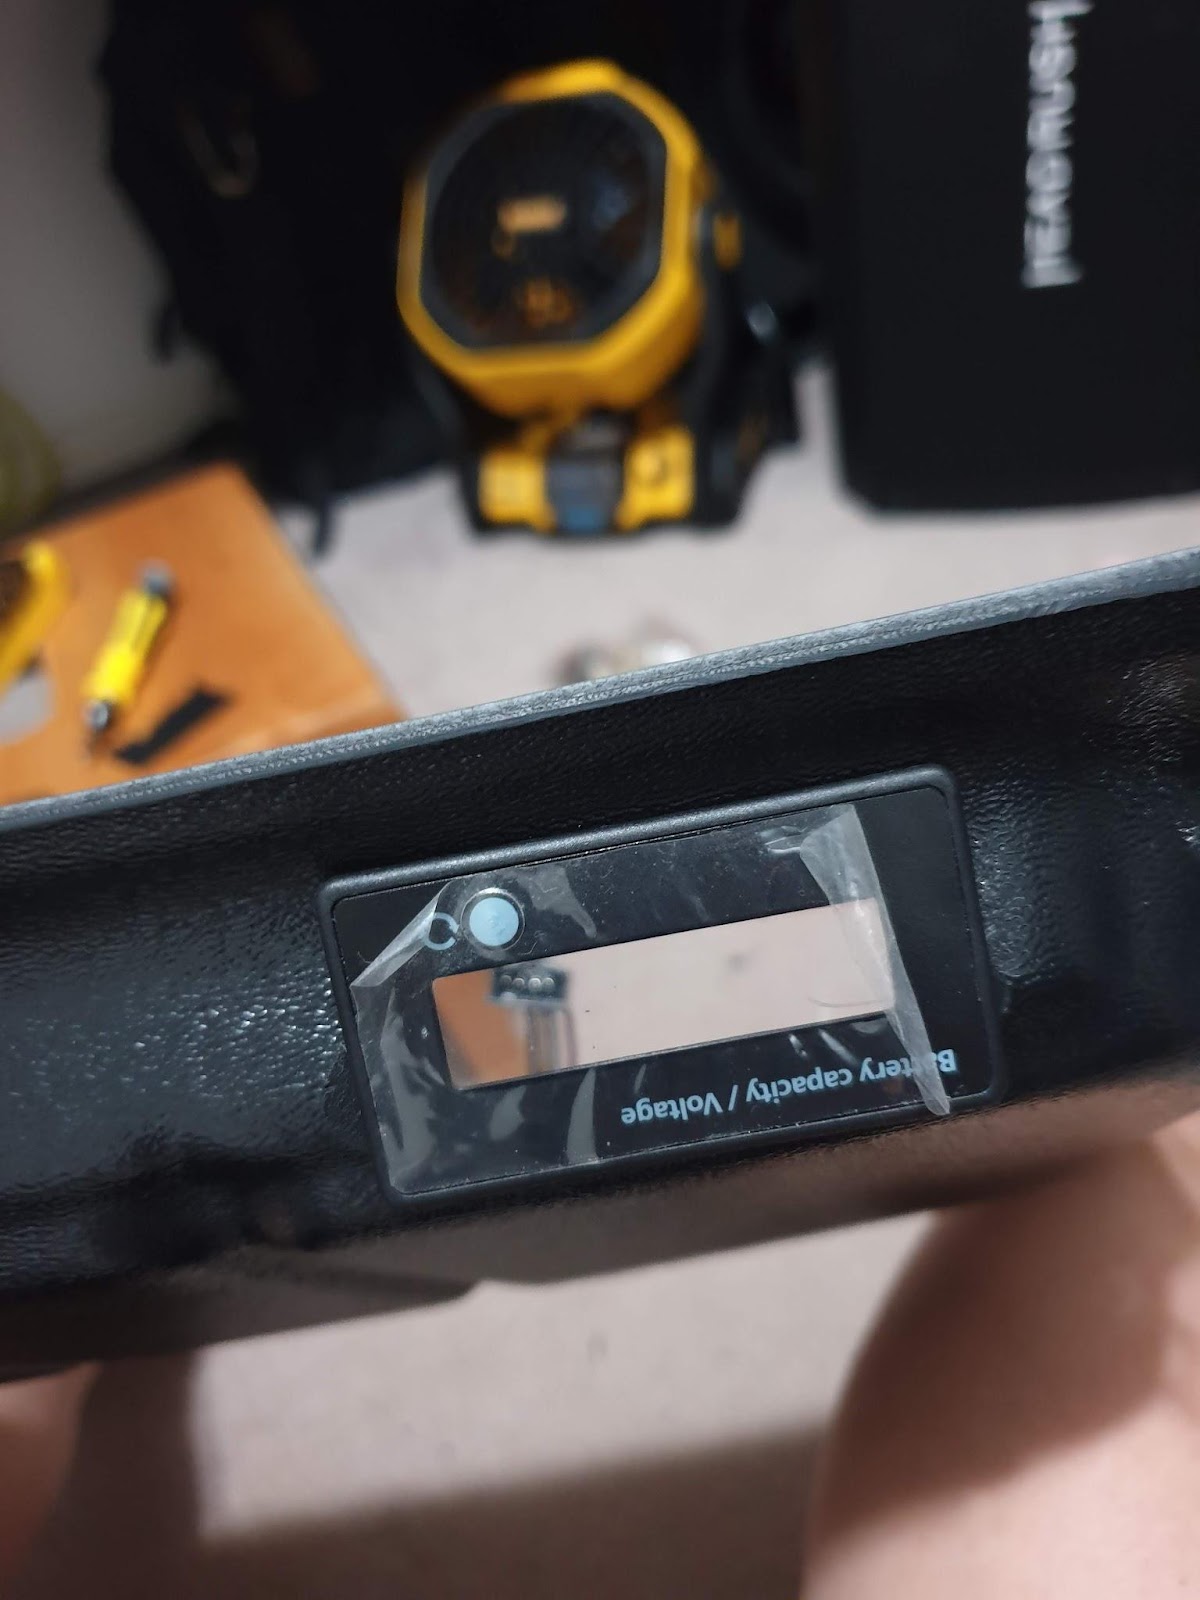
Looking at this, my first impression was how big (and heavy) the freakin’ battery was. These are the Samsung 40T 21700 cells. Although this is a good battery, I am not a fan of this all-in-one design especially having the power switch hard wired to the battery. (The guys at Propulsion Boards were awesome for switching out this battery for me. The first one that I received was a nightmare of a defect. Despite the battery/BMS being off, it was outputting full voltage at all times.)
I love all things battery-powered. And along with the battery is a generous sized enclosure to house this thing. At first glance, I thought it was a “generous” size until I quickly learned, it was barely able to fit everything inside. Ya can’t have it all - biggest battery, biggest VESC, and everything else in a slim enclosure. This is about as good as it gets without routing out a layer of wood from the deck (and I wanted the stiffest deck possible for my fat butt to stand on).

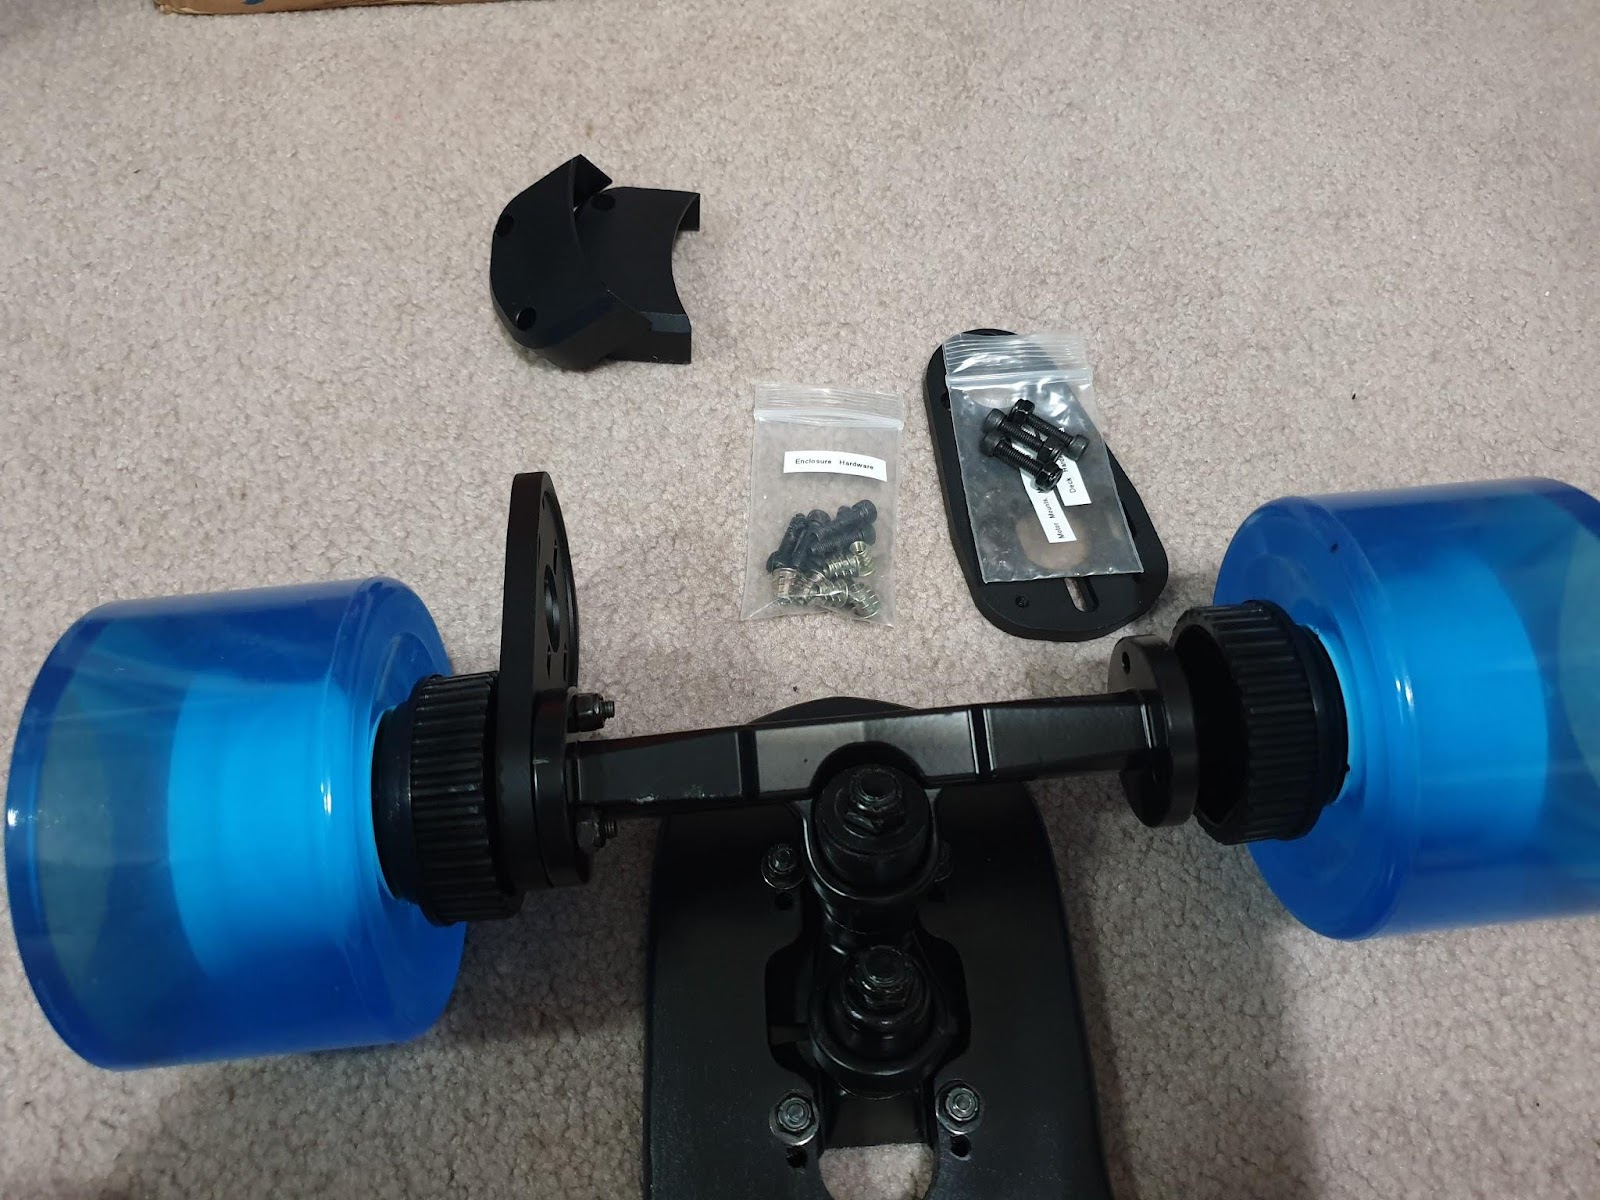
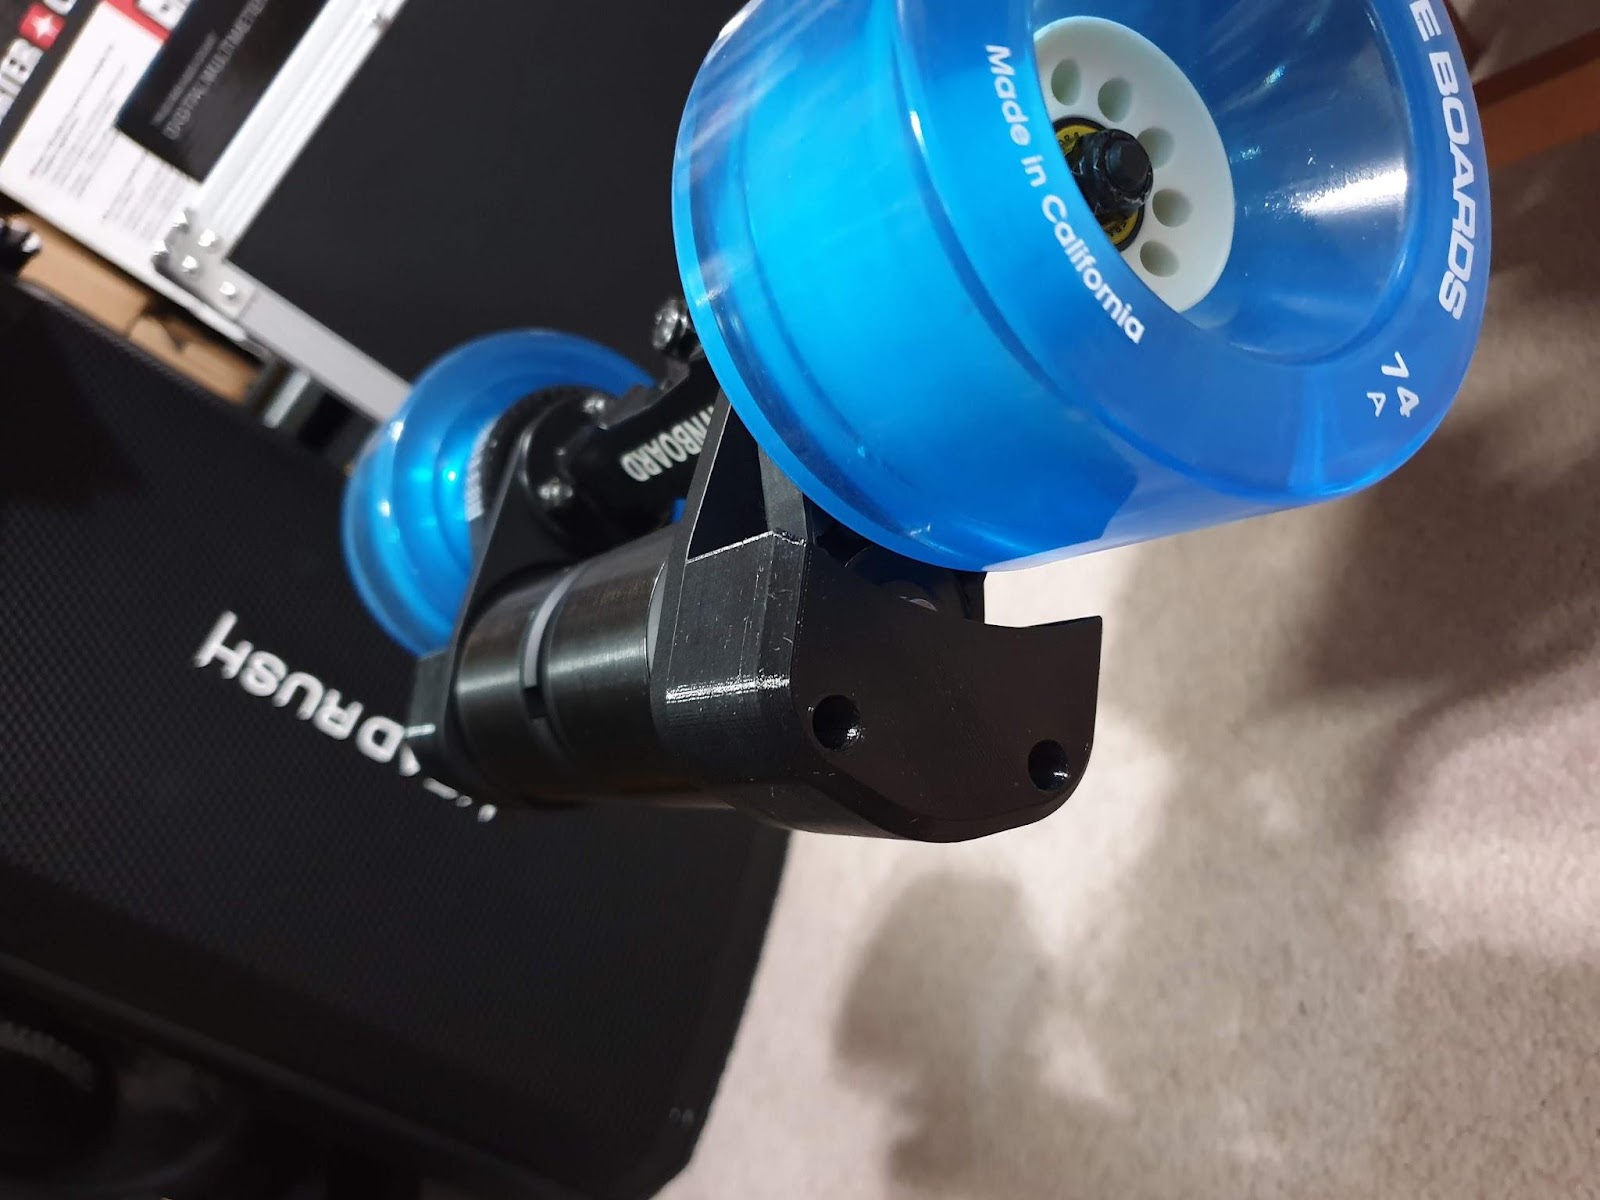
These Torqueboards 110mm blue wheels are huge. And they stand out from the black board. I thought about getting everything black and stealthy, but the blue wheels at least at the time of this purchase were “softer” than the black wheels. Black wheels were rated at 78A whereas the blue ones were 74A. Torqueboards, at the time of this writing, just released their new sets of wheels that are 72A. The bearings that I installed in them were Sector 9 Black Ball Ceramics Race Bearings.

The wheel pulleys are made by Evolve. These are the 36T kegel pulleys. Propulsion Boards advertises that these had to be used on the trucks/wheels. Not sure why. Maybe because the trucks are Evolve clones? I might have to experiment with a few other pulleys to see what’s up. If someone do know the answer to that, please let me know.

Just for a comparison, I pulled out my old Caliber II trucks to put it up against the double kingpin trucks and my goodness, I got almost an inch and a quarter more height between the two. And if it isn’t apparent, the Ownboard trucks are wider than the Caliber II trucks.
Time to test fit and fit the wheels, pulleys, and mounts.
If the following is confusing, no worries, TL;DR, I stripped out every single bolt insert.
This part of the build, I failed miserably. Let’s just say that I was stupid and didn’t drill a big enough pilot hole for the wood inserts so when I went to install the wood inserts, I stripped out all of the soft brass on the insert. What made it worse was that I did this to all six, thinking, “Oh, this is permanent, no worries, I wouldn’t have to remove this ever.” Well, when it came time to test fit the enclosure, the enclosure was so rigid and tight that I ended up “rethreading” all six of the enclosure insert fittings from the otherside.
So here’s the repair: I tried screw extractor sets to remove the old stripped out inserts. You read that right… SETS! I went through three different types of extractor sets. ALL three failed me. The deeper the extractor went in, the bigger it shred the brass inserts. My last resort. I used a larger diameter drill bit, drilled out all six of the wood inserts, bought M6 x 15mm wood inserts from Amazon (the inserts that I had before were M5’s) to continue the build. The cap head bolts that I used were also longer (M6 x 25mm). I was going to use washers, but the interface between the bolt and the enclosure were “pinching” the washers thereby completely defeating the purpose of washers. So I used two 5mm diameter o-rings to cushion the bolt and the enclosure. Were they necessary? No. But I wanted some clearance between the bolts and the enclosure to allow a minute amount of flex. Whew!!! It all worked out this time. I am happy with the installation.

Mounting Motors
This part of the motor install was pretty straightforward. M4 x 8mm bolts with threadlocker to fit motors to the mounts. The tension of the belts were set by hand. What is the appropriate tension? Obviously tight enough that the belts aren’t slipping, but not too tight that it is exerting too much pressure on the bearings. I guess the best way to describe it is pinching my thumb to my pinky and pressing on the muscle right underneath the thumb - that’s how much tension I set the belts too.
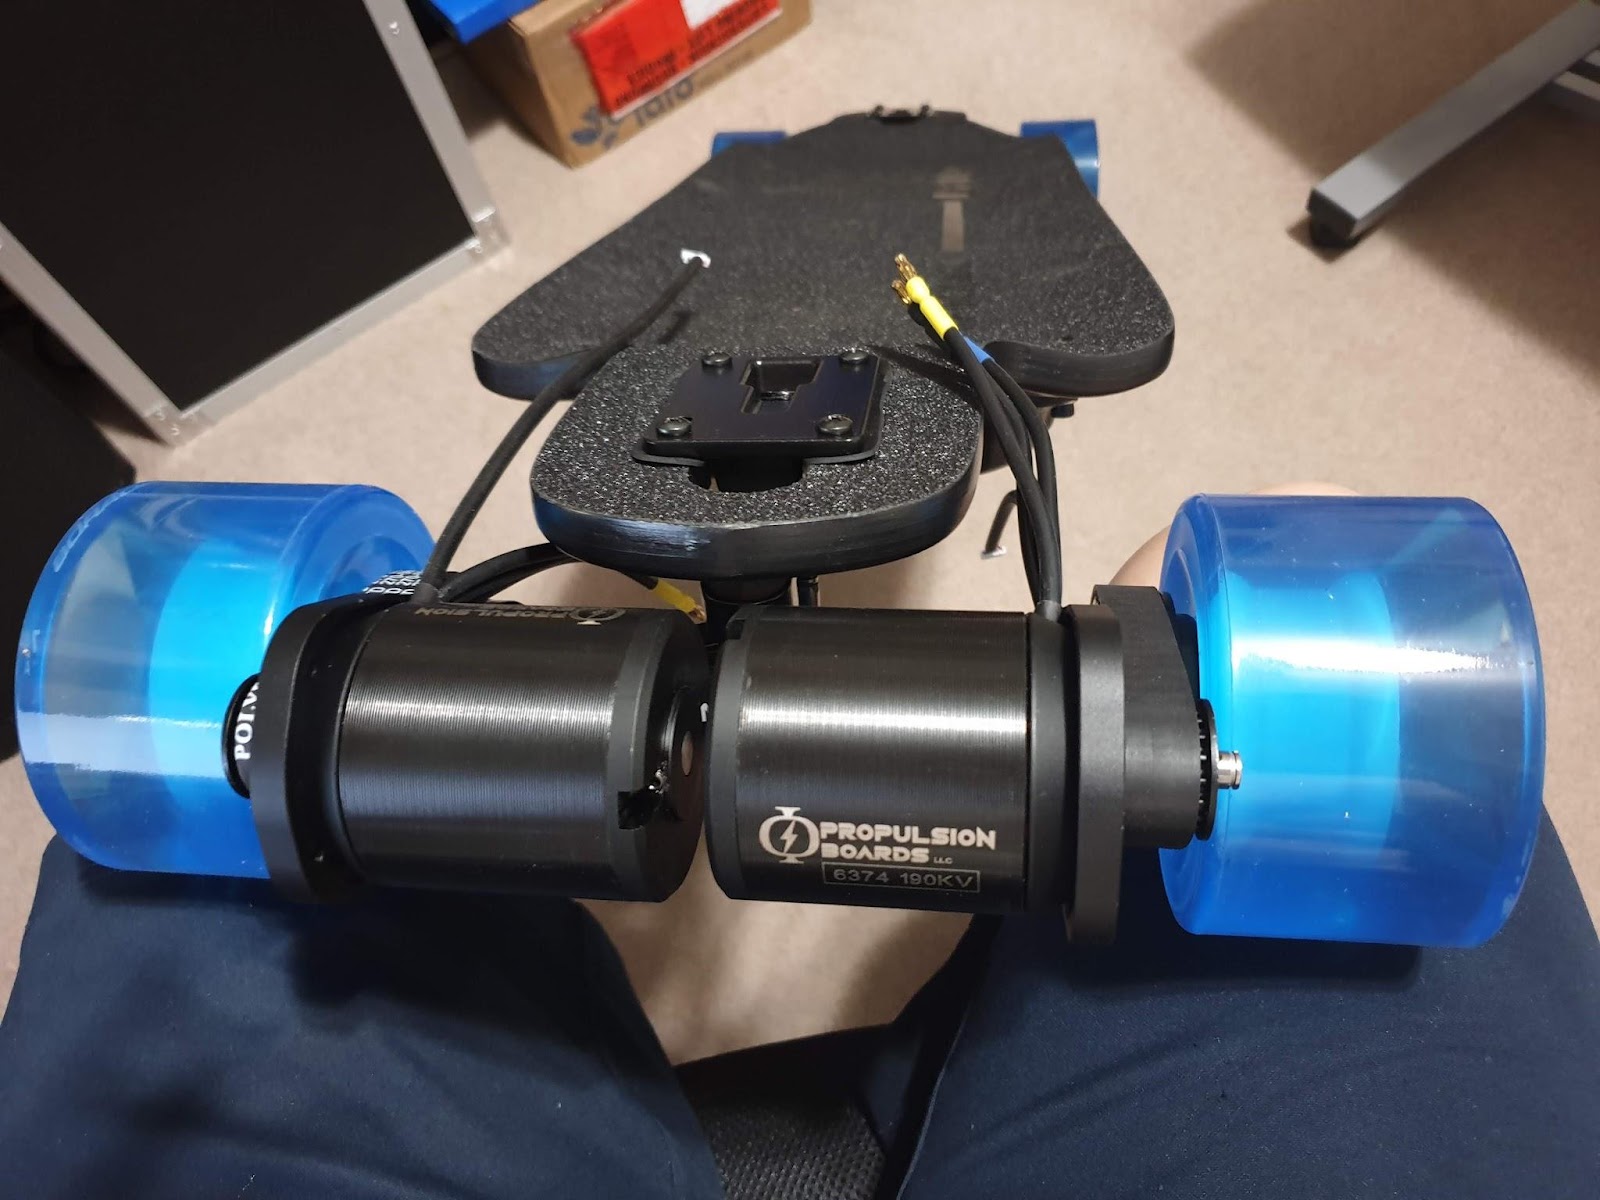
Now to the key and keyway. The key fit quite well in the keyway, but it was impossible to fit the key into the motor pulley. So file and clamp, get yourself ready. Let’s do some filing! I took .3mm of steel off the key and viola! [Cameo appearance: that’s my dad working on the second key while I was doing something else.] It fits smoothly and nicely.

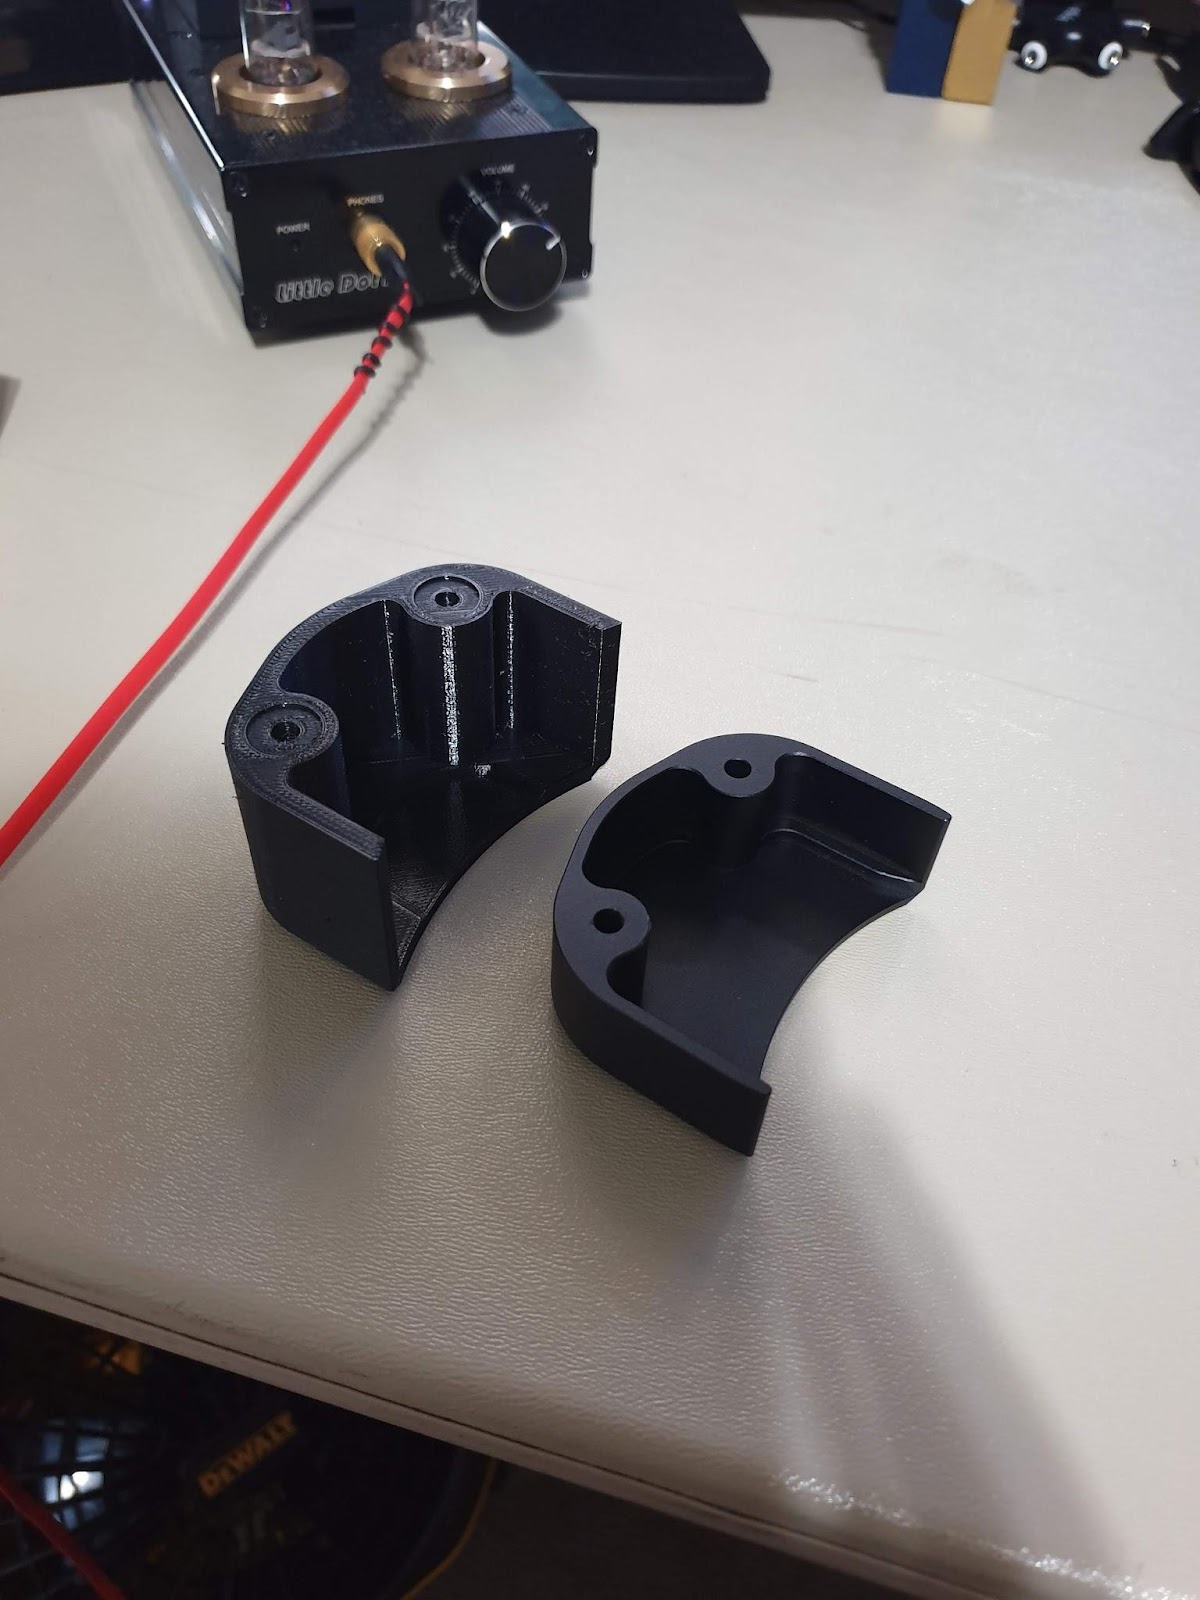
I personally enjoyed this part of the build a lot. The part where I get to improve something that was better than what was manufactured. The original belt covers were too short. These covers were made by Ownboard (And I would assume that they were designed to work out of the box with Ownboard motors), and when used on Propulsion Boards/Flipsky motors, the shafts are too long so I can’t even screw down the covers. So I had one of two options, either cut down the shafts or extend the belt cover. Now I conveniently have a 3D printer sitting around so I just printed a taller one. I also shortened the depth to give the wheels more clearance - if I ever use smaller wheels, I’ll just extend the depth. Using black PETG filaments and printed at 100% infill, this thing is solid! It took about four hours to print each cover.

Enclosure
This part of the build easily took the most amount of time (for me at least). I had one enclosure and if I screwed it up… let’s not even go there. After doing a test layout, I started with the holes for the interface between the deck and the enclosure, the hole for the charging port, and the hole for the switch.

Next up was the battery indicator. The easiest way that I found to cut the rectangular shape to the exact size was to use a post-it note template. I traced out the outline on a post-it note, taped (note the word ‘taped’) the post-it note on the enclosure, and cut out everything that was white.


After cutting out the rectangle, you’d think that the indicator would fit. NOPE! I wanted a tight tolerance between the indicator and enclosure so I didn’t want a bigger rectangle. I disassembled the indicator into three parts (it’s not hard to do): The case, the display/circuit board, and back cover. I installed the case first. The case was installed upside down. That way when I needed to see something, I didn’t have to crouch all the way down - I just need to lift the side of the board.
If you look carefully, the case is warped. At this point, it looked like I needed four hands to put this thing together. I pried the four sides apart and placed the screen/circuit board into the case and screwed the back cover on.

Looks awesome to me at this point. In this bottom photo, you can see that I shaved off a chunk of the edge of the enclosure to get a flush mount with the indicator. Side note for those of yall who have this style of battery indicator. I was actually impressed to find out how much functionality/versatility this indicator had in the settings.

The tabs on the side of the case should be enough to hold it in place in the enclosure, but in my world, I like to over do things, so I put two nails in the tab to make sure that it can never collapse.
I’ve got my six holes for the motor cables and the slot for the sensor cables. Everything was nicely spaced until I drilled the slot for sensor cables, bugs the heck out of me, but I’ll live.

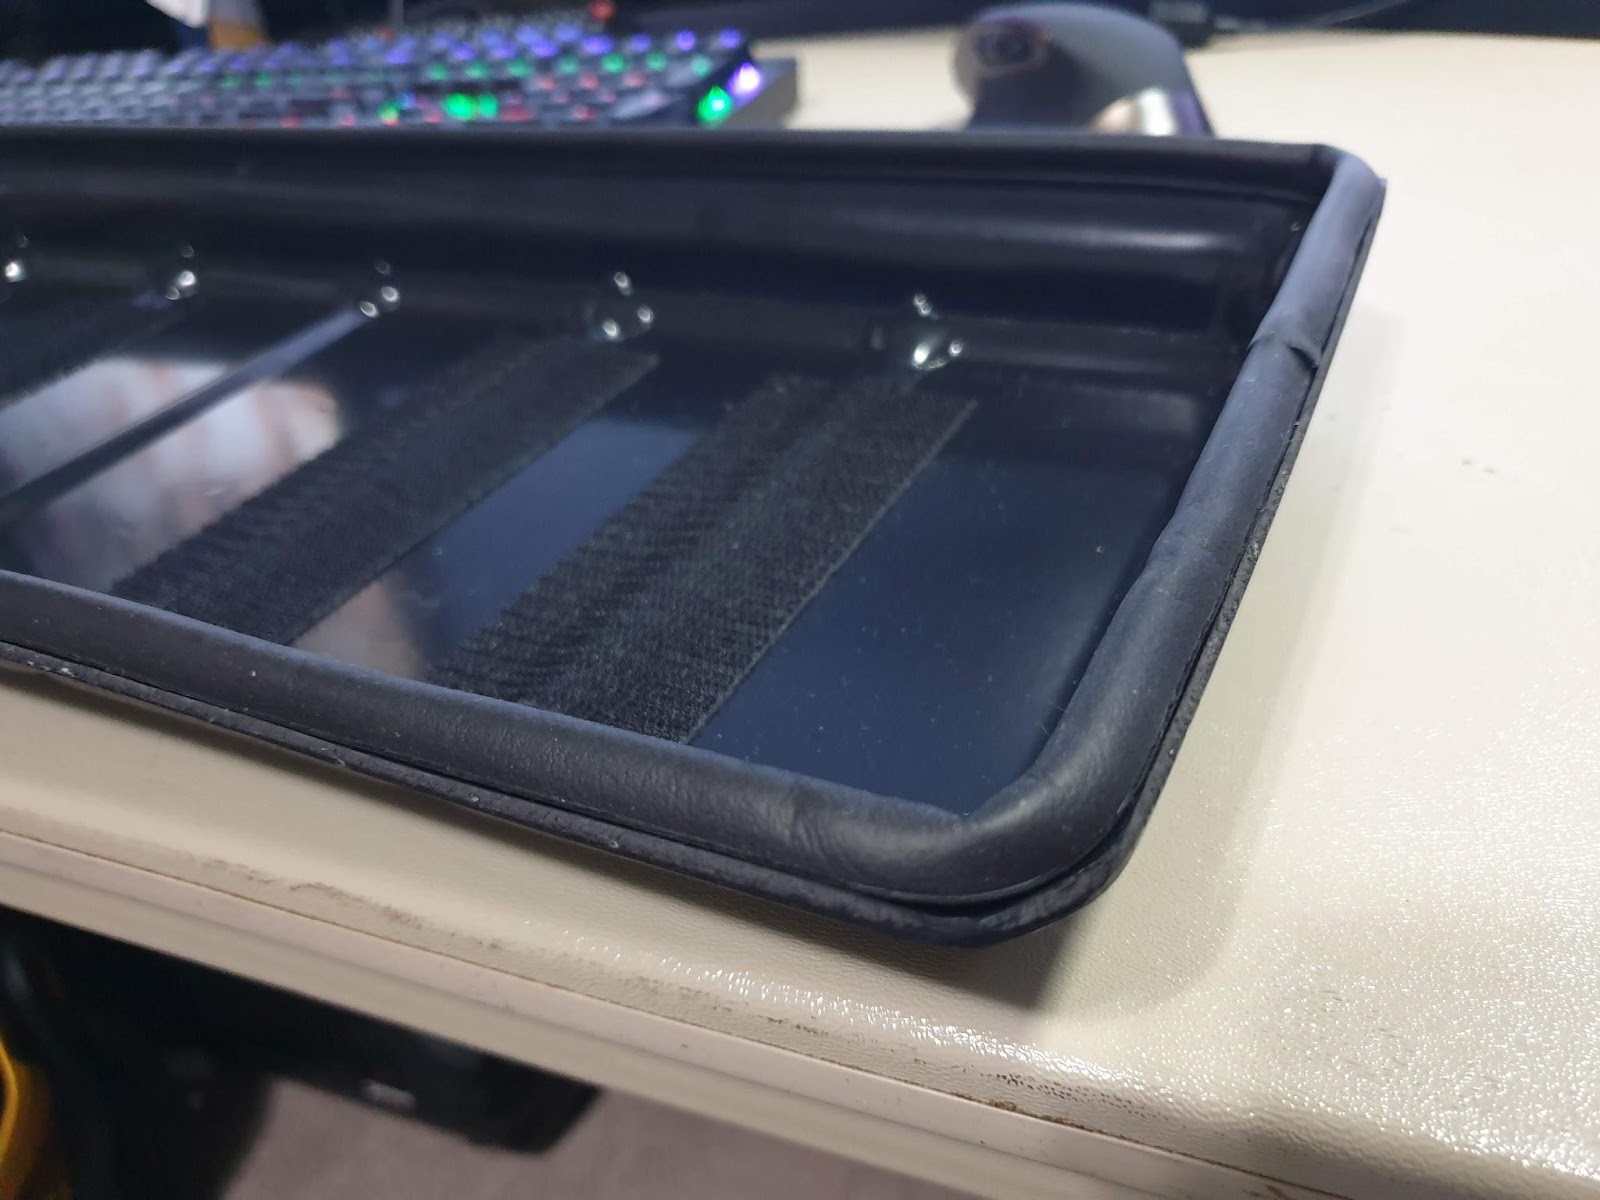
Time to velcro this thing up!

Time for the weather-seal… I don’t ever plan taking this board through water, but at least the seal can help keep dirt out (and creatures that can potentially eat my tasty electronics 

 or live in the enclosure).

Electronics
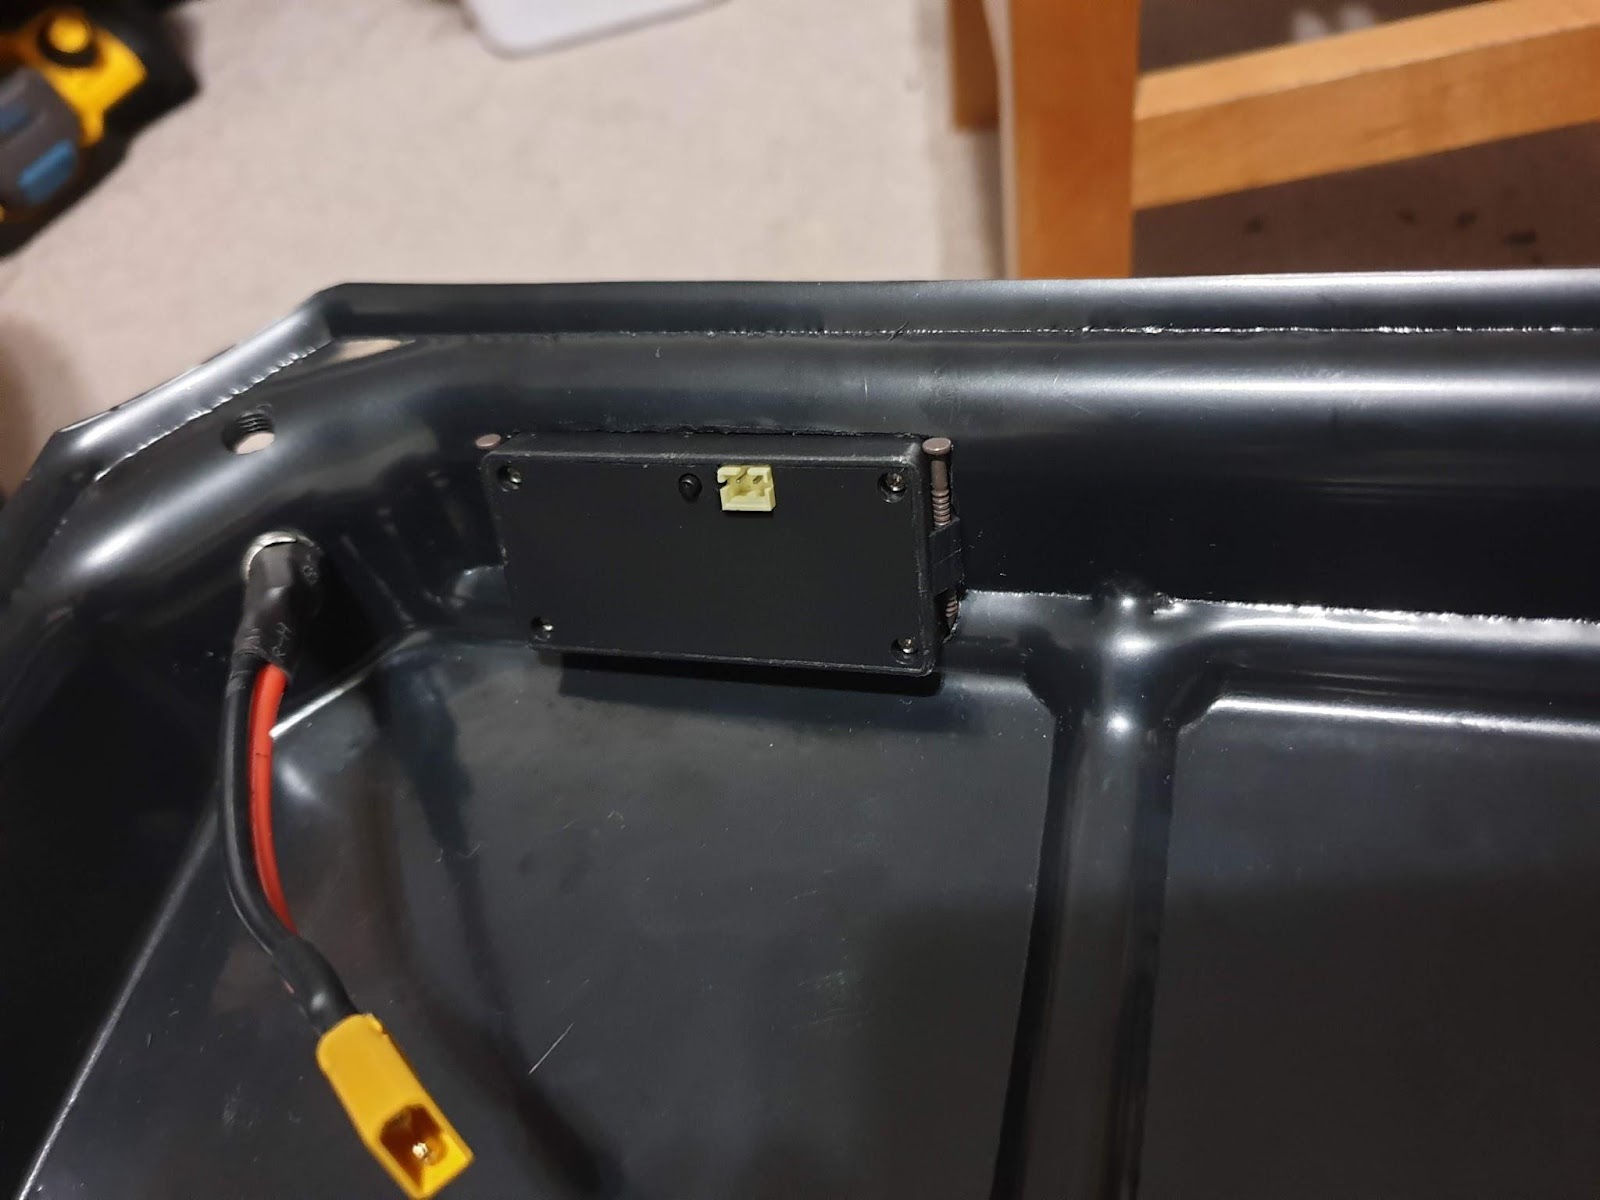
This part took forever: soldering the tiny 4mm bullet connectors into the relatively thick motor wires, but eventually it got done. Same goes for the XT90 connector and the VESC input power wires. Plugging all of the connectors up was simple - if it doesn’t fit, it’s not in the right place. OH, and I forgot to mention, while velcro-ing down the VESC, I wasn’t paying attention and broke off the charging port. The housing and the port snapped in half (cheap Chinese plastic stuff). Thankfully, I had a few extra ALL METAL 5.5mm x 2.1mm ports sitting around. Drilled a bigger hole and installed it.


“Anker”Lights
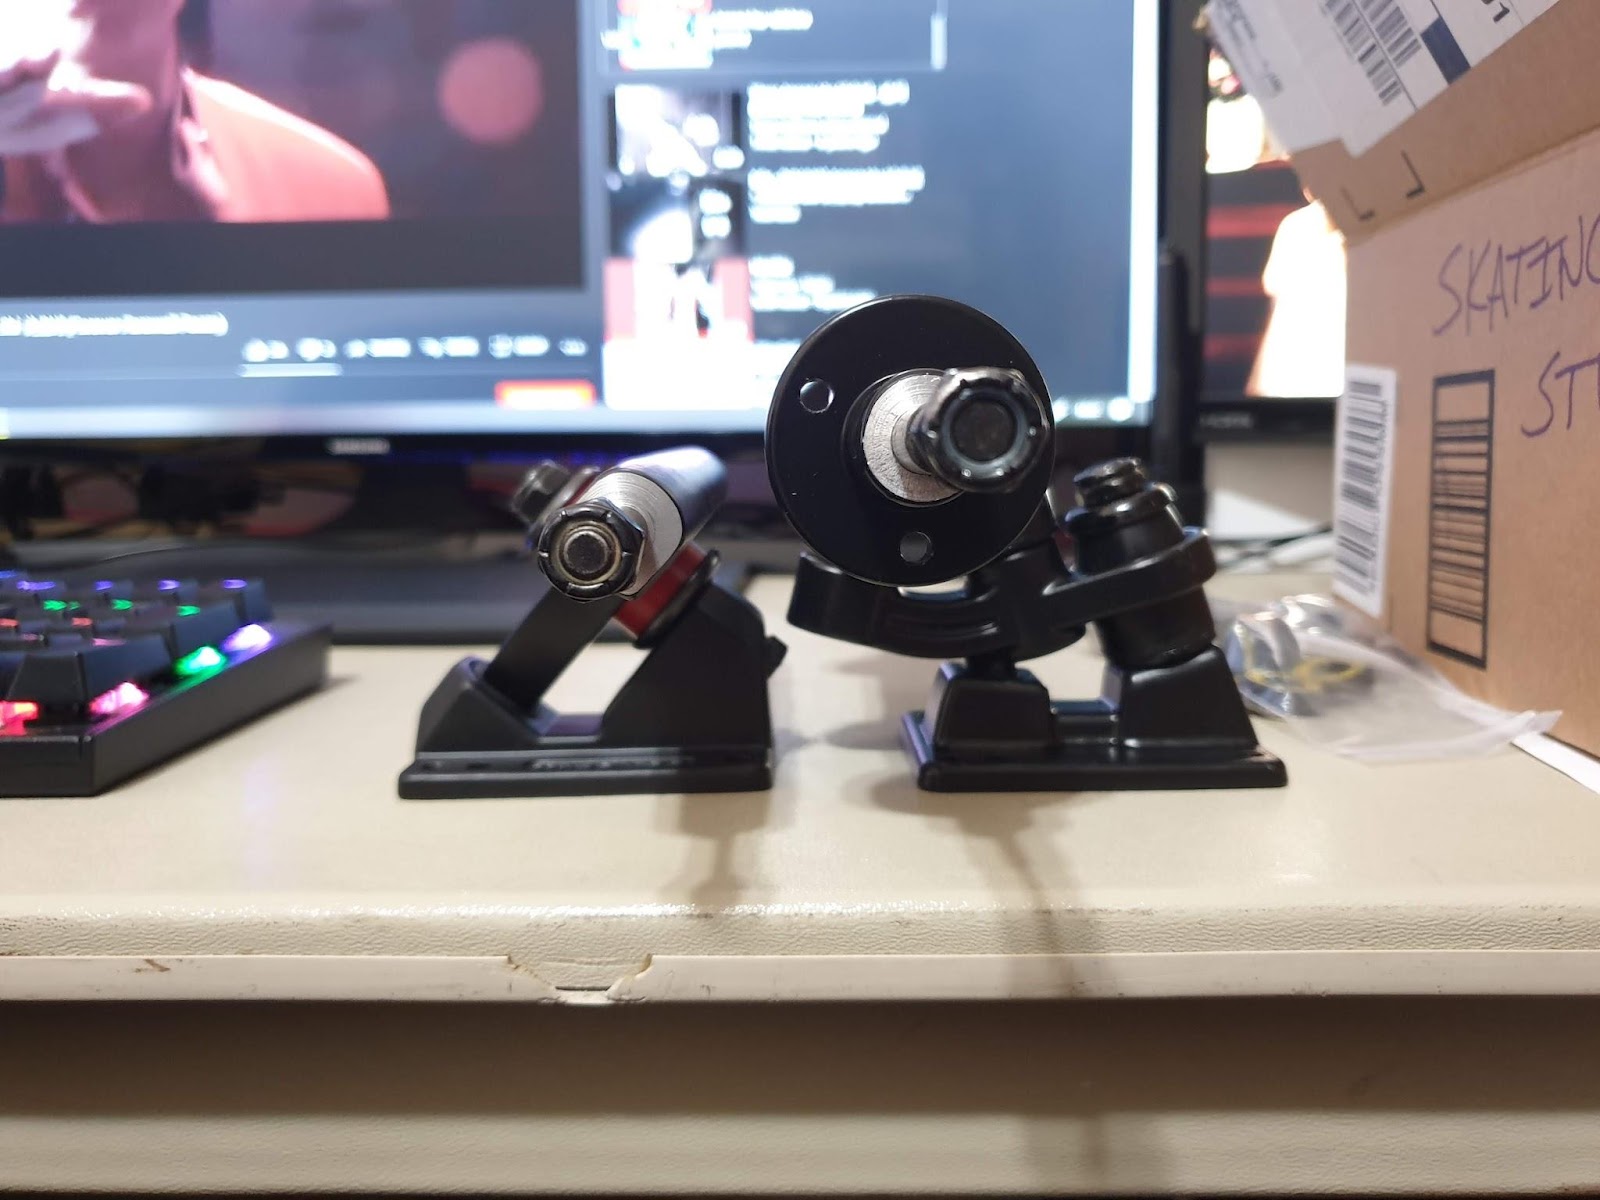
This is my version of ShredLights. I liked the idea of the ShredLights but wanted more power. I do happen to have a couple of picatinny rails, flashlight mounts for an AR15 build, and two Anker flashlights.
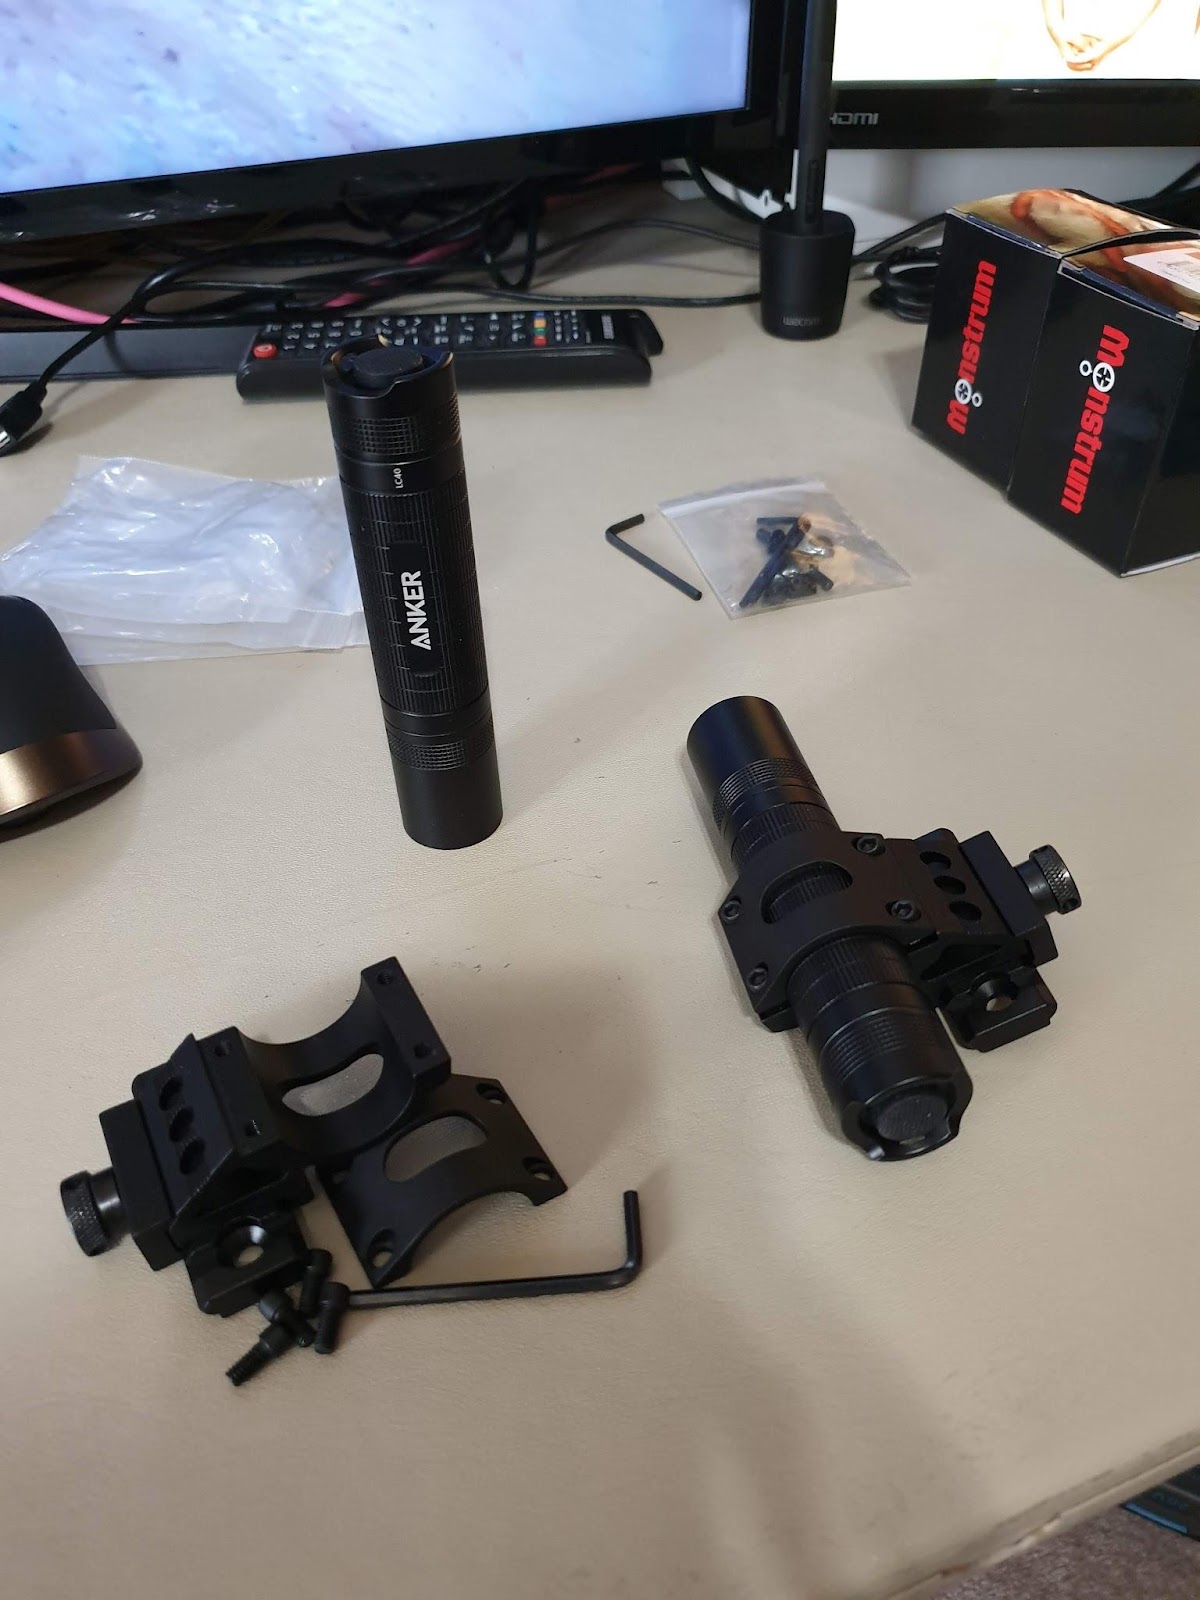
These Anker flashlights are 1” in diameter as with most flashlights of this size so they fit well with the 1” mounts.

sighs I encountered my first problem with the install. The rails aren’t tall enough. The adjustment screws hit the top of the truck’s baseplate. My 3D printer came to the rescue again! Taller pic rails printed at 100% infill using PETG for rigidity.
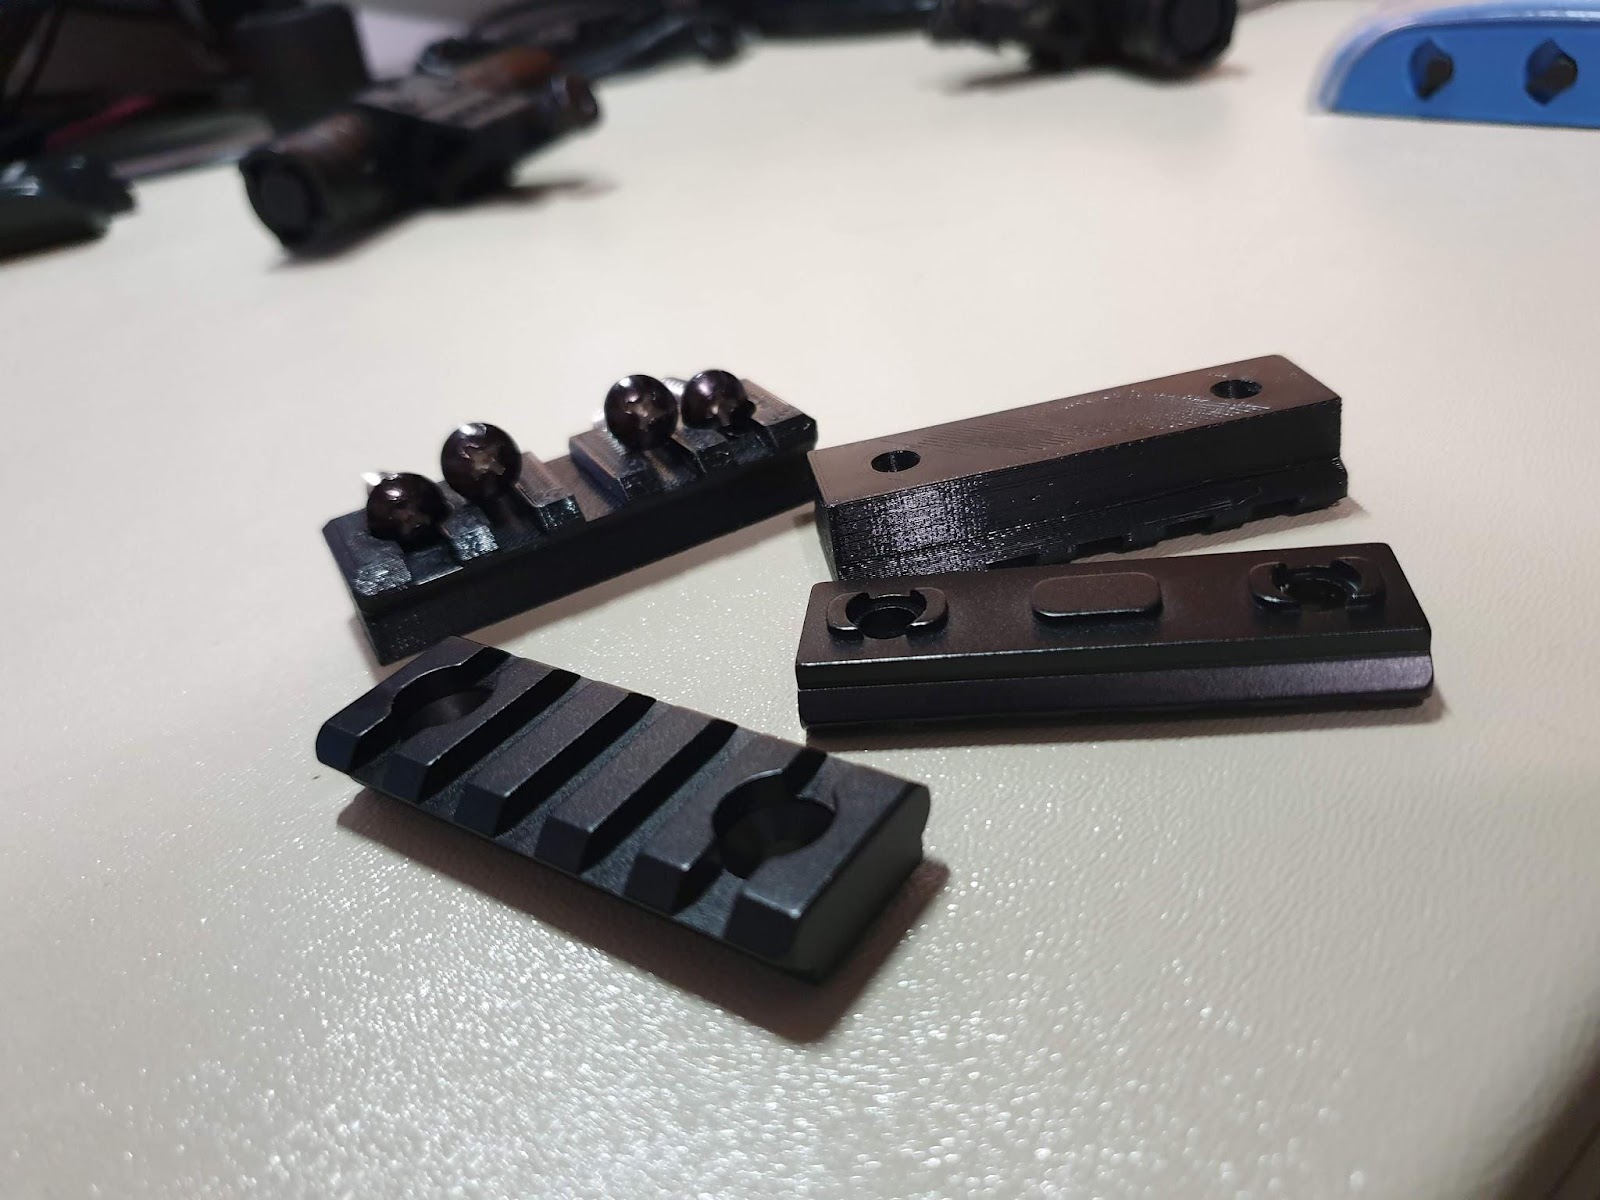
Works beautifully!
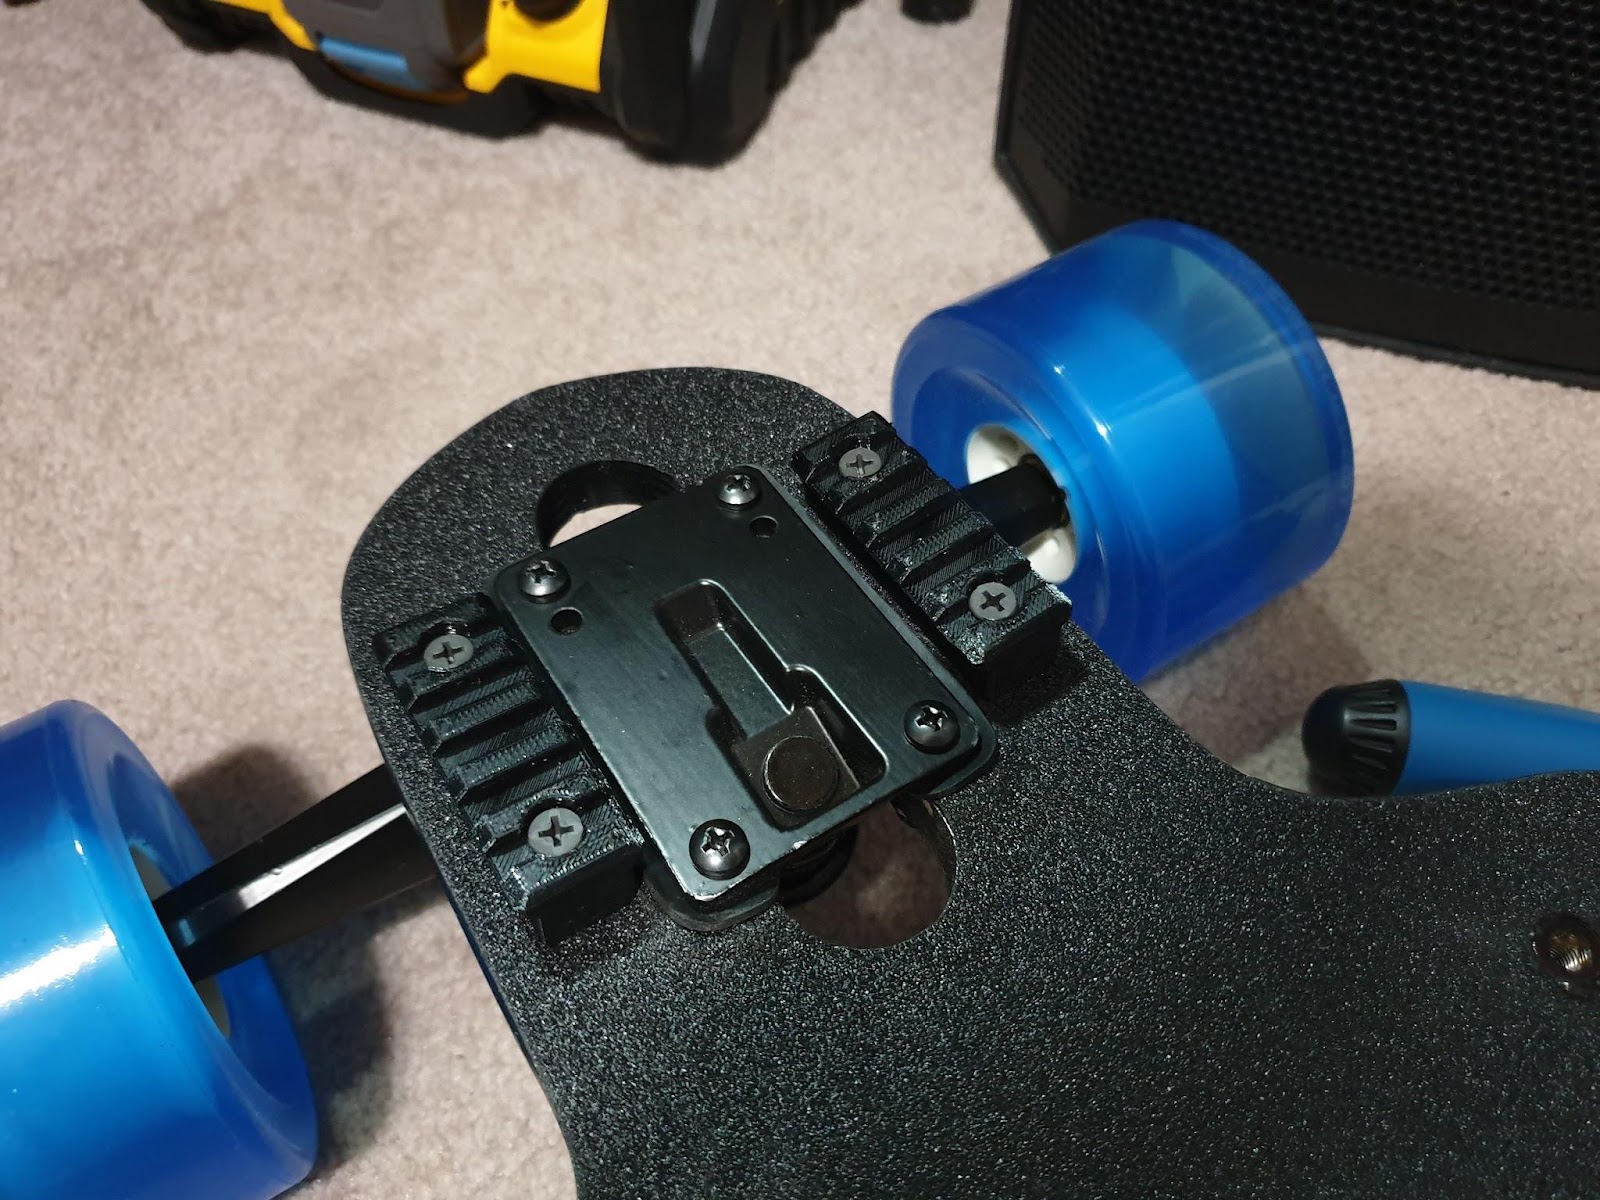
Looks nice until I encountered problem number two: when I lean about 85% into the trucks, I get wheel bite at the edge of the mounts. After playing around with different heights, angles, etc. I gave it up. I wanted something that was wide and low profile. I can have one or the other but not both. (Yes, yes, I know, I could potentially 3D model a rail that turns the flashlight outward, but I was too lazy. It’s a project for another day.)


I ended up settling for this instead: I took my 1” scope mounts and used it on my flashlights. My brother’s description of the lights was that they were “unnecessarily bright.” Mission accomplished! [for now, until I can make some angled rails so I can have a wide beam, maybe high beam too). Note the fact that the word “OWNBOARD” in the top photo have been sharpied out in the bottom photo - so much cleaner!

Final Setup
With the reversed mounted motors, when I lean again about 90% into the turn, I get motor bite. Will I ever lean that much into the trucks? Maybe, more likely never. But why not fix it in the build stage so that if I ever do happen to lean that much into it, it won’t mess up my motors? So grinder, ready. Painter’s tape, check. Spray paint, got it.

The grinder took away wood in no time.
The chamfered edge solved the motor bite issue. Spray painted it black, and it is looking good!

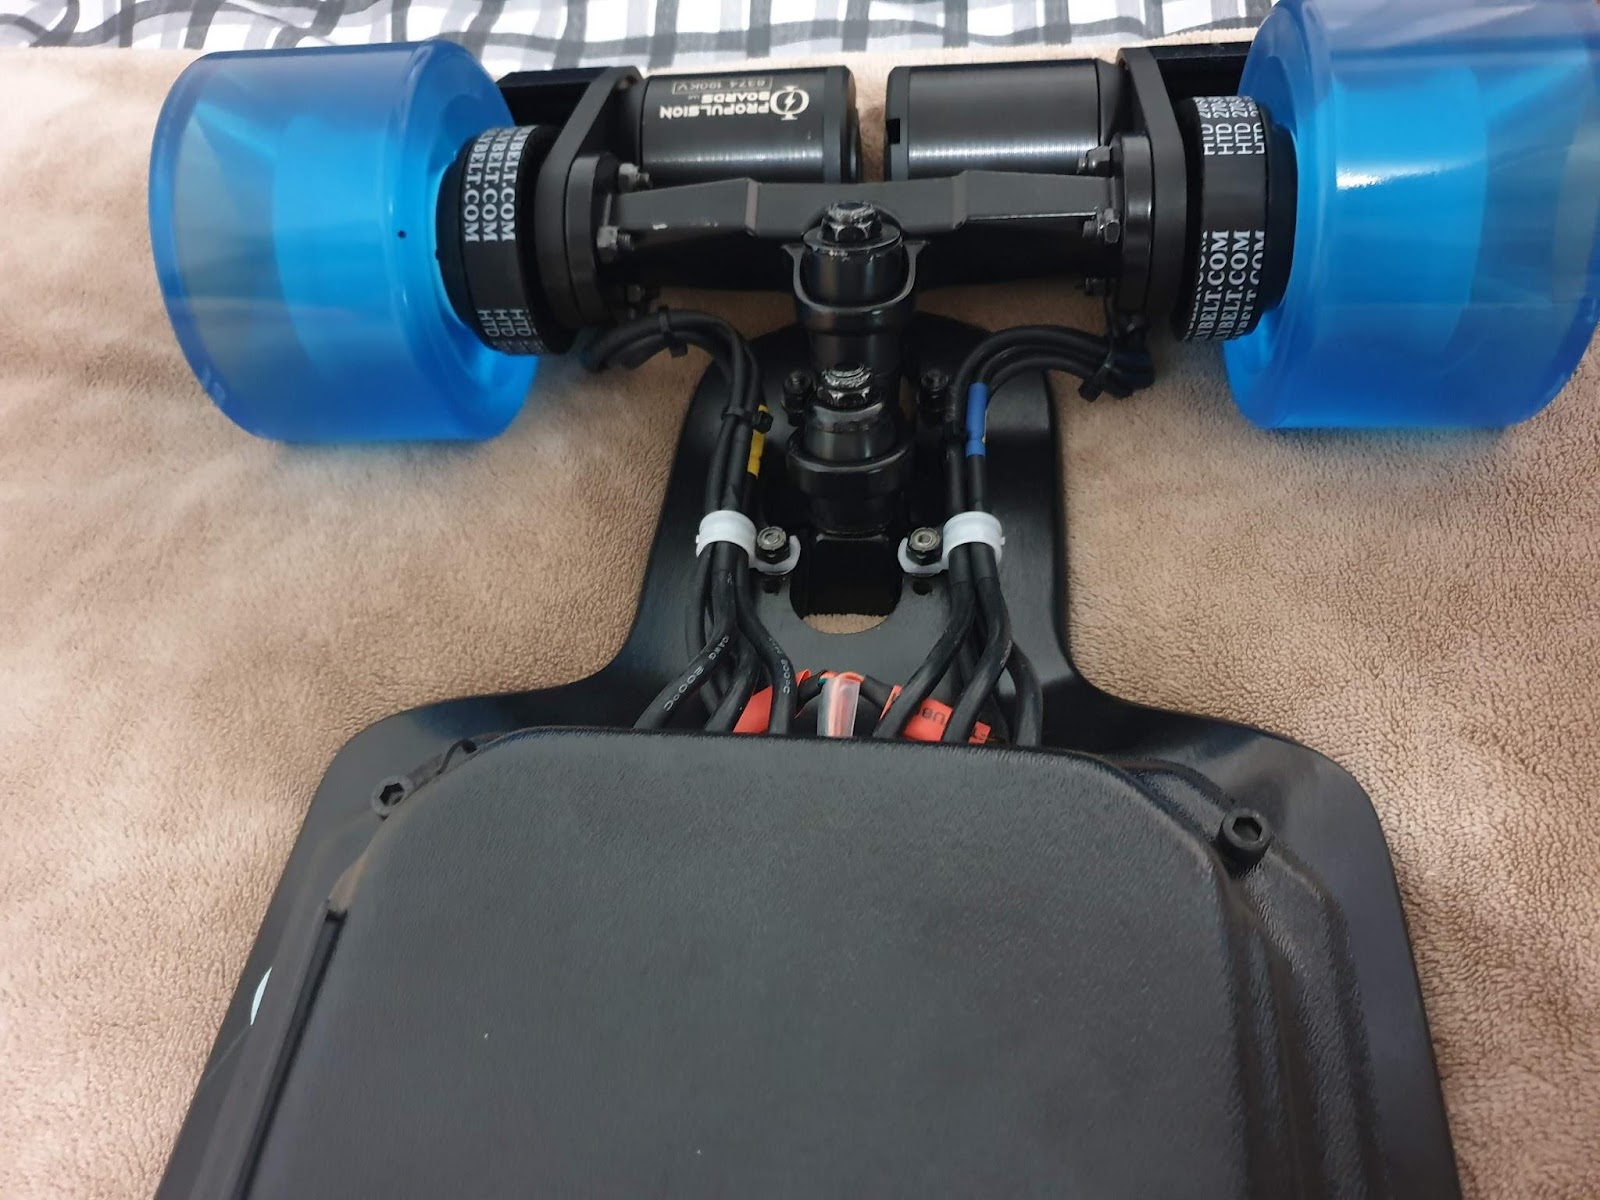
I connected all the cables and clamped it down using two of the baseplate screws. To get the right angles into the bundle of wires, I twisted the wires and zipped tied it into place. The sensor wire connectors are covered with heat shrink, but I didn’t “heat shrink" it. I also placed a heat shrink tubing in the slot of the sensor wires to prevent the enclosure from shredding the thin wires (I already sanded down the edges of the slot to smooth it out, but it doesn’t hurt to have another layer of wire security.) In these two photos, the cable clamps are white so that they would show in the pictures, but I have since painted them black.

And here is the completed product! HALLELUIA!! I didn’t have screen shots of the VESC programming, because it’s pretty generic, but I got the VESC programmed and the bluetooth board paired with the VESC Tool app on my phone. Works just like the app on the computer!


Test run down the hallway:
