Just received enclosures for the VESC and batteries from . It shipped with some bolts that I’m too sure how to go about mounting (see image below). Do I just drill a hole through the board and place the silver part through the top? If I did that would I need to glue that in place or something as it seems like they could move around over time?
A separate idea that I had to mount the enclosure was just to use 10/32 bolts (similar to hardware used to mount trucks), drill holes through the board where I want it to be mounted, with a washer and nylon locking nuts. Does that sound like it would be a valid alternative?
Drill a hole through the board, then drill a slightly bigger hole a small bit of the way through to counter sink it. The hole should be tight fitting so the knurls on the rivet keeps it in place
There are many threads about people using these included mounting hardware with TB’s power packs and having the pack fall off while riding and injure themselves.
Not only is the enclosure brittle, but the bolt head is just far too small.
I recommend using a 10/32 bolt, with some sort of large washer to distribute the force on the flange of the enclosure.
I’ve been using those bolt heads just fine for a year now, though I did buy washers for them. I use them on the Enertion Space Cell enclosure however and not the TB ones, though both are known to crack if you overtighten.
Problems with overtightening this enclosure are mainly because of the flange profile. I just used some rubber washers below to mitigate the issue. Something like this:
My washers are actually a bit higher than the profile because I also have a foam pad all around. So enclosure is basically not touching the board at all but only the pad and ofcourse the washers where it is tightened up. End result and how I have it for almost a year now:
Thanks for the advice. Think I’ll go with my original idea before I realized they sent hardware along with the enclosures and use 10/32 bolts with nylon locking nuts and washer. And I’ll get a rubber washer to reduce the strain on the flange of the enclosure and most likely get some weather stripping to help reduce the strain as well.
The washers I could find locally were like 19mm OD, 5.5mm ID, 3mm H. I glued two of them together. One would suffice but because of the sponge pad I decided to raise a bit further.
Later I found “washers” (technically they are not washers but they look all the same) in the plumbing department that were 19mm OD, 4.5mm ID, 5.5mm H. So same sh*t but a bit softer rubber.
@SilentException that worked perfectly. Currently I’m only using one rubber washer, but I’ll probably do what you’ve done and glue two together to raise it a bit more.
Weather strips for ESC controller / other electronics and battery enclosures. Probably could have been a bit more precise on this, but I don’t think it matters too much since I’m using the weather stripping as a way to reduce any vibrations and strain on the enclosure.
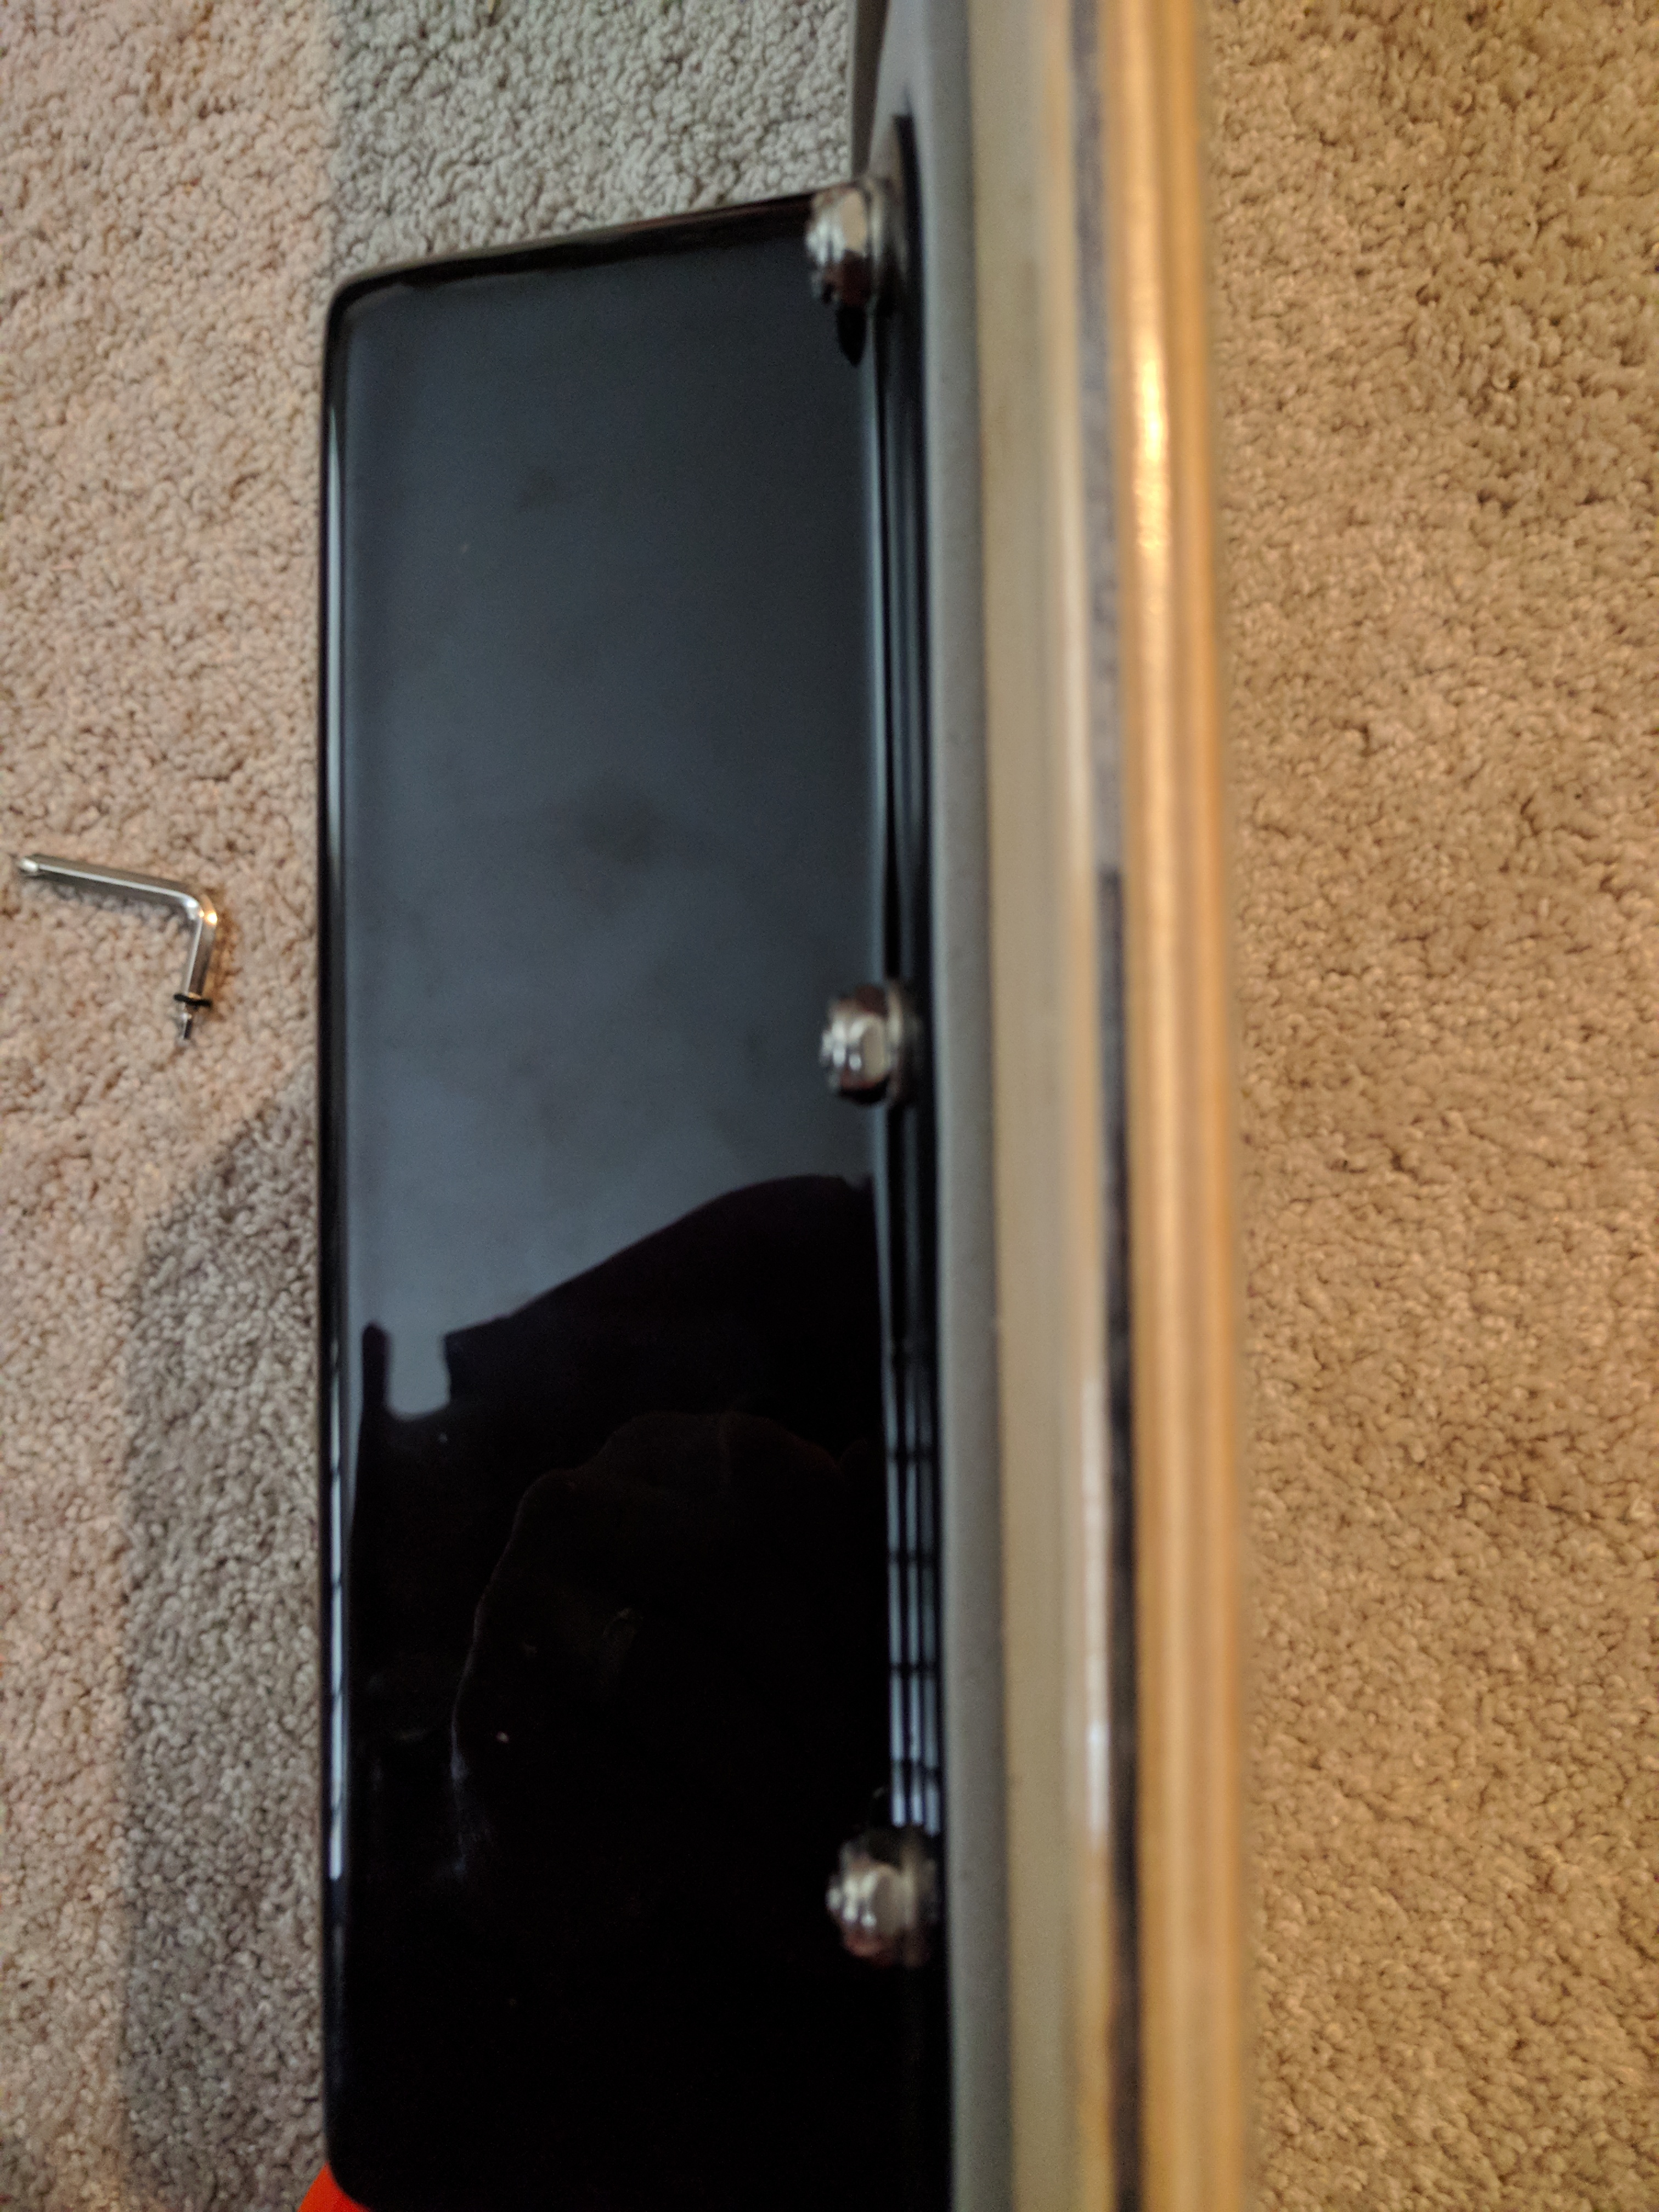
Testing the fit. Used the 10/32 bolts with washer and nylon locking bolts. What I like about this solution is if I need to take the enclosure off in the field I can just use my skate tool since these bolts and nuts are the same size that are used for the truck hardware. One thing I still need to do is to drill a counter sink for the bolt, but that can be done later, also don’t have the bit to do that.
Very glad to see it has worked good for you as well!
I feel like the enclosure isn’t so strained anymore and the mounting method reduced some of the noise, squeaks and rattling.
I think you should use just a bit longer bolts(counter sinking the deck might be enough already) and use lock nuts if you aren’t already.
Yeah, it’s possible I won’t need to counter sink the both, they come up about a millimeter on top, which might be fine. And using 1 inch bolts at the moment, probably wouldn’t hurt to go a quarter size more as the bolt just barely makes it over the nut when tightened.