Inspiration:
Seeing all the good people of the internet whizzing around on some sort of electric vehicle last year, I felt the urge to join in the fun and build an electric longboard. My main inspiration was this instructable, but I used this forum and others to fill in the gaps. I didn’t want to spend more than $450, so this is a budget build (sorry speed demons). I didn’t want to just mod an existing board either. I wanted to go all in, so I decided to build a board from scratch. I also wanted to be able tell people, “I built this!” instead of just “I modded this.” ![]()
Here’s what I made:

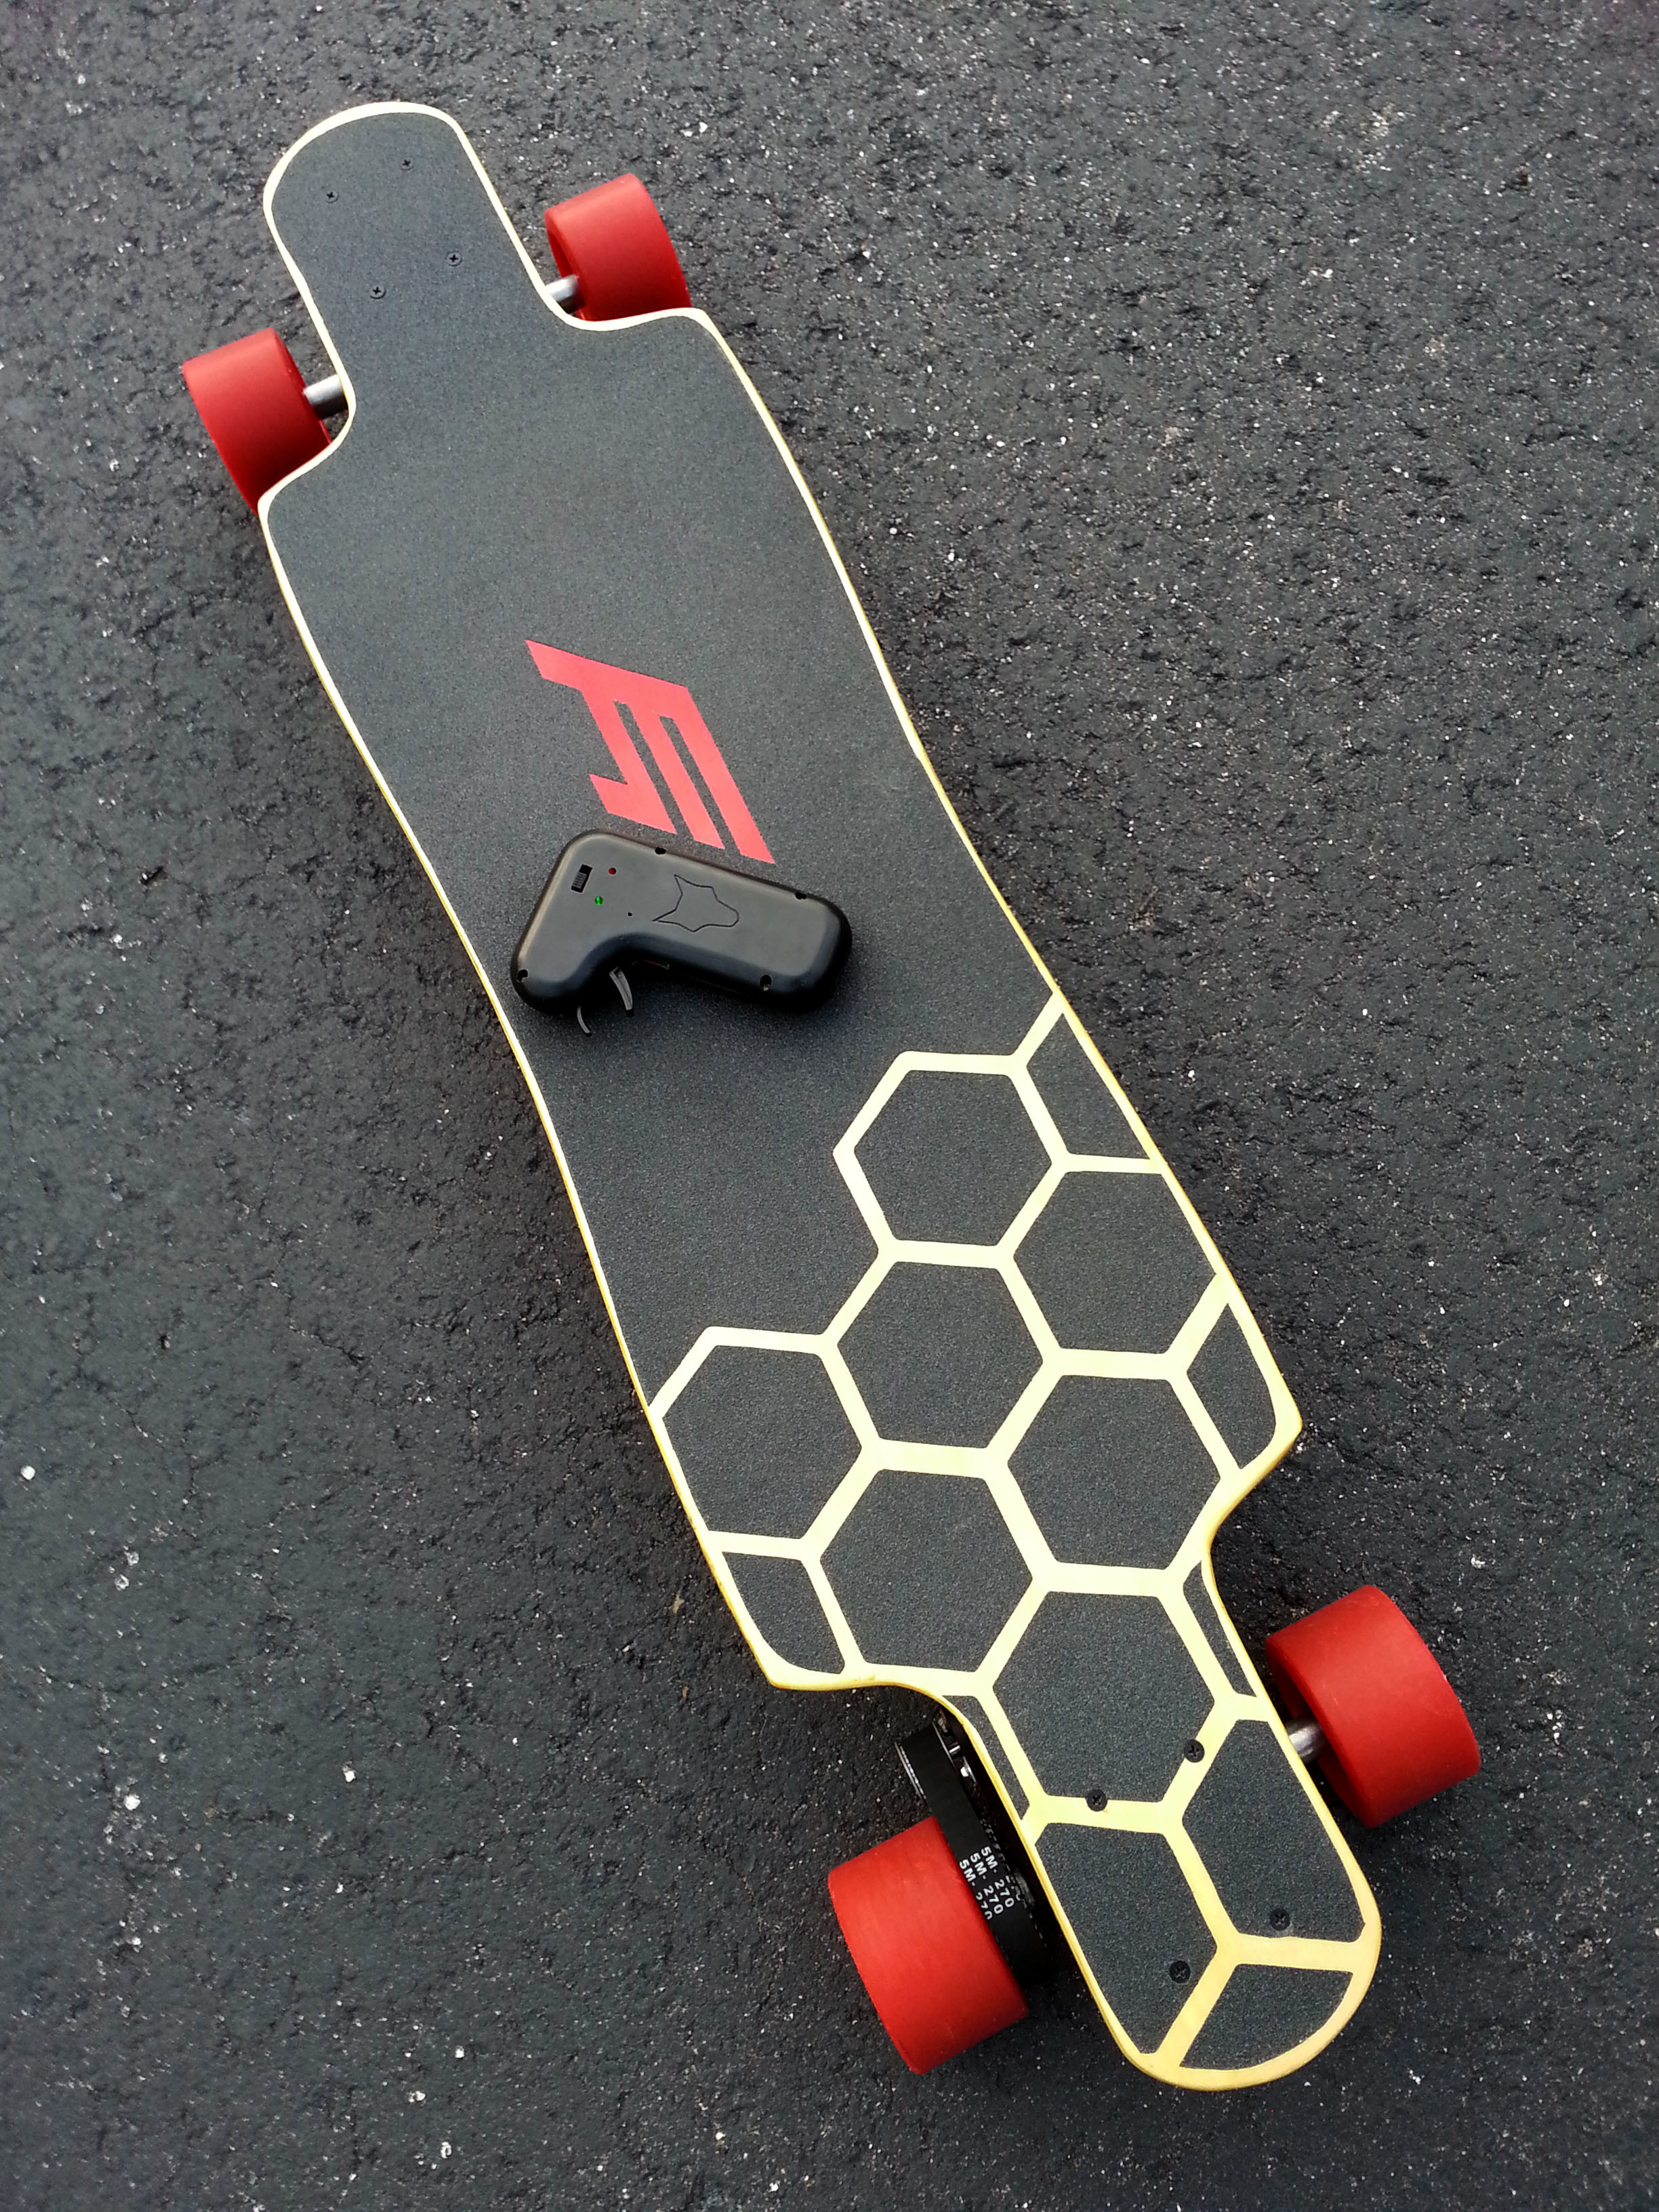

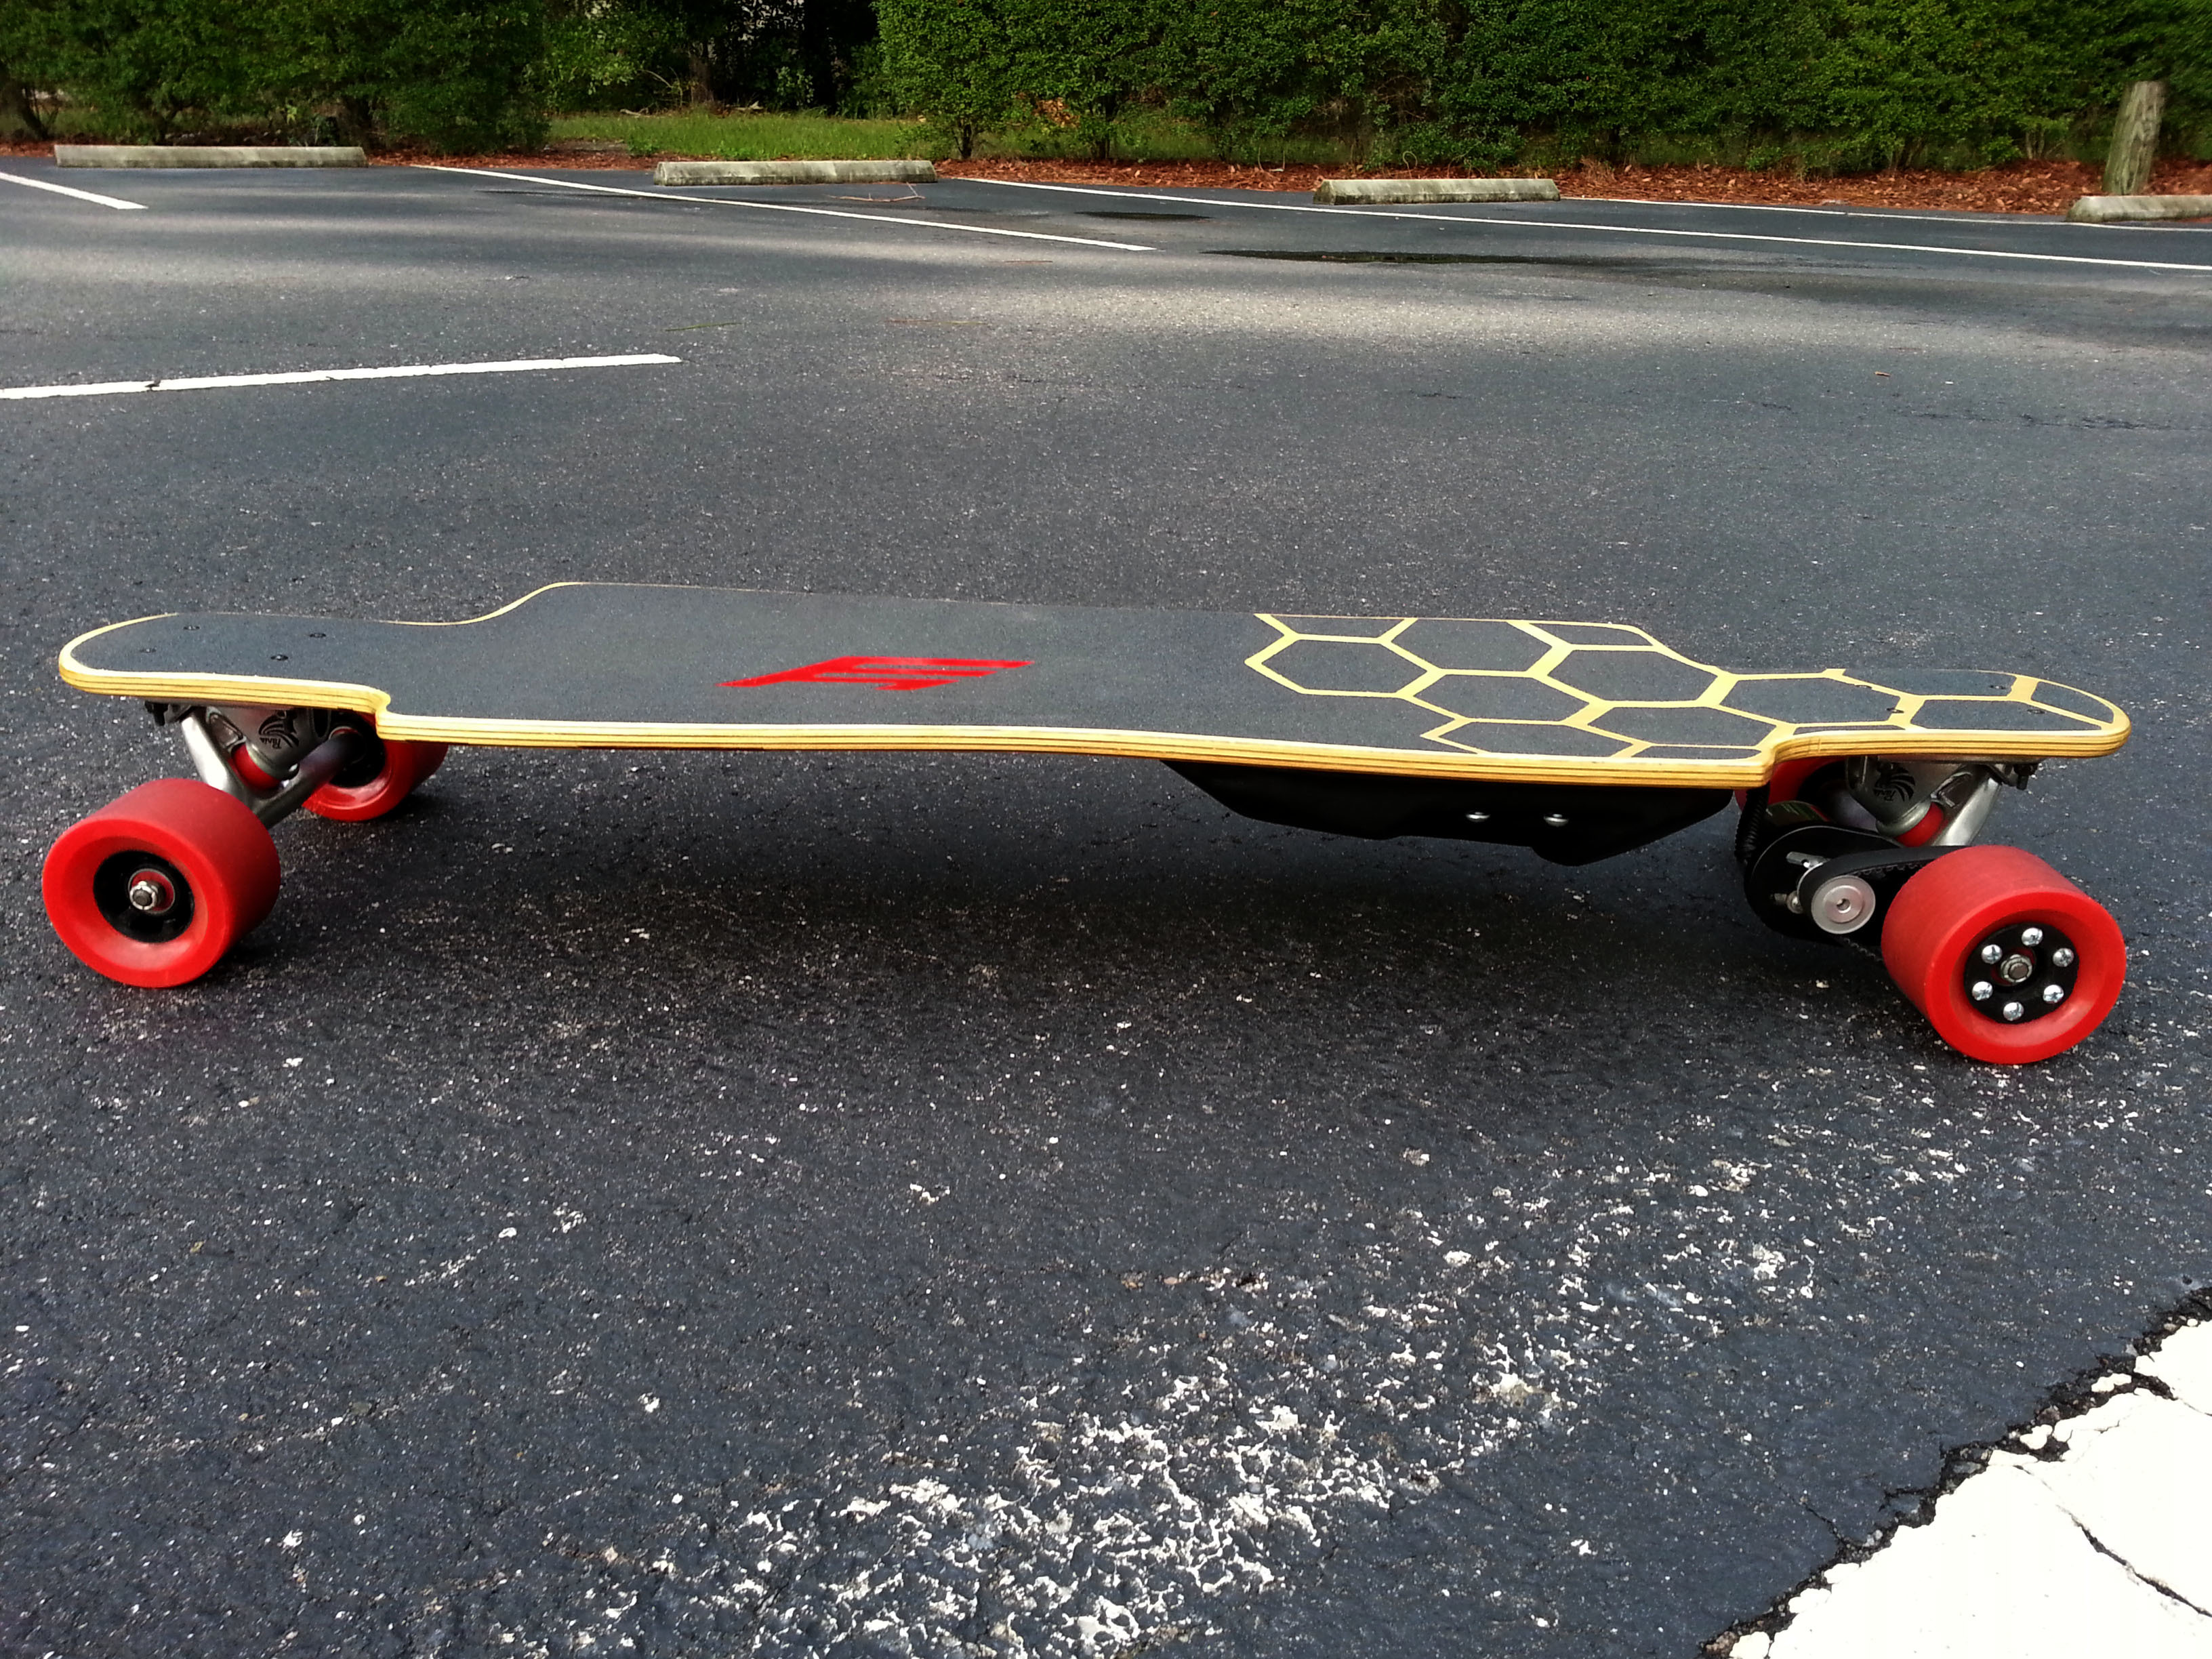
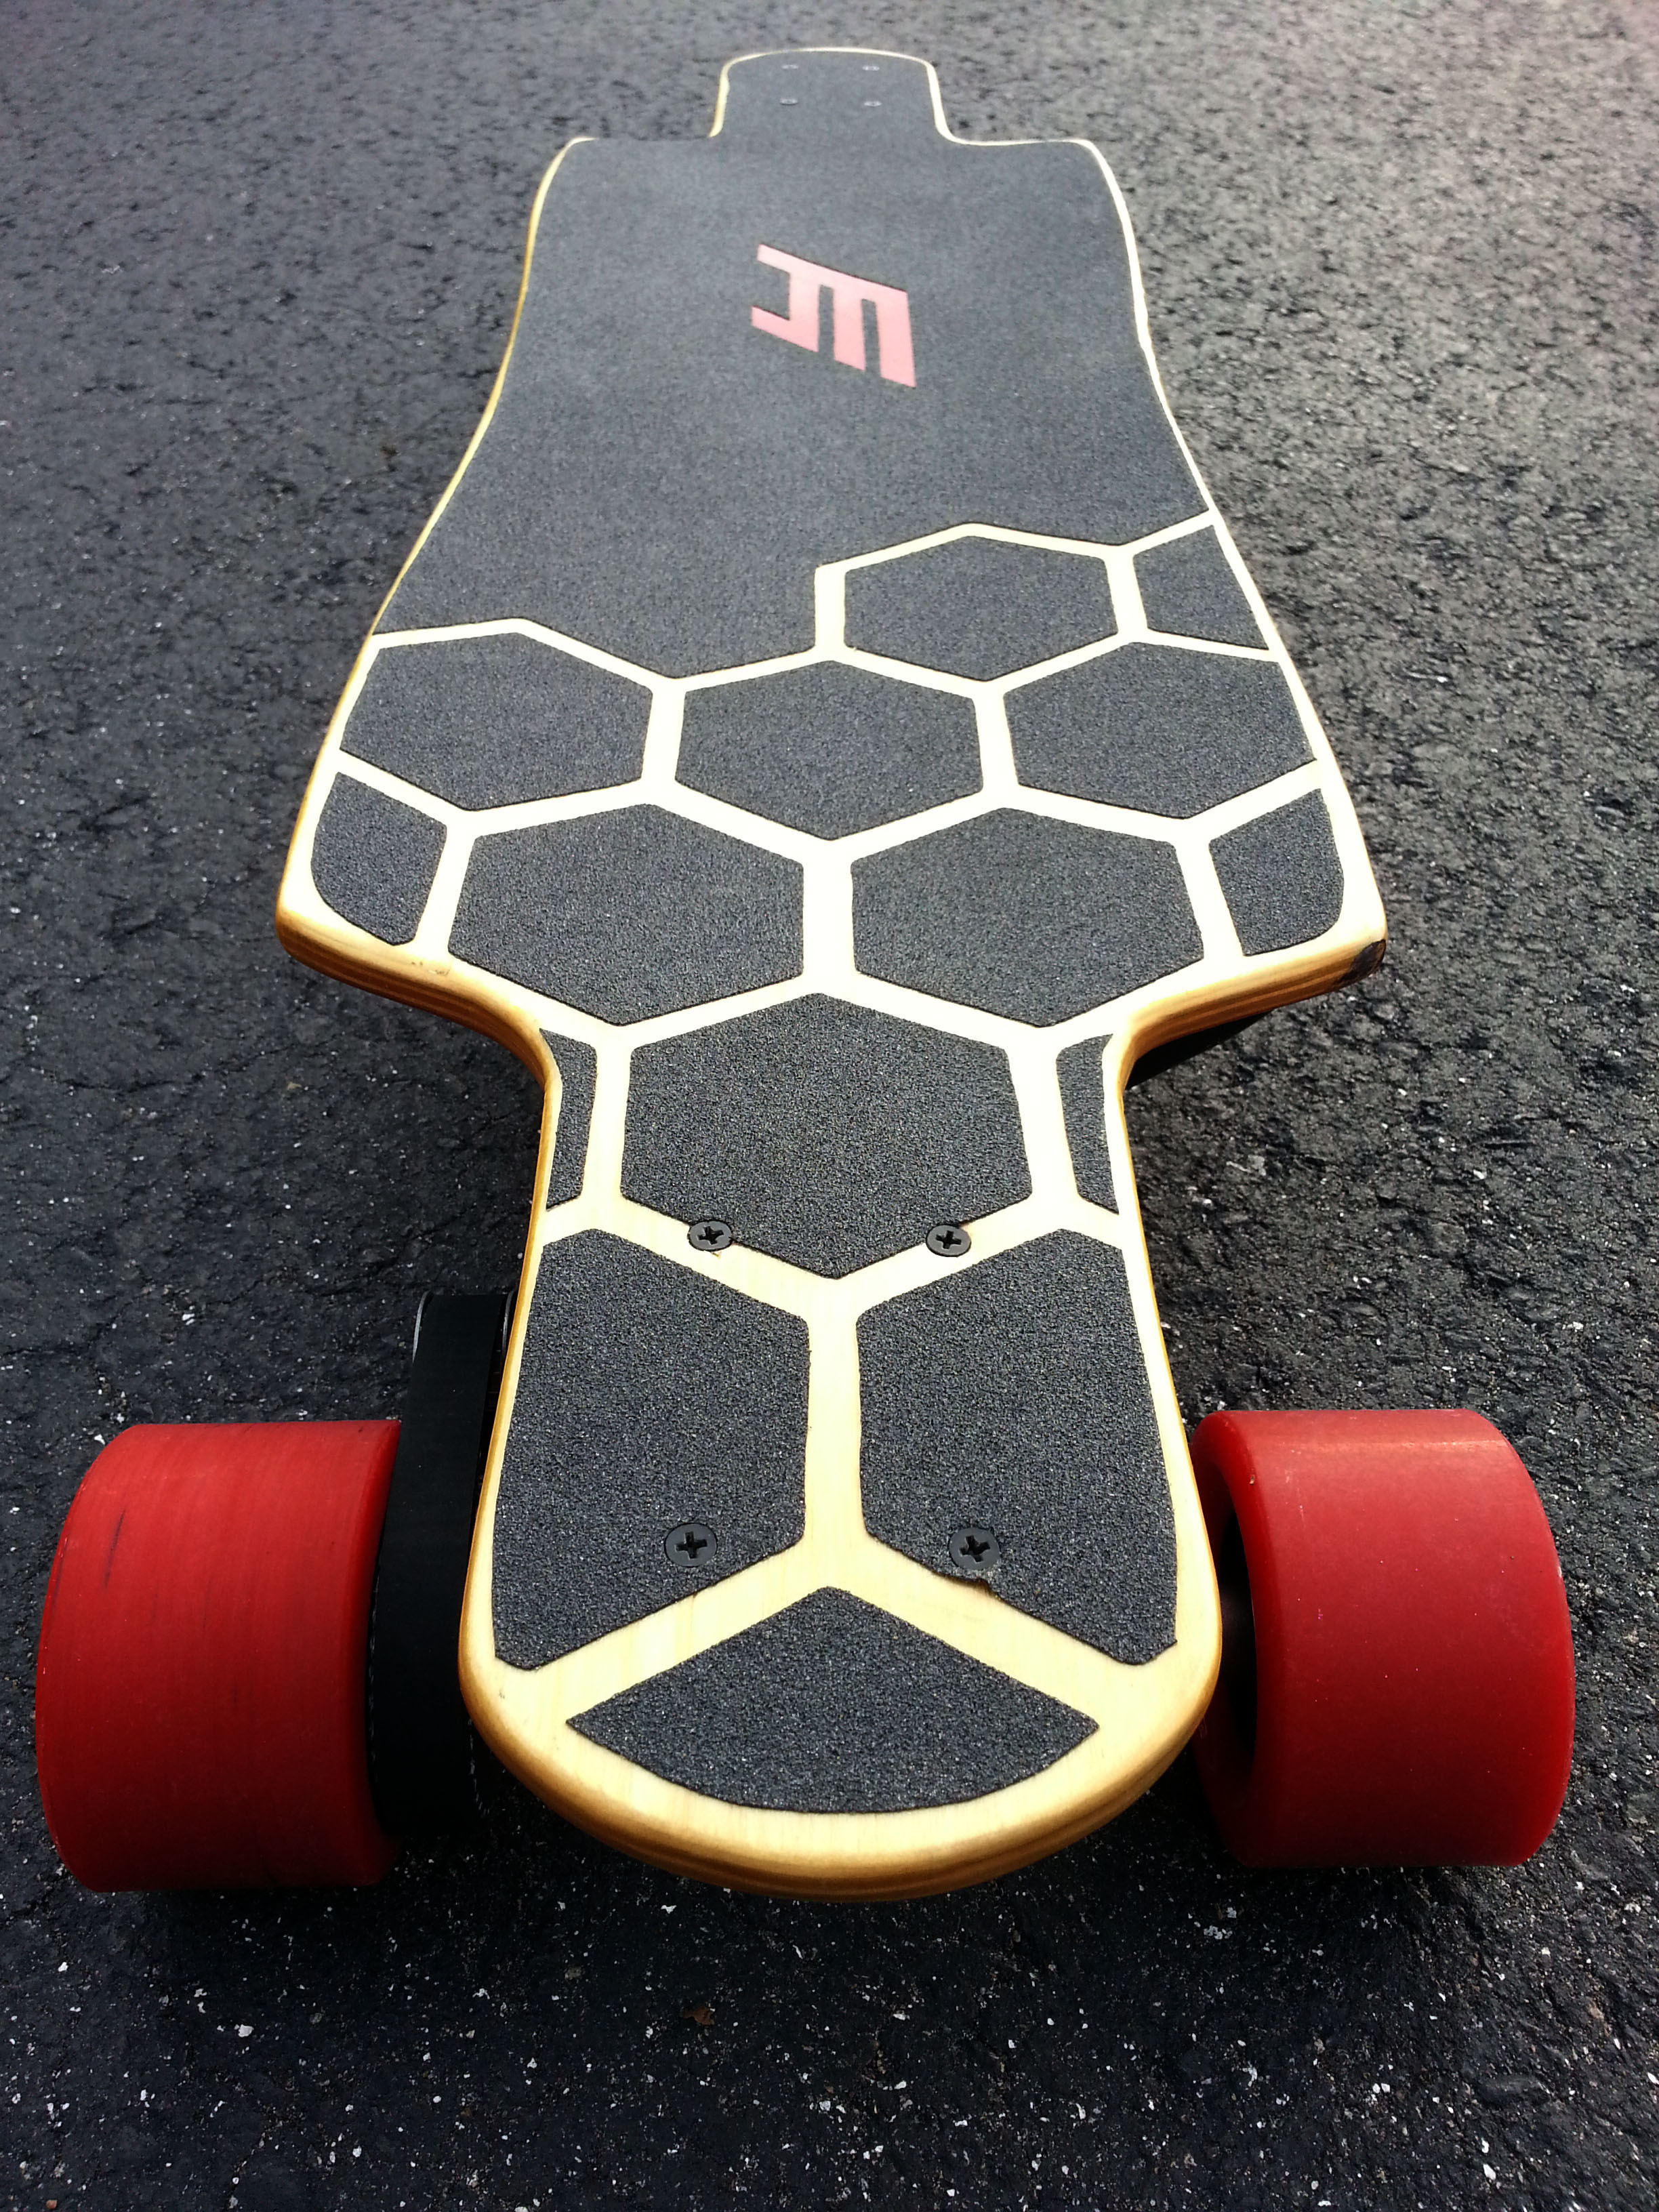

Here’s a spec sheet (btw we should standardize this template): Name: Rouge Rogue Class: Budget Build Top speed: 20mph (according to an app) Range: (Will update when tested) Weight: 12lbs Deck: 39in Custom Baltic Birch Trucks: Paris Wheels: 83mm Flywheels w/ ABEC 7 bearings Motor: Turnigy Aerodrive SK3 - 5055-280kv Motor mount: Generic eBay kit Batteries: 5000mAh 6S1P LiPo (2x Zippy 5000mAh 3S1P 20C LiPo) VESC: Hobbyking X-Car Beast Series 120A Remote: FlySky FS-GT2B in BadWolf 3D printed case
BYOB(Build Your Own Board):
If you’re getting started in e-boards, I can’t recommend building the board itself more. It’s arguably another discipline entirely, but it’s so ridiculously satisfying i̶f̶ when it comes out nice. Also, you’ll learn a lot about longboards in general by building your own (I certainly did).
Deck Design:
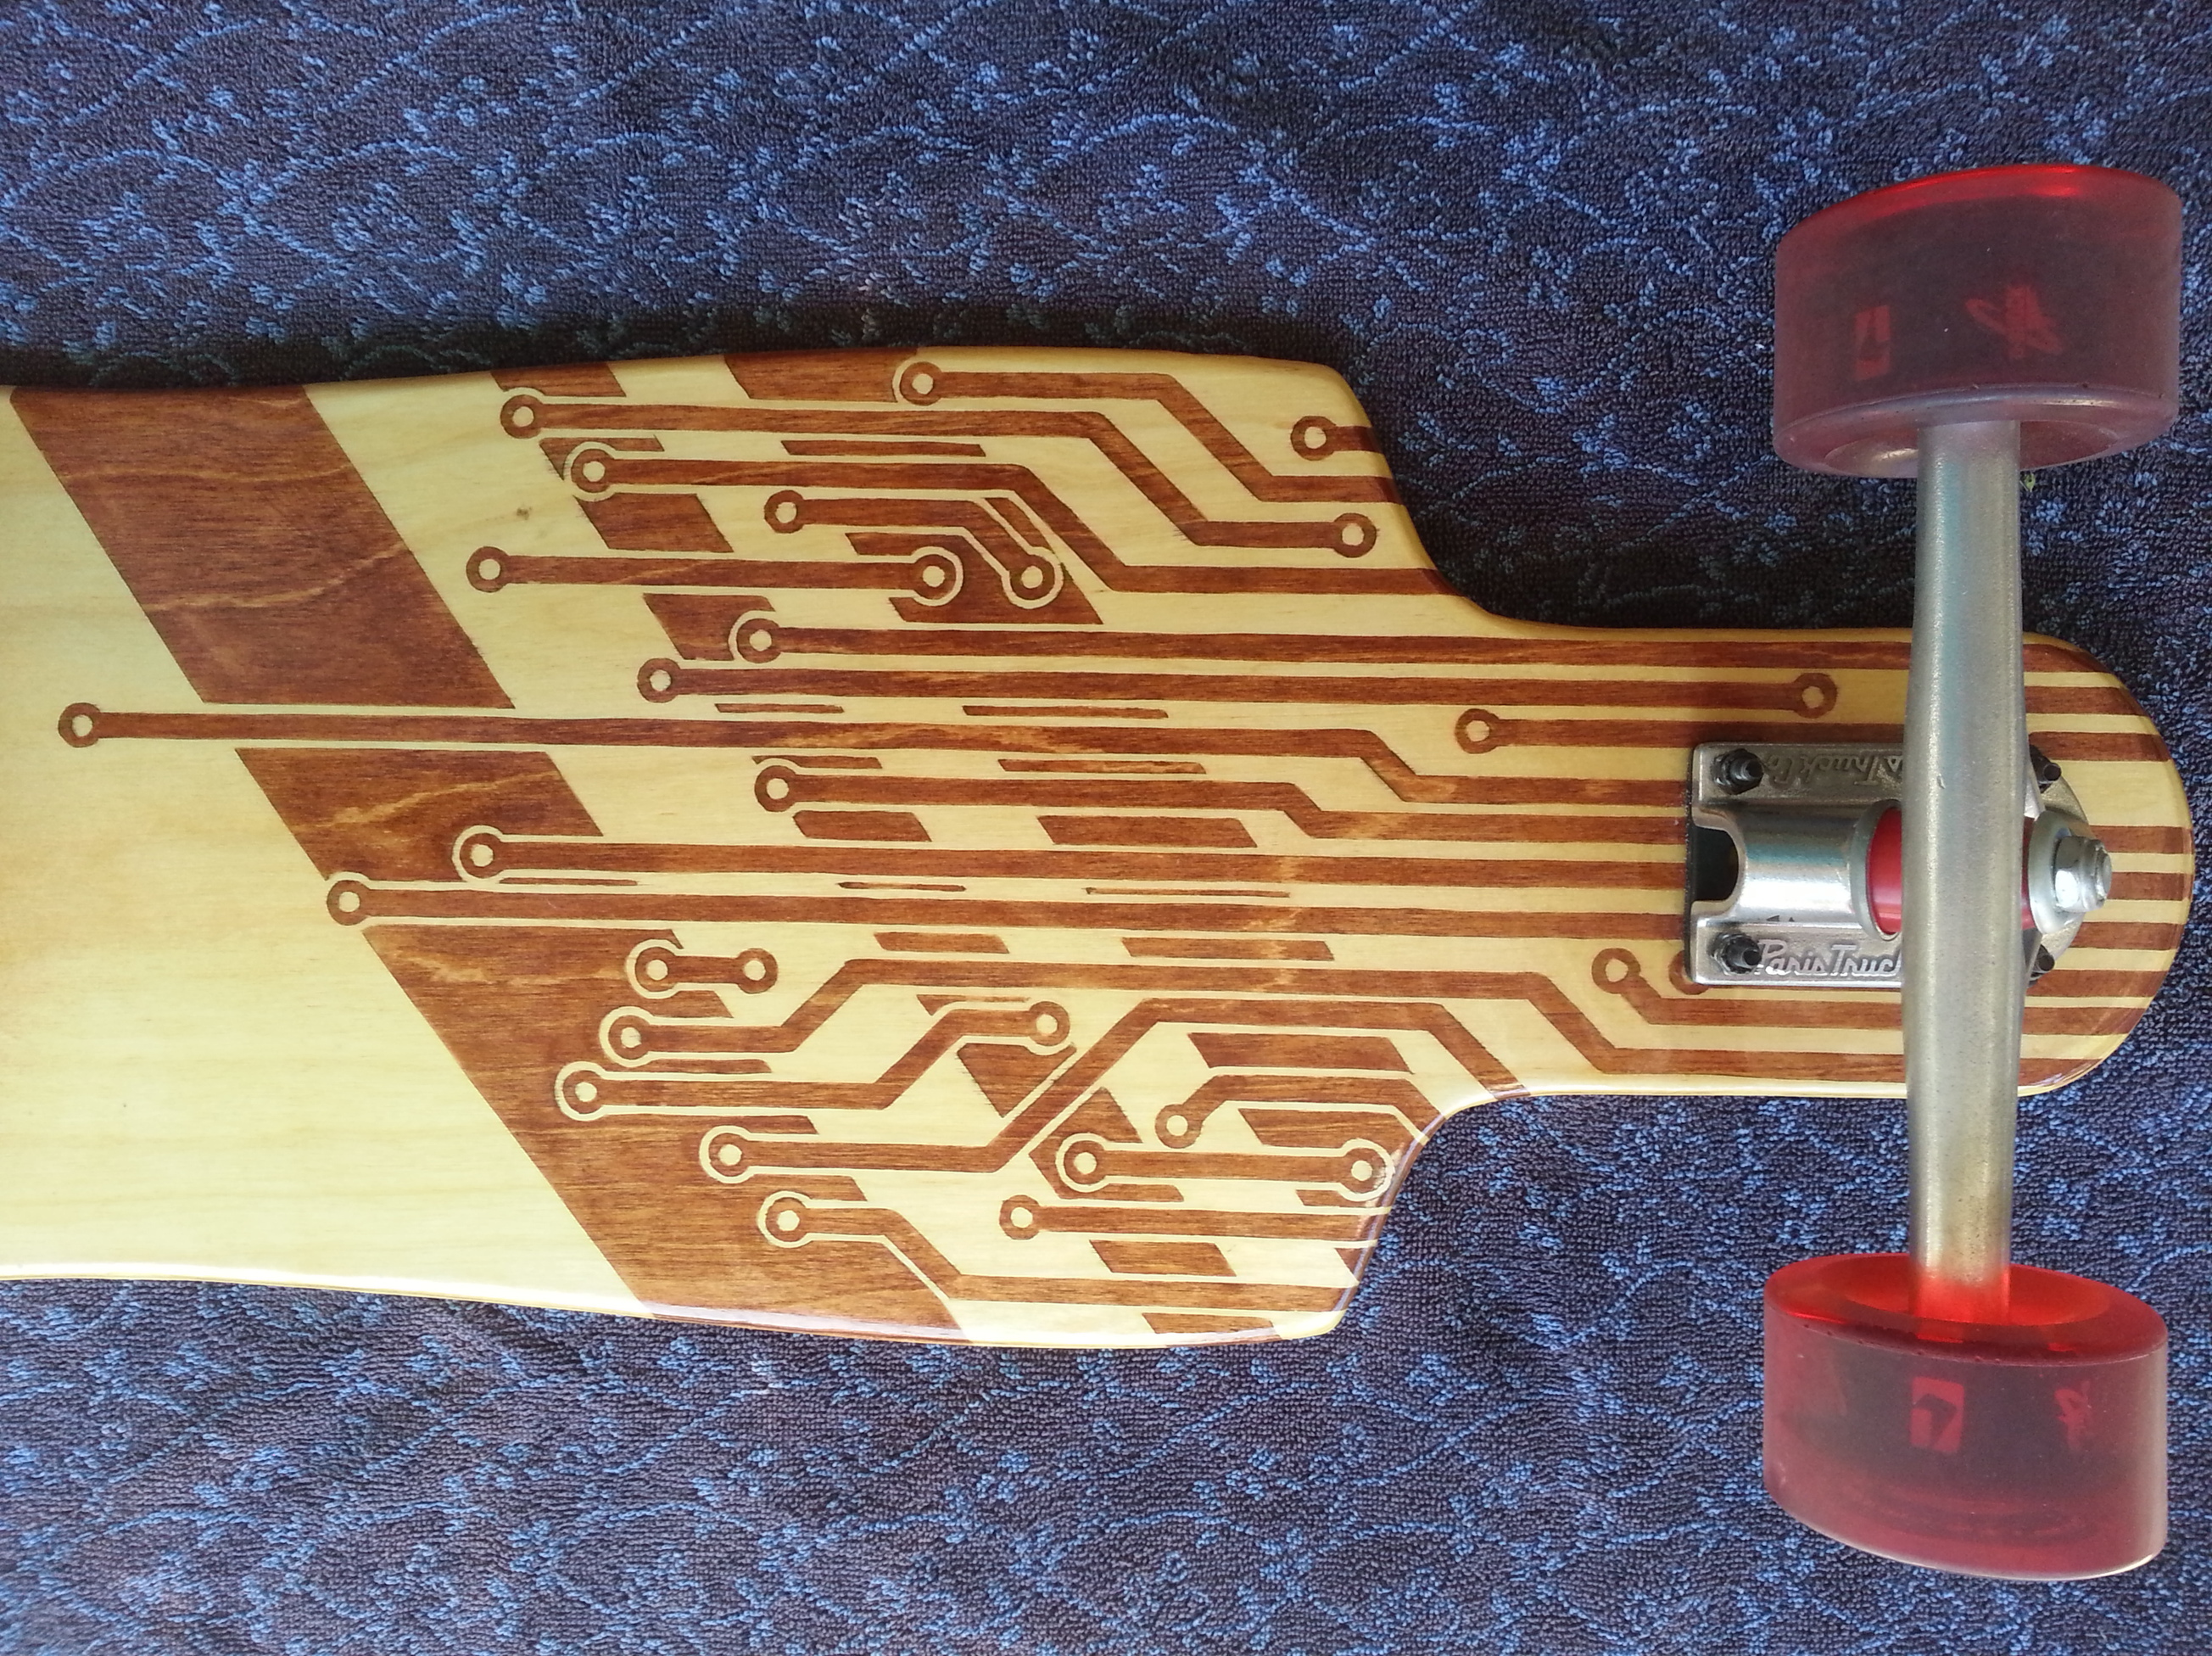
Thanks to warco on silverfish longboarding forum for uploading an awesome page of Churchill MFG templates that I could choose from. I settled on ST16. I imported the file into Illustrator, vectorized it, sized it properly for printing, and modded it a bit (since I wasn’t doing a drop-through board). It’s not perfect, but who can tell? ![]()
I plan on making all my files available for free download on my personal website soon. Until then, just PM me and I’ll send 'em your way.
I won’t go into a lot of details regarding building the board itself. If you want more info, these instructables were very helpful:
https://www.instructables.com/id/How-to-make-a-Longboard/
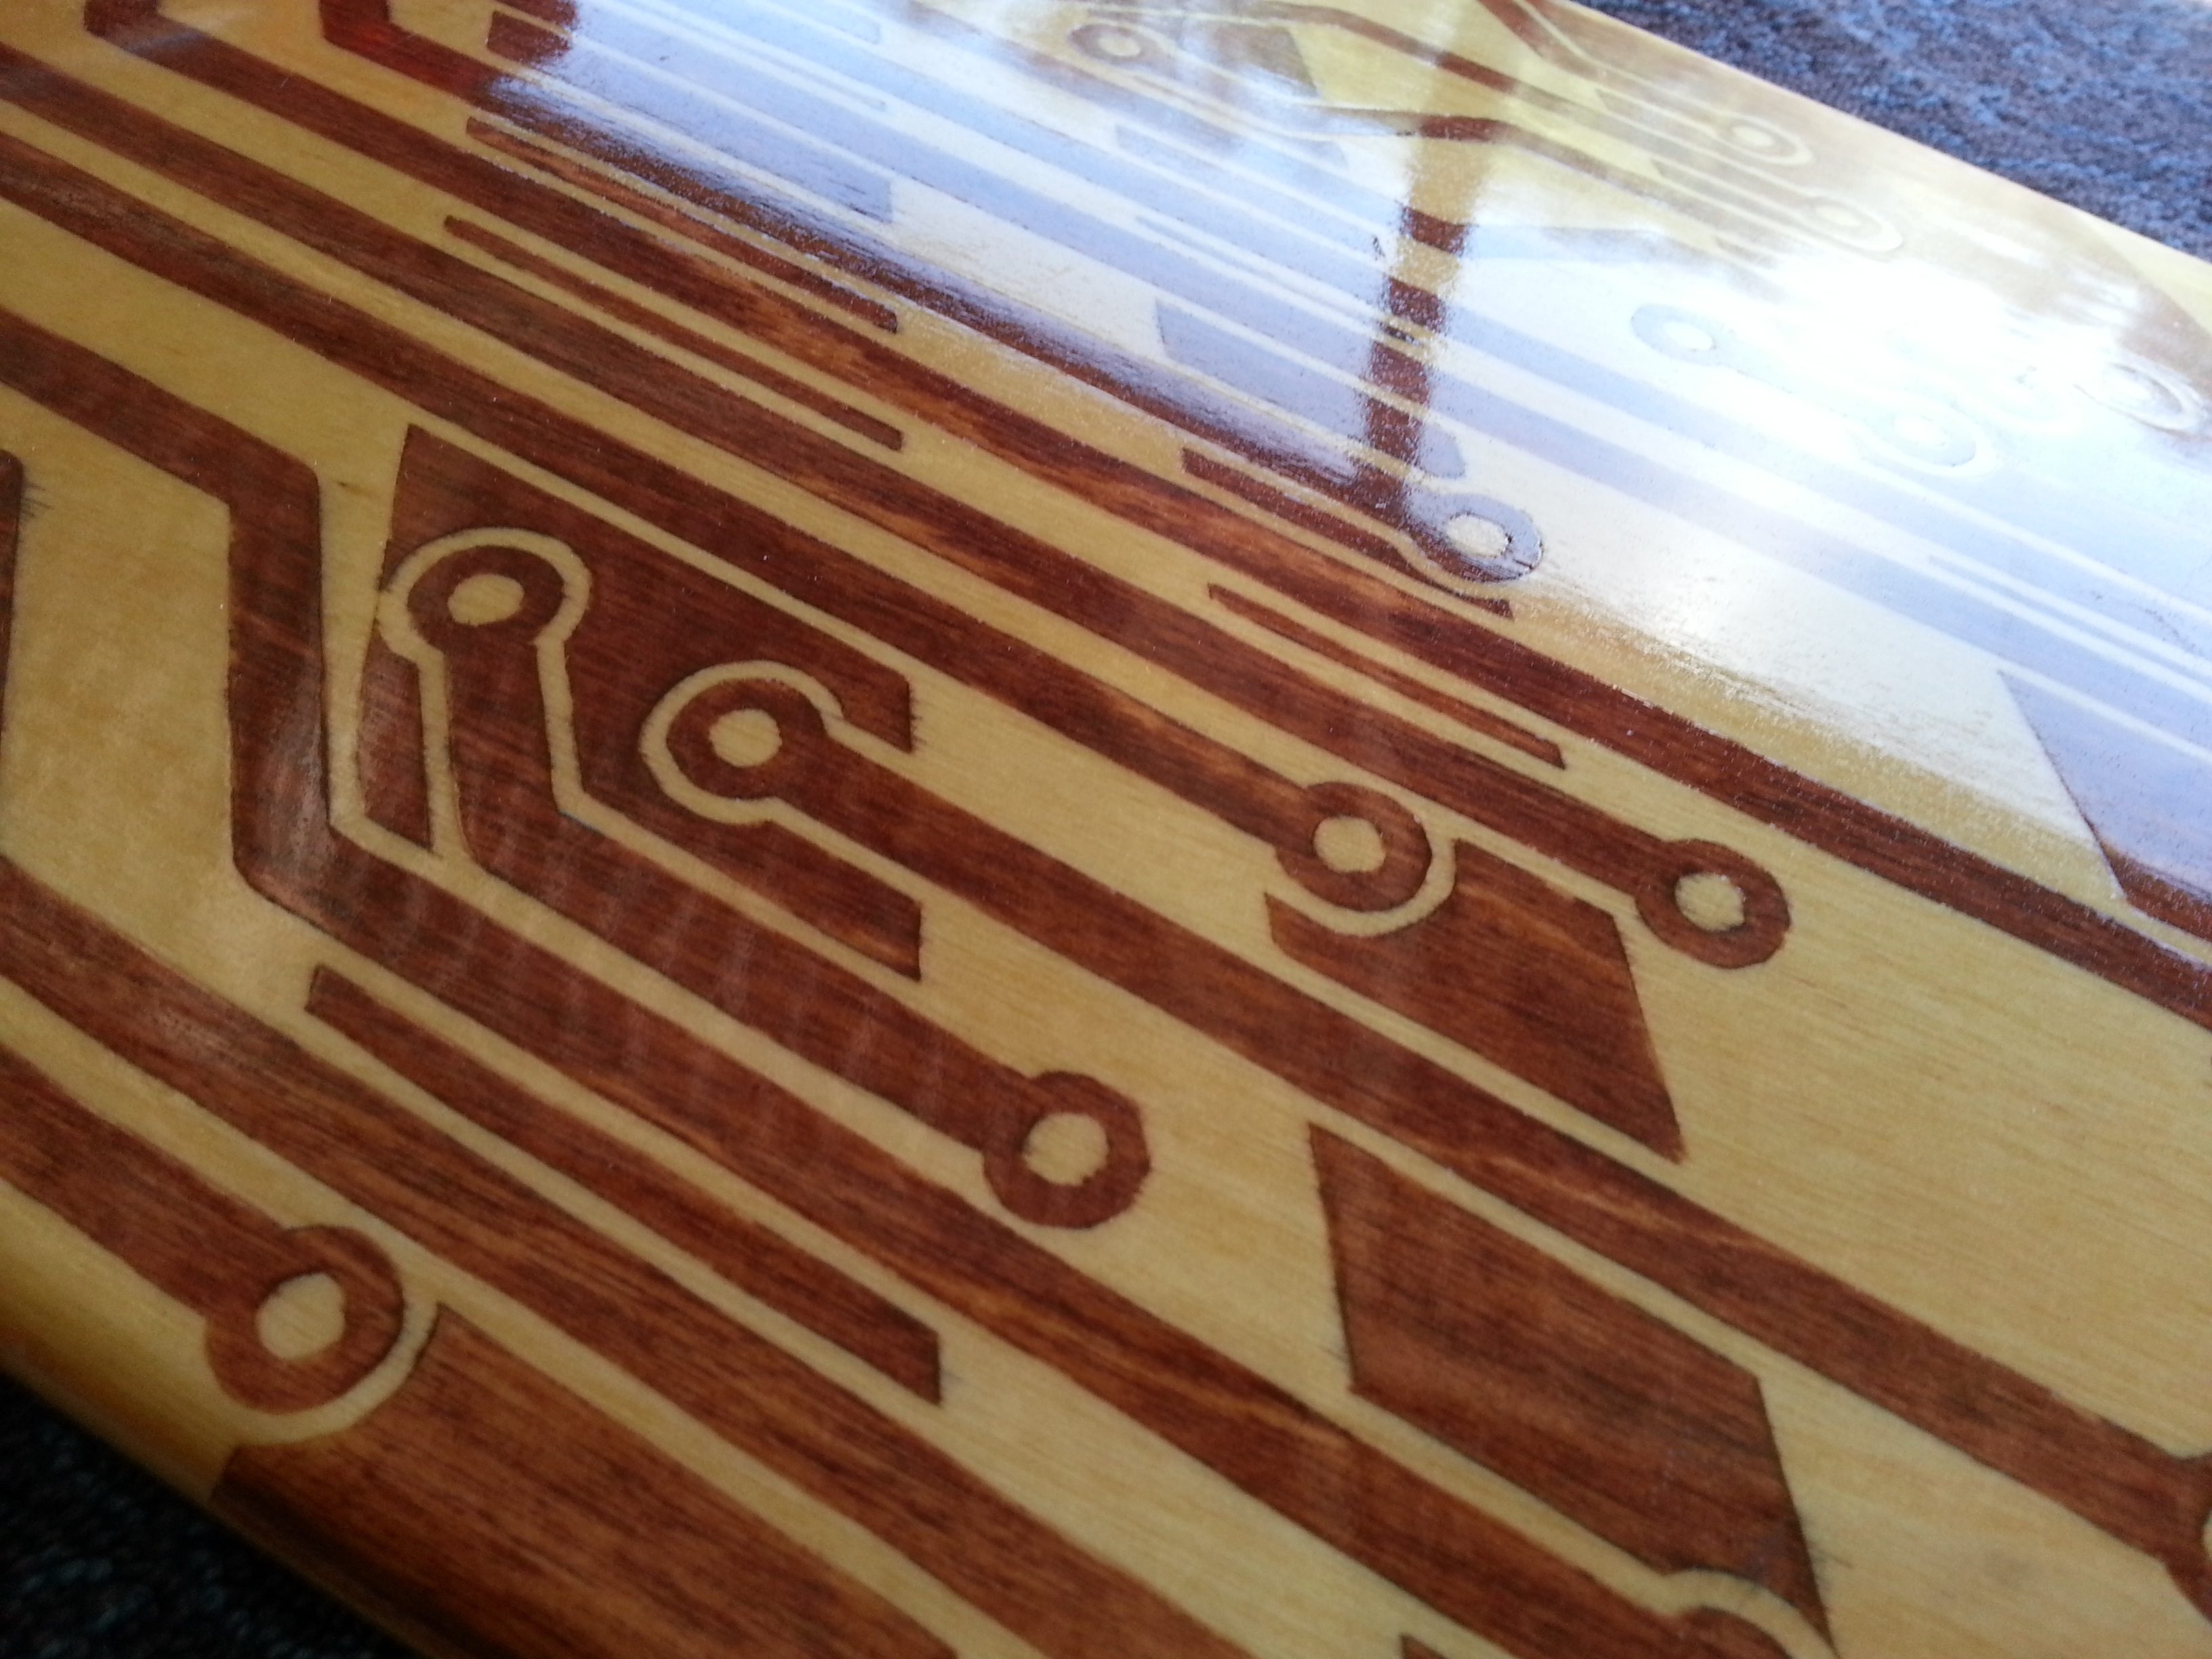
I loved the look of stenciled stain and I wanted something techy looking, so I made this circuitry pattern in Illustrator and printed it out. This post was helpful for figuring out the staining process (unfortunately the pictures have been removed): https://www.silverfishlongboarding.com/forum/longboard-board-building-q-a-discussions/85110-stencils-wood-stain.html
I then covered the top of the board in painter’s tape and spray glued the paper pattern on top. Using an exacto, I cut through the paper, tape, and into the board a bit. Scoring the board itself is important! It provides a small trough that catches excess stain. Otherwise, the stain will bleed along the grain of the wood and make your crisp lines fuzzy. ![]() Give it a coat of polyurethane, sand, and repeat. I’ll try to make a nice video of the whole process eventually. In the meantime, here’s a (very) rough edit of all my Snapchat stories thrown together:
Give it a coat of polyurethane, sand, and repeat. I’ll try to make a nice video of the whole process eventually. In the meantime, here’s a (very) rough edit of all my Snapchat stories thrown together:
")
Similar deal for the grip tape: design it on the computer (reverse it), print it out, spray glue to back of grip tape. I used push pins to tack it flat to my desk and make it easier to cut. Laboriously cut out with exacto. Scuff up board and apply (symbol is my initials btw). How do you guys apply griptape patterns? It was really hard to get it straight.


Propulsion System:
Now onto the important part: the propulsion system! Using a dremel, I ground the truck down so I could affix the motor mount. I couldn’t weld it and prices for gears, belts, and such are pretty steep, so I decided to go with this $35 kit from eBay that came with everything I needed. This was a big mistake. The gearing ratio was around 2.4:1 (48:16) and it was 3mm pitch so some spare belts I’d also bought were too large (5mm). The motor didn’t line up correctly with the mounting holes, so I had to grind it to fit and only use two screws. The pinion gear bore was too large so it didn’t fit my motor shaft. I had to make a collet to get it to fit. This might work well for some motors, but not the SK3 I used. Be warned: you get what you pay for.
Anybody know what size motor this mount is even for? The mount got loose on a few test runs so I ended up drilling a bit into the truck in order to give the set screws a socket to grip into. It feels rock solid now. Depending on how well the el cheapo mount holds up, I might upgrade the trucks to calibers with @Shogu12 ‘s $22 aluminum/CF motor mounts (like I should have done in the first place).
The trucks and wheels also came as a set from eBay. Initially, I drilled through the kit’s 70mm G-Shock wheel itself and used bolts/washers plus the aluminum gear to sandwich the wheel in between. This turned okay, but coupled with the wobbly pinion gear, the board had some seriously janky vibrations (as I feared).
Once I had the motor, gears, etc mounted, I really wanted to test it out on the road. I didn’t have the enclosure finished yet, so I just taped and rubber banded all the electronics to the bottom of the board. It looked hilarious and didn’t instill a lot of confidence in the rider, but it worked. As exhilarating as it was to finally get on the road, this maiden voyage showed a lot of its weaknesses. The bolts started vibrating out since I couldn’t use lock nuts and didn’t use thread lock on the gear. Eventually the mount got loose as well. I also was getting a top speed of around 17mph according to my phone. This was slower than I wanted. This wasn’t going to work. I went back to the drawing board and ordered these 83mm flywheels. I didn’t notice the size difference till I got them (the previous kit came with 70mm). Much better! I 3D printed brentyi’s awesome ABEC insert at my library and ordered a new pinion gear putting my gear ratio at 3:1. After changing the gearing, the board rode much smoother and a few mph faster too!

Electronics:
As for the electronics, it’s literally a jerry-rigged RC car. This is the way they did it in the olden days before all these newfangled VESC’s. ![]() The ESC is a 120A Hobbyking X-Car Beast with a 280kV Turnigy Aerodrive SK3. I bought this ESC programmer. This ESC supports ramping initial acceleration, braking, reverse, and many other handy options. Another nice thing about this ESC is it has a built in power switch so no anti-spark is needed! I replaced the original switch with a sweet LED power button and powered it via the receiver’s servo connectors.
The ESC is a 120A Hobbyking X-Car Beast with a 280kV Turnigy Aerodrive SK3. I bought this ESC programmer. This ESC supports ramping initial acceleration, braking, reverse, and many other handy options. Another nice thing about this ESC is it has a built in power switch so no anti-spark is needed! I replaced the original switch with a sweet LED power button and powered it via the receiver’s servo connectors.
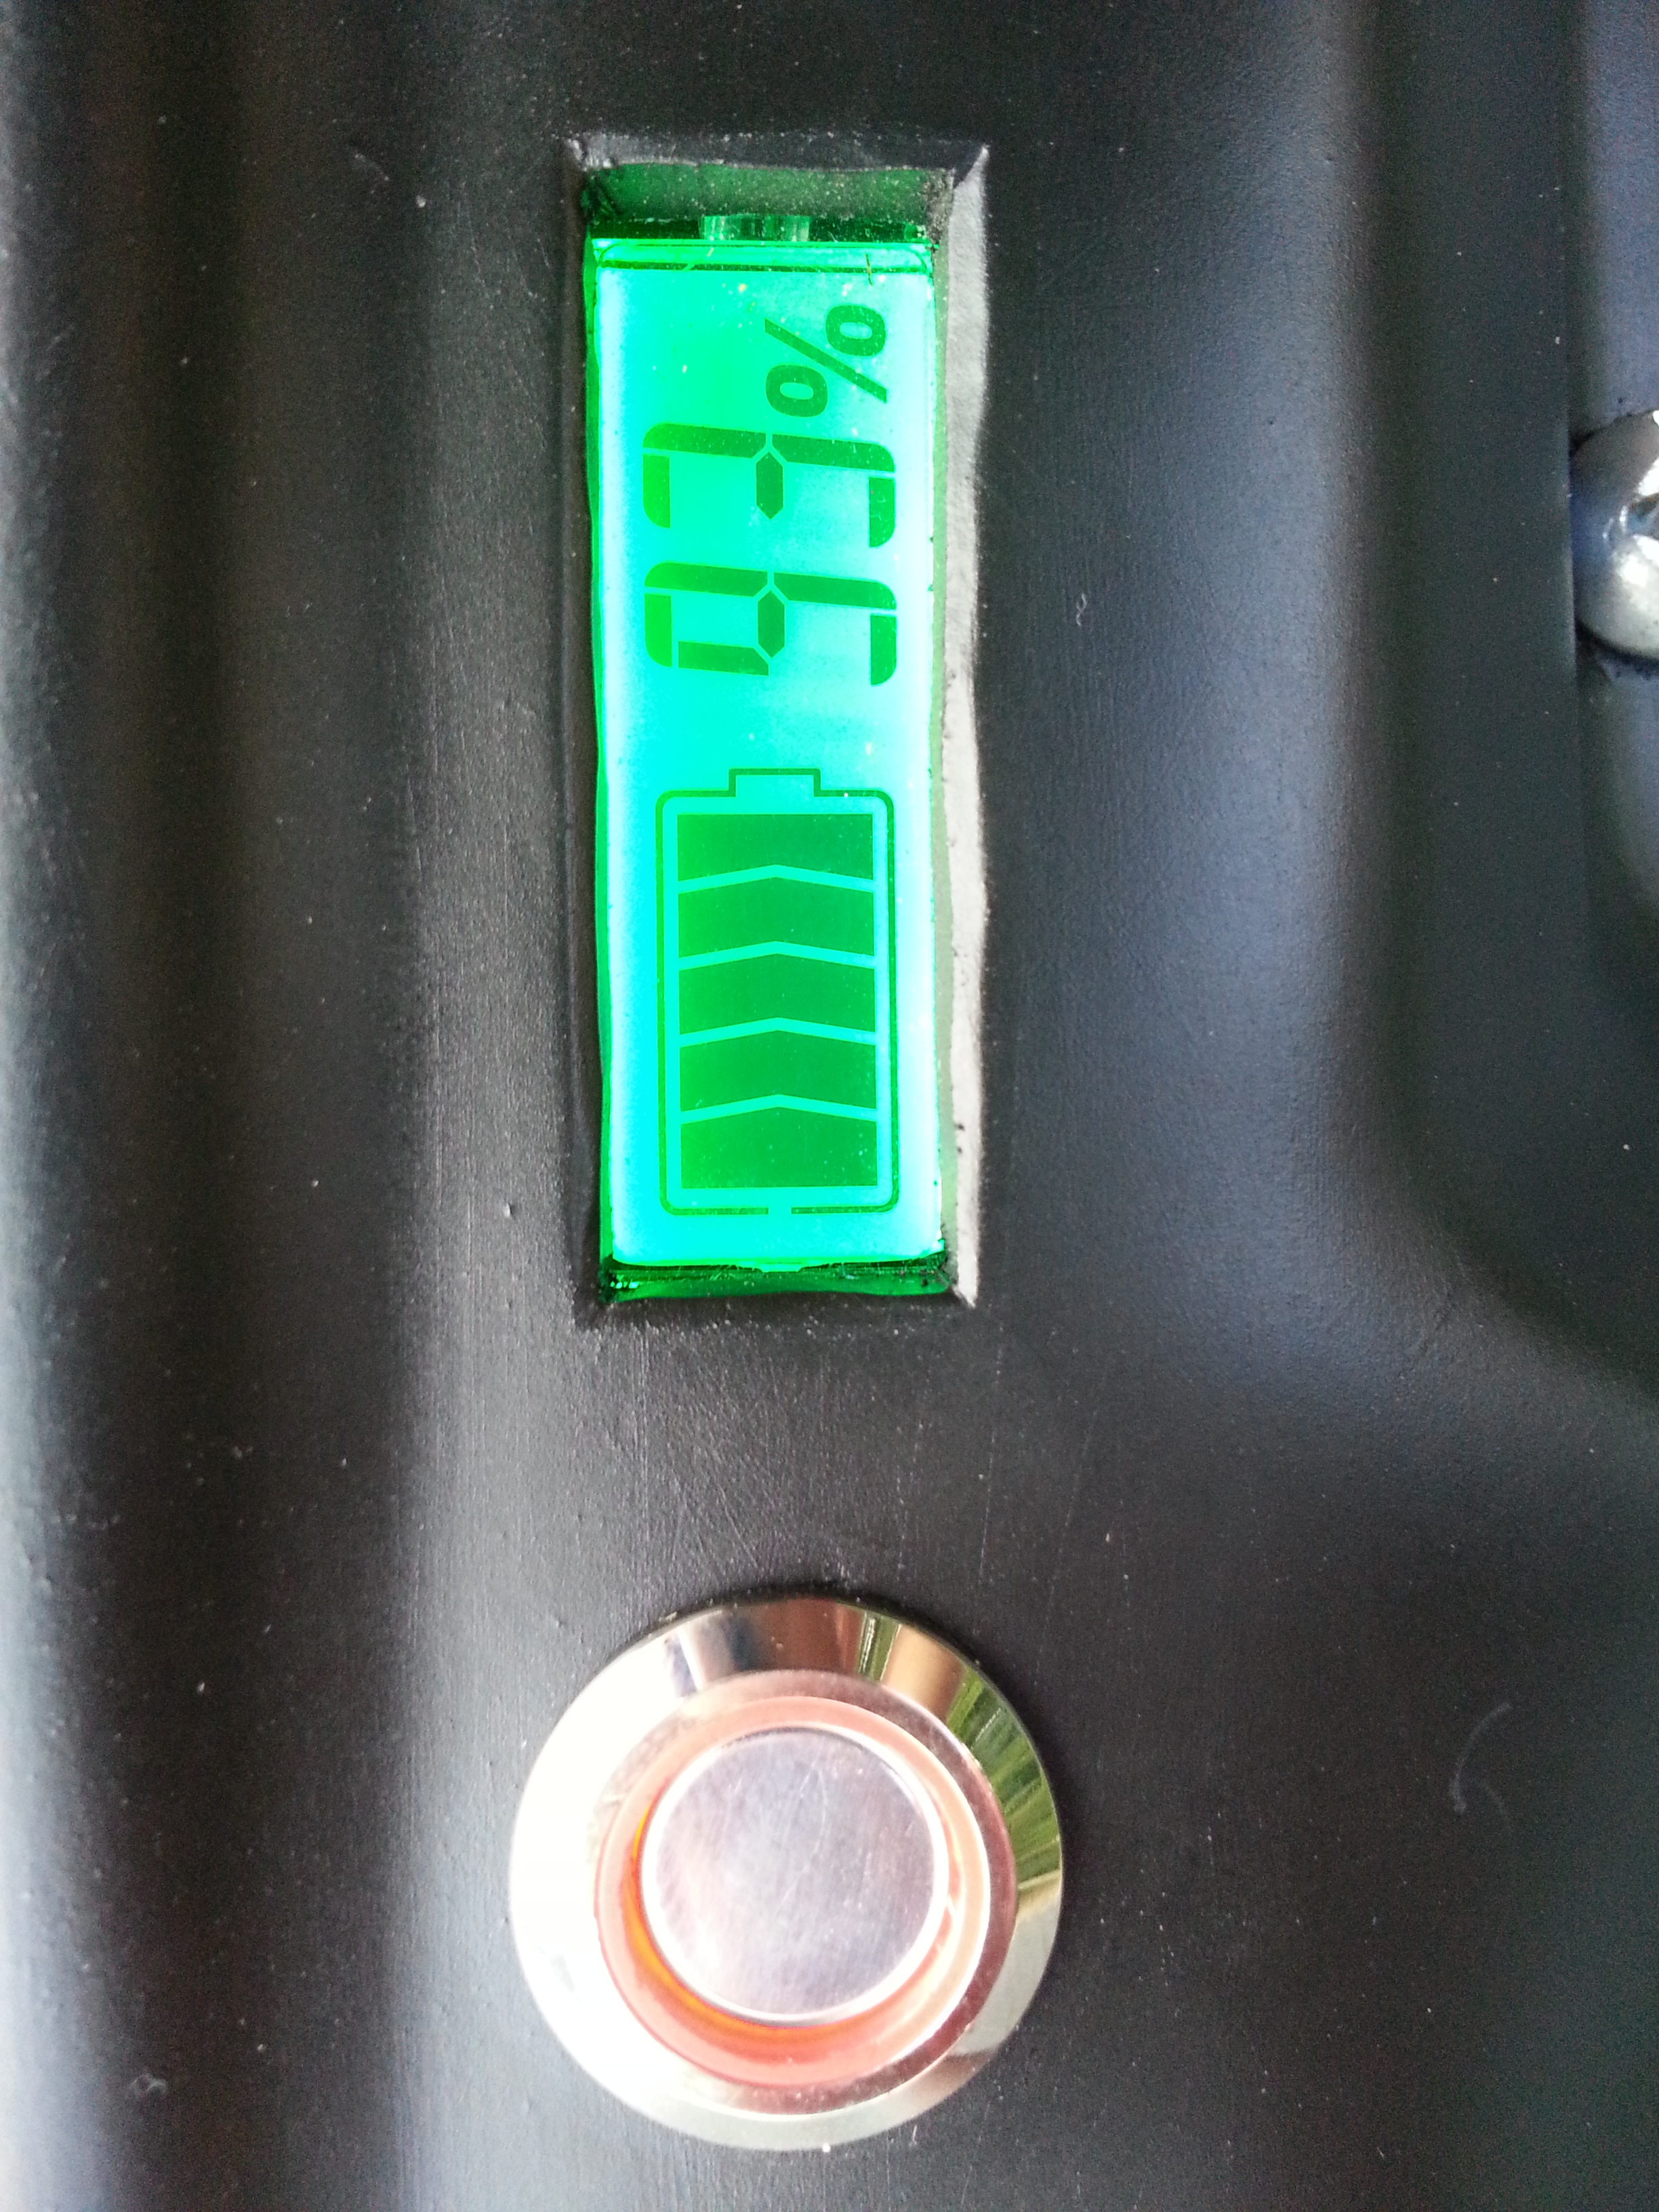
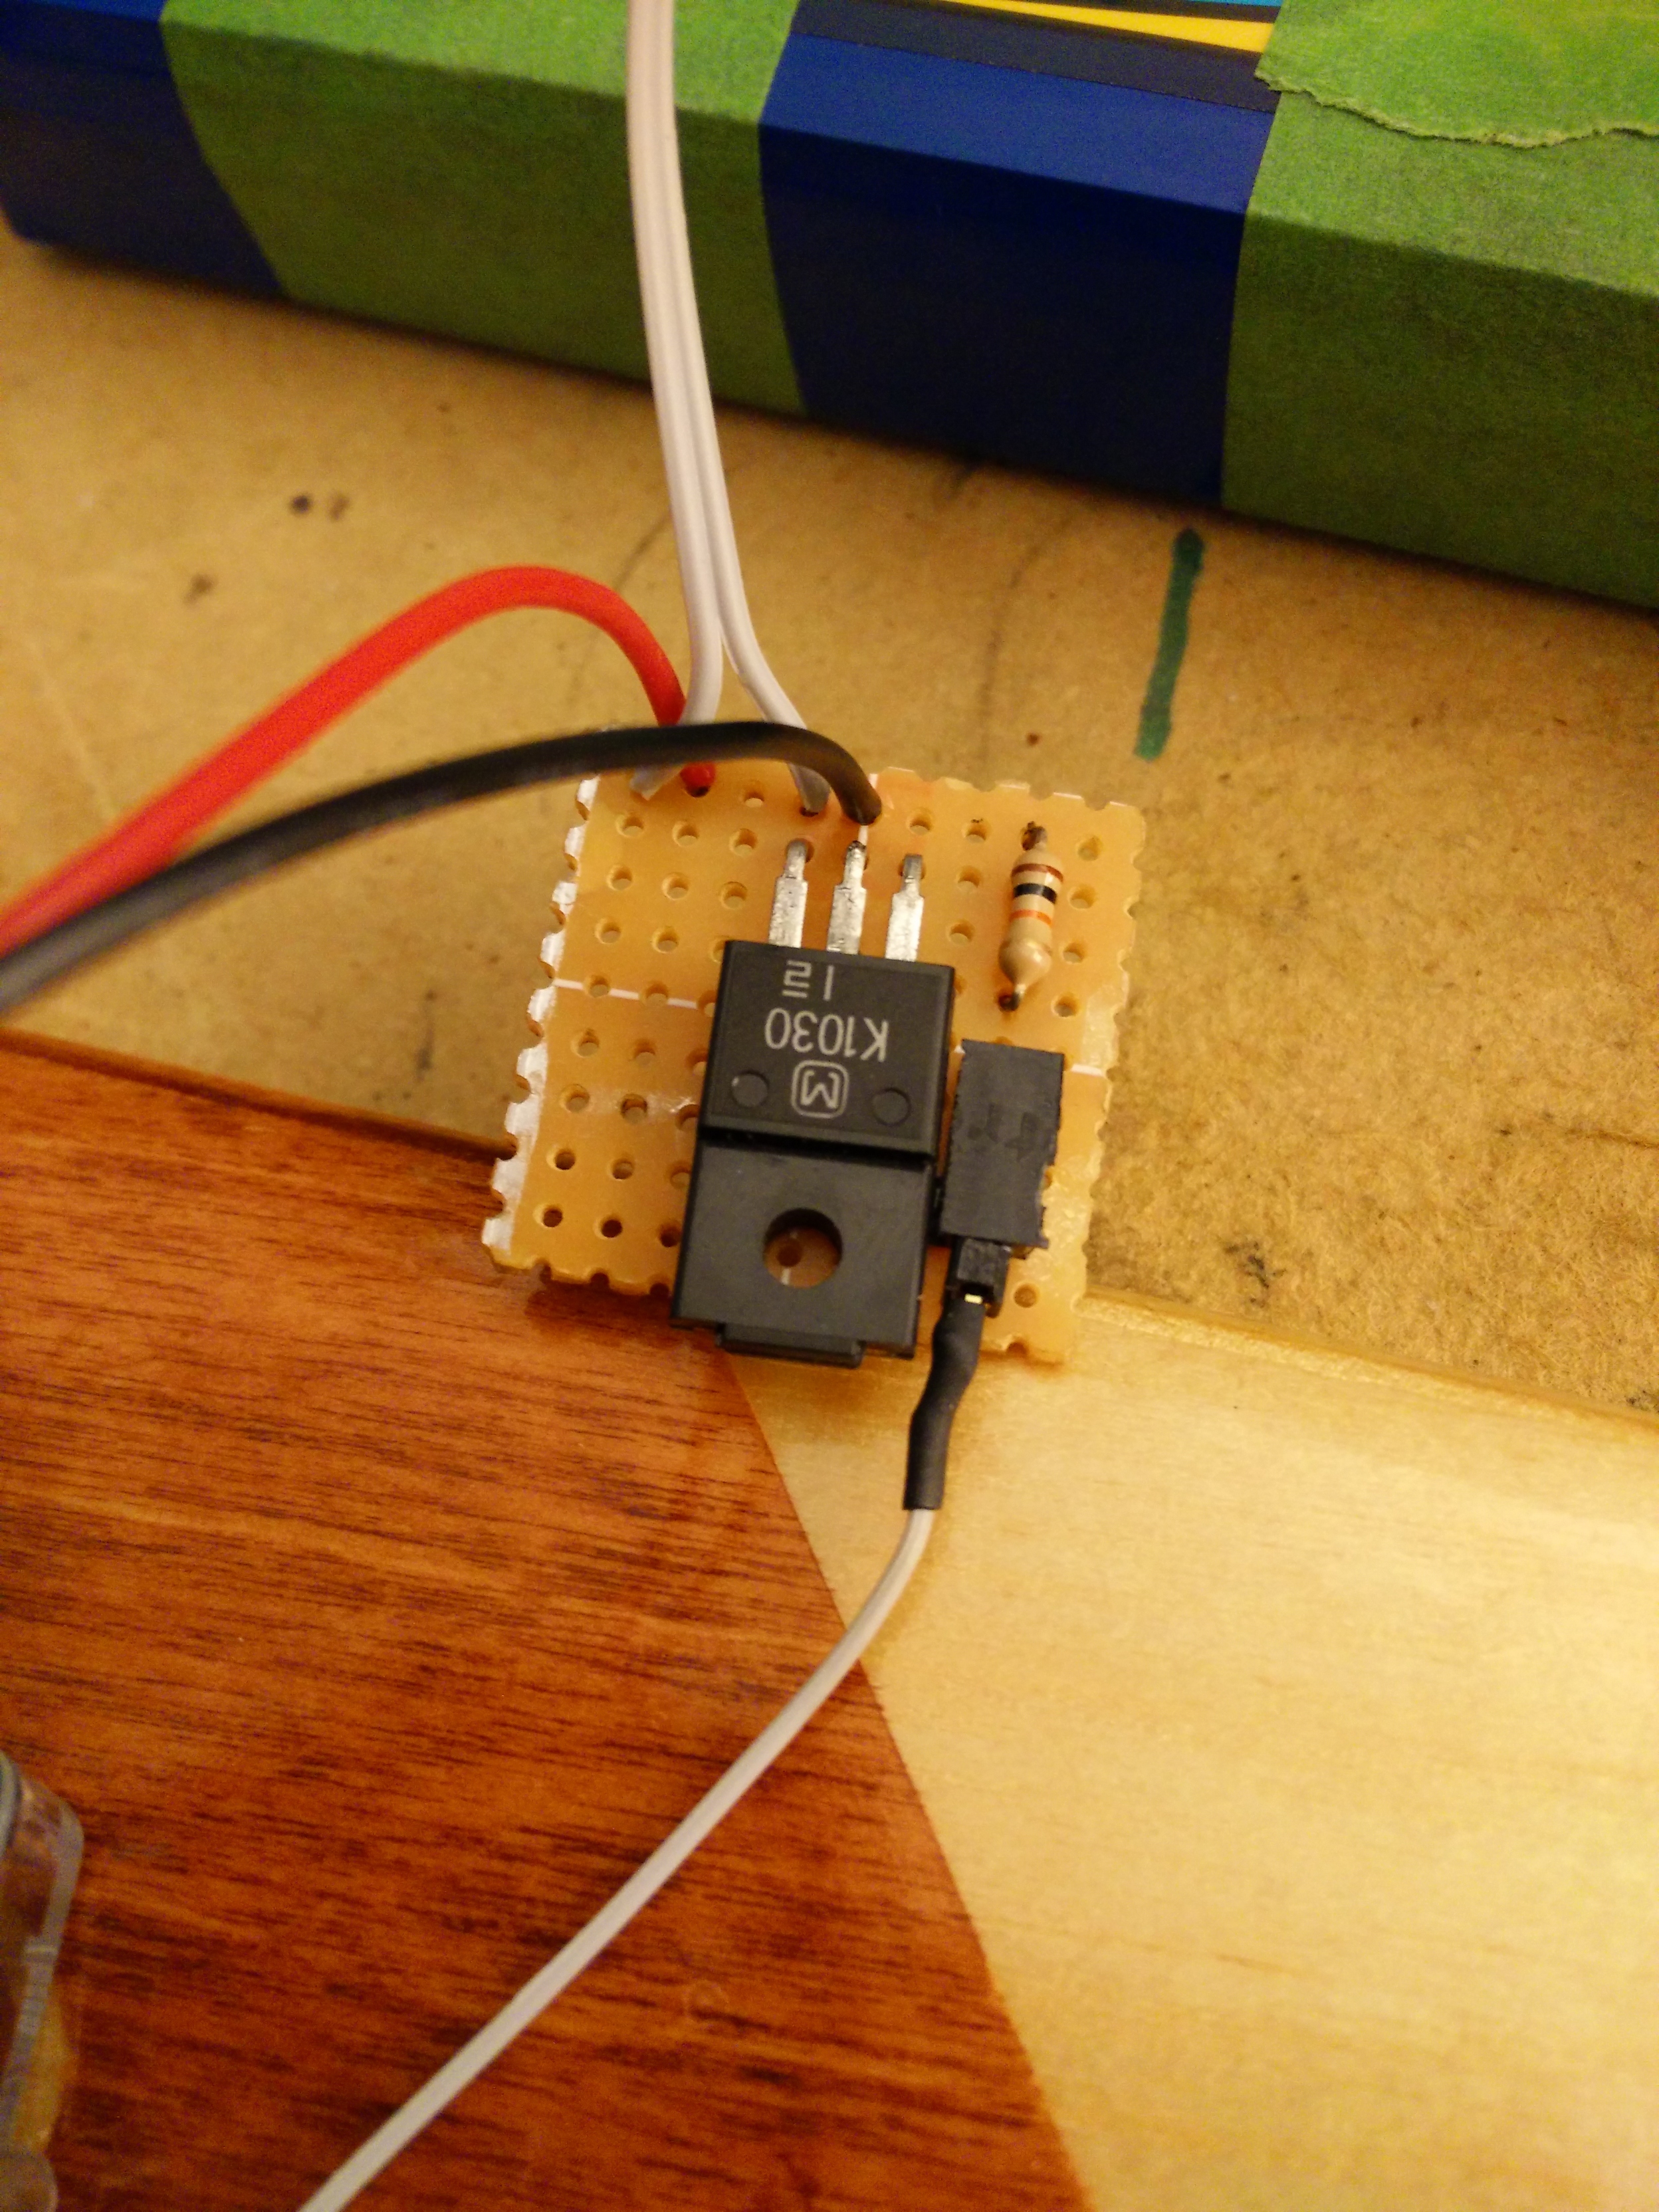
A fancy battery gauge was a must-have so I bought this one on eBay. In order to have it turn on when I powered on the ESC, I had to connect the normally open lead of the power switch to a MOSFET which connects the screen to power whenever it’s fed a 17V signal from the power button being pressed. I bought a FlySky FS-GT2B on Amazon and stuffed it into a BadWolf 3D printed case. Turned out really nice with some sanding and painting! It comes with a receiver which I connected to the ESC. I mounted everything to the board with high strength/normal velcro. Charging only takes about an hour, and the range is longer than I care to measure (anyone else with my setup have an estimate?).

Case:
The case was kind of an experiment. Most budget builds use premade plastic cases, or vacuum formed plastic over wood. These are pretty economical, but they’re also pretty ugly. I wanted something like a boosted board case, but couldn’t 3D print or CNC it. I don’t have a 3D printer, but I do have a 2D printer and a magical program called Pepakura. As far as I can see, no one else has made a case this way before (perhaps for good reason). It’s usually used for building helmets/props.
The Pepakura method is as follows:
- Design a case any way you want on a computer or download one from thingiverse.
- Import 3D file into Pepakura.
- Adjust and print on cardstock.
- Cut out patterns and glue together.
- Coat with resin for strength (if needed)
- Create cast using plaster of paris.
- Sand and smooth.
- Vacuum form
This method offers the precision of 3D printing with the strength and smoothness of vacuum forming. Optionally, you could skip the casting/forming steps and use the mold as a form for carbon fiber vacuum bagging.
My results were subpar at best. As you can see in the video, I used a friend’s abnormal vacuum former (for prosthetics) and I used some really thick polypropylene that said friend gave me for free. The vacuum former didn’t have enough suction so the finished case was much smoother and thicker than I wanted but with the added benefit of likely withstanding a javelin missile. The two straight ribs on top were for reinforcement, but are obviously unneeded.
In order to mount it, I used some ¼ inch threaded inserts and bolts cut to size. Painful as it was to drill holes in my baby, it had to be done. Unfortunately, they weren’t perfect so the case is off-centered a bit. I tell myself it adds character. ![]()
I’ll continue experimenting with this case-building method and perhaps do a full write up/video of the process with tips and tricks on how to get it right. Feel free to ask any questions or sling any mud about the process below (or PM me). Anyone know of other alternative ways of making cases/boards?


In total, I spent under $500 and I’m really pleased with the result. Again, it’s certainly not a crazy $3000 mountain board, but it’s good-looking, fun, and inexpensive. This has really just gotten my feet wet in the esk8 world and I’m already planning my next board. There are several new things I want to try that no one else has yet. Boy oh boy, have I got plans! ![]()
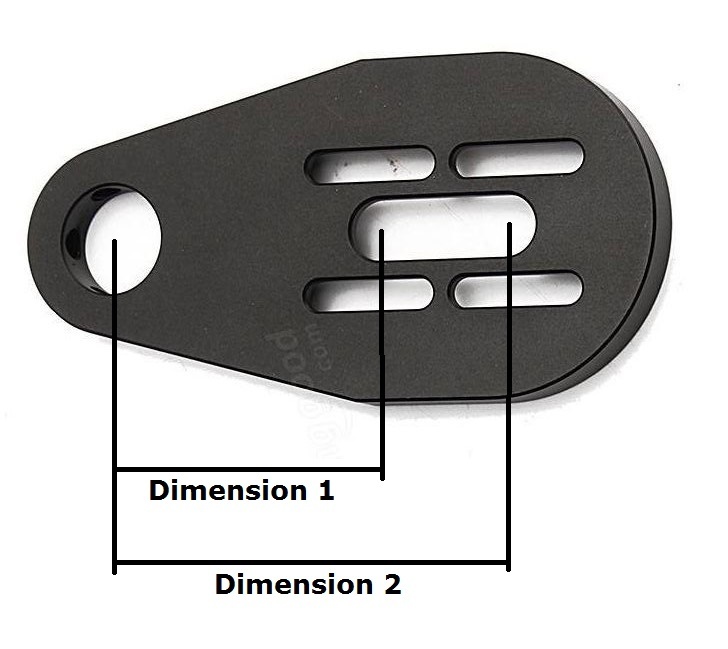
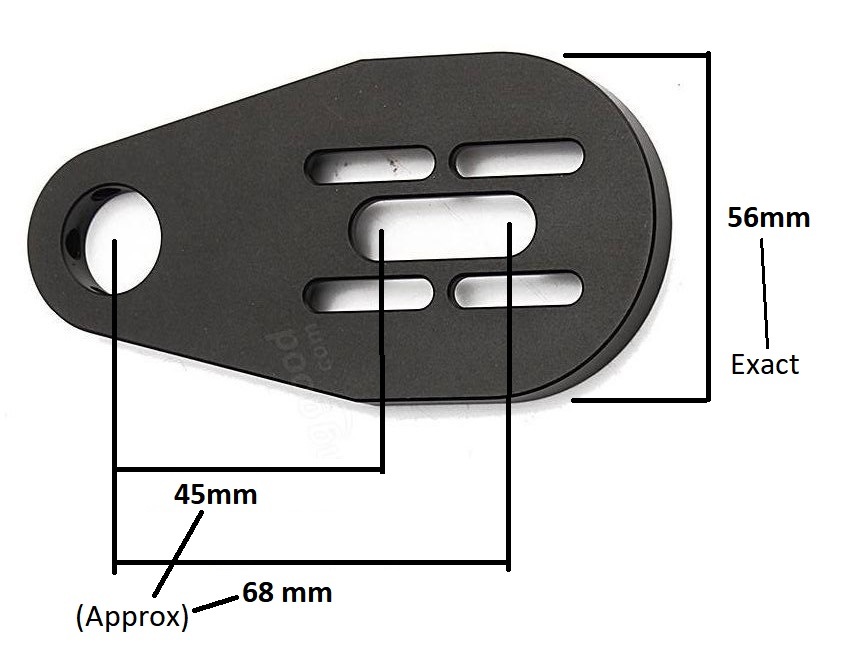
 Is there a possibility to measure these 2 dimensions?
 .
.


