Being an owner of a Yuneec E-Go for 2 years, I knew exactly what I wanted: same long range as the E-Go, same modular approach for easy repair by me as the E-Go, and something much faster. DIY seemed to be the only choice. I called this DIY Simple because using hub motors made the assembly super easy.
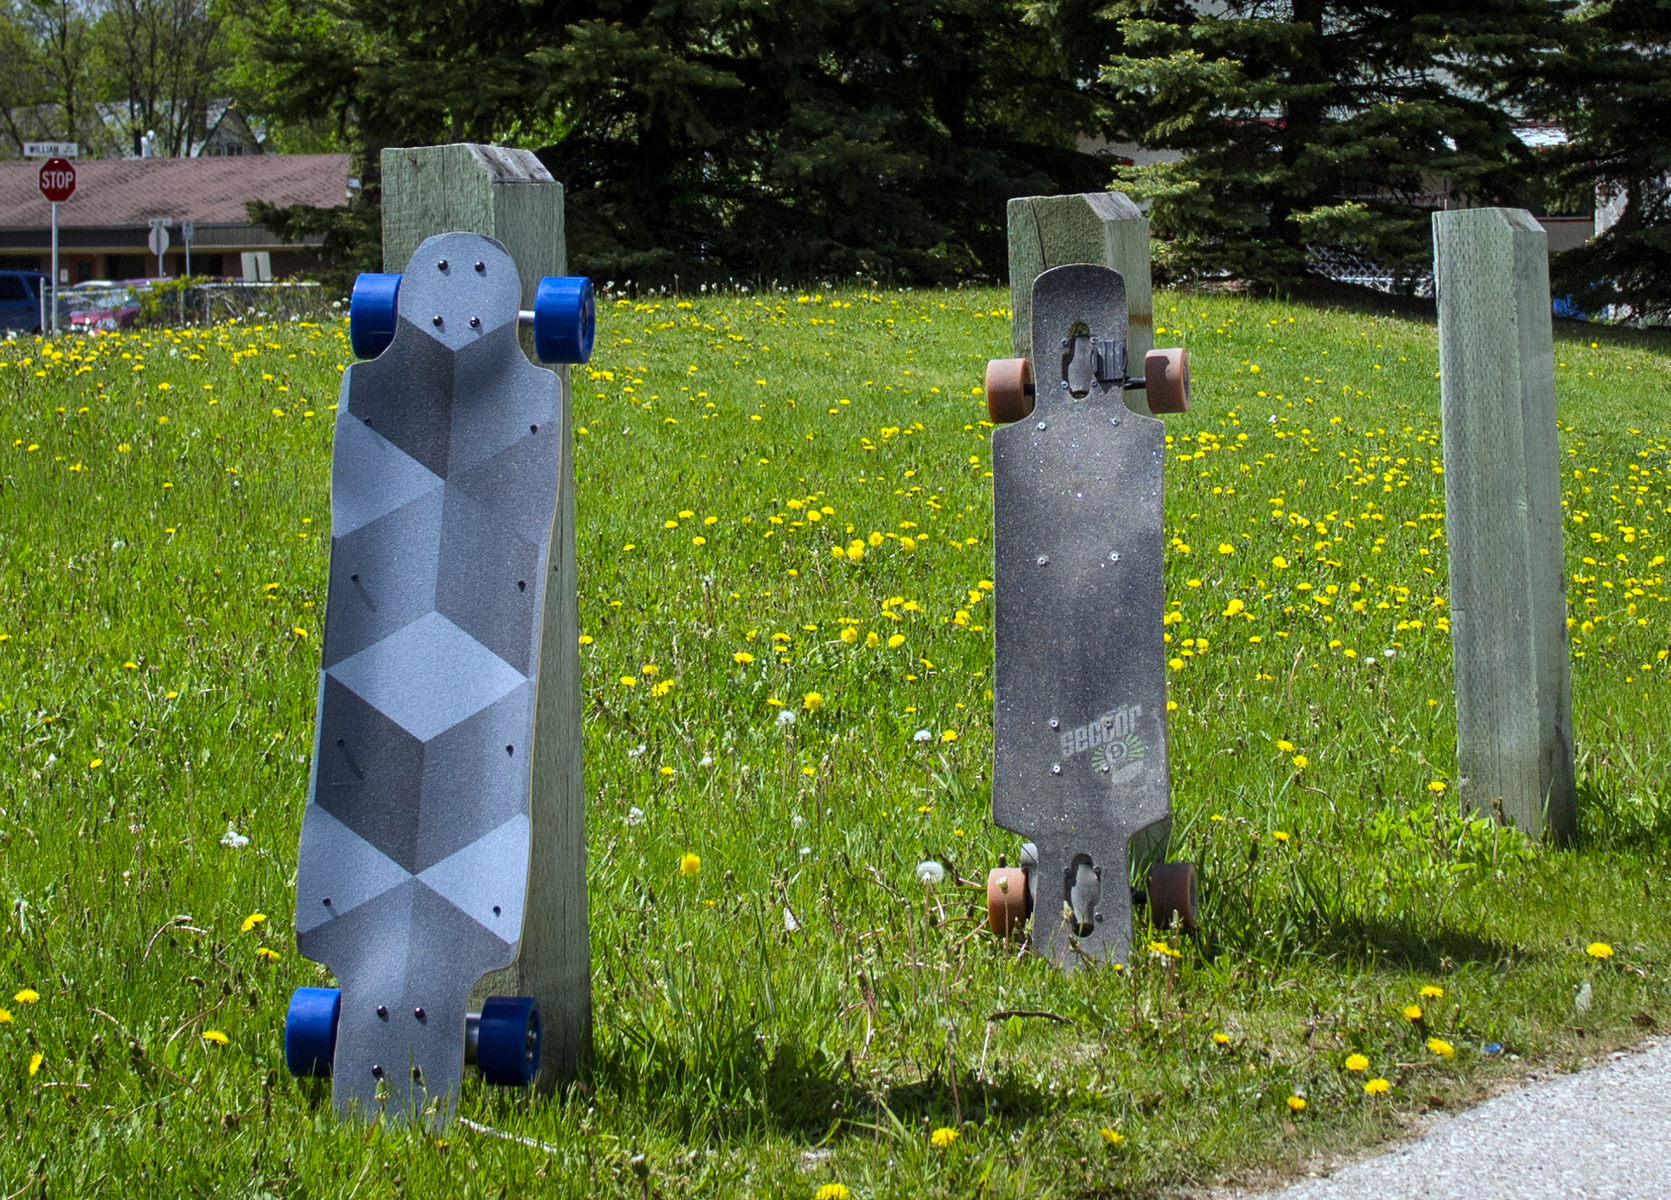
The only stiff deck that I could find with a kicktail back in January was a 42.5” Rayne Supreme. It had deep concave and it was just big enough for the Enertion Space Cell Pro 4 (10S4P) Enclosure.


I put a handle to the kicktail for easy dragging (and possibly as a footstop too)

And drilled two more holes for mounting my Action Cam. Rubber bands are vital to keep the cam in position. I broke several joints before caming up with this rubber band solution.

I trimmed two inch off one kicktail to make a nose for dragging this heavy board. I didn’t check how heavy it was but it was a lot more heavy than my E-Go.

This was my simple custom grip tape, 11x45” from Restless. It’s only a few dollars more expensive than standard grip tapes.

I made a XT60 to Twin XT90 power adaptor cable to match those XT90 on the VESC’s from ToqueBoard.

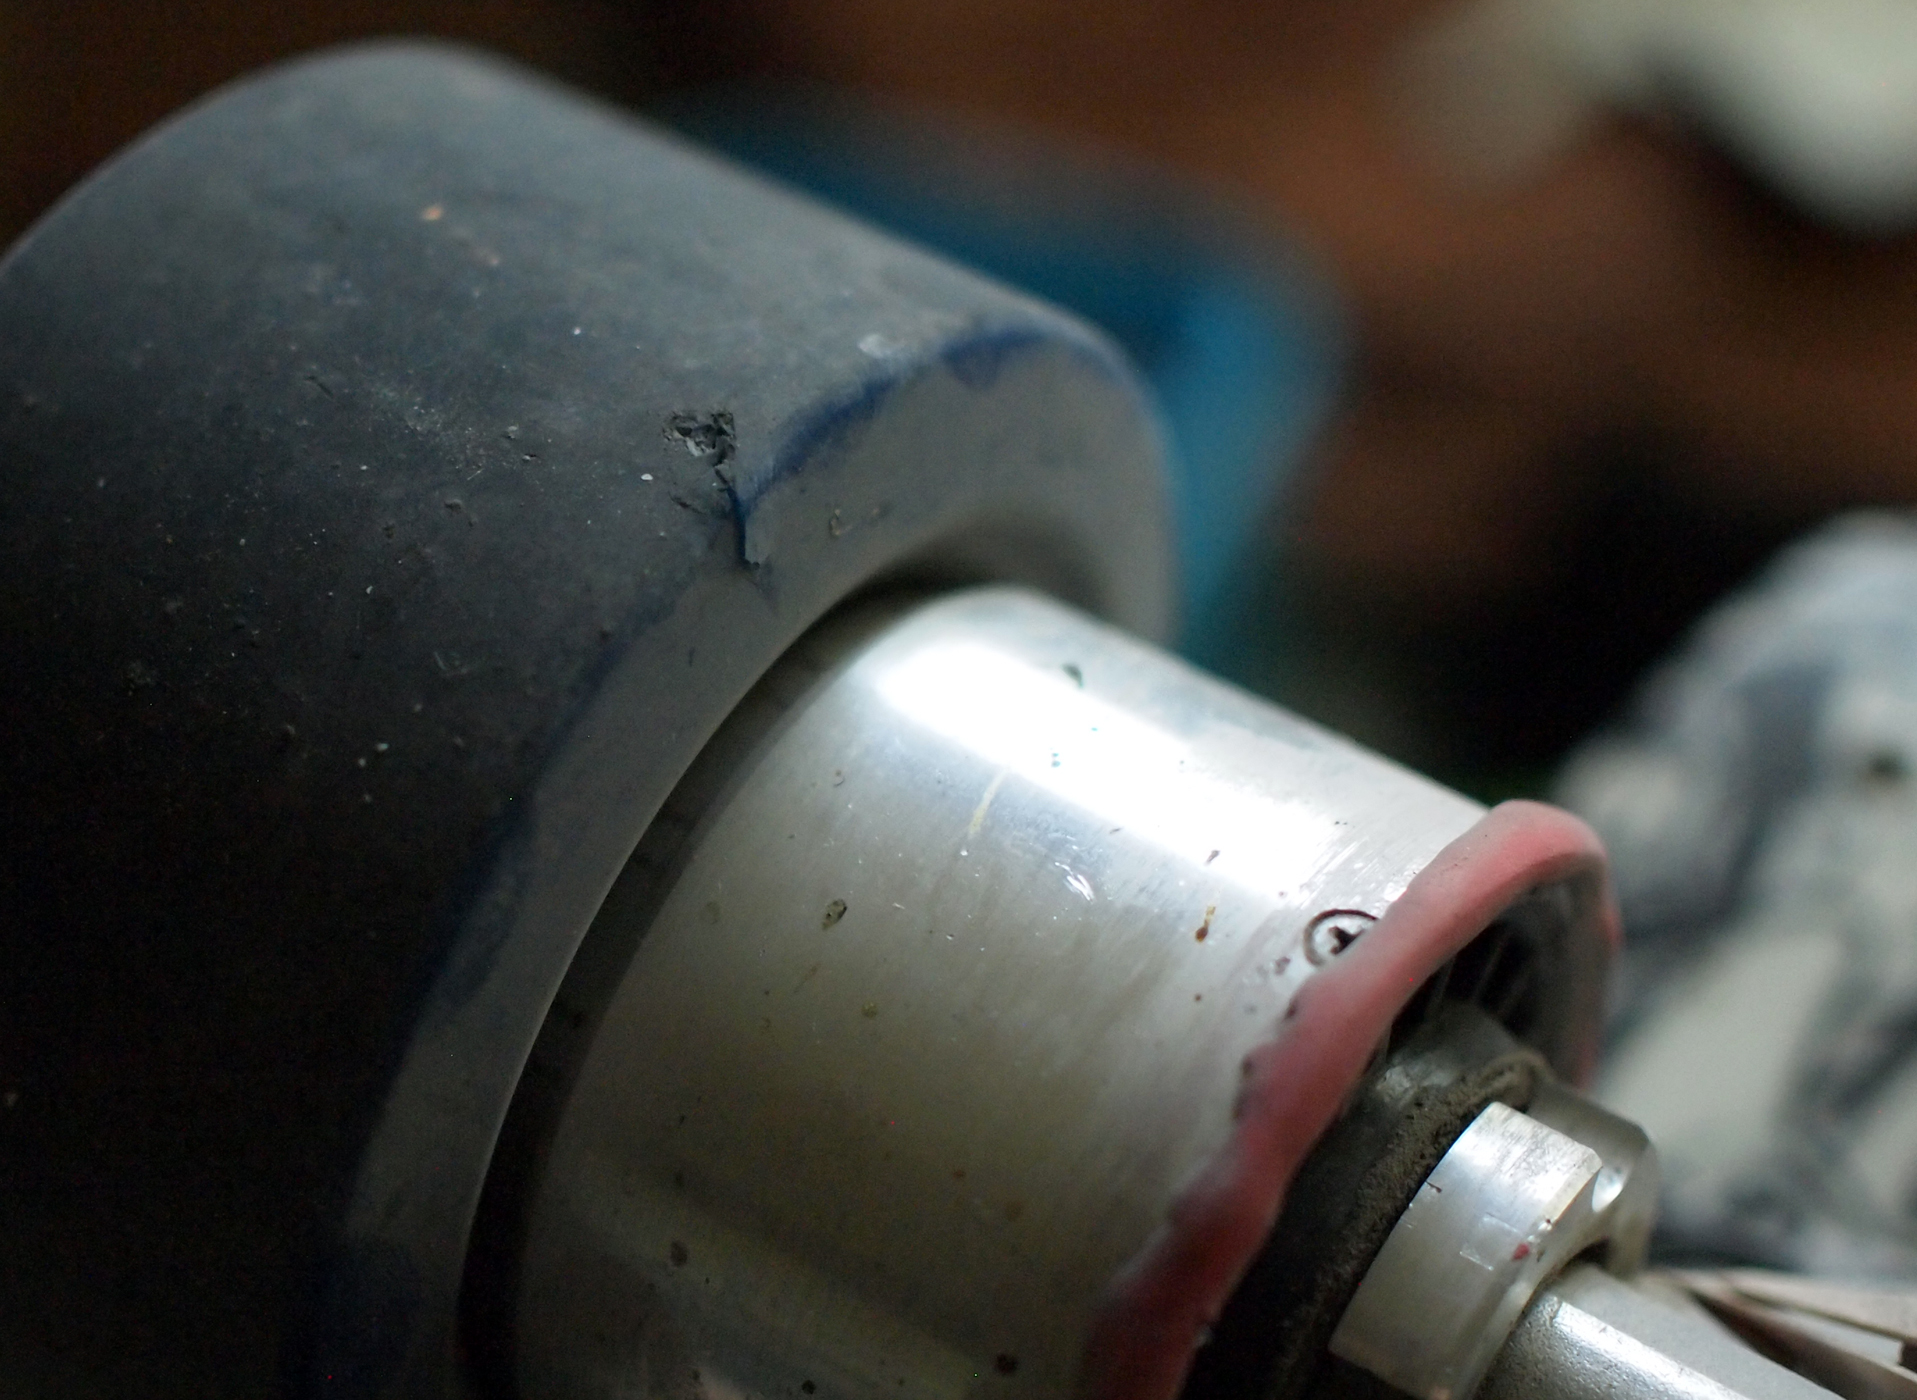
The CarvOn Dual V2.5 hub motors finally arrived in May, after a long wait of 3 months. 97mm wheels! Great for the kind of rough pavements that we have. I changed the bullet connectors to 5.5mm to match those on the VESC’s.

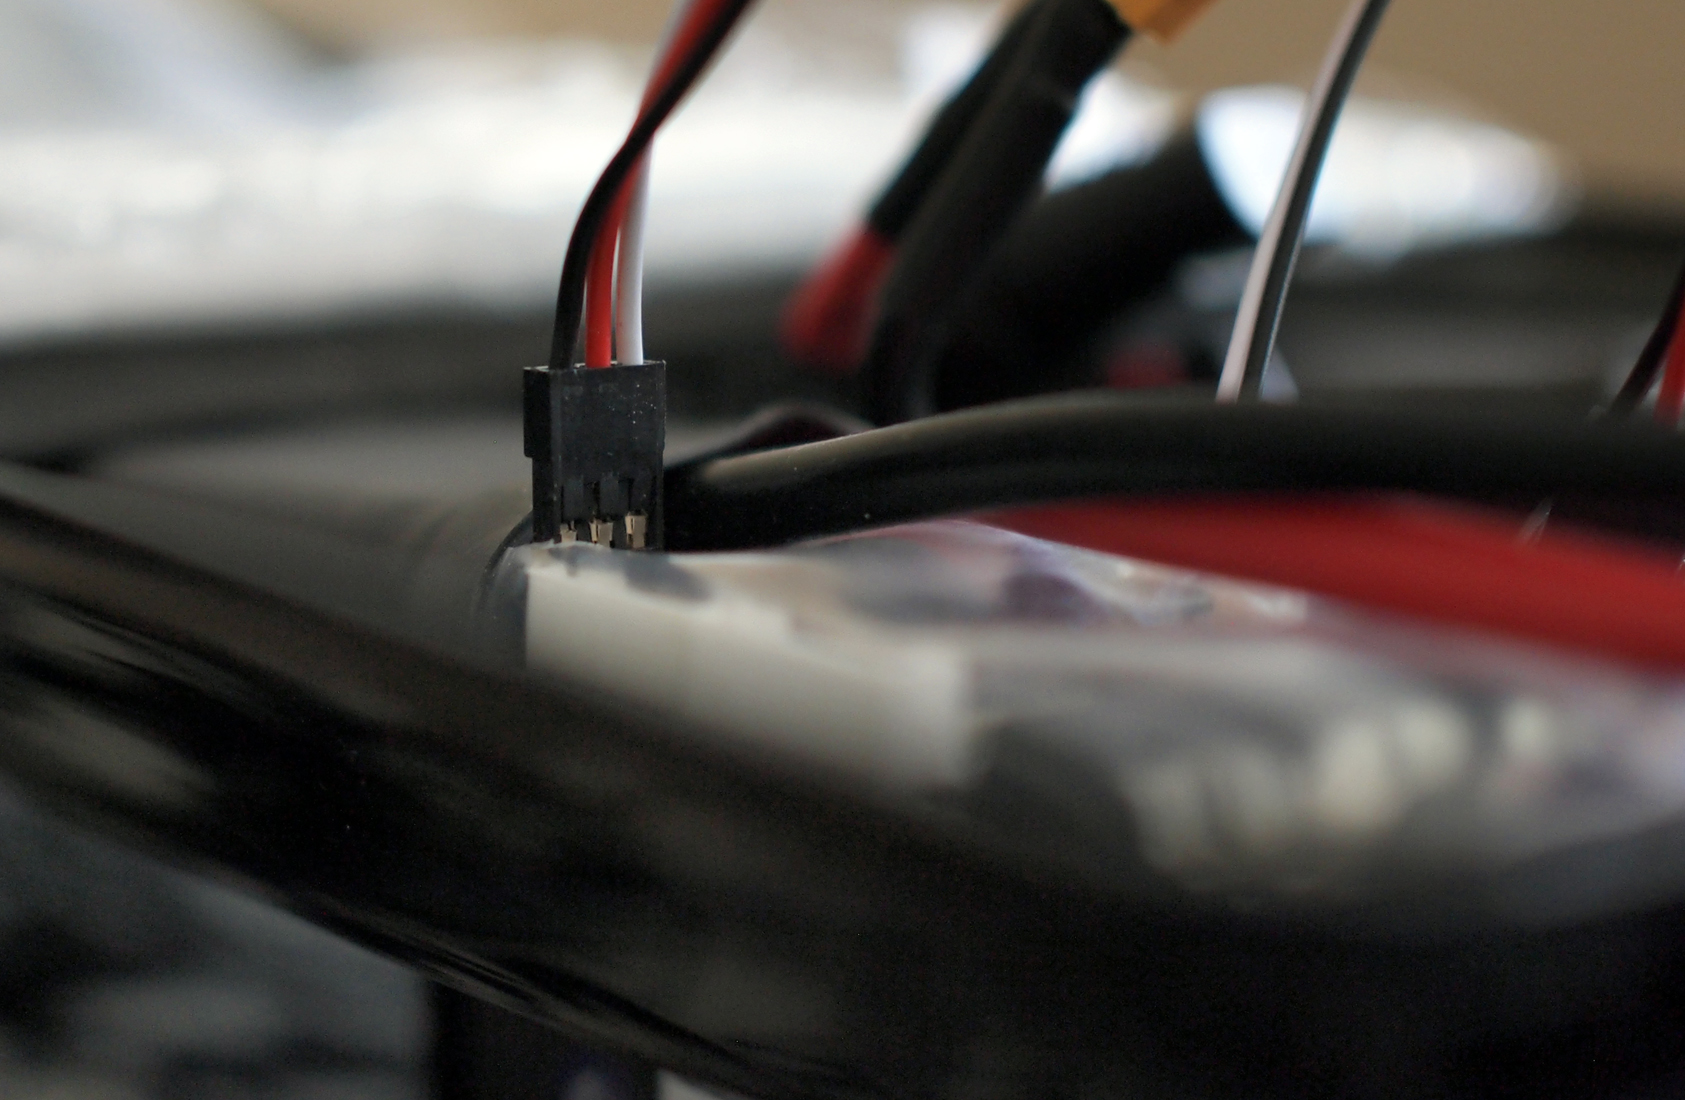
It was a challenge for a newbie like me to fit everything in the battery enclosure. I had two Micro USB cables laying around and I thought I could install them permanently to the enclosure. Unfortunately, VESC uses Mini USB connectors. Sugru was later used to seal the holes for the motor cables.
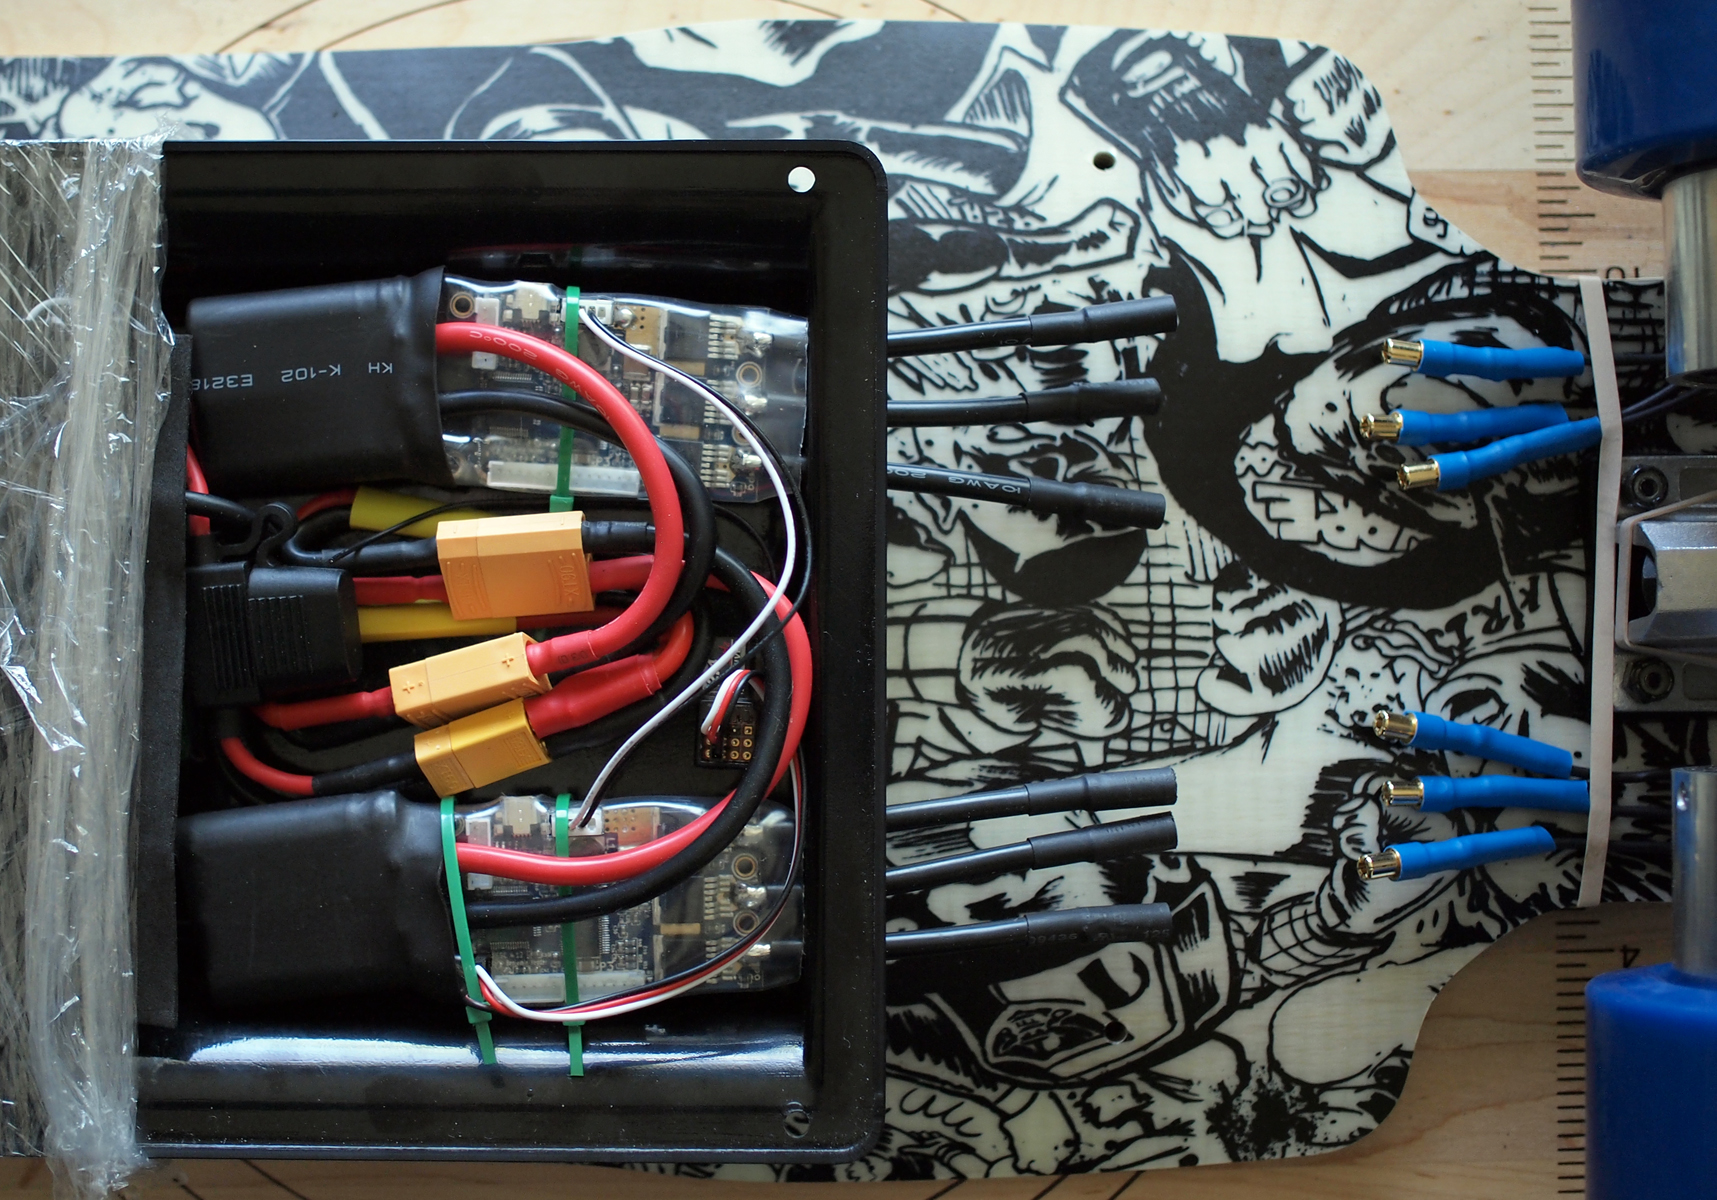
The CAN Bus connector extended a few mm above the enclosure. Fortunately, the deep deck concave accommodated it.
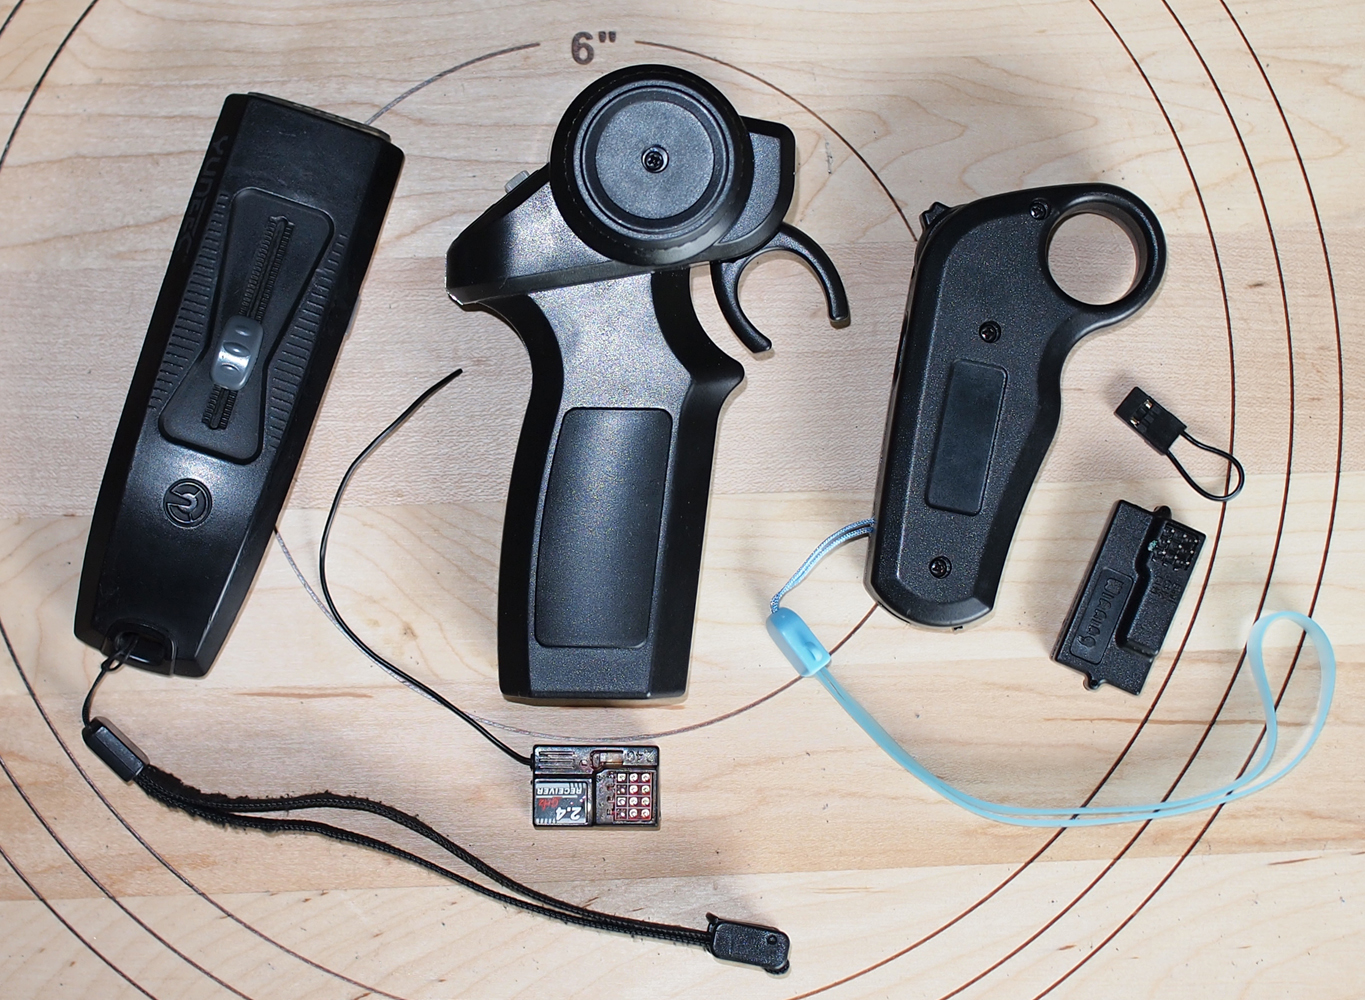
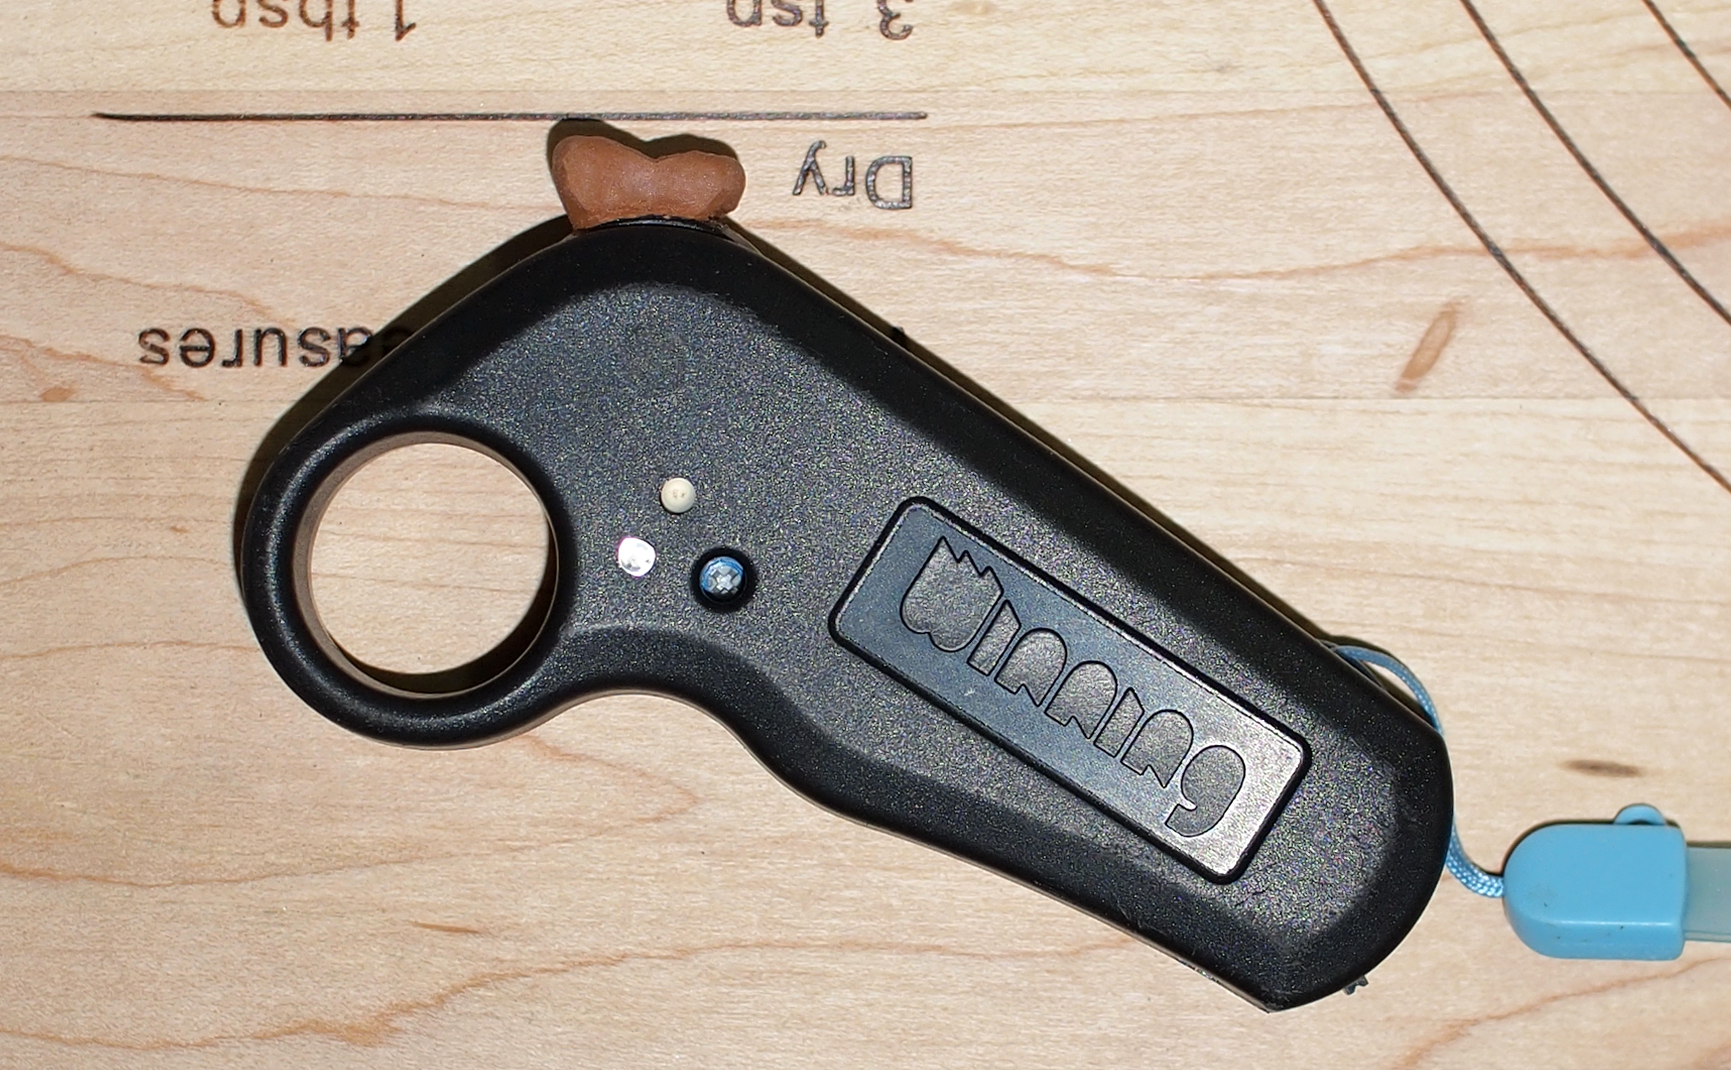
I heard that the Mini Remote Controller was more reliable but I bought the Nano too from TorqueBoard just to be qualified for free shipping. The Mini was put to use first as it was supposed to be more fail-safe. It’s a bit bigger than the E-Go Remote Controller which I liked a lot.
It seemed that there was no official location to download the BLDC Tool. I found a link in one of the posts here and it turned out to be a current version that fitted the VESC hardware and firmware. I changed only a handful of parameters. None related to ERPM was changed as I had a limited understanding of them. BLDC mode was used so that I could experience the full torque of the motors. (FOC mode that I tried 3 weeks later or yesterday was somehow not successful. My question would be posted at the end.)
These are the screen captures:


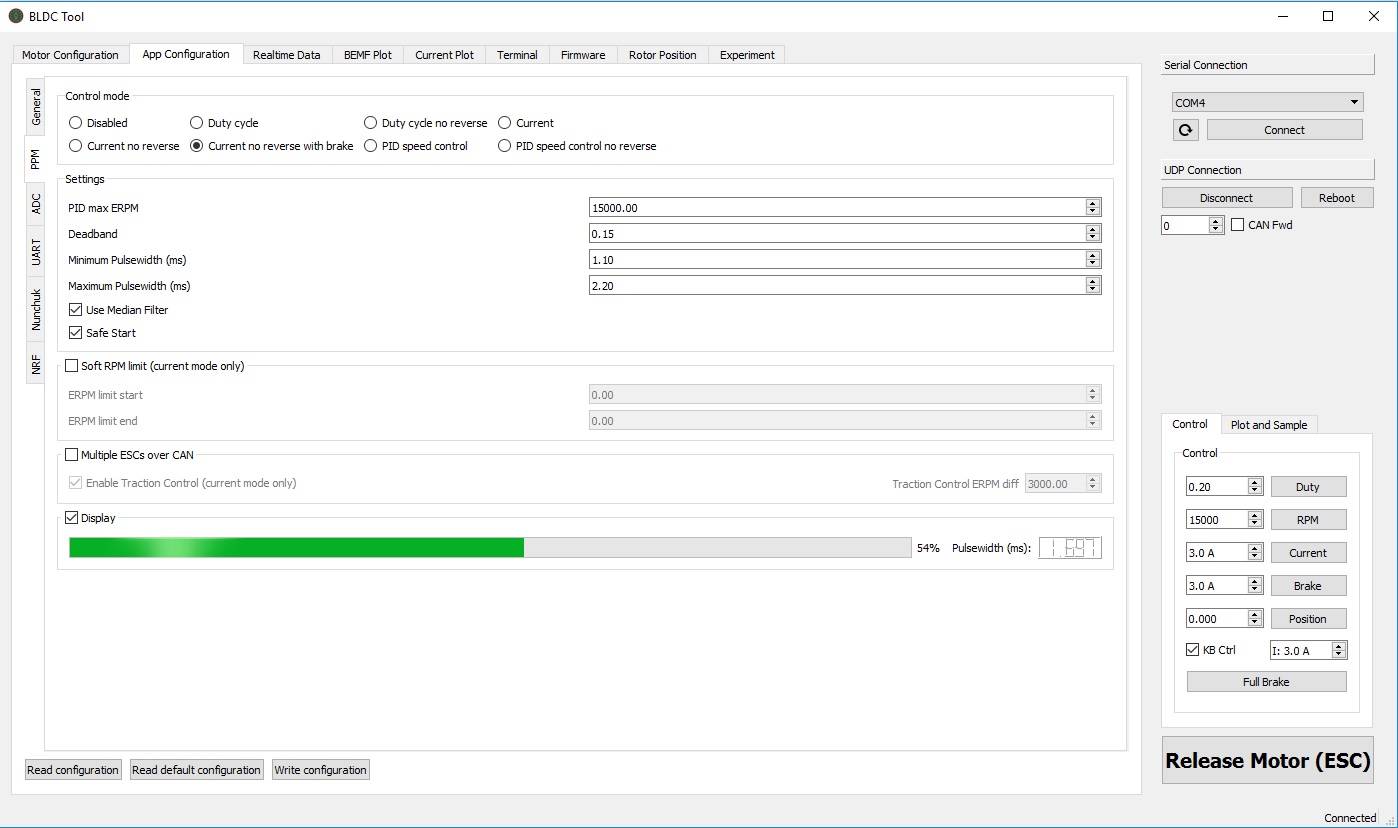
The whole process of using the BLDC Tool was simple and quick even for a newbie like me. And then I was shocked! The motors ran wild after I turned the remote off. It turned out that it was because I skipped the step of binding the remote with the receiver.
It was time to bolt the battery onto the deck. A lot of padding was needed to take care of the deep deck concave.


It’s time for a test ride outside.
Comparing it to my E-Go (ported to a Sector 8 deck):

I was pleasantly surprised that the ride with these dual hub motors was very comfortable, more than my E-Go. Noise level was lower than that of my single drive E-Go, and that the torque was well, so strong. It was a beast to my skill level! I tried hard to remember that the operation of the Mini Remote was exactly the opposite of my E-Go Remote. Things went well for 10 minutes until I needed to stop quickly near a car park exit. My muscle memory took over and did what I normally do with my E-Go Remote: pulling back the trigger quickly for braking. Fortunately, there was no car coming out.
A few days later, I switched to the Nano Remote and did a long trip to see how fast I could possibly go at my skill level. 37km/h was achieved. Anything faster got me wobbles. The battery started at 41.7V. After roughly 20km and 100 minutes, it dropped to 37.1V.
I made some changes with Sugru after the ride. The Nano Remote: much more easy now to change from pushing to pulling and vice versa.
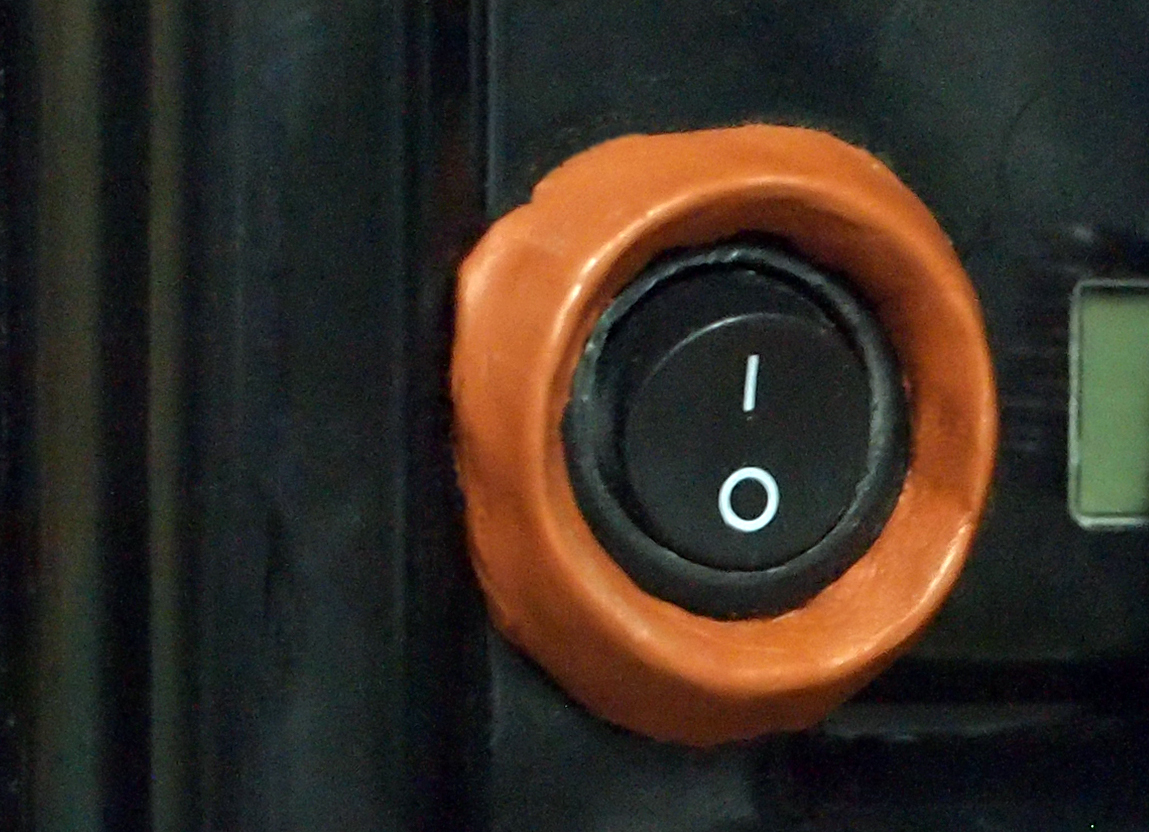
The Power Switch: now less prone to changes when carrying.
The Hub Motors: now less likely to cut into you with its sharp edges in an accident. As one can see, the Sugru stayed on securely even after sustaining some abuses. Also can be seen from the photo, the wheels are very soft. It’s less than 100km. My E-Go wheels showed something similar only after a few hundred km.

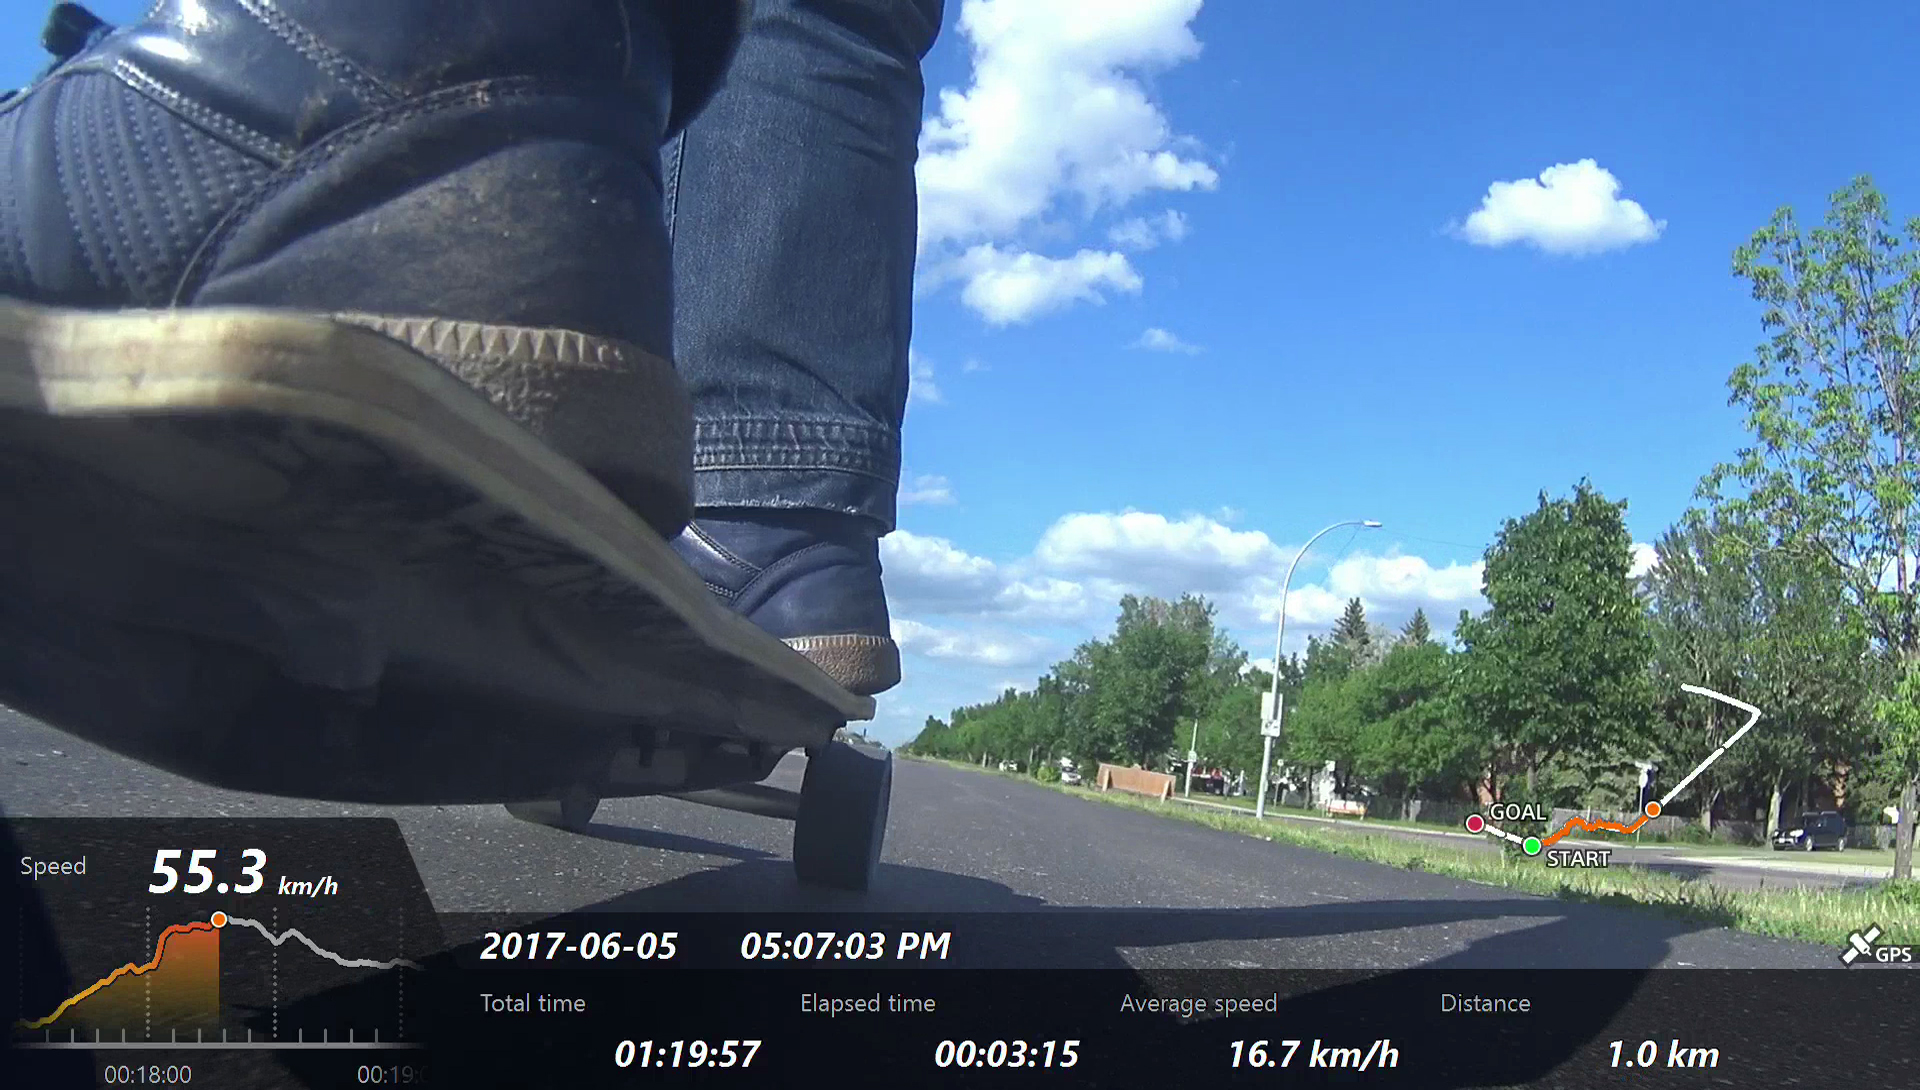
A day or two later, I tightened my trucks and tried once again to see how fast I could go. I just could not believe it: 55km/h! I thought wind was on my back or something to make this possible. From the graph, it took 40s to get to 55km/h. My next target was to achieve maximum speed in just a few seconds. (I guess I am around 150lb.)
The wheelbase was 30”, too long for tight street corner turning and I wedged both trucks. I went out for a third long ride and I got wobbles again once I reached 37km/h.

And then it was raining almost every day till today. I took the time to work on my regular longboard, changing the wheels from 70mm to 80mm. (I ride my regular in rainy days.) There was a huge improvement in comfort and control!


So far, the motors may get warm but not hot. The battery enclosure near the VESC never get warm or hot.
Now the negatives. Firstly, motor cables coming apart quite easily.

I ordered some MT60 connectors and hopefully they would work well. Secondly, the wheels seemed to be very soft. It’s been at most 100km only. I am a bit worried. The E-Go wheels looked much better than this even after one thousand km. (From the spec: CarvOn are 78A and E-Go are 83A. But I could be wrong on these numbers.)
Lastly, I have some questions and need your advice. Q1. I heard that there is a bug with Max Current Ramp Step and so I entered a value of 0.004. According to TorqueBoard, my VESC is of v4.12 Hardware and v2.18 Firmware. Is this value of 0.004 OK?
Q2. Mini Remote Controller – Is there a way to switch the acceleration with the braking, may be by switching a couple wires inside, so that it would act just like a thumb operated remote, i.e. forward for acceleration?
Q3. The Nano has a throttle throw of only 5mm and the board would reach max speed after I push the throttle only 3mm forward. The last 2mm is useless. For braking, nothing would happen until I pull the trigger back a couple mm. I certainly can adapt to these but can such response curves be changed? (BTW, no disconnects so far.)
Q4. FOC – I tried FOC yesterday. Measuring Lambda were mostly not successful. I found that if I turned the wheel/motor a bit to a new position, measurement could become a success and returned me a value. I used such values, “Apply”, “Apply”, and then finally “Write Configuration”. It was just as loud as BLDC (except that the speed was just a tad slower to pick up)! I was really disappointed. What was I doing wrong? Also, I set the cutoff voltages to 12 and 10 according to the TorqueBoard video. Is this really necessary?

Q5. Space Cell Pro 4 Voltage Display – At the beginning it showed a percentage (and L10). After a few days, it showed only voltage, which I found more useful. And then a few days later, it showed only percentage again. I have no idea what triggered the changes. Is there a way for me to set the display to show voltage permanently?
Q6. Finally, should I use it? Should I spray it on the motors, on the electronics, and on the battery cells? Does it really work?

This is it. All comments are welcome!

