Man please, get hub motor for this one. Please ! Please ! Please !  this is too beautiful to be running around with a belt and motor hanging from the truck.
@RunPlayBack help me out here 
Man please, get hub motor for this one. Please ! Please ! Please !
this is too beautiful to be running around with a belt and motor hanging from the truck.
@RunPlayBack help me out here
@Kaly @whitepony I agree on the hub motor but I’m bias all I know is hub motors lol. This entire build is a work of art. Big props on the detailed photography, this is amazing.
Holy crap that is gorgeous. Again.
Seriously - you make it hard for anyone else to share pics because the bar is set too high.
Nicely done and love all the pics and tips. I have some CF+Vacuum projects almost directly as a result of you!
Should i have my GF call you directly when she sees the bill for materials?! hehehe
@whitepony Extremely well done craftsmanship, as expected. You have a talent for taking the right pictures and explaining things very cleary. Have you considered the possibility of writing an E-book on ESK8? I’ve got ALL of your stuff bookmarked on this forum as well as on Endless Sphere. I was going over a few of those bookmarks today and it occurred to me that you already have enough material out there to fill more than a few pages. You have enough solid material to justify someone spending a few $$$ on it. Just saying…I’d buy it! I could put something together out of my bookmarked material, but I wouldn’t even begin to do that without your consent. I can’t emphasize enough how grateful I am for your contributions. Keep up the inspirational work!!
You’re a rockstar, dude!! 
this is shaping up to be something really special. Can’t wait to see how it all turns out
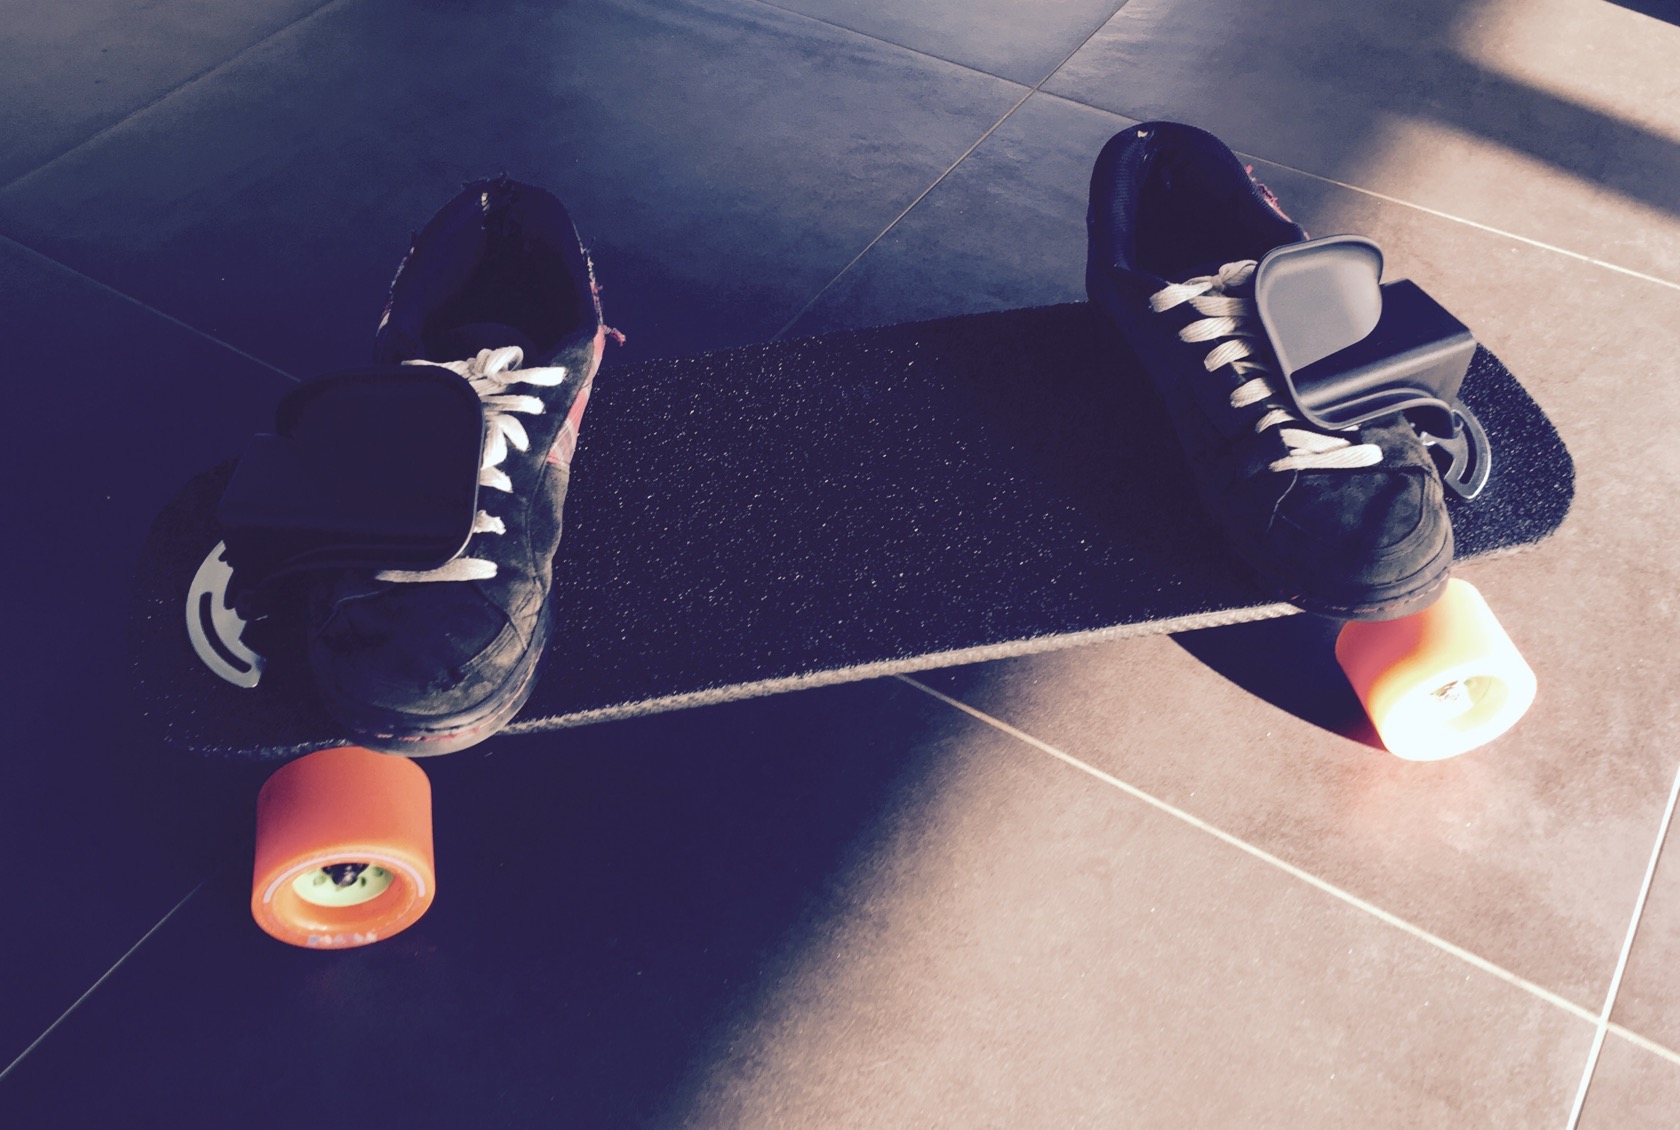
hm, you arent actually strapped into those - they are closed towards board rear & front and open towards the middle, so you can quickly move in and out as you want. think its perfectly possibly to push that board, then slide your feet under the bindings for an ollie, then pull back a little and just stand on the board like you normally would. sure, its a little more eye-catching than without bindings, but I dont have to push it with led stuff. ![]()
check okps video - there is a short moment where he is actually cruising with his feet outside the bindings too:

its money spent for learning something new that youll carry around for the rest of your life. things like that have no price tag! ![]()
dont be silly and enough with the praise ![]() I really enjoy taking good looking pictures though, even of trivial things - its why my threads are so picture-heavy - I simply like it.
I really enjoy taking good looking pictures though, even of trivial things - its why my threads are so picture-heavy - I simply like it. ![]()
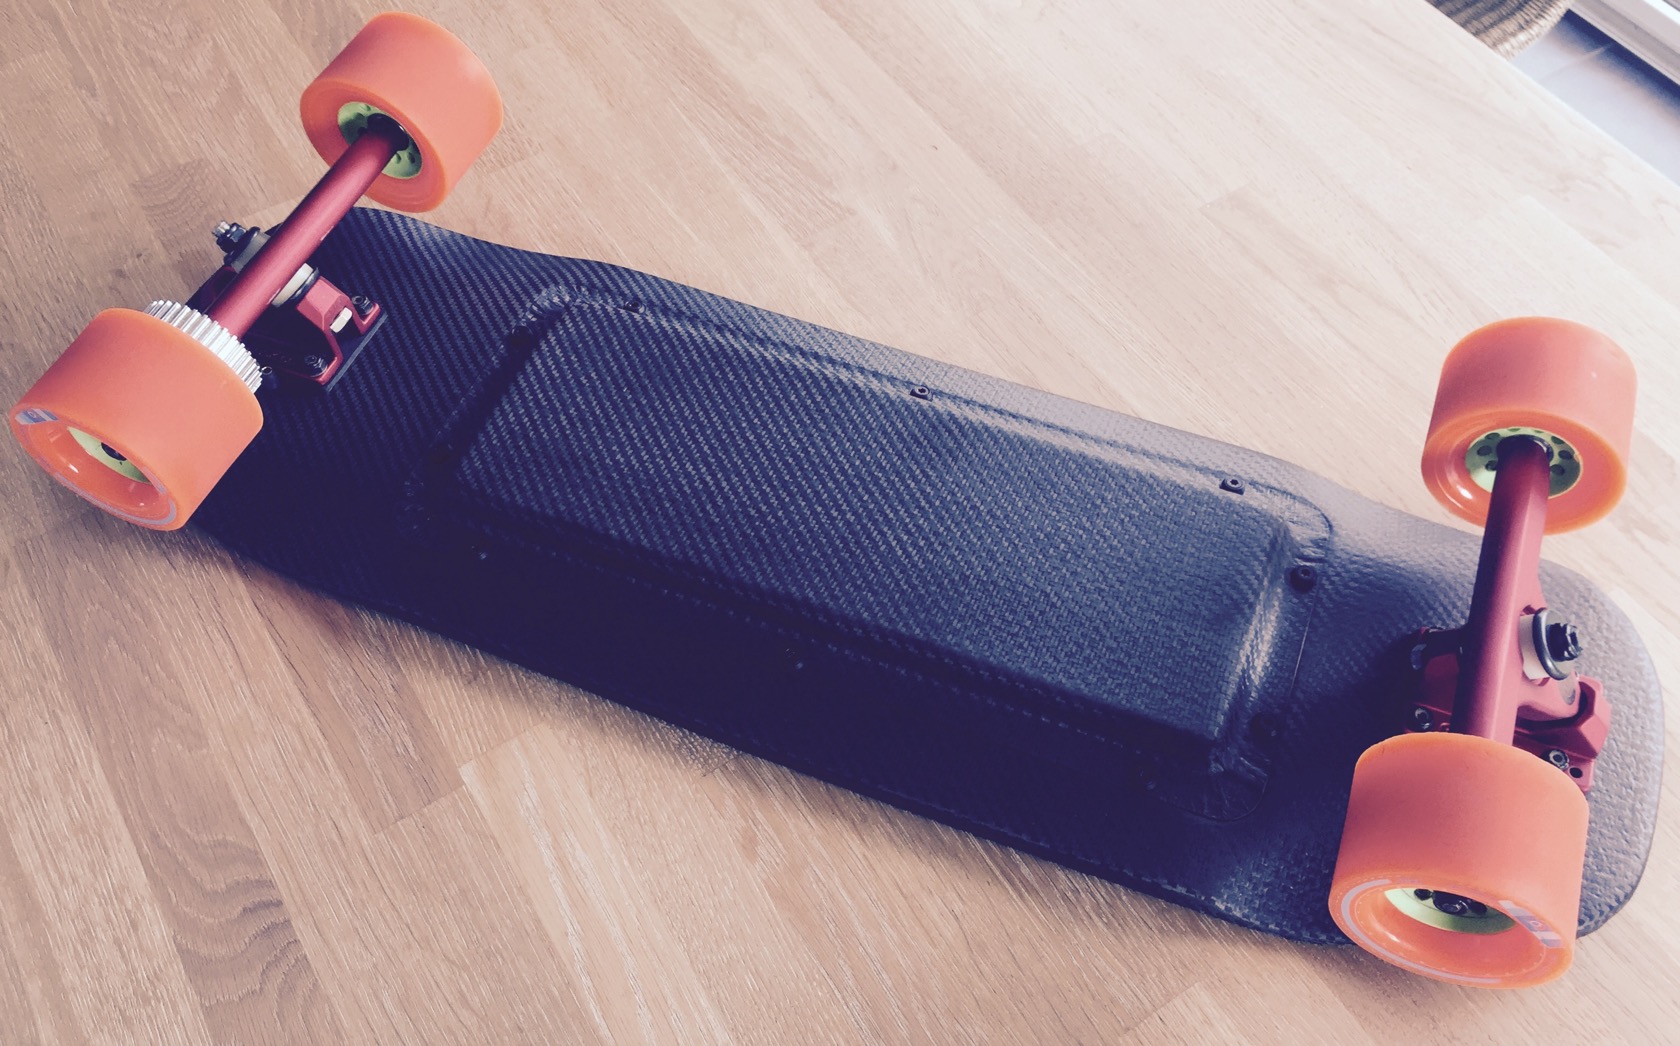
mounted caliber 44s now for real - still had those from my to be reworked topspeed build, sadly only stock bushings which are way too soft for me - got wheelbite right away with those. my beloved krank barrels should be in the mail tomorrow.
aaand I mounted the enclosure now as a test before I get all the electronics. actually got my cells today, so I might start working on the 10S3P battery tonight … or I might just ride the board manually a little and find a good mounting point for the bindings. love holidays, so much time to do just what I want
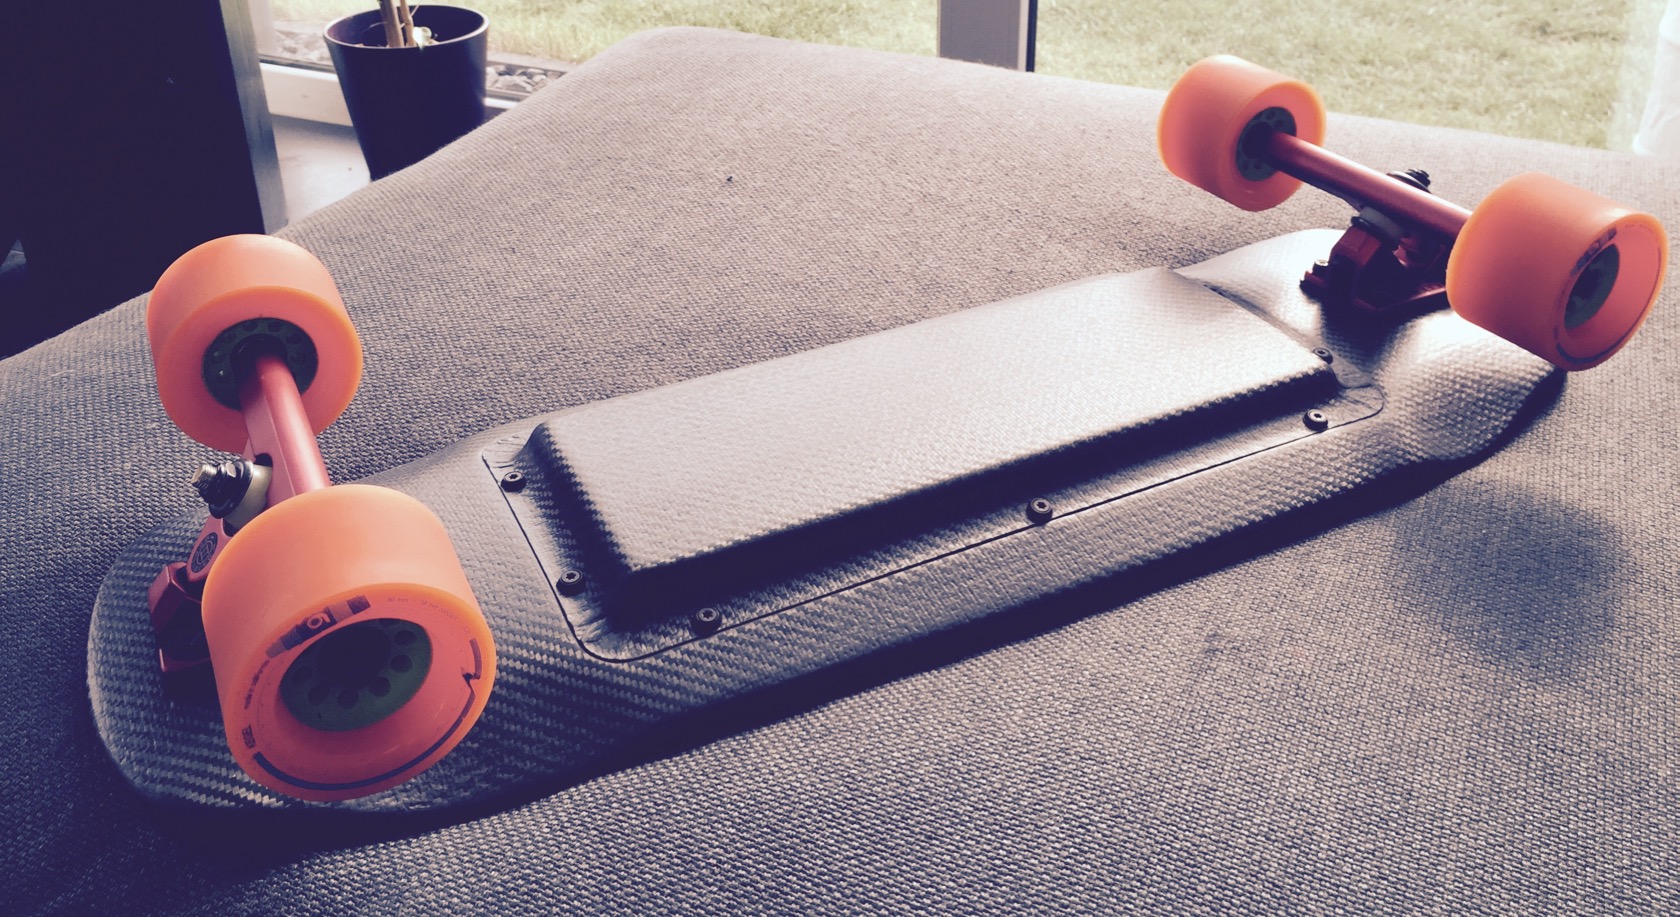
anyway, a few pictures of the mounted enclosure - love the screw combinations that took me a while to set up (its a flat countersunk torx screw with a countersunk washer and a 1mm thick rubber washer  ):
):

Holy crap man you’ve got some serious precision skills. Everything about this build looks better than any machine!
get a 60-100cm springsteel ruler (& springsteel angle also helps) and start drawing directly on your board, it helped me so much with precision. also, ALWAYS double check from different fixpoints (like truck holes) if numbers add up! ![]()
the rest is patience and diligence. you can always make things perfect if you just take your time. I didnt have any patience when I build my first board, but I finally got it now (most of the time). and even now I sometimes act too quick, screw something up … its just that you wont see any pictures of that. ![]()
I tried to position the bindings and I might not have to try much afterall because I found a near perfect spot already. when I ride boards with wheel wells, I most often just have my foot next to it, so that the board feels like it got tons of rocker. and coincidently, if I just use the outer 2 truck mounting screws for the bindings, it just aligns perfectly for that position … for front and rear! Im just a little puzzled why unikboard has the bindings so close to nose and tail … they probably had a good reason. ![]()

really dont like the cheap silver look of the binding baseplate, its also so ridiculously heavy ![]() I might at least color it black before the build is complete - its a waiting game now anyway, vesc, motors, mount not there and not coming very soon. and I dont feel like using parts from my tesseract, just like that board too much.
I might at least color it black before the build is complete - its a waiting game now anyway, vesc, motors, mount not there and not coming very soon. and I dont feel like using parts from my tesseract, just like that board too much.
Or stick grip tape (piece by piece) on the plates so they are totally camouflazed
ah, thats a pretty good idea, Ill quickly get the vicious leftovers back out of the trashcan 
hmm, to be honest, I could actually route the area below the binding and sink them in so they form one surface with the top of the board. and THEN cover them with the same griptape that covers the board. that would really be badass and the best looking solution!! 
Ill get some experience with the binding position first though before I do anything silly. patience is the key! 
red anodizing for that baseplates to match the trucks 
not sure if you can anodize it, the baseplates seem to be steel! also, if I bought trucks, they probably wouldve been black I think, just fits all that carbon better! maybe oneday Ill swap if I need the satin reds for something else! 
started raining cats & dogs, really wanted to check how the caliber 44s suit the board… 
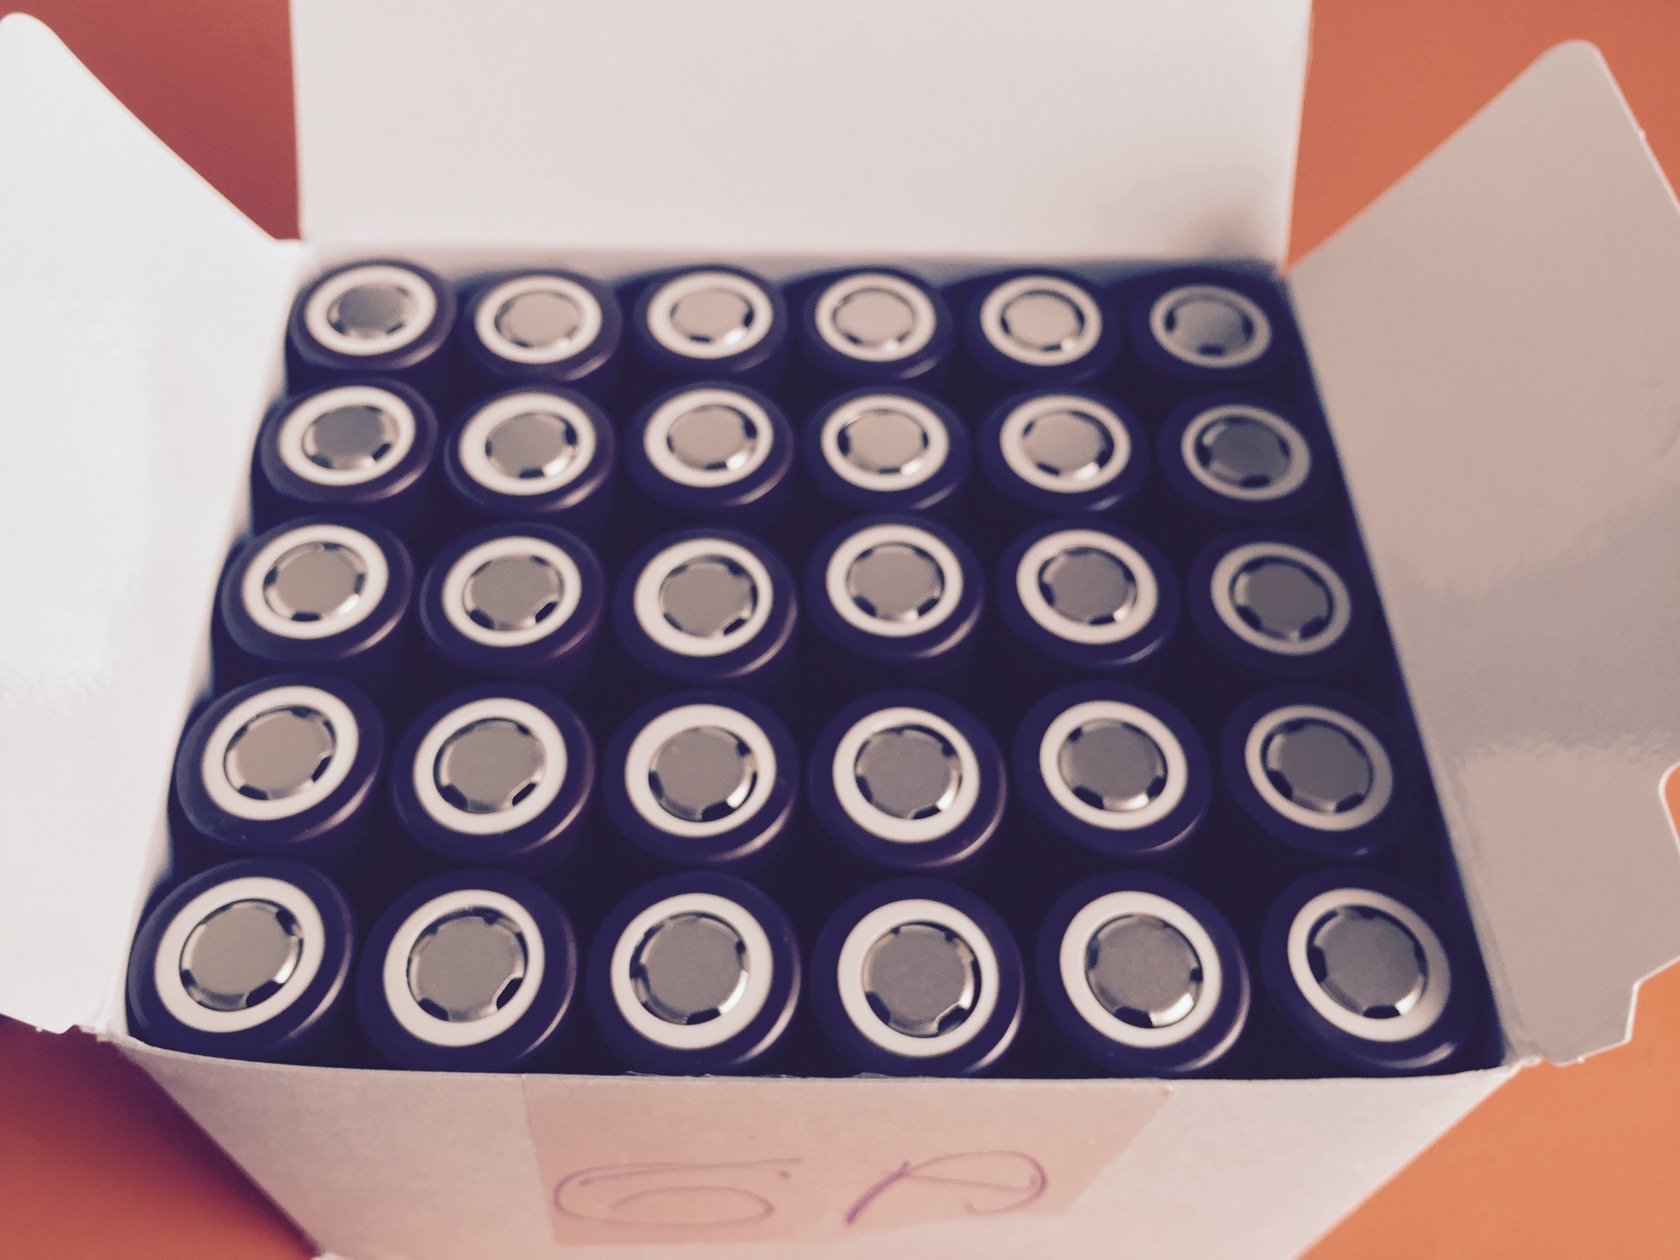
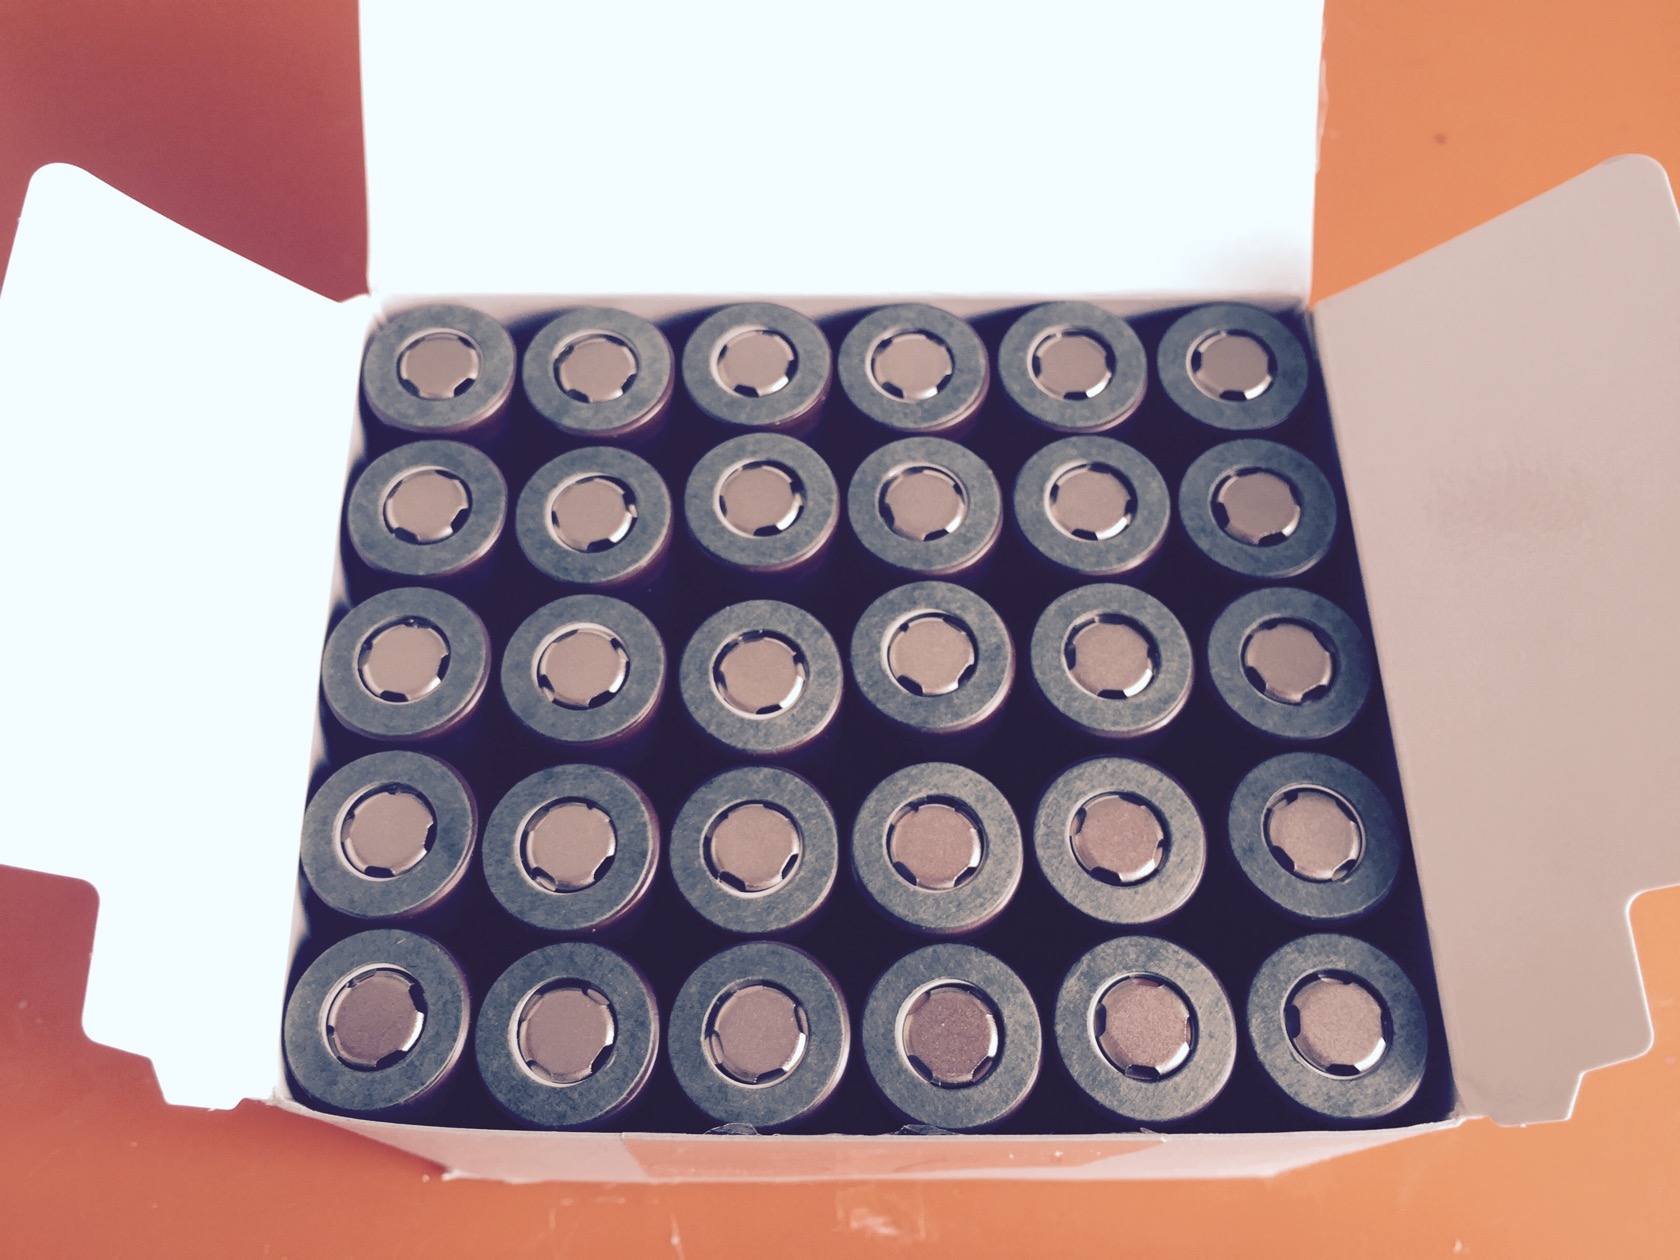
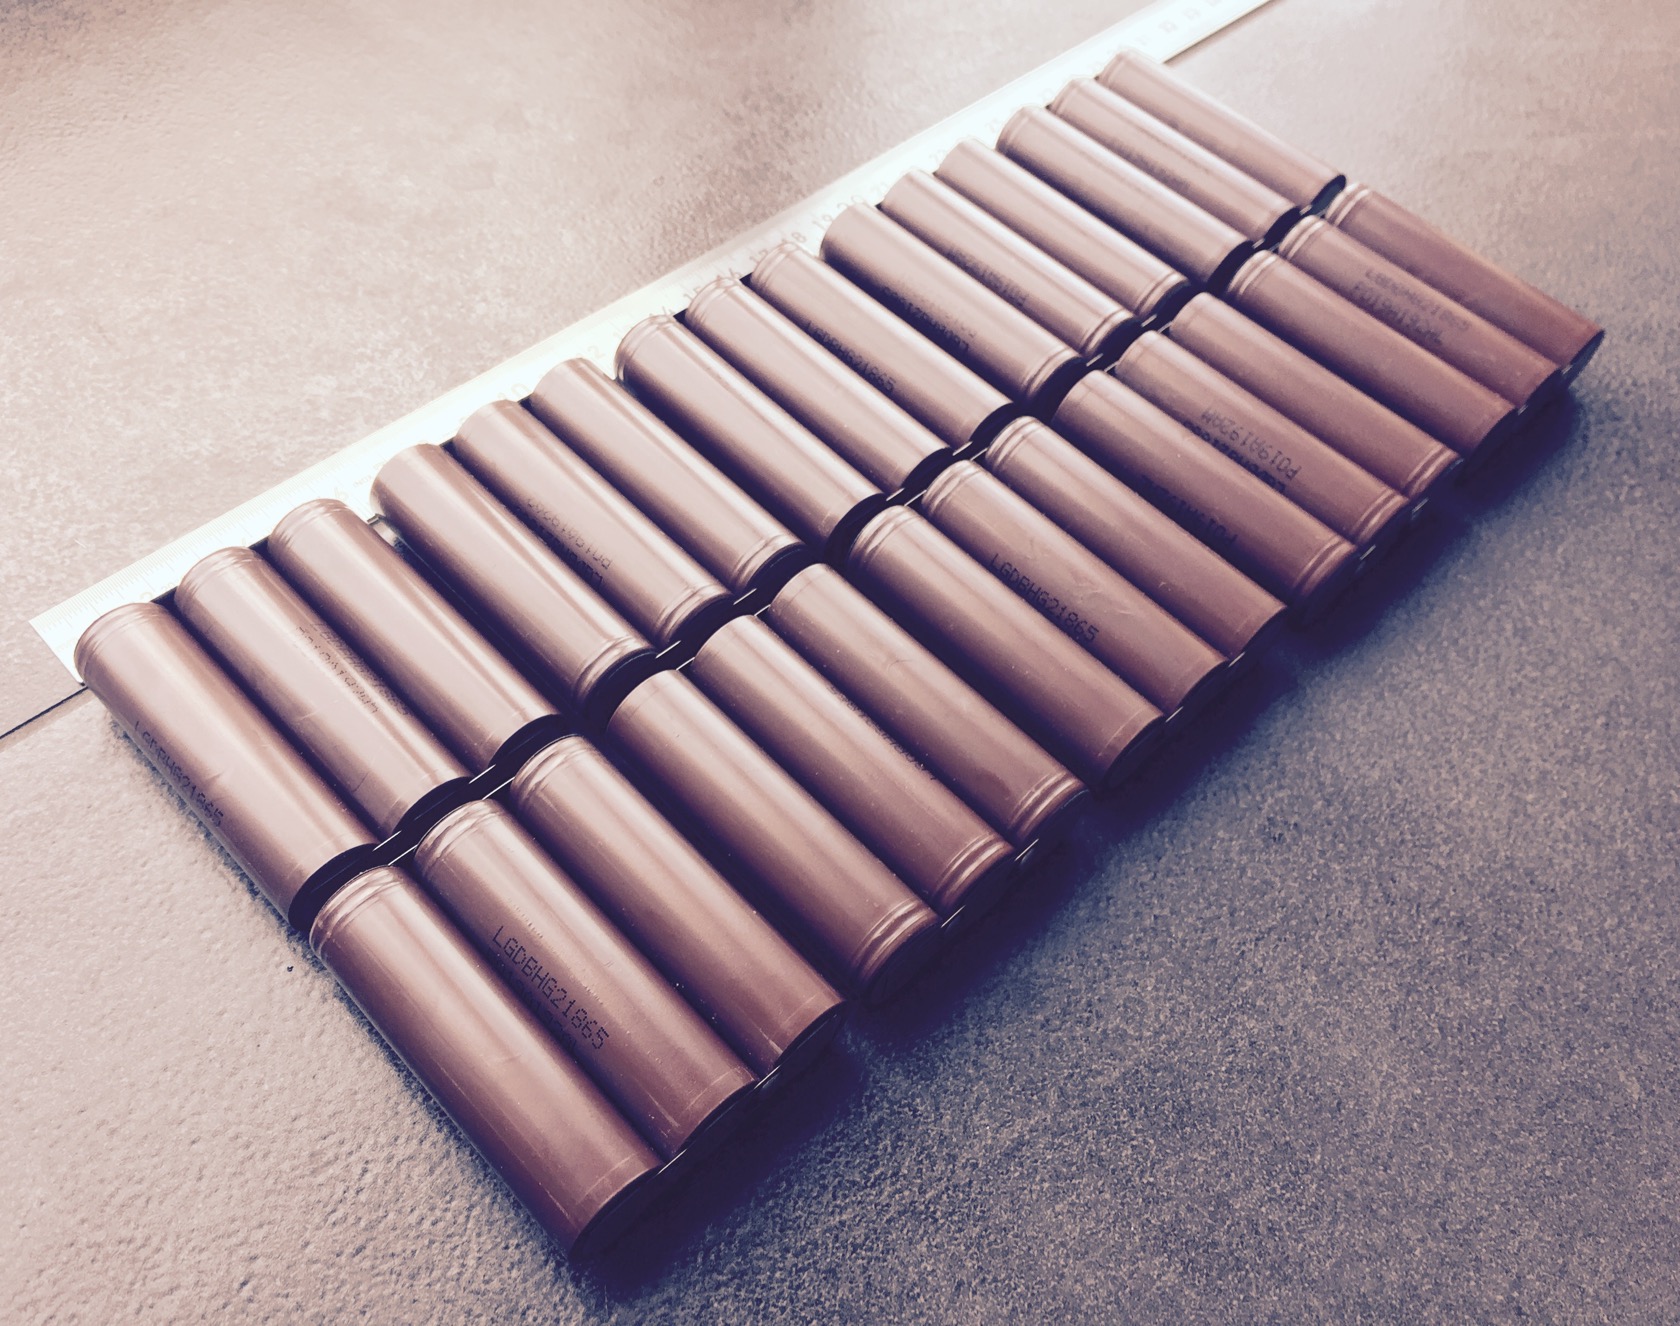
made the battery today, going quicker everytime really. worked through this a few times on endless sphere, but I guess it cant hurt to do a quick picture story of the battery welding - who knows whom it might help and it will be quick for me
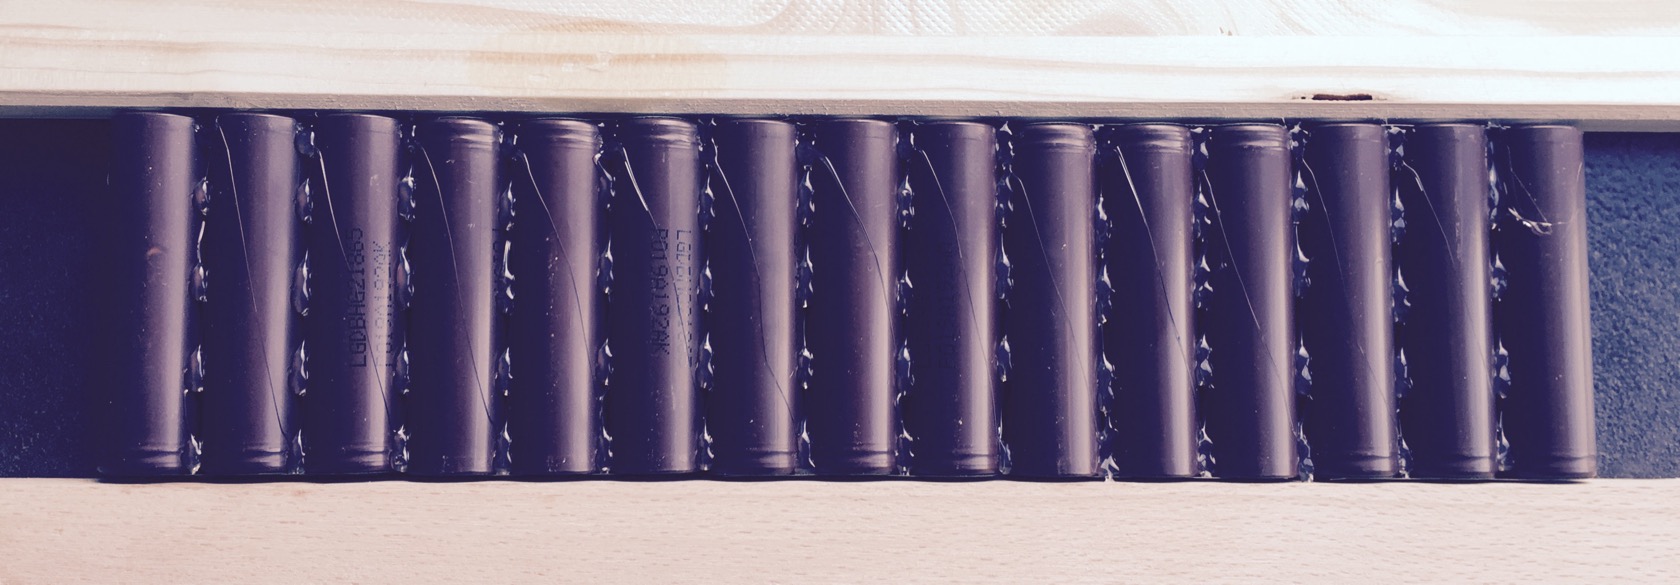
30 cells LG 18650HG2
added cardboard shield to prevent shorting of plus with the negative shell
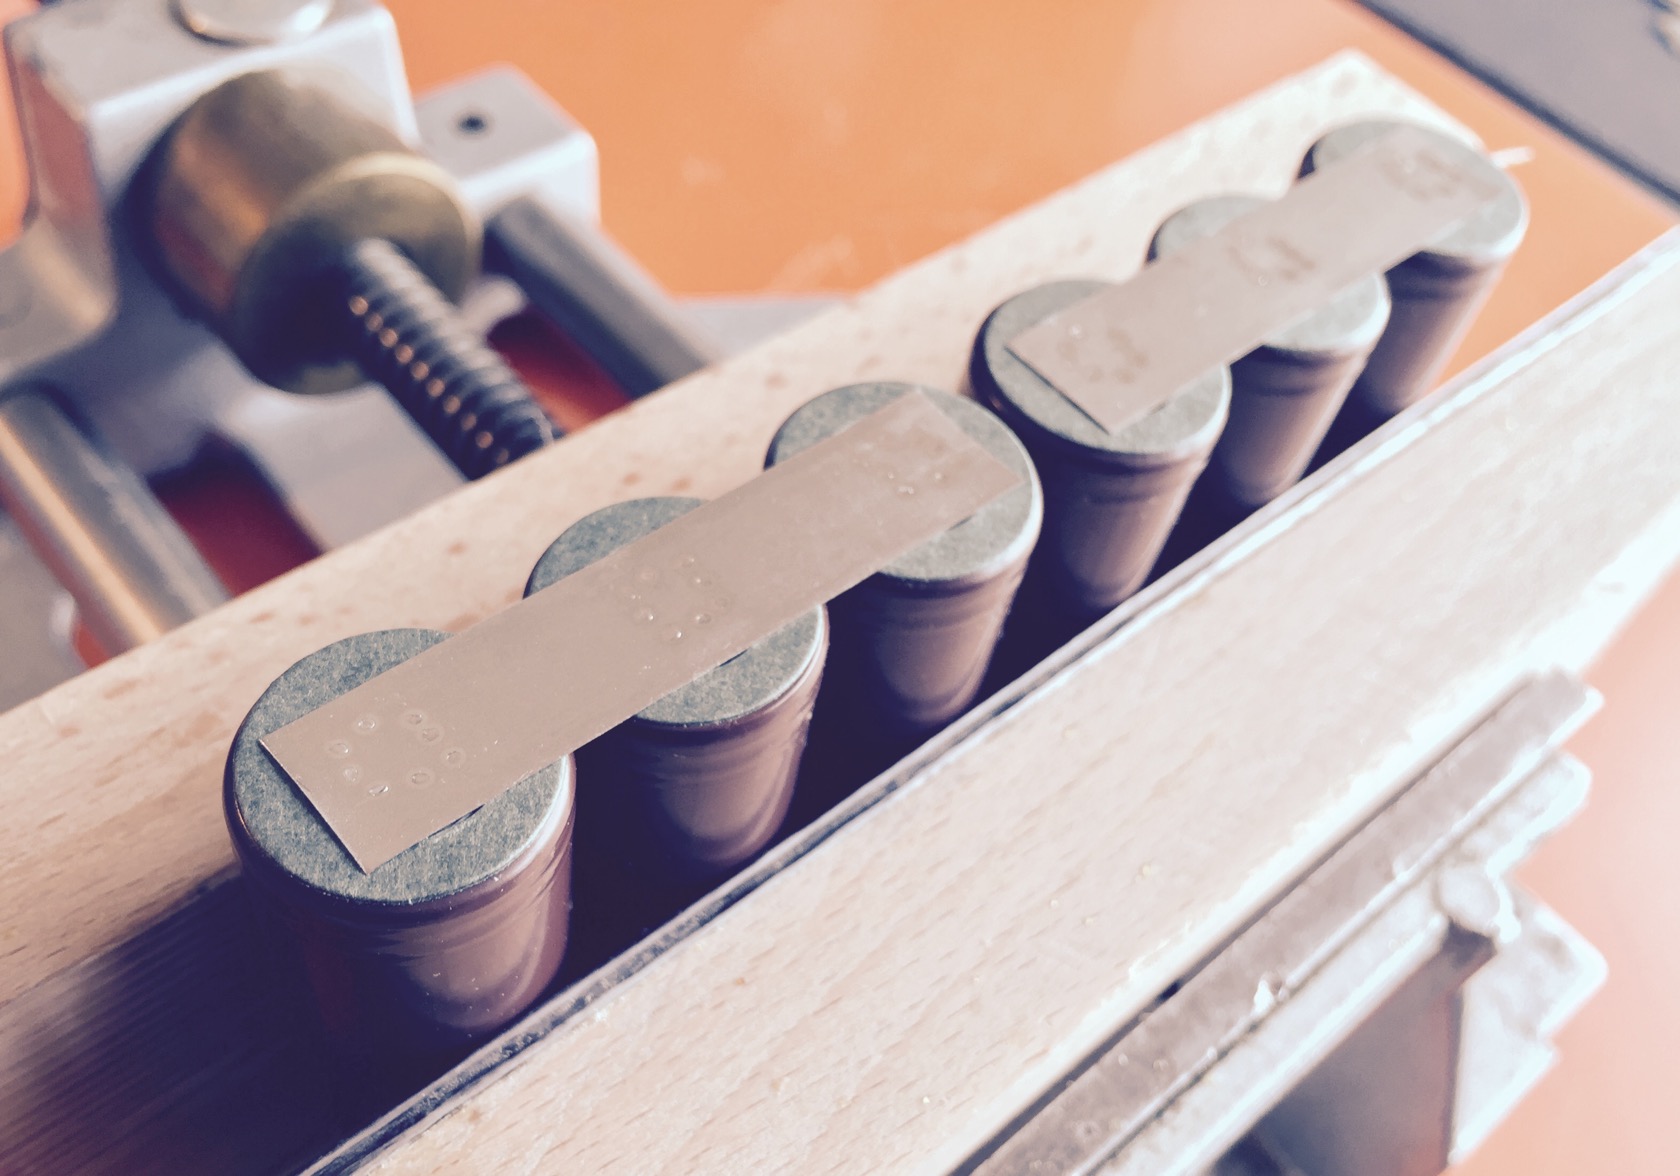
cut 20x 10x0.15mm nickel strips
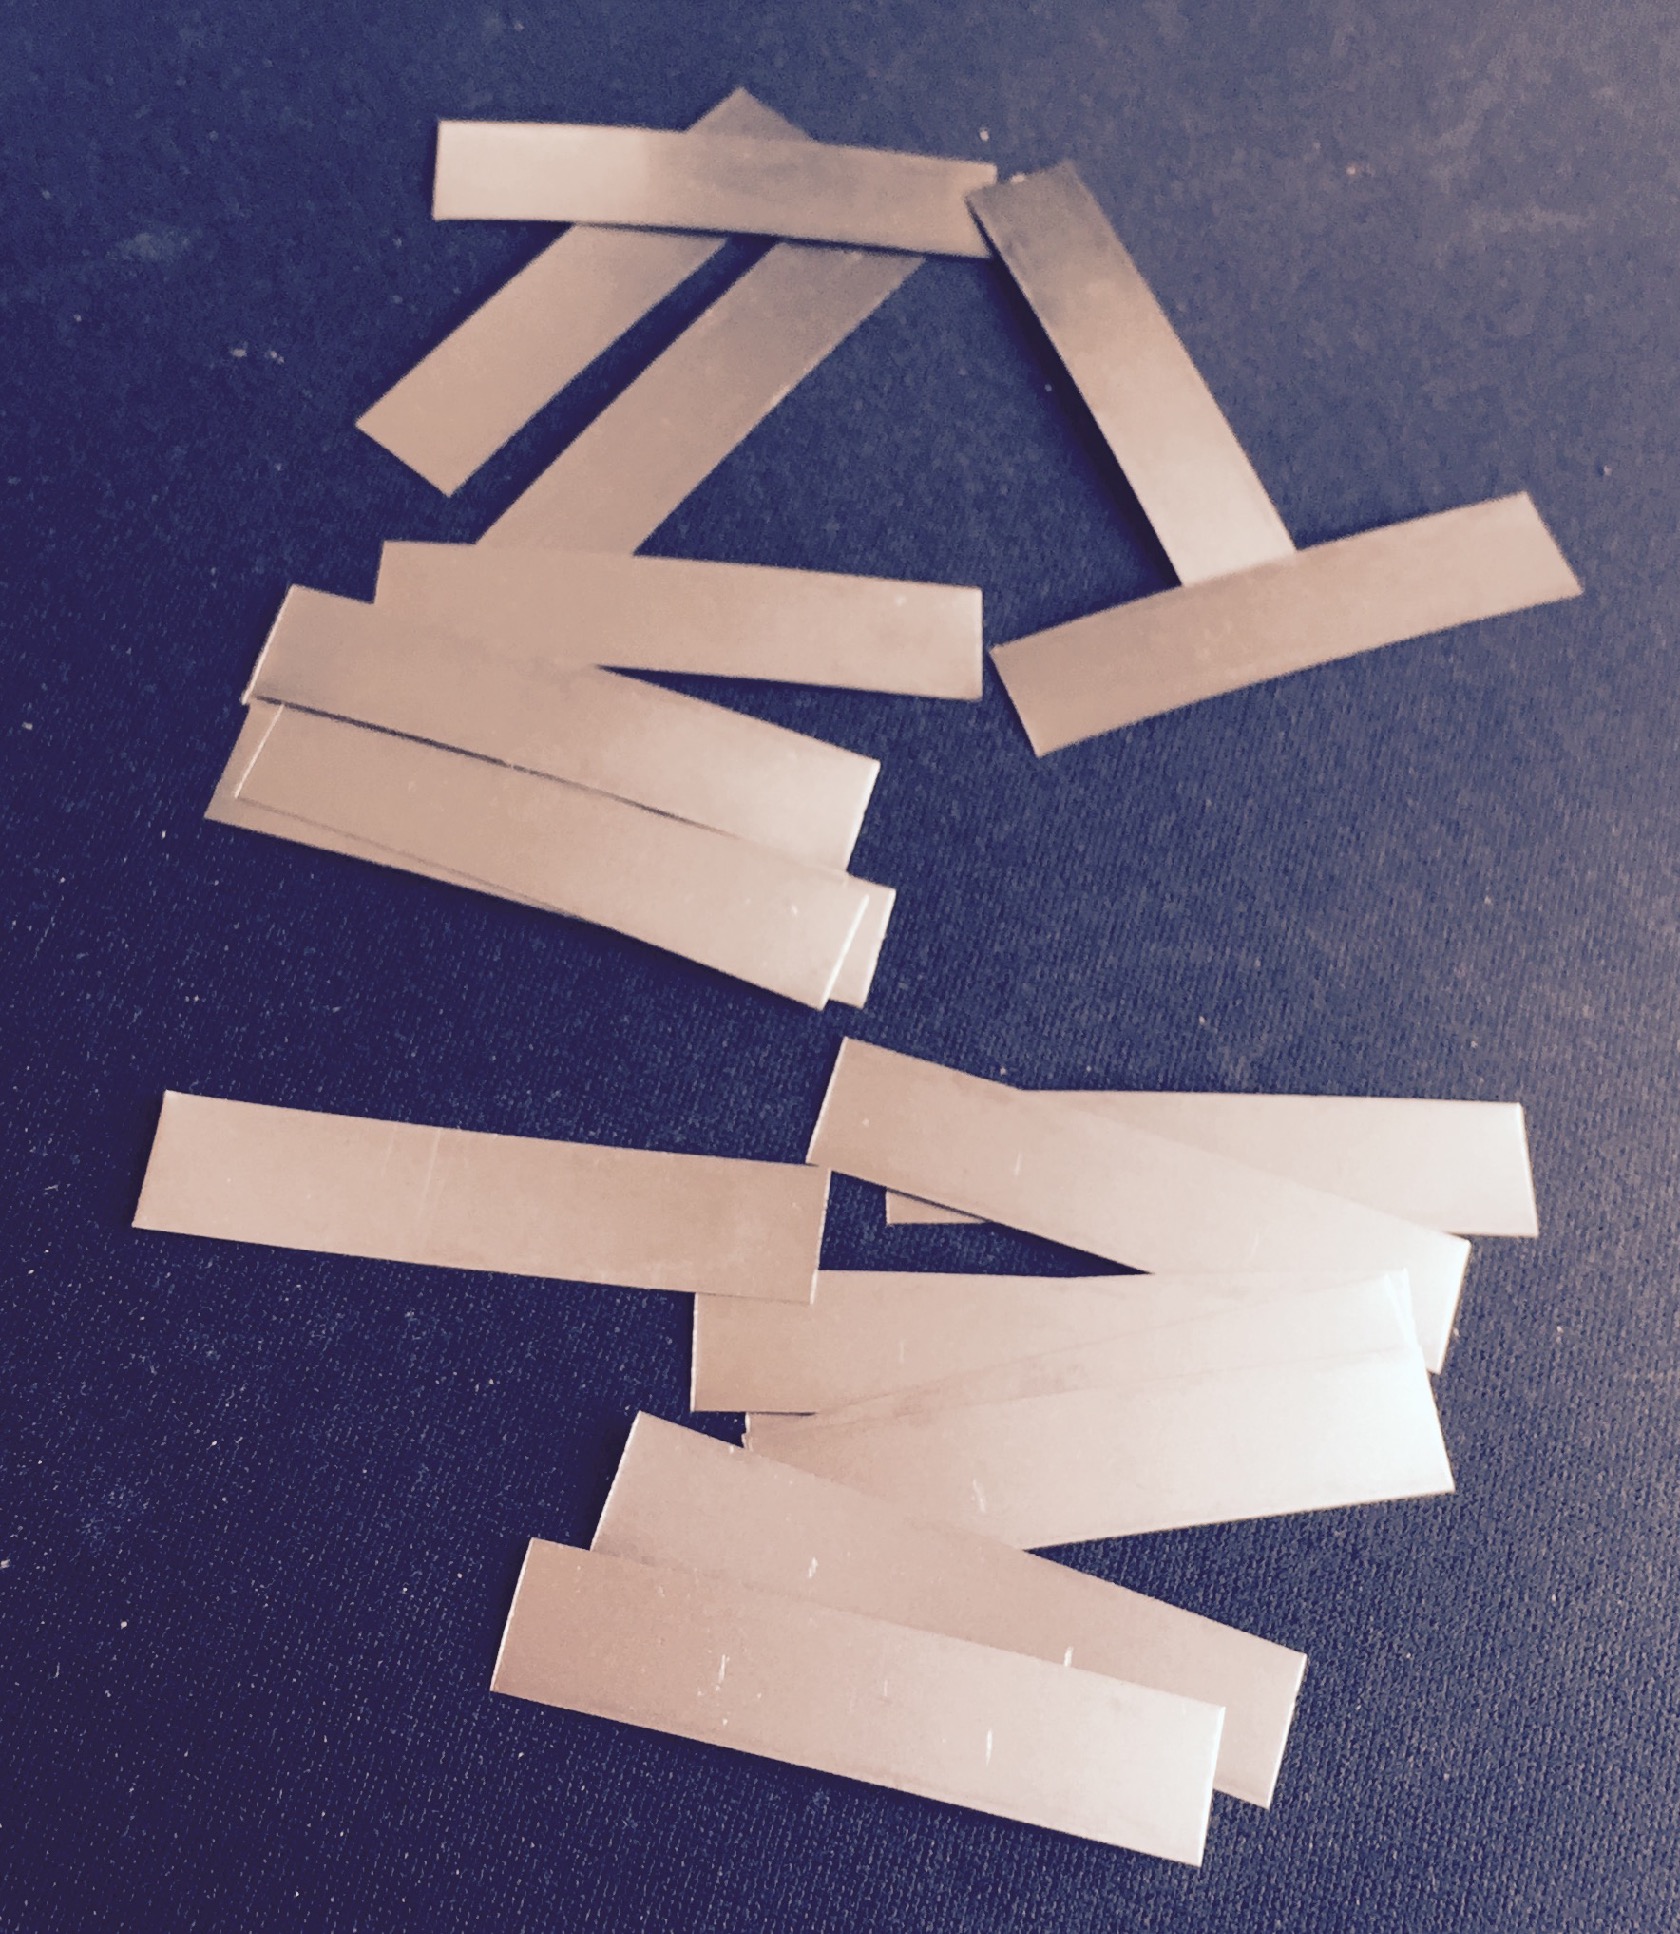
marked 10 of them with my knife and added flux to that spot for later serial connection reinforcement
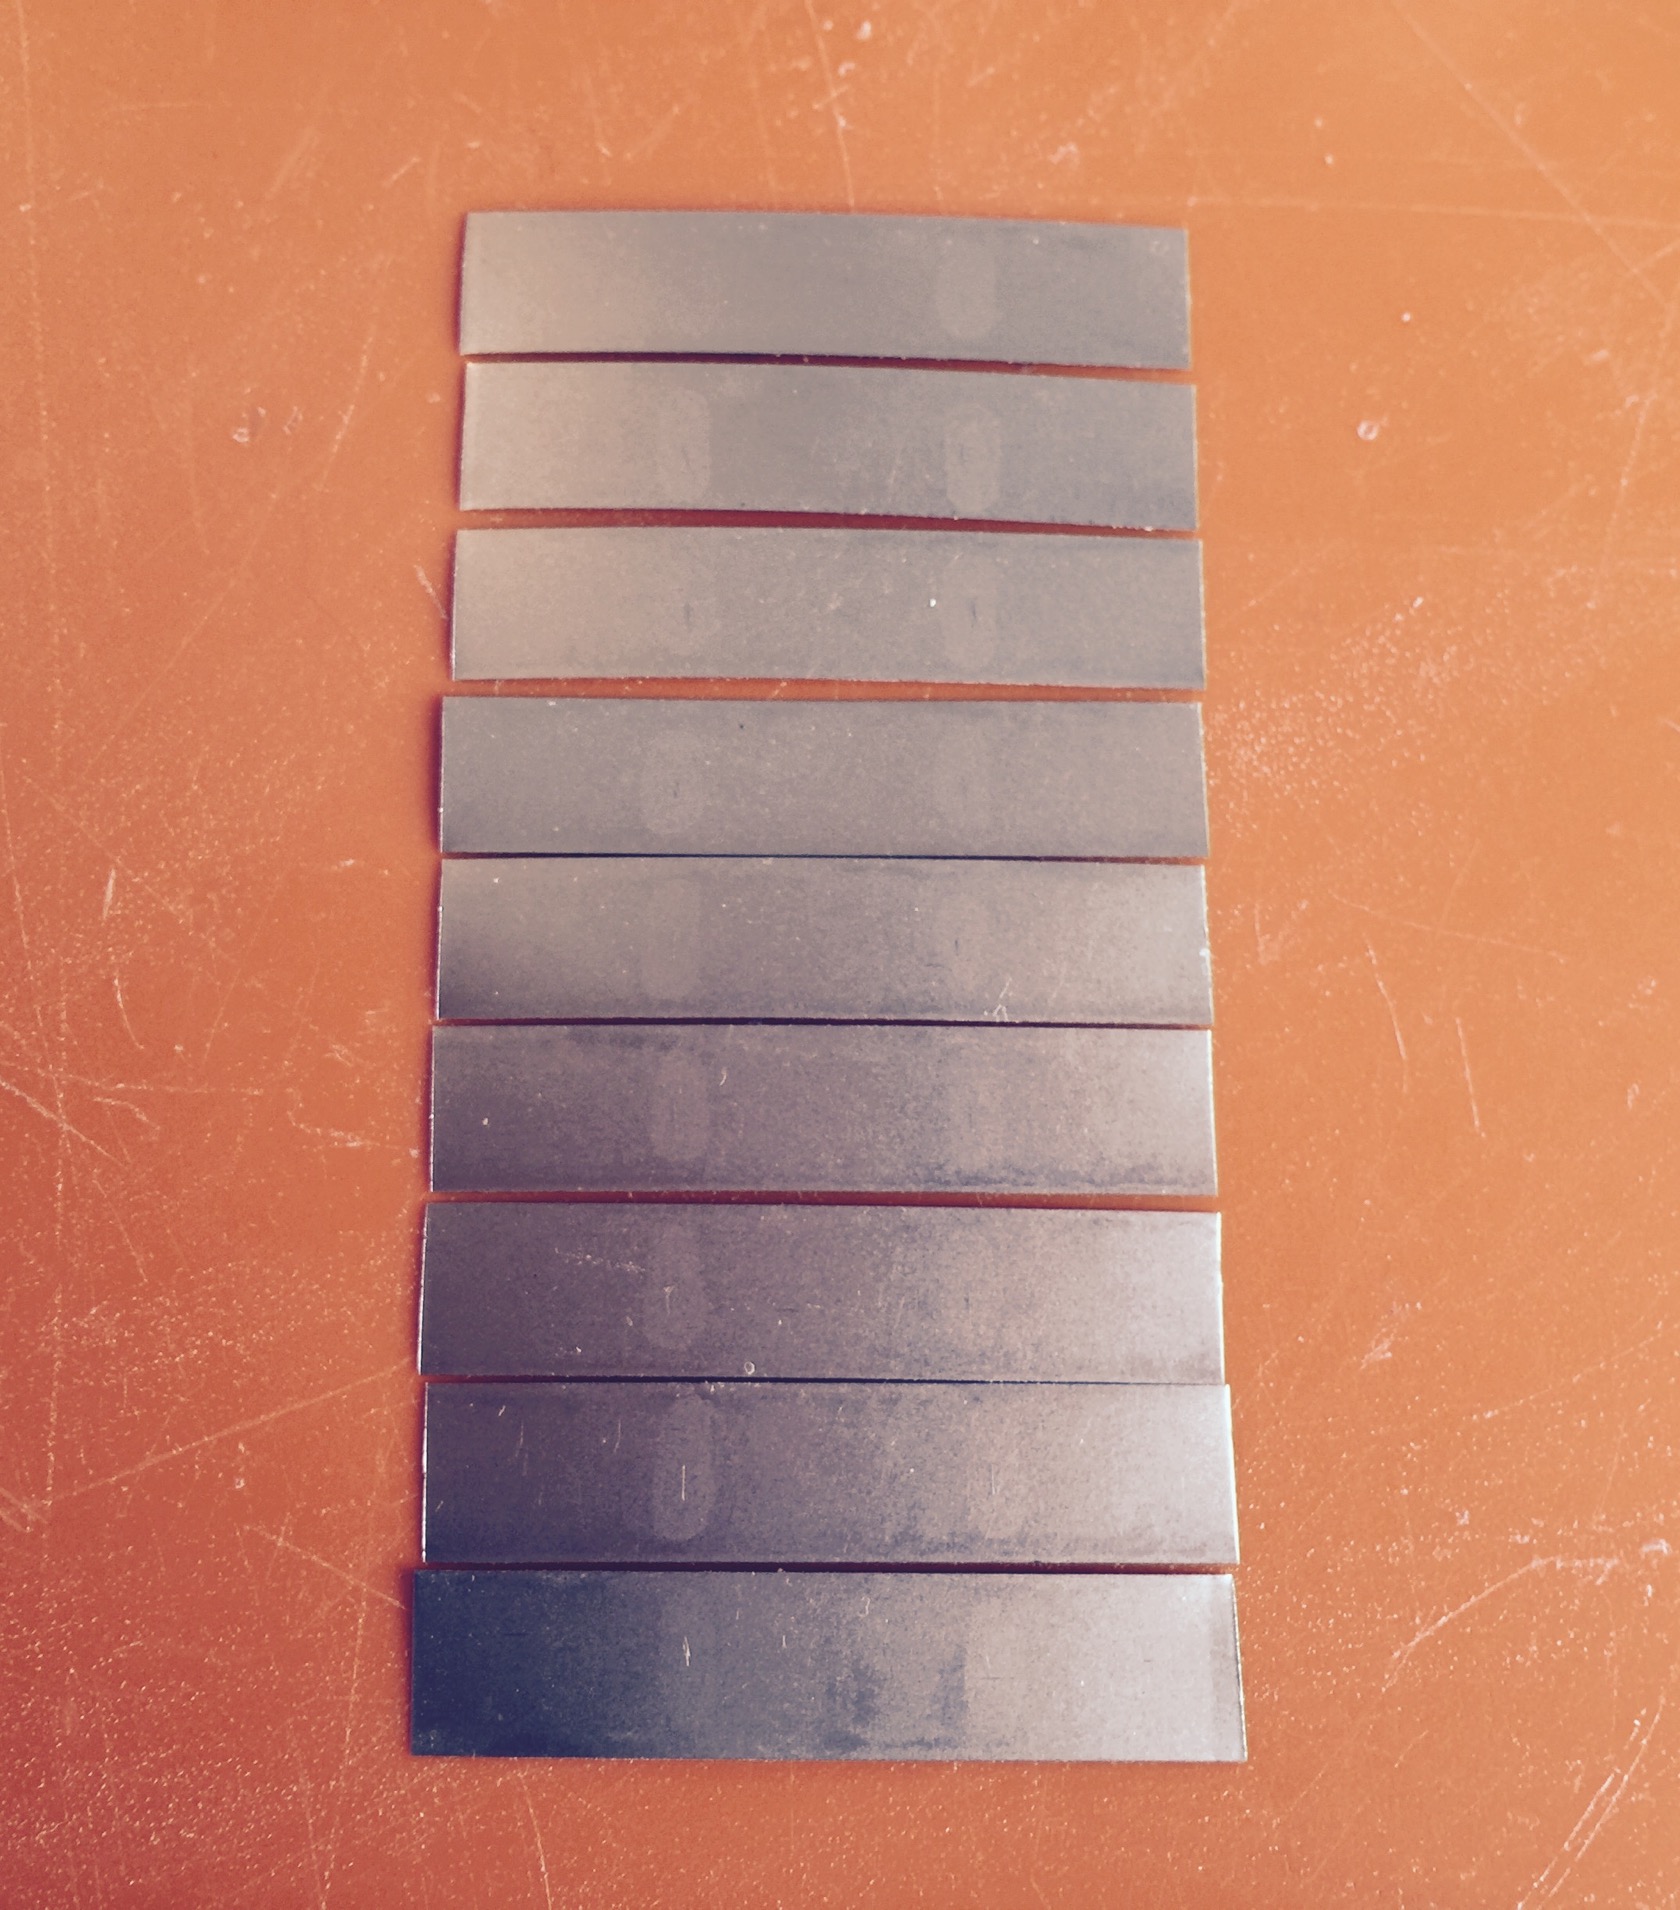
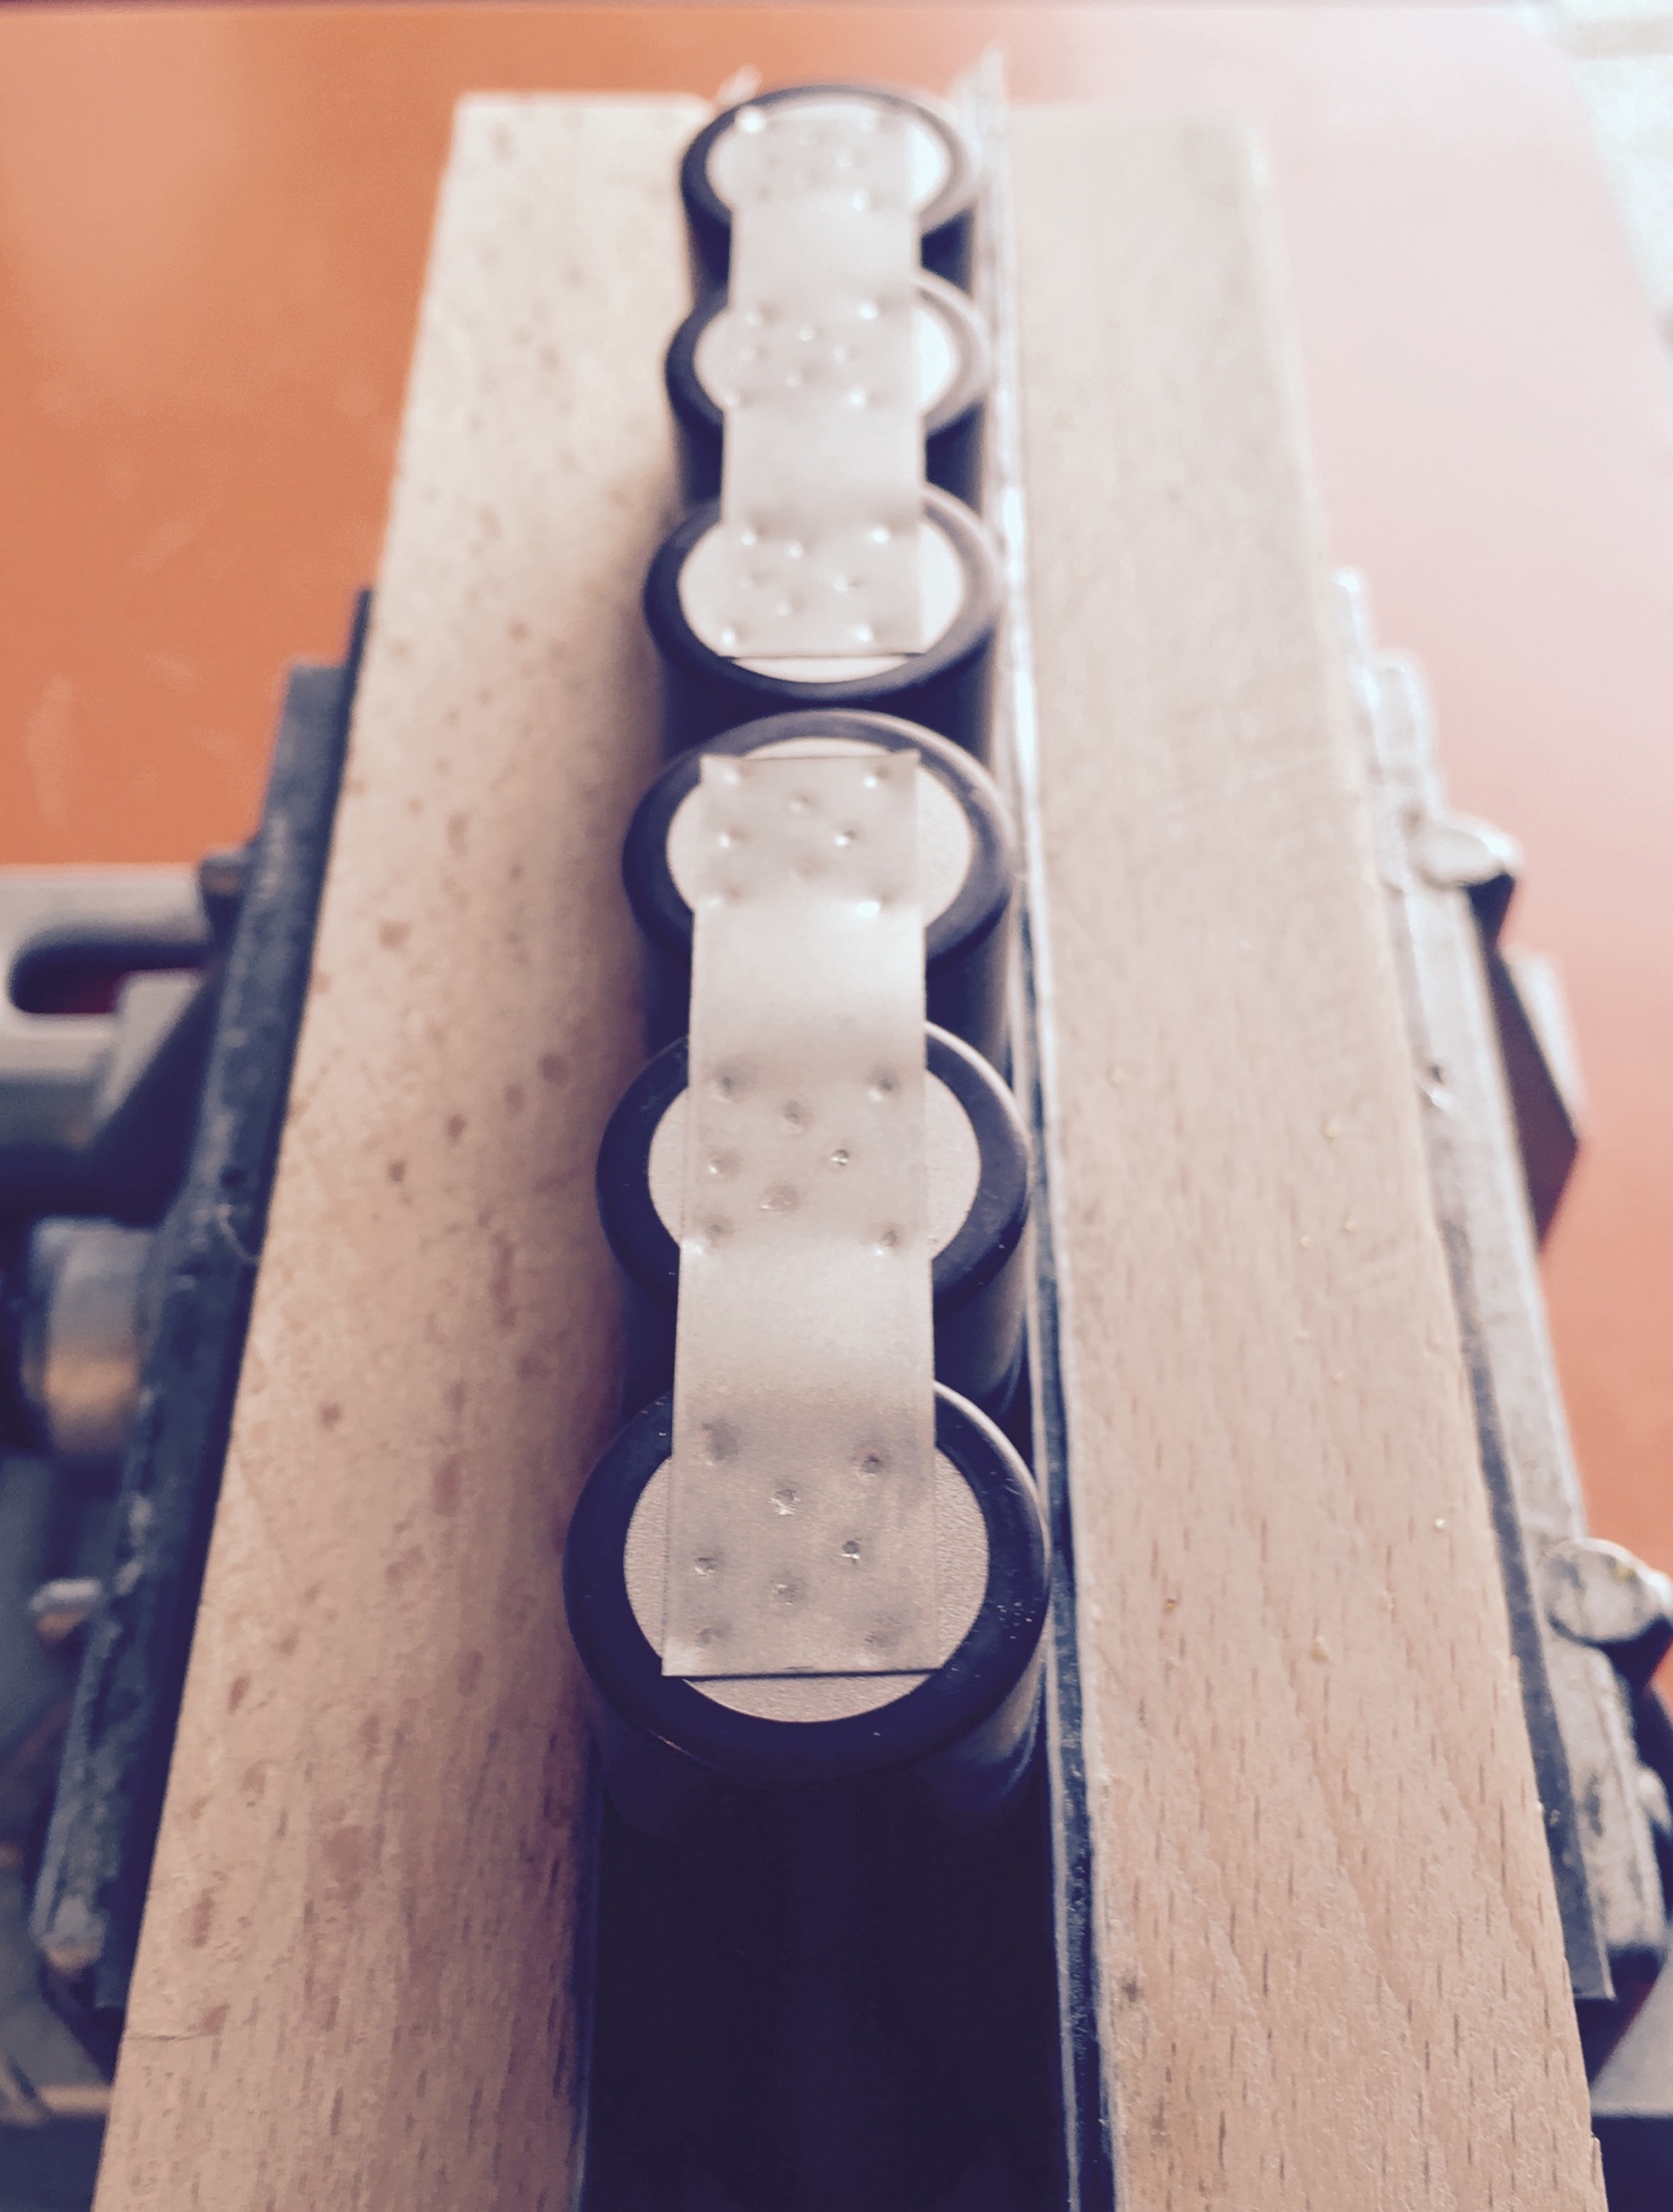
set up solder spots. yes, its only 9 because I forgot one … 
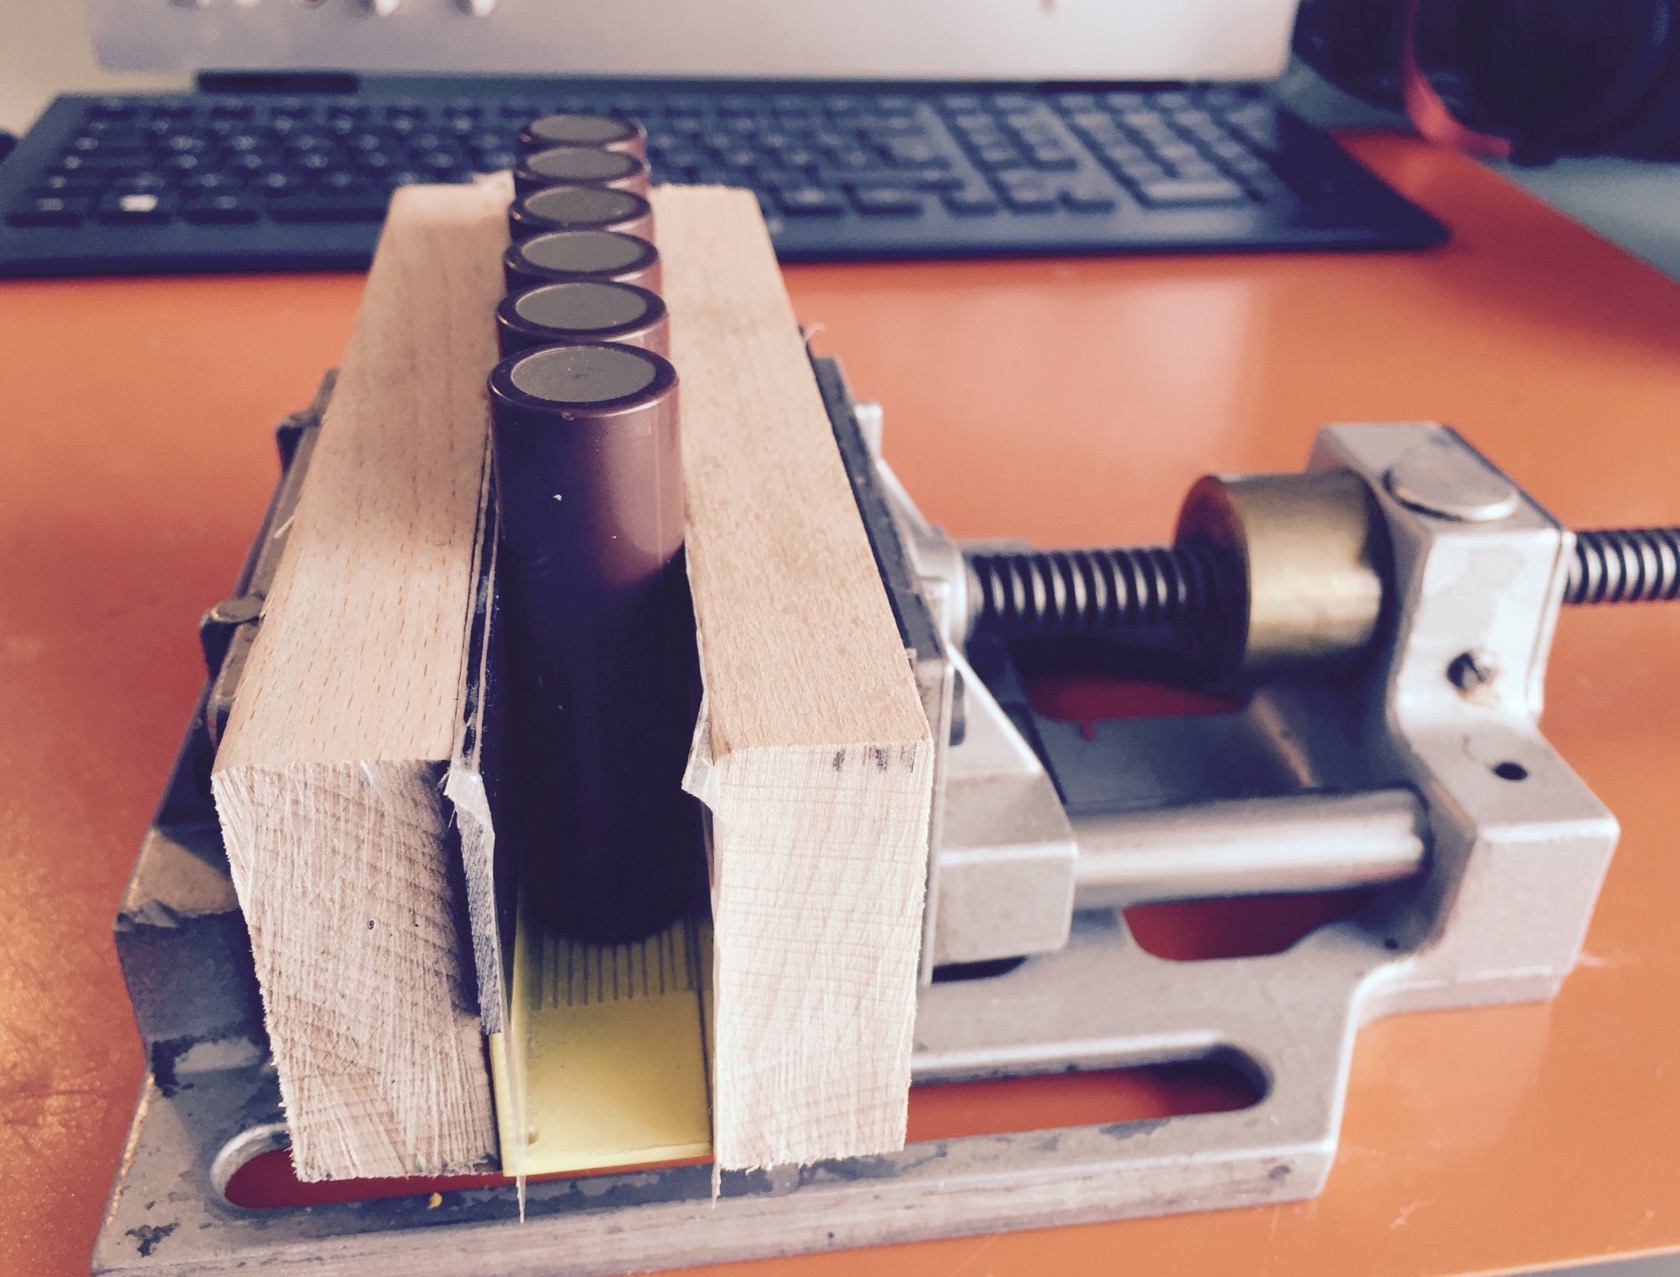
my vice, set up with 2 pieces of wood and an angle to keep cells aligned. with only 3 cells parallel, I was able to do 2 parallel packs at a time
off to welding - my fabulous stoneage DIY spotwelder - a superold battery charger, probably from WW2, directly connected to a 2F supercap. when I want to weld, I stomp on the DIY copper switch, basically 2 thick copper bars that will touch briefly. in order to avoid that they weld together, I put half a skate truck bushing between them to reliably separate after each welded spot!

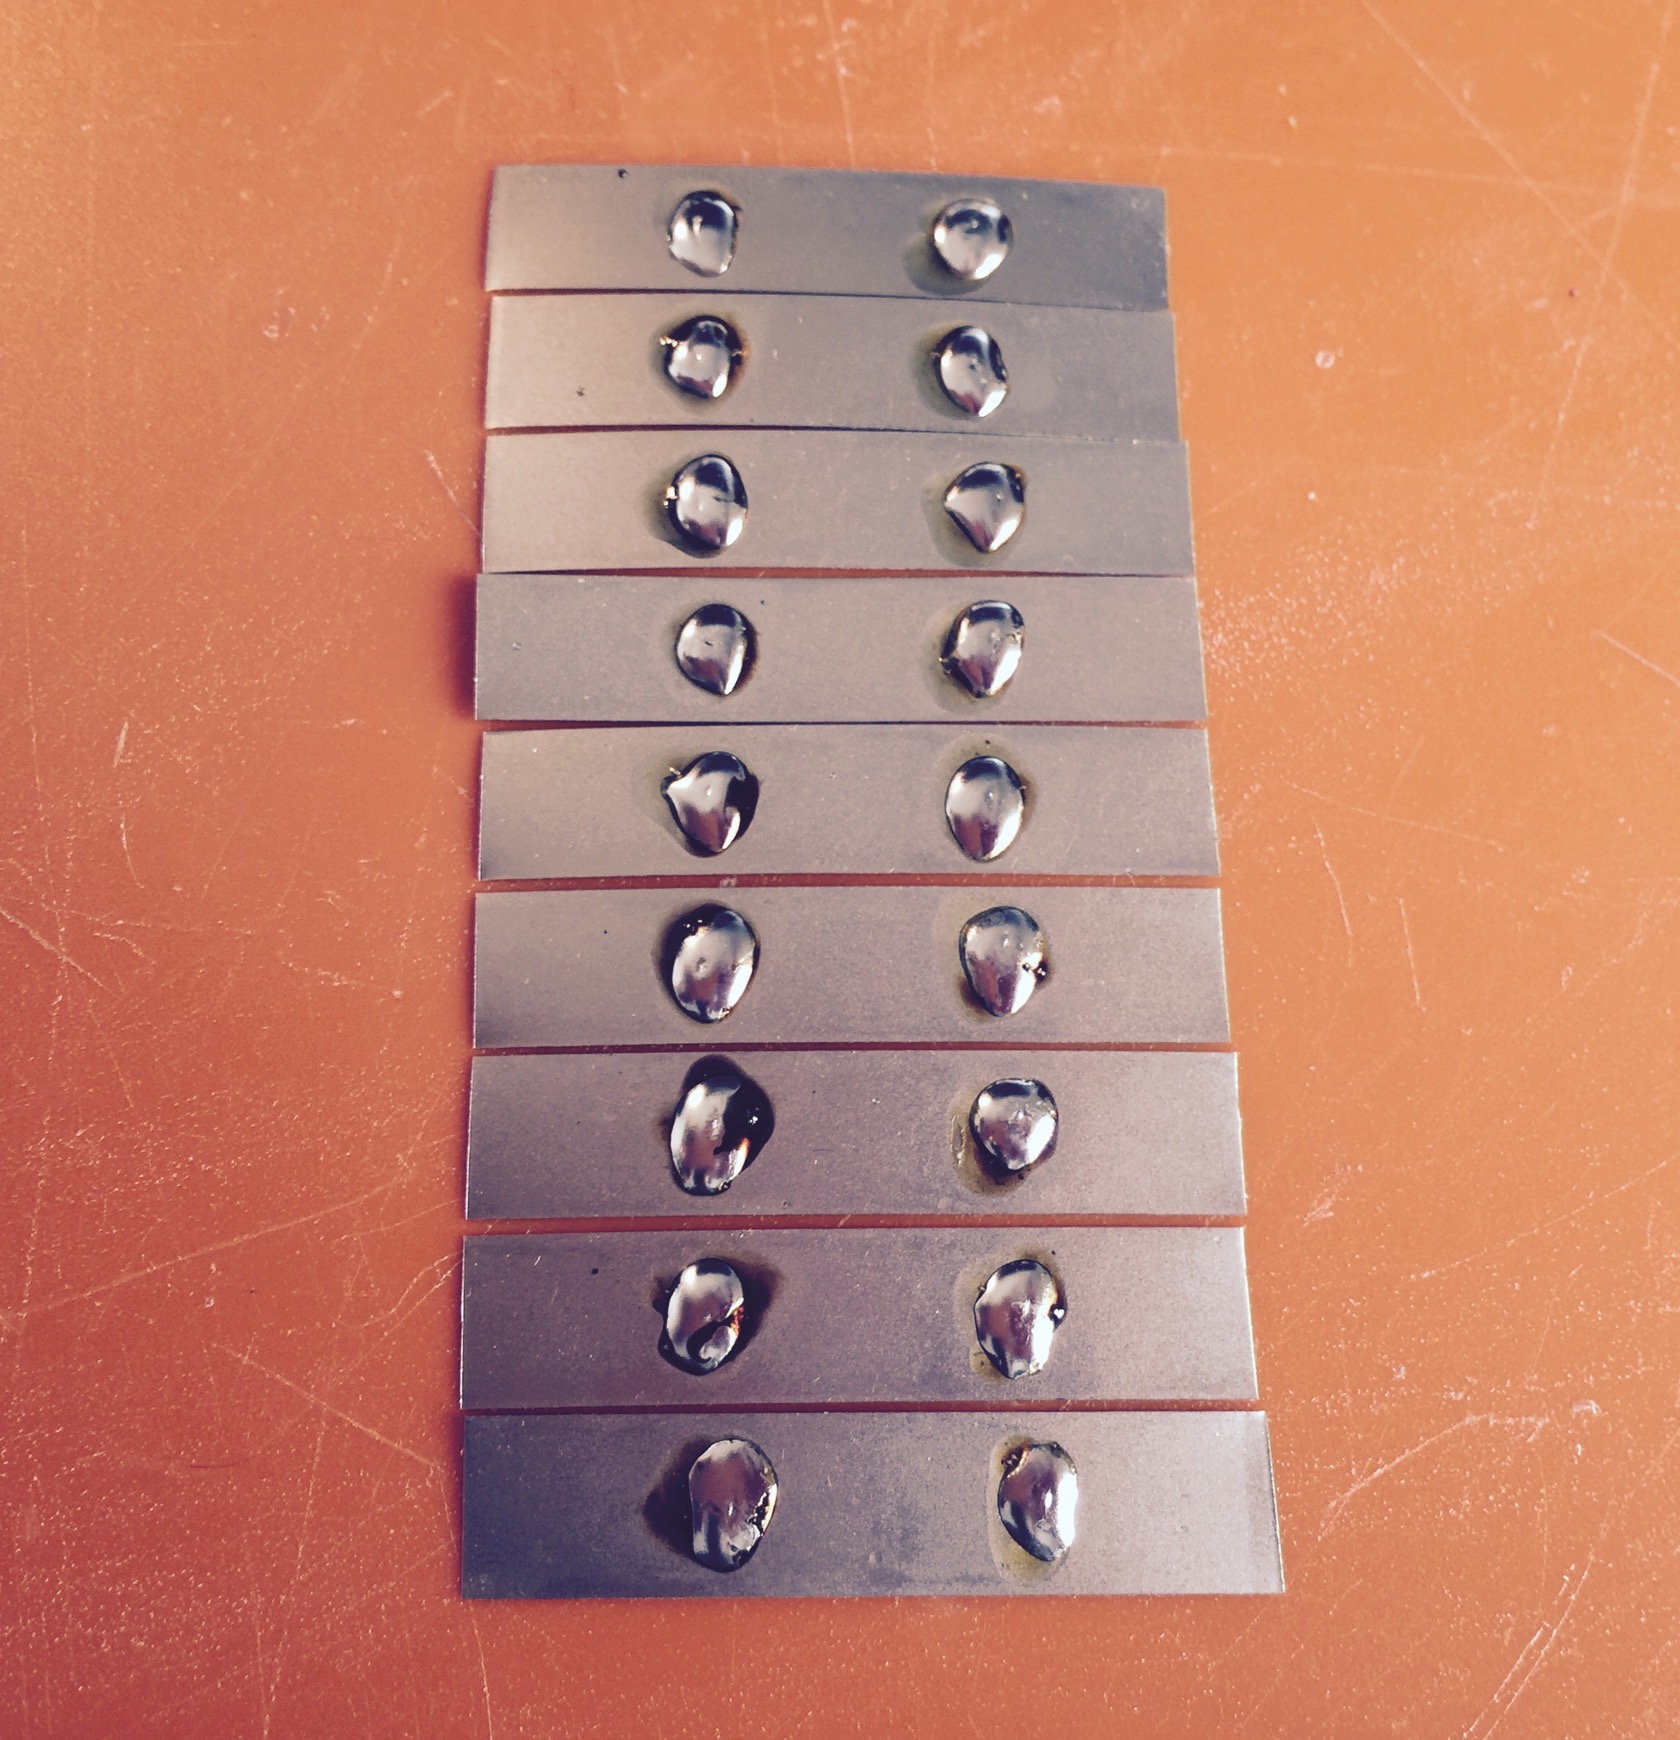
it works well though - plus sides with the small pole:
and minus side with more room to work with
all 10 packs done
adding some hot glue to avoid that the shells will work on each other
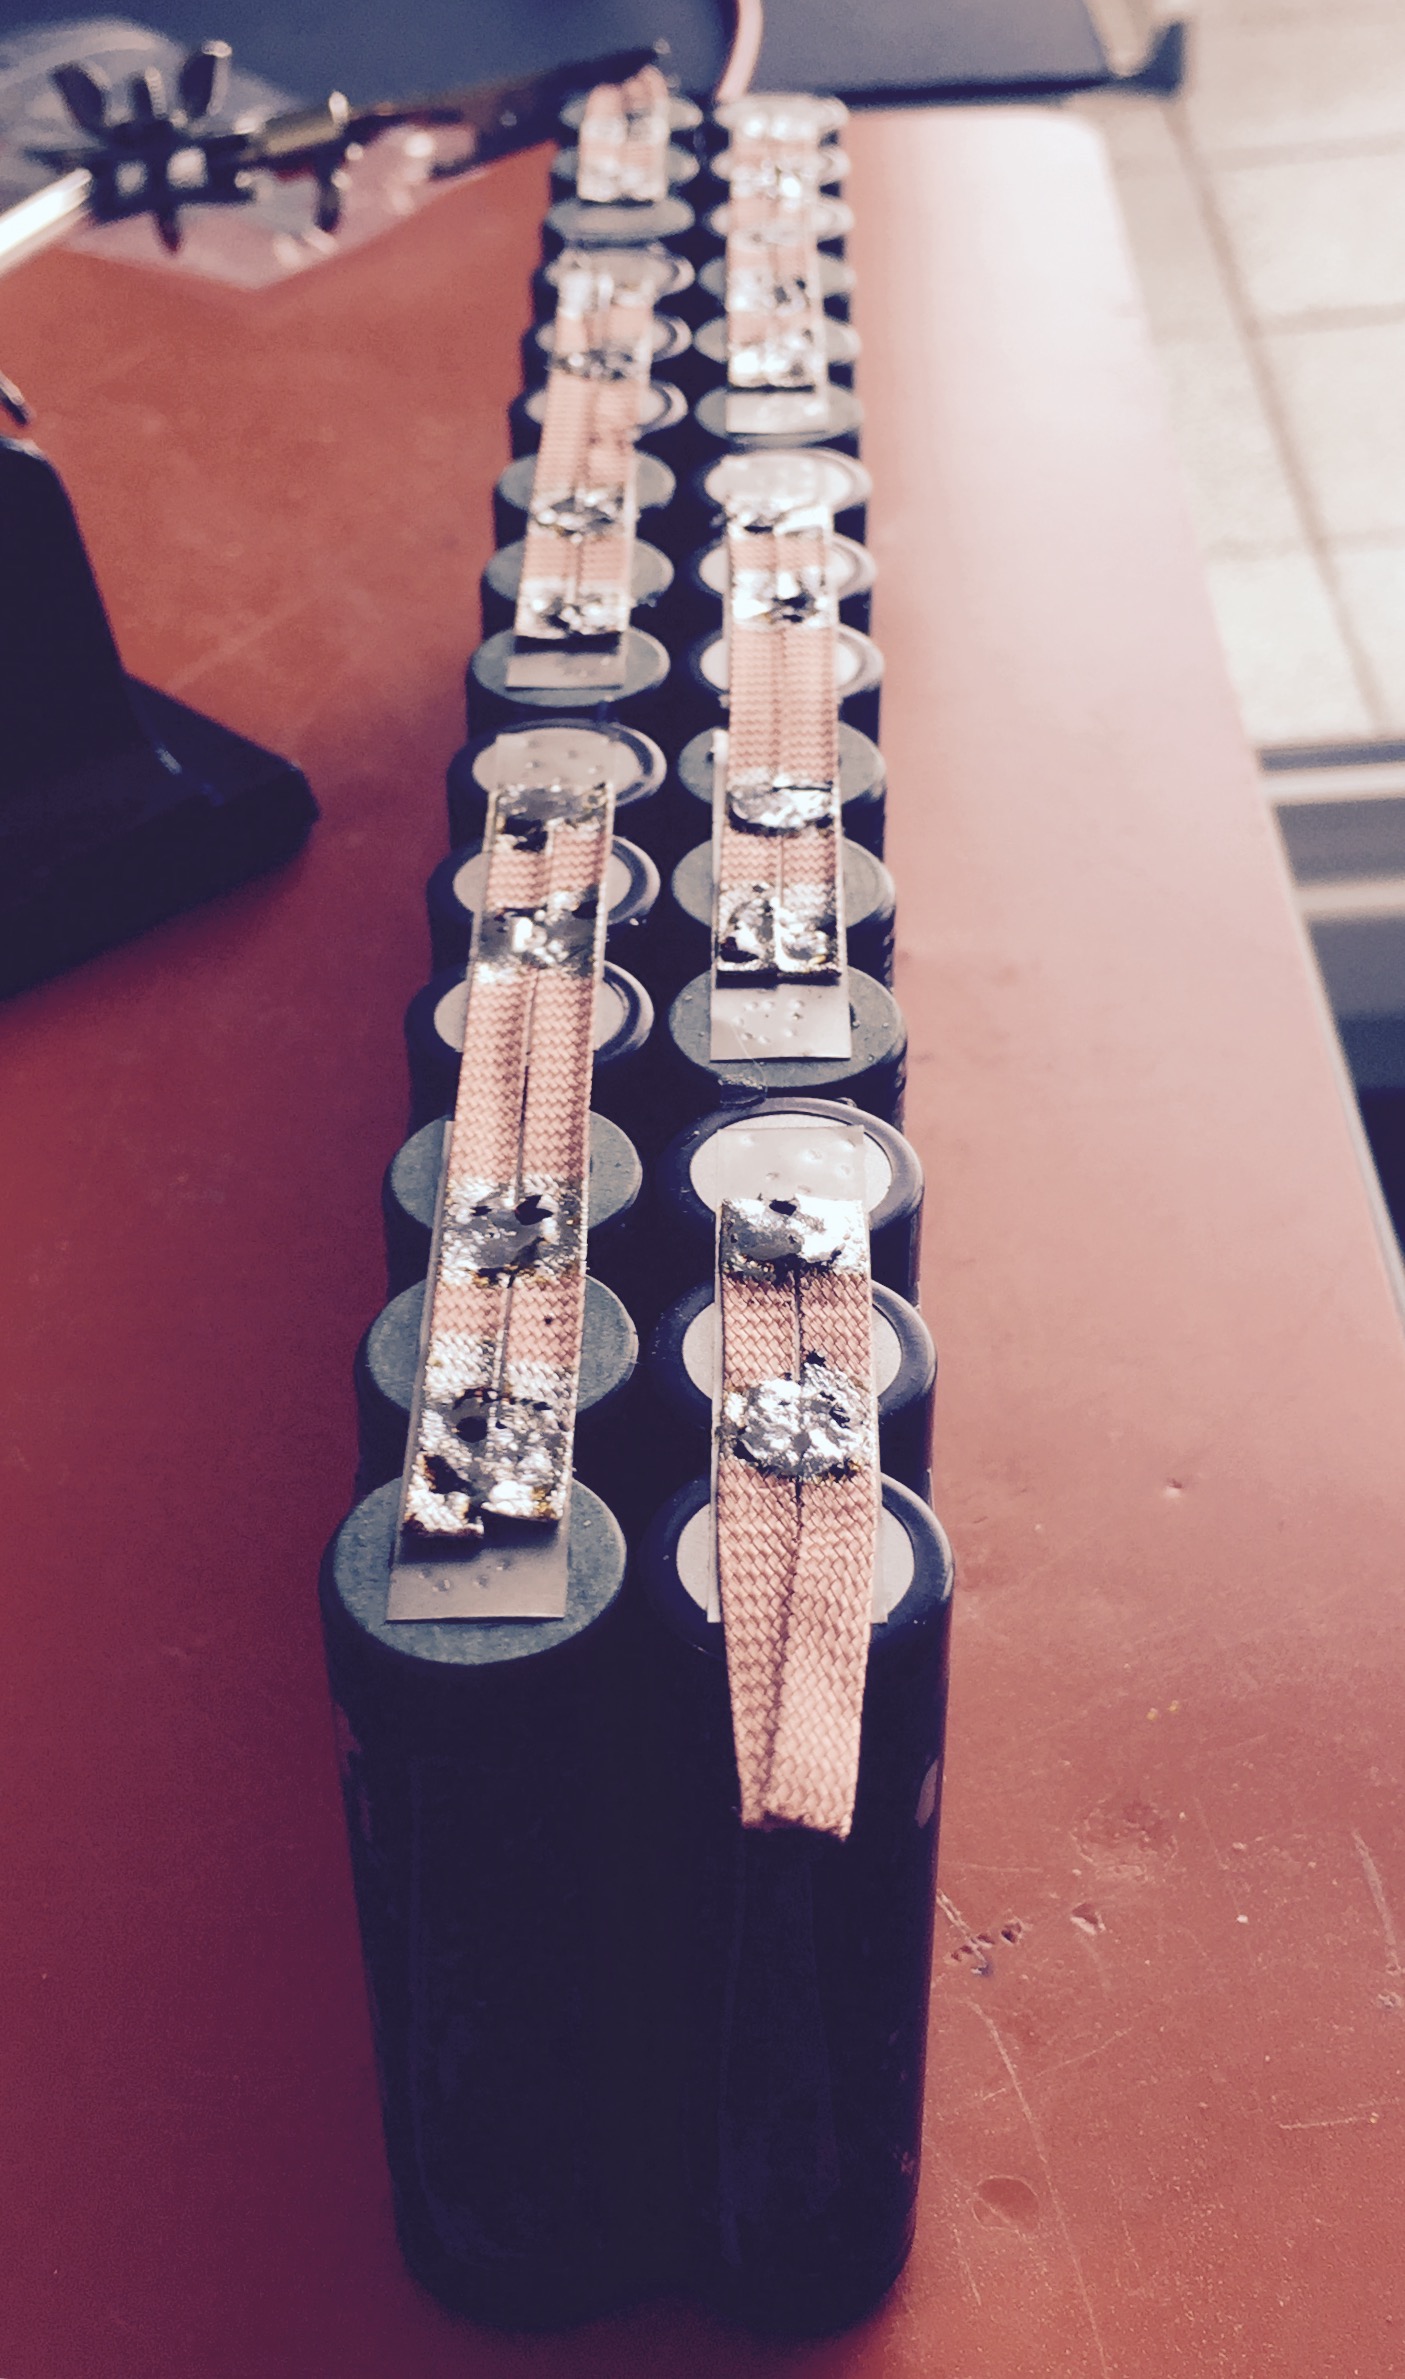
then doing all serial connections. the middle of the battery by 3 nickel strips each (its not a lot, if I assume about 15A per nickel strip its just 45A, but that works for me in a max 60A continuous battery).

the “outer” connections I did with 2x 5mm wide copper wick each, because a single nickel strip feels a little too small for the typical currents
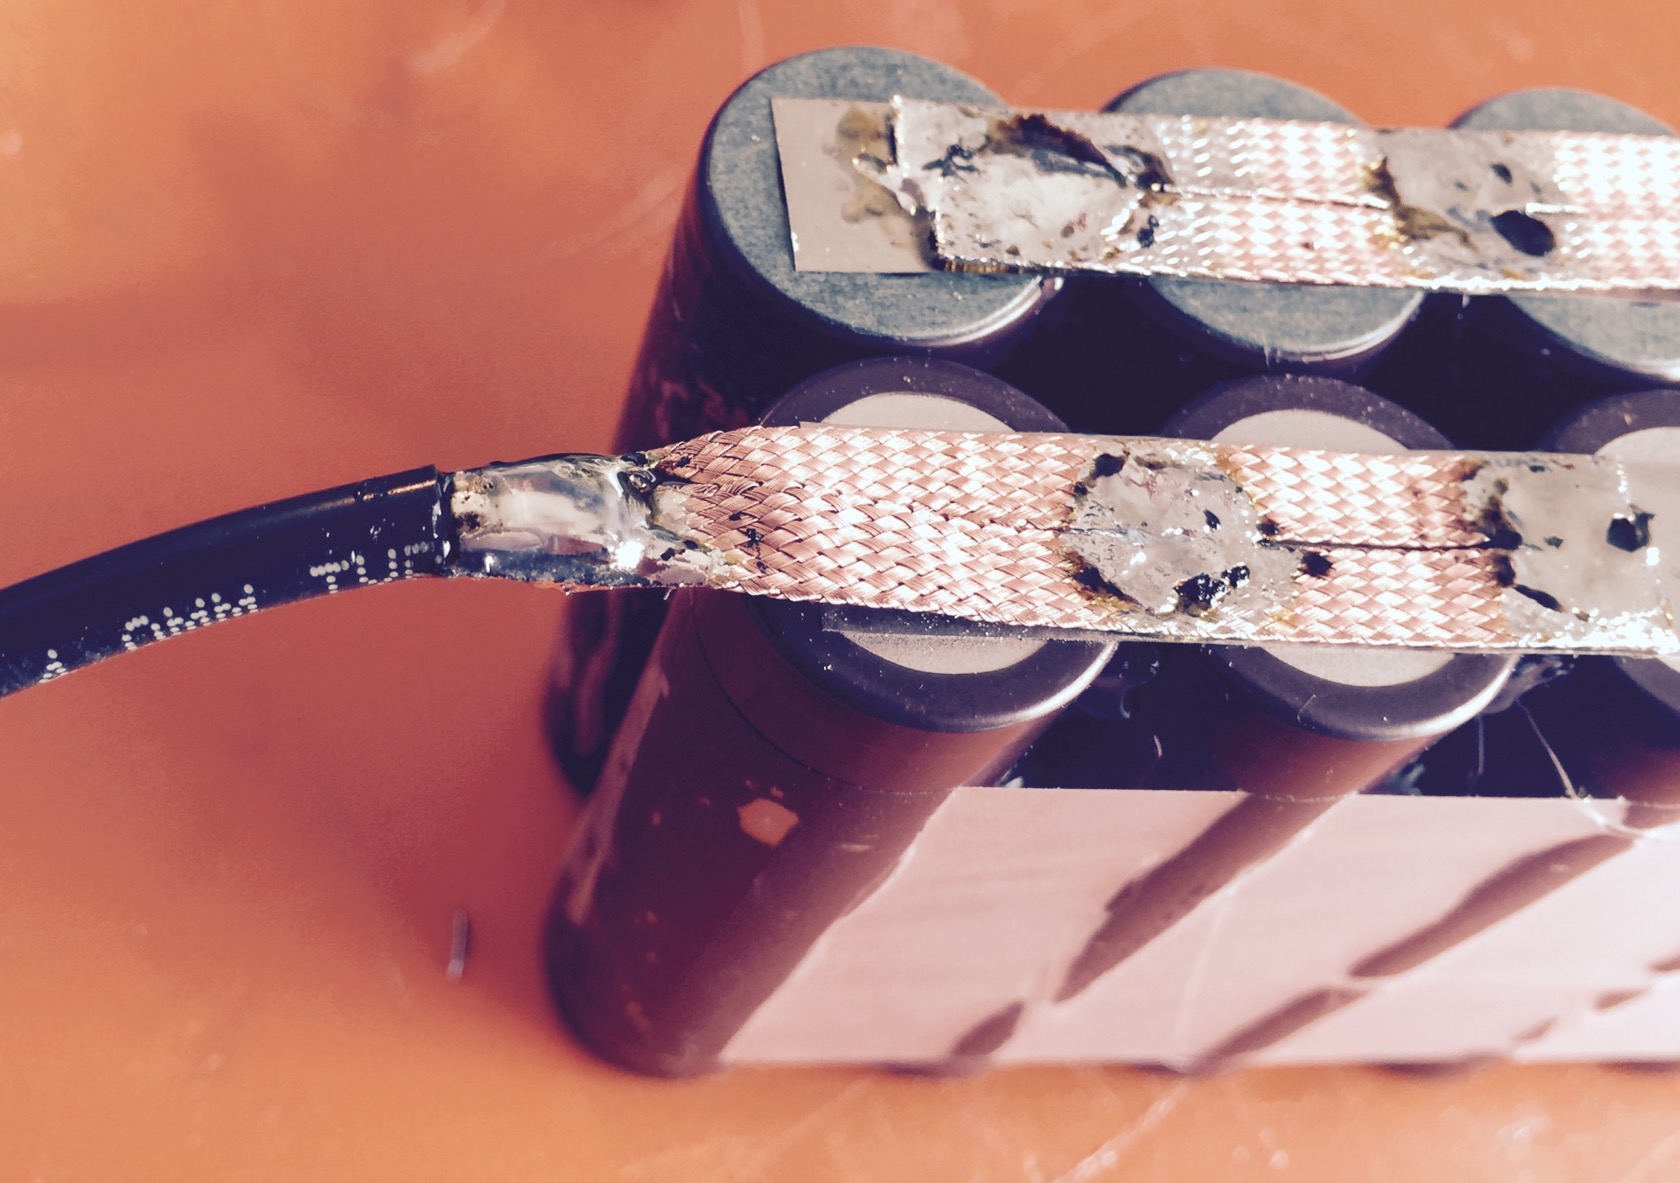
plus and minus side has a little extra copper wick to attach the battery wires - I usually go with 10AWG, but I think this time 12AWG will do. taking the isolation off, then splitting the small copper wires inside in half, putting the dual copper wick in between and clamping the split sides together.
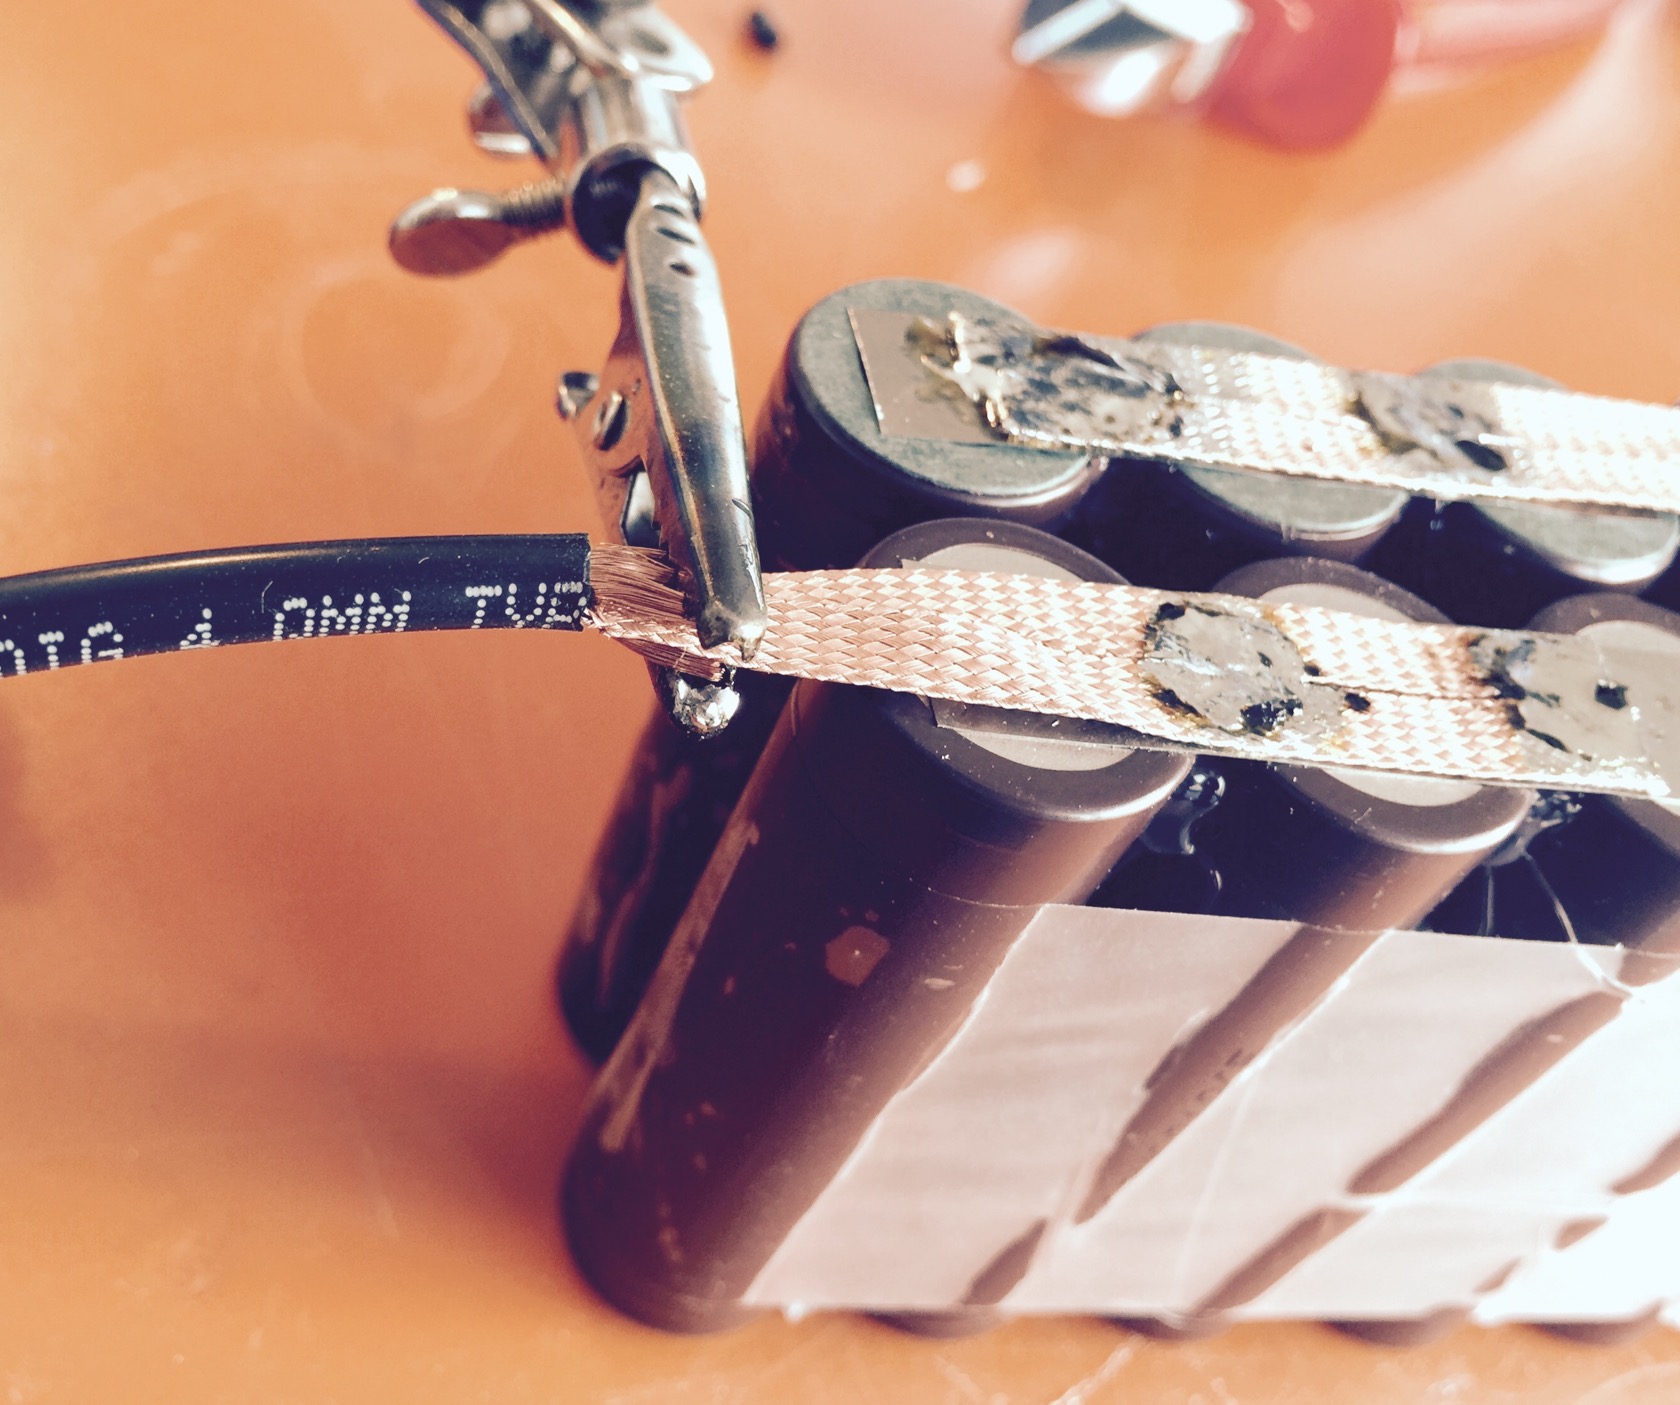
this makes for a very nice joint after soldering
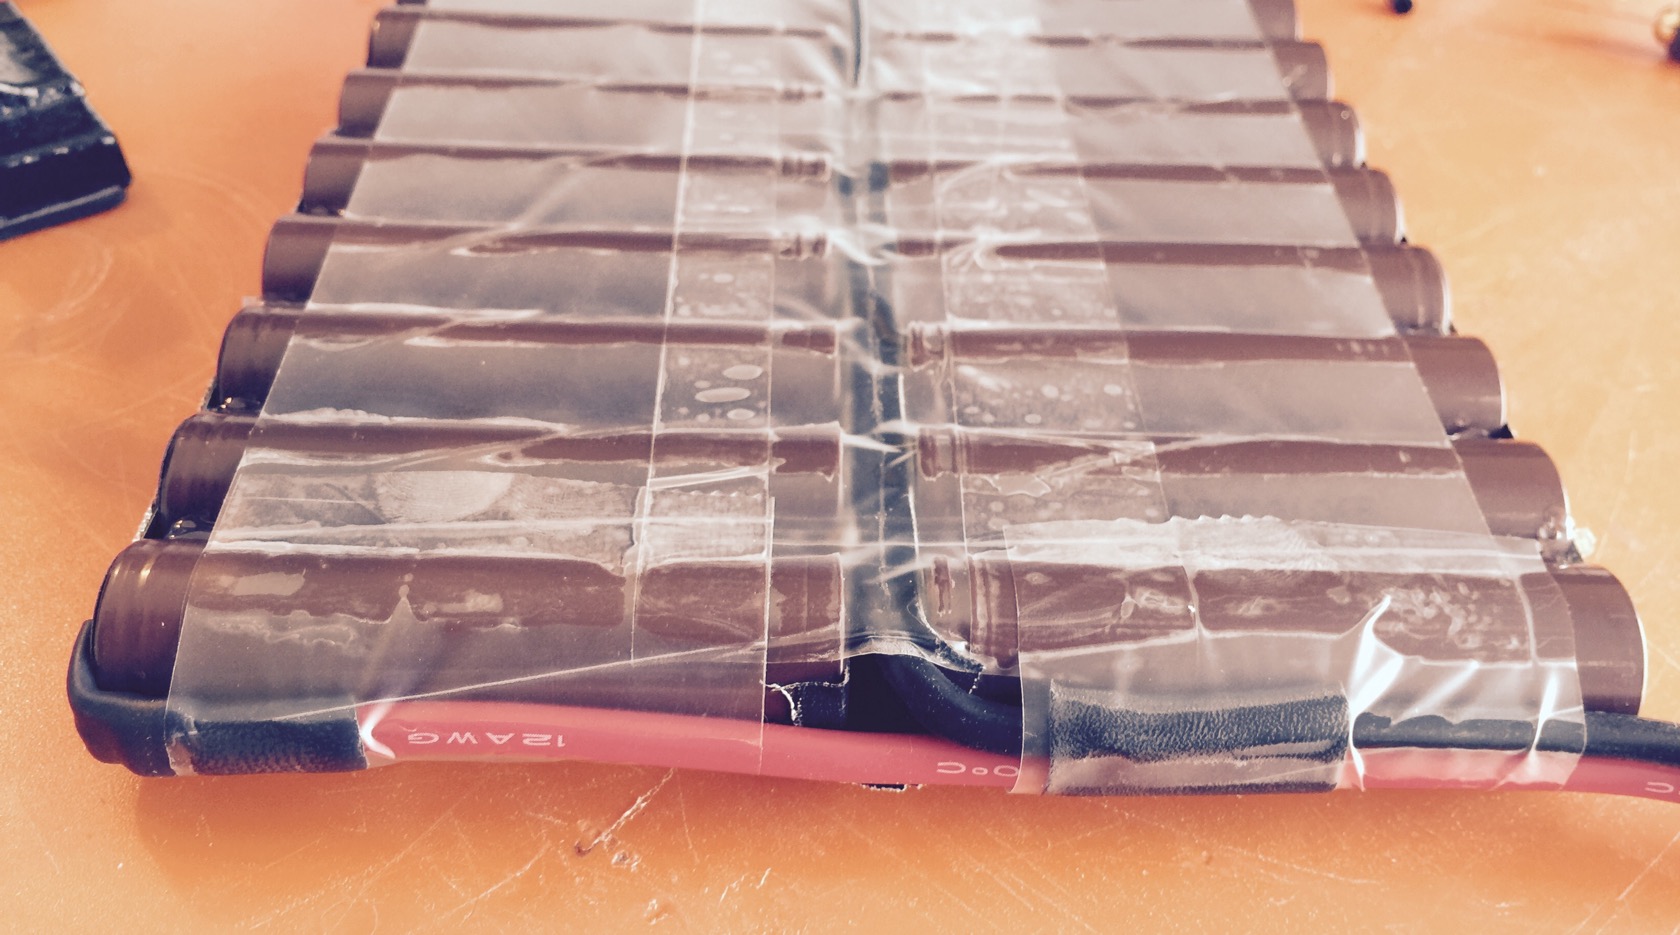
finally thick shrink tube with glue inside and bending the wire in the correct form while the shrink tube is still hot
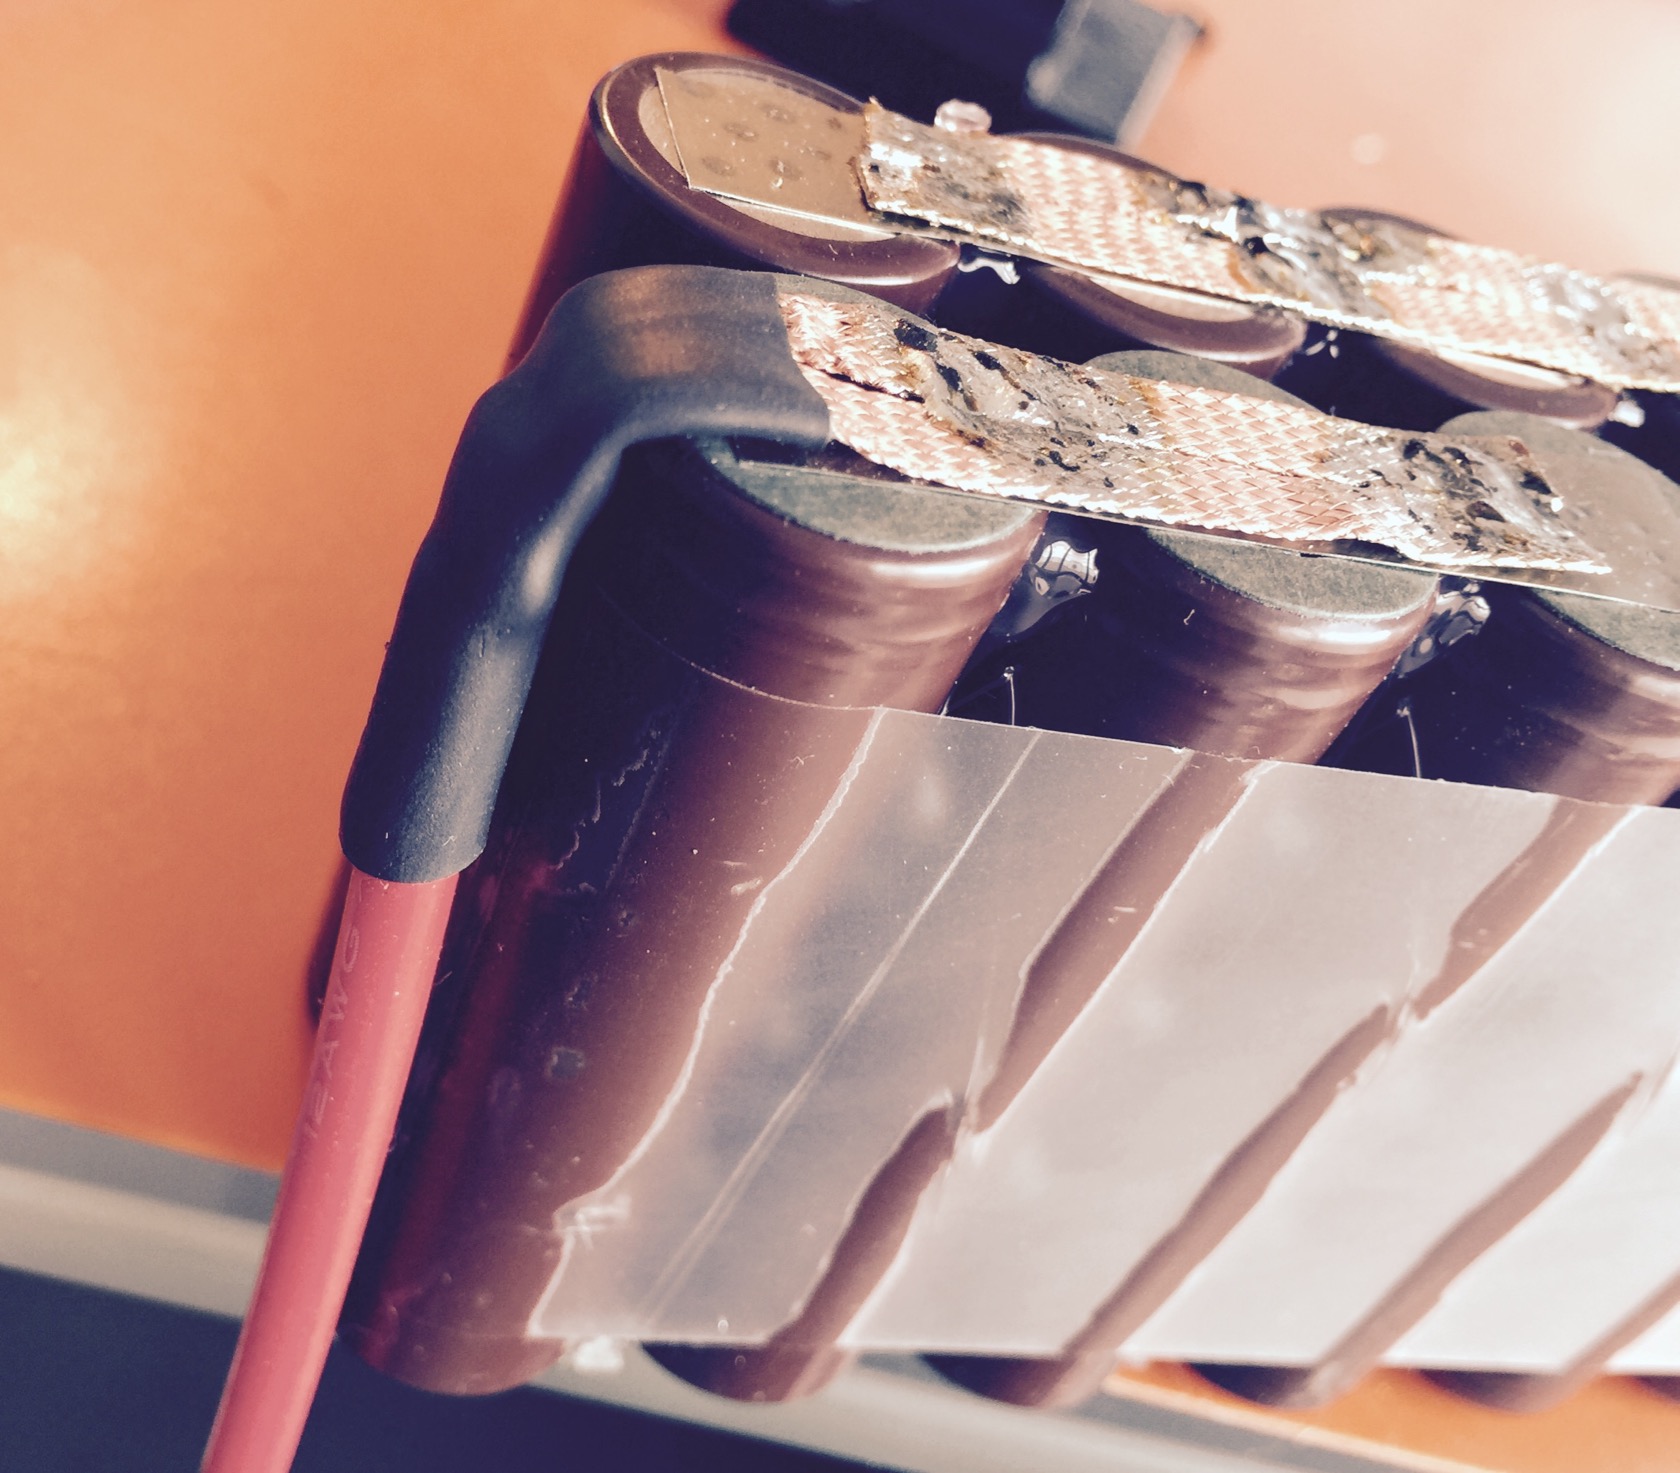
then fixating the wires with some scotch tape and folding the battery like a butterfly. the minus wire is running in the channel made by the 20 serial connection nickel strips (that I covered with thick adhesive tape)
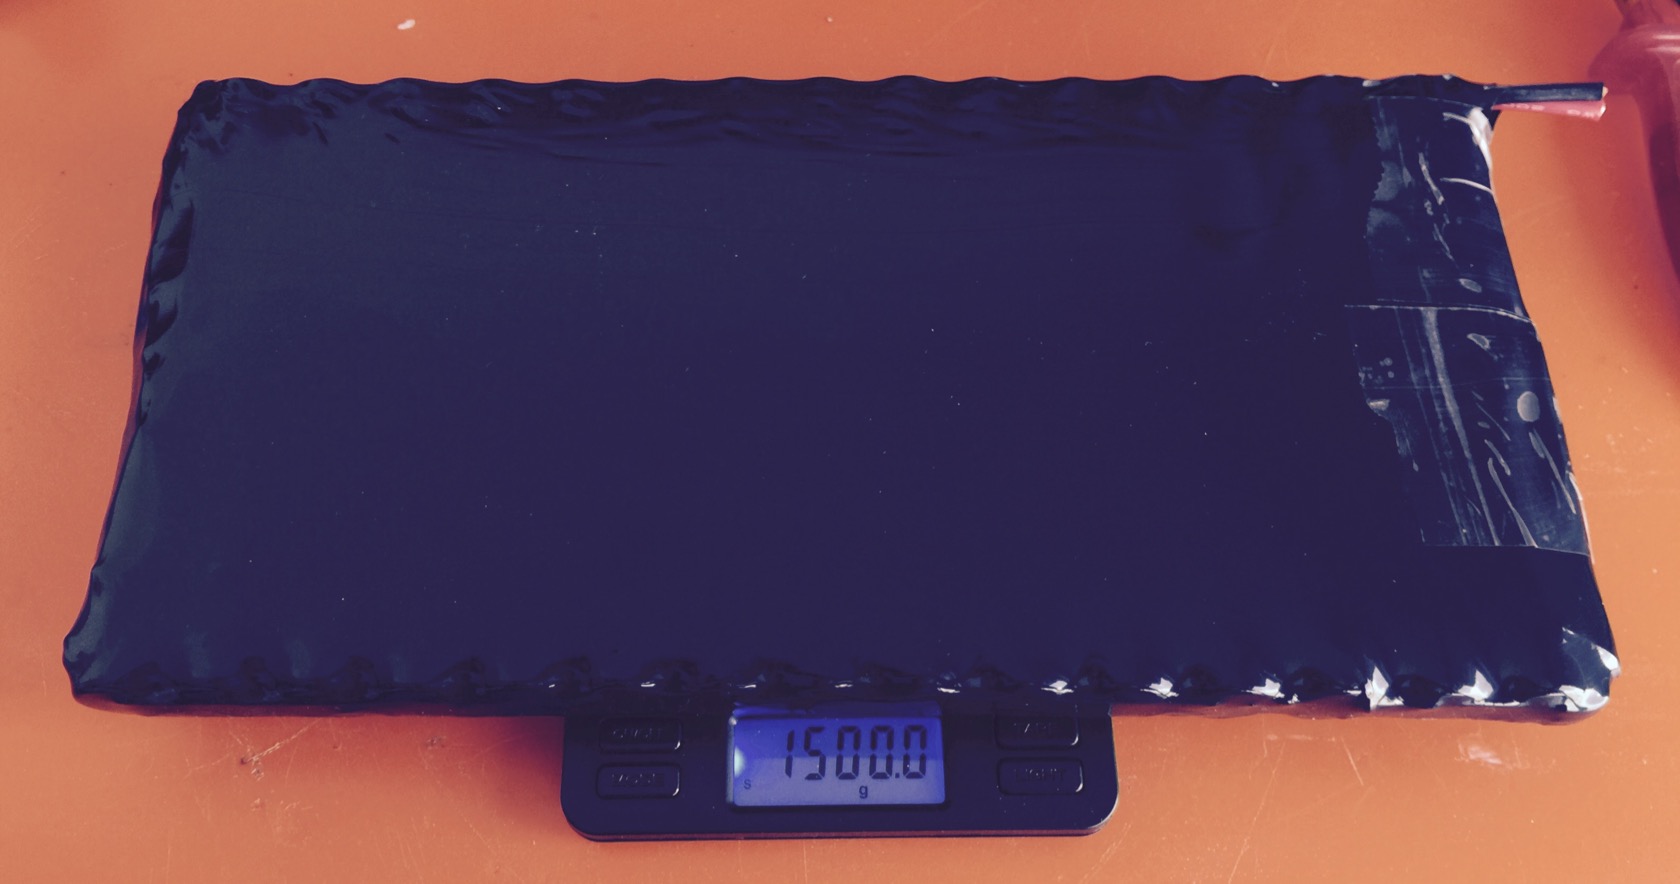
finally shrink tube and a quick weight check: 1500gr!
no balancing wires - Ill check back on the battery in a few months for maintenance and measure the serial packs manually. I dont expect any drift because all my other batteries also never showed any drift. but who knows, this is my smallest battery - maybe with more load Ill see some drift eventually.
You should take vacation more frequently, Thanks for all these great foto-posts, they are a really nice break from my job and real inspiration
How many W or V deos The battery charger have to be ?
How do u plan to balance when you do finally? I don’t know much electronics but could you simply use a voltmeter and change the resistor to something smaller?
I see u added those insulation donuts to the plus side but u didn’t mention them. I’ll be soldering my lg hg2 as well since my compression pack didn’t work. Great cells.
Somehow he’s going to have to charge to 12s (50.4 volts). Wondering myself how he does it and at what wattage. Looking for options. I’m using a meanwell bulk charger that does 400watts to any voltage around 50


