How-To/HACK: Build compact controller using GT-2B & Badwolf v2 Enclosure

Sharing a post from ES.

Credit to Badwolf and others who have obviously developed and done this before.

Besides Badwolf’s directions on thingverse, and some detail from others here on how they did theirs - there wasn’t anything consolidated in one spot. I’m a visual person and since couldn’t find a step-by-step, i figured i’d build one while doing mine. Hopefully to help out the next person who wants to do this, and give back to the ES community that’s helped me so much!

I had some spare time today and figured i’d give it a shot. Others might have more elegant or better steps, but these worked for me. This does involve your ability to solder and handle delicate electronics safely. If you really have no idea how to do this, i might suggest you get someone to help you.

I have my HK GT2B, and the 3dhub printed Badwolf v2 enclosure (bit rough print quality, but not horrible):

There are 8 screws on the side (and under replaceable “backstrap” replaceable grip. Cut or remove the top sticker behind antenna to split it in half).

Take your time. There are a couple other screws on the CH3 mid grip, and 3 more on the steering servo/wheel control. The antenna is super simple and just sticks up into the rubber ducky on top of the controller.

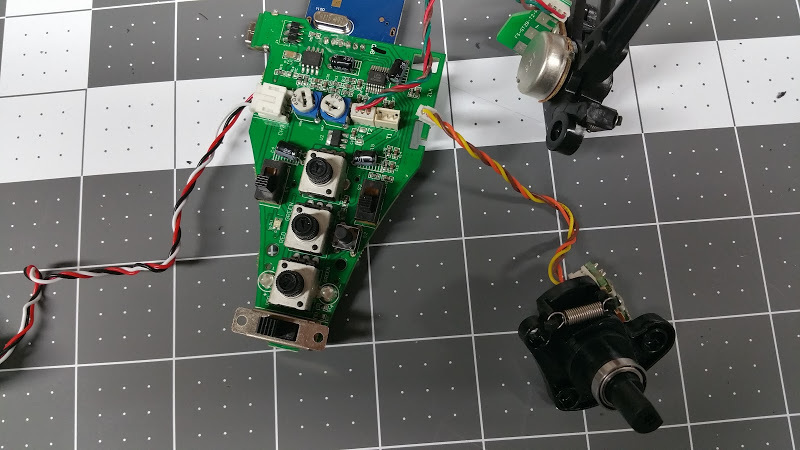
Top Bottom Once everything is pulled out you should have this.

Pop the labeled cover off, and disconnect the Steering channel.

Looking at alignment and test fitting to v2 enclosure.

Top and Bottom of left side to remove.

slow and steady w/ a dremel cutting disk

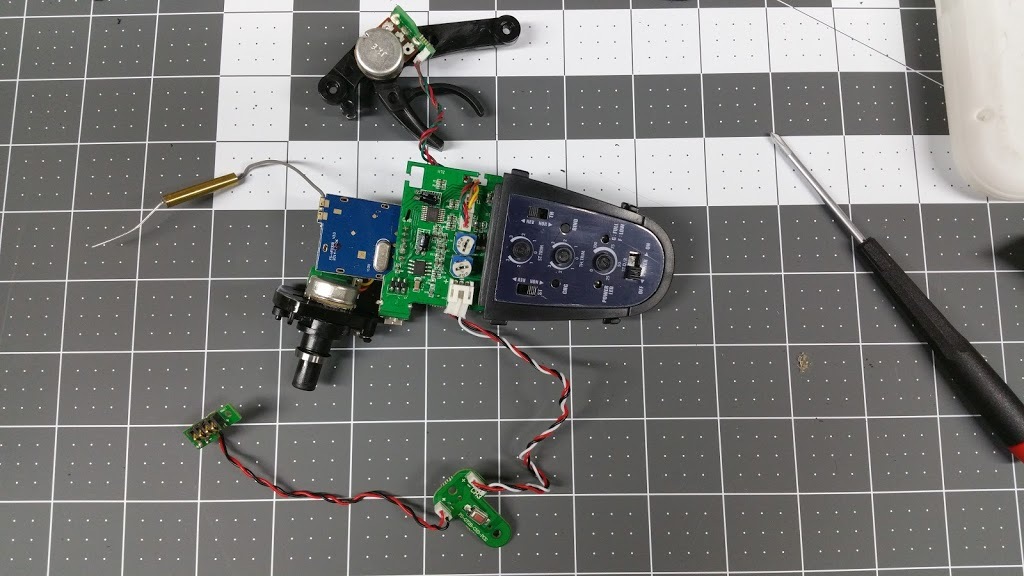
Let me just say that i SUCK at desoldering… couldn’t find my solder wick and finally resorted to slightly more “brute force” methods.

On each side of the USB Mini-B charging port there is this solder you need to remove. Desolder or…

I quickly grinded it off with the dremel cutting disk and then used my razor knife to “lift” it while heating the top and bottom solder/pins. Time consuming and a PITA. If you have good solder wick i think you’d have this done in just a few minutes. I went slow and fiddled with it for entirely too long, but got it done eventually.

Battery steps:

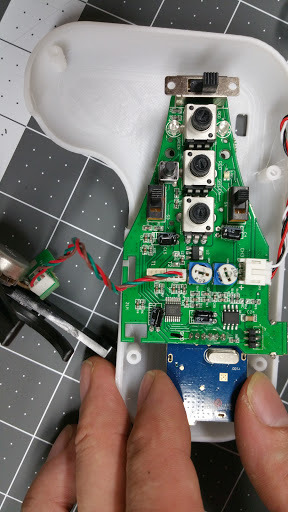
Pry/peel off the plastic and cover around the battery. I immediately made sure to label + and - , just to be extra sure i dont mix them up.

Test fit in other half of enclosure.

Waste not want not

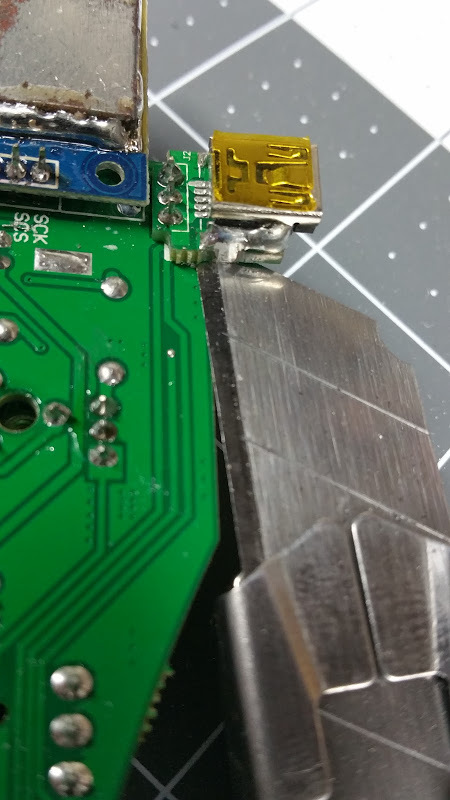
Donor wires for both the battery and relocating the USB charging port (don’t throw these away).

A bead of solder on the + and - terminals on the battery, notice i kept the connector for the battery to connect to the PCB. Instead of hard wiring/soldering it later i could replace it easily.

Some electrical tape around the perimeter then gorilla taped it up.

a simple loop of the antenna and electrical tape to hold it in place at the bottom.

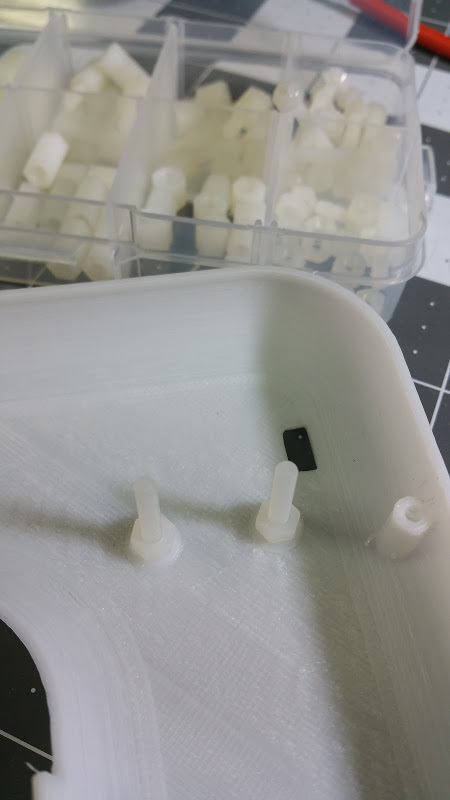
I was going to run to the hardware store for the extra m3 screws i needed, then remembered i had this “standoff kit” from Amazon for a quadcopter KK board - perfect!

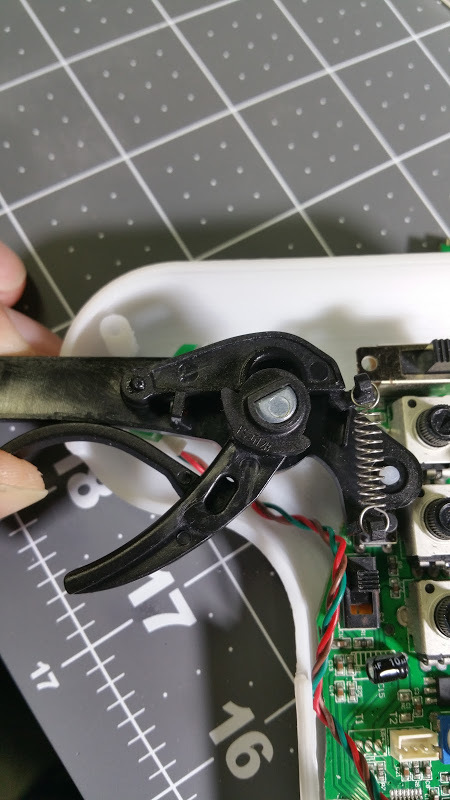
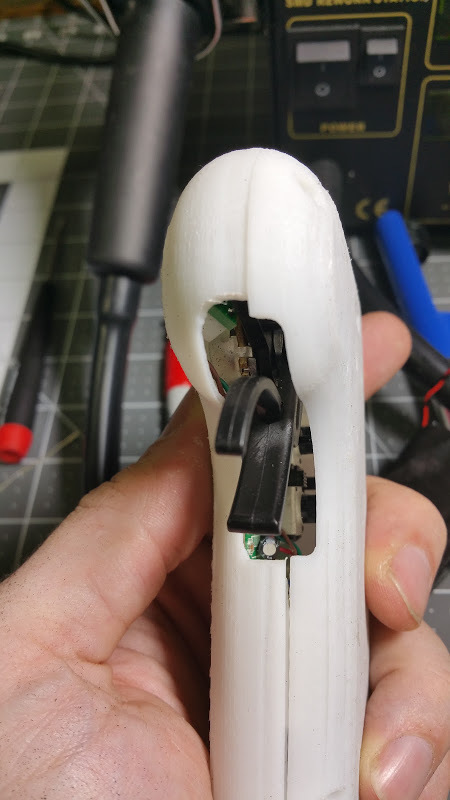
Getting close to completed. I’m not sure if it was just my print, or if all of them are going to be like this, but i found the range too restricted for full throttle to full brake on my enclosure.

I got it pretty well lined up. Notice the almost flat bar extending out from the trigger pivot. I marked it w/ a sharpie to cut and tried to keep it snug for good stability (going to be pulling/pushing on it). I also notched out the part that slides down onto the m3 bolt so it went around both the bind and one of the adjustments (throttle iirc).

Bent the backside of the throttle/trigger board to sit flat (but contact the enclosure for more support).

You can see how much i cut away to give full throttle range.

re-using the wires from the handle, the 3 wires to the USB Mini B charging port

A bit of a closeup of the battery and charging ports. Note that the USB charging port does use all 3 wires, but since i had to mangle it a bit when desoldering the port, i put the white wire in the middle to the bottom side (more room to work at the time as well). So top has black and red, with the middle white connected on the bottom. You can also see the notched out part of the throttle assembly to clear the bind button and throttle adjustment. To keep it straight (what does what), i used the label from under the top cover to help keep them ID’d.

Pretty much ready to screw it together and test. Note - use the shorter screws to hold the halves together. The longer ones i tried on the two bottom broke off part of the screw hole they went into. I used the shorter screws on the top 2, then used the longer ones on the two bottom holes. If you brake off the screw hole bottom piece - just re-use the longer screws. I’ve had it apart a few times already and seems to be holding up ok w/ me being careful not to try to tighten it down too much. Could be typical, or just the lower quality print (medium quality on 3dhub)…

Moment of truth:

plugged in and charging! I then got it to bind up and control my board w/o any trouble.

Some issues i had:

  • On/Off extension did not line up for me. So i have to use a straw/keys/long-pokey-thing to turn it on.
  • Broke the bottom 2 screw holes w/ longer screws from too much force/too thin or poor quality print, or gunk in the screw hole splitting it?
  • I’m an idiot. I wanted to dye the plain white PLA printed enclosure. Directions on the RIT dye say to use boiling water. Don’t do that. One of the two enclosures is permanently warped. Hot tap water actually did great cleaning up the adhesive residue w/ some soap before mounting the electronics into it. seemed to also make the enclosure less “flexy” and more rigid w/o warping it. I think my hot water heater is set around 125*.
  • 680 Ohm resistors - not currently used. Seems to work fine, but wanted to try it both ways. (anyone with specifics on why you need them please chime in!)

I have 100 of the 680 Ohm resistors. If anyone needs a pair for their new enclosure, just PM me. I’ll ask you to send a stamped envelope so i can drop them back in the mail to you.

Bench testing this worked fine. Will try to get it out and ride it soon. Great conversion on the GT2B - now fits in my pocket!!

I hope this helps the next person trying to do this, and let me know if you have questions. (Please like this post if it helps you)

-Rob

4 Likes

This is an excellent post! Thanks for sharing. I’ve had a printout of BadWolf’s mod shell sitting on my desk for months now, and i keep finding other things to do besides start this project. Things like fiberglassing a new enclosure and setting inlaid motor wires (as in epoxied into channels in the deck) between my box and the rear truck, which i will be posting here very soon.

But what has me so very interested in this particular post is that you used the existing battery pack. The mod tuts I’ve seen suggest buying a smaller lipo pack to squeeze it into the remote handle. Here you didn’t have to do that. I think tonight when I get home i’m going to take another look at my GT2B battery and see if the badwolf version I have printed out will take it. If so, I have less of an excuse for not doing this.

His v1 (angular edges vs rounded) still requires a smaller battery. And relocating the power switch (which i might end up doing since mine doesn’t line up).

1 Like

this is a really good how to. you have made a much nicer control than the clunky GT2B.

however it does seem like a lot of work when the wii nunchuck is readily available and practically plug and play.

True. I actually really like my wiiceiver setup on GF’s board. BUT in some areas w/ lots of 2.4 interference - it disconnects frequently which sucks. Luckily I’ve never had any major issue, but i’ve heard horror stories about run-aways and crashes as a result.

GT2B is rock solid and rechargeable. Now it’s also pocketable!

I have solved the wii ceiver drop outs by soldering the nunchuck reciever dongle direct to the board. no more drop outs.

Nice @ lowGuido. I’ll keep that in mind. Do you have your Wiiceiver set away from your motor wires?

GT2B is 100% rock solid. I need to make a new badwolf enclosure that doesn’t require any soldering or re-positioning any components.

Hey Torque - i think this is doable w/ a bit of ingenuity. I think you could knock out a square’ish hole for the USB charging port to stick out the back bottom of the case. It would probably poke your palm if you have a death grip, but perhaps a small piece of sugru to mold it would probably work!

The desolder and reposition of the USB charging port was definitely the hardest part for me. With some desolder wick and practice it shouldn’t be too hard. I just suck at desoldering i think.

Don’t forget lots and lots of hot glue! Mine is not going anywhere, anytime soon…

Hey sl33py, I think that the white wire is the data cable. I might be wrong but maybe it delivers the signal when channel 3 is clicked?

@lox897 - yes, that makes sense. Two wires from battery, then 3 from CH3 switch (in grip handle) to the power plug on PCB.

When i saw Badwolf use 3 wires on his v1 setup, i simply mirrored that on this v2 setup. The desoldered USB Mini-B charging port has 3 wire leads to connect to. Unsure what the 3rd wire is used for, but it doesn’t hurt to have it from my experience (charging fine). Likely not needed though.

Here’s the v1 image i saw that showed the 3 wires used for the USB charging port:

how do you guys using the GT2B go about cruising? is it easy enough to hold a consistent speed? maybe my next build will use a GT2B.

Definitely easy to cruise. While you don’t have a “cruise control” button like wiiceiver, i haven’t had issue holding a steady speed on my longer 6-9mi cruises. BUT that is with a fair number of people traffic so quite a bit of slowing down and re-accelerating as well.

Even if you don’t convert into the smaller badwolf enclosure, the GT2B is a fantastic Tx!

I have two GT2B controllers, one wii receiver, and two boards.

the wii receiver has been used a few times, but the GT2B is just solid- the only negative being size, which still, isn’t too bad. Not only is it still easy to maintain a cruising speed, but I just feel like the throttle inputs are much more precise and less jerky. You also don’t have to worry about pairing it, or the signal cutting out… it just plain works.

2 Likes

ditto on all of that. I love my GT2B. Even on hour and a half cruises at lower speeds its no problem. Also, its tough. I’ve dropped mine i don’t know how many times and have even broken it, but its easy to fix when it does break and it takes quite a beating to break it.

1 Like

i just uploaded the v2 models from Thingiverse into Shapeways and it looks like its about $50 to have all three pieces printed there in strong, polished plastic. For those of us without access to a 3D printer, that’s not a terrible deal, especially since you can get it in just about any color you want, though they seem to have slightly different prices for colors than for black or white, but it only varies by about a dollar. That puts you at about $70 or $80 total if you include the price of the remote itself.

You can also get your Bad Wolf in stainless steel for about $150 if you so desire. Or even porcelain for around $70 if you want to print one for grammy’s curio. They do different materials for the switch because its a smaller size, so don’t be afraid to drop $430 on an 18k Gold switch if you just have to have that bling. lol

Importantly, USPS First Class shipping looks to be about $5 for these parts. This is certainly one case where they’ve got UPS Ground beat by a large margin.

1 Like

I did the same for my last two (i have 3 now). I go the polished strong plastic as well. Nice matte look. Unfortunately i don’t think it’s as thick as one i got just doing cheap-o PLA from 3dhubs. Much nicer finish, but thinner walls and the screw holes sucked to hold it together. Ended up ghetto gluing it together so if it ever breaks it’ll be a PITA to get into and fix. But looks good in orange and pink matte.

I’d really love to see a v3 with thicker walls throughout. Sturdy and make the screw holes more secure.

1 Like

question to you guys that are stateside, how much is a nyko karma delivered?

I have a couple. Typically around $10 on ebay shipped. Might need a little searching but that was my going rate a while back.

far out… cost me like $40 AUD to get one here…

on topic… has anyone tried vacuum molding ABS into a shape like bad wolf’s box?

I may try something soon.