just wanted to give a quick headsup on the trampa urban carver Im working on and since you can pretty much just buy anything except for decent enclosures nowadays, I just wanted to show the works Ive done on my enclosure during the last few days!
already in early 2015 I had the idea of a segmented carbon enclosure to allow flex - back then with my topspeed:
… but a bargain vanguard passed my way back then and i never went through with it - instead for the last 2 boards I always used split enclosures closely at the trucks to preserve a boards natural flex as good as possible.
well, today is the day for my first segmented carbon enclosure, since the trampas are too short for short split enclosures and I was tired of the ugly boxes on top of the decks. and oh boy, it was probably the hardest thing I have done so far with vacuum and carbon. 
I started to make wood forms with pleasantly rounded 0.5cm radius edges. 5 of these segments are 14x8cm to give room for 2x4 18650 cells for a 10S4P segmented battery. finally a larger segment 14x11cm for dual vesc and a switch. I used double adhesive tape to fixate the wood blocks on the trampa, which has no concave, so it was kinda easy to do.


I then covered the blocks with separation foil - kinda a tough kind so I wouldnt mess with resin on board and wood blocks. each segment in the picture is separated by a small wood spacer that I covered with clear tape, whose dimension should fit exactly between each segment once I got all the glas & carbon layers set up.

at the sides of the wood block, I used very thin dbl adhesive tape to fold the separation foil in order to avoid too many wrinkles and to make application of resin and layups easy. its super annoying, when you do your layup on a separation foil and its moving around the whole time.

I then tried something new (bear in mind that this was actually already my 2nd try - the first try I had a lot of folding of carbon with separation foil. 
I made the total layup dry - 2x 400gr/m^2 glas, 2x 200gr/m^2 carbon, each time using the wood spacers to bring each layer of fabric into form using my fingers to bent the fabric around all the edges so that it would follow the mold halfway well. THEN I started to use resin and tried to soak the whole 4 layers at once, working it in with a roller and trying to keep the layups snug to the mold as good as possible. while doing that I still had the wood spacers in like in my previous picture! sadly I got no pictures of this process, since it was already way past midnight and I quickly had my hands full with resin.
in the end when I felt everything was wet down to the separation foil, I removed the wood spacers and carefully put a bleeder layer ontop (separation foil with small holes in it):

you can see that each segment still looks kinda bloated without good definition of the mold form, but its following the mold halfway well and it doesnt have supermany wrinkles. I carefully laid the bleeder to avoid a dangerous foil carbon folded wrinkle (hard to explain, but its basically a carbon->foil->carbon layup that can happen when foil and carbon wrinkle together).
finally I added the soaking layer (again as wrinkle free as possible) and added the wooden spacers back into the mix - then off with it into the vacuum bag! I kept massaging the segments for a quite long time in order to make sure that I had no dry patches - you can see very well where you have excess resin by looking at the soaking layer. was kinda paranoid that I would get try patches, since the way I added the resin was a little similar to resin infusion.

after 24hours curing I removed the enclosure from the vacuum bag - it looked quite decent, no dry patches … just the wood spacers and wood molds didnt really come out without a fight:

I drilled small holes, inserted a screw and pulled the wood blocks and wood spacers out:
after cutting and some sanding of a few wrinkles, the enclosure now looks really nice:


and it flexes really easily:


and the beauty of vacuum bagging: it just fits!


for the battery that will run on the inside: on my first test I realized that I wont be able to really get the interconnections of each segment completely flat with my wood spacers - and I also realized that a lot of resin will just be in the area between the segments below the wood spacers - just enough that I can actually dremel a few flat channels without hurting the fabric and run battery cables through there! 


 Great job as always
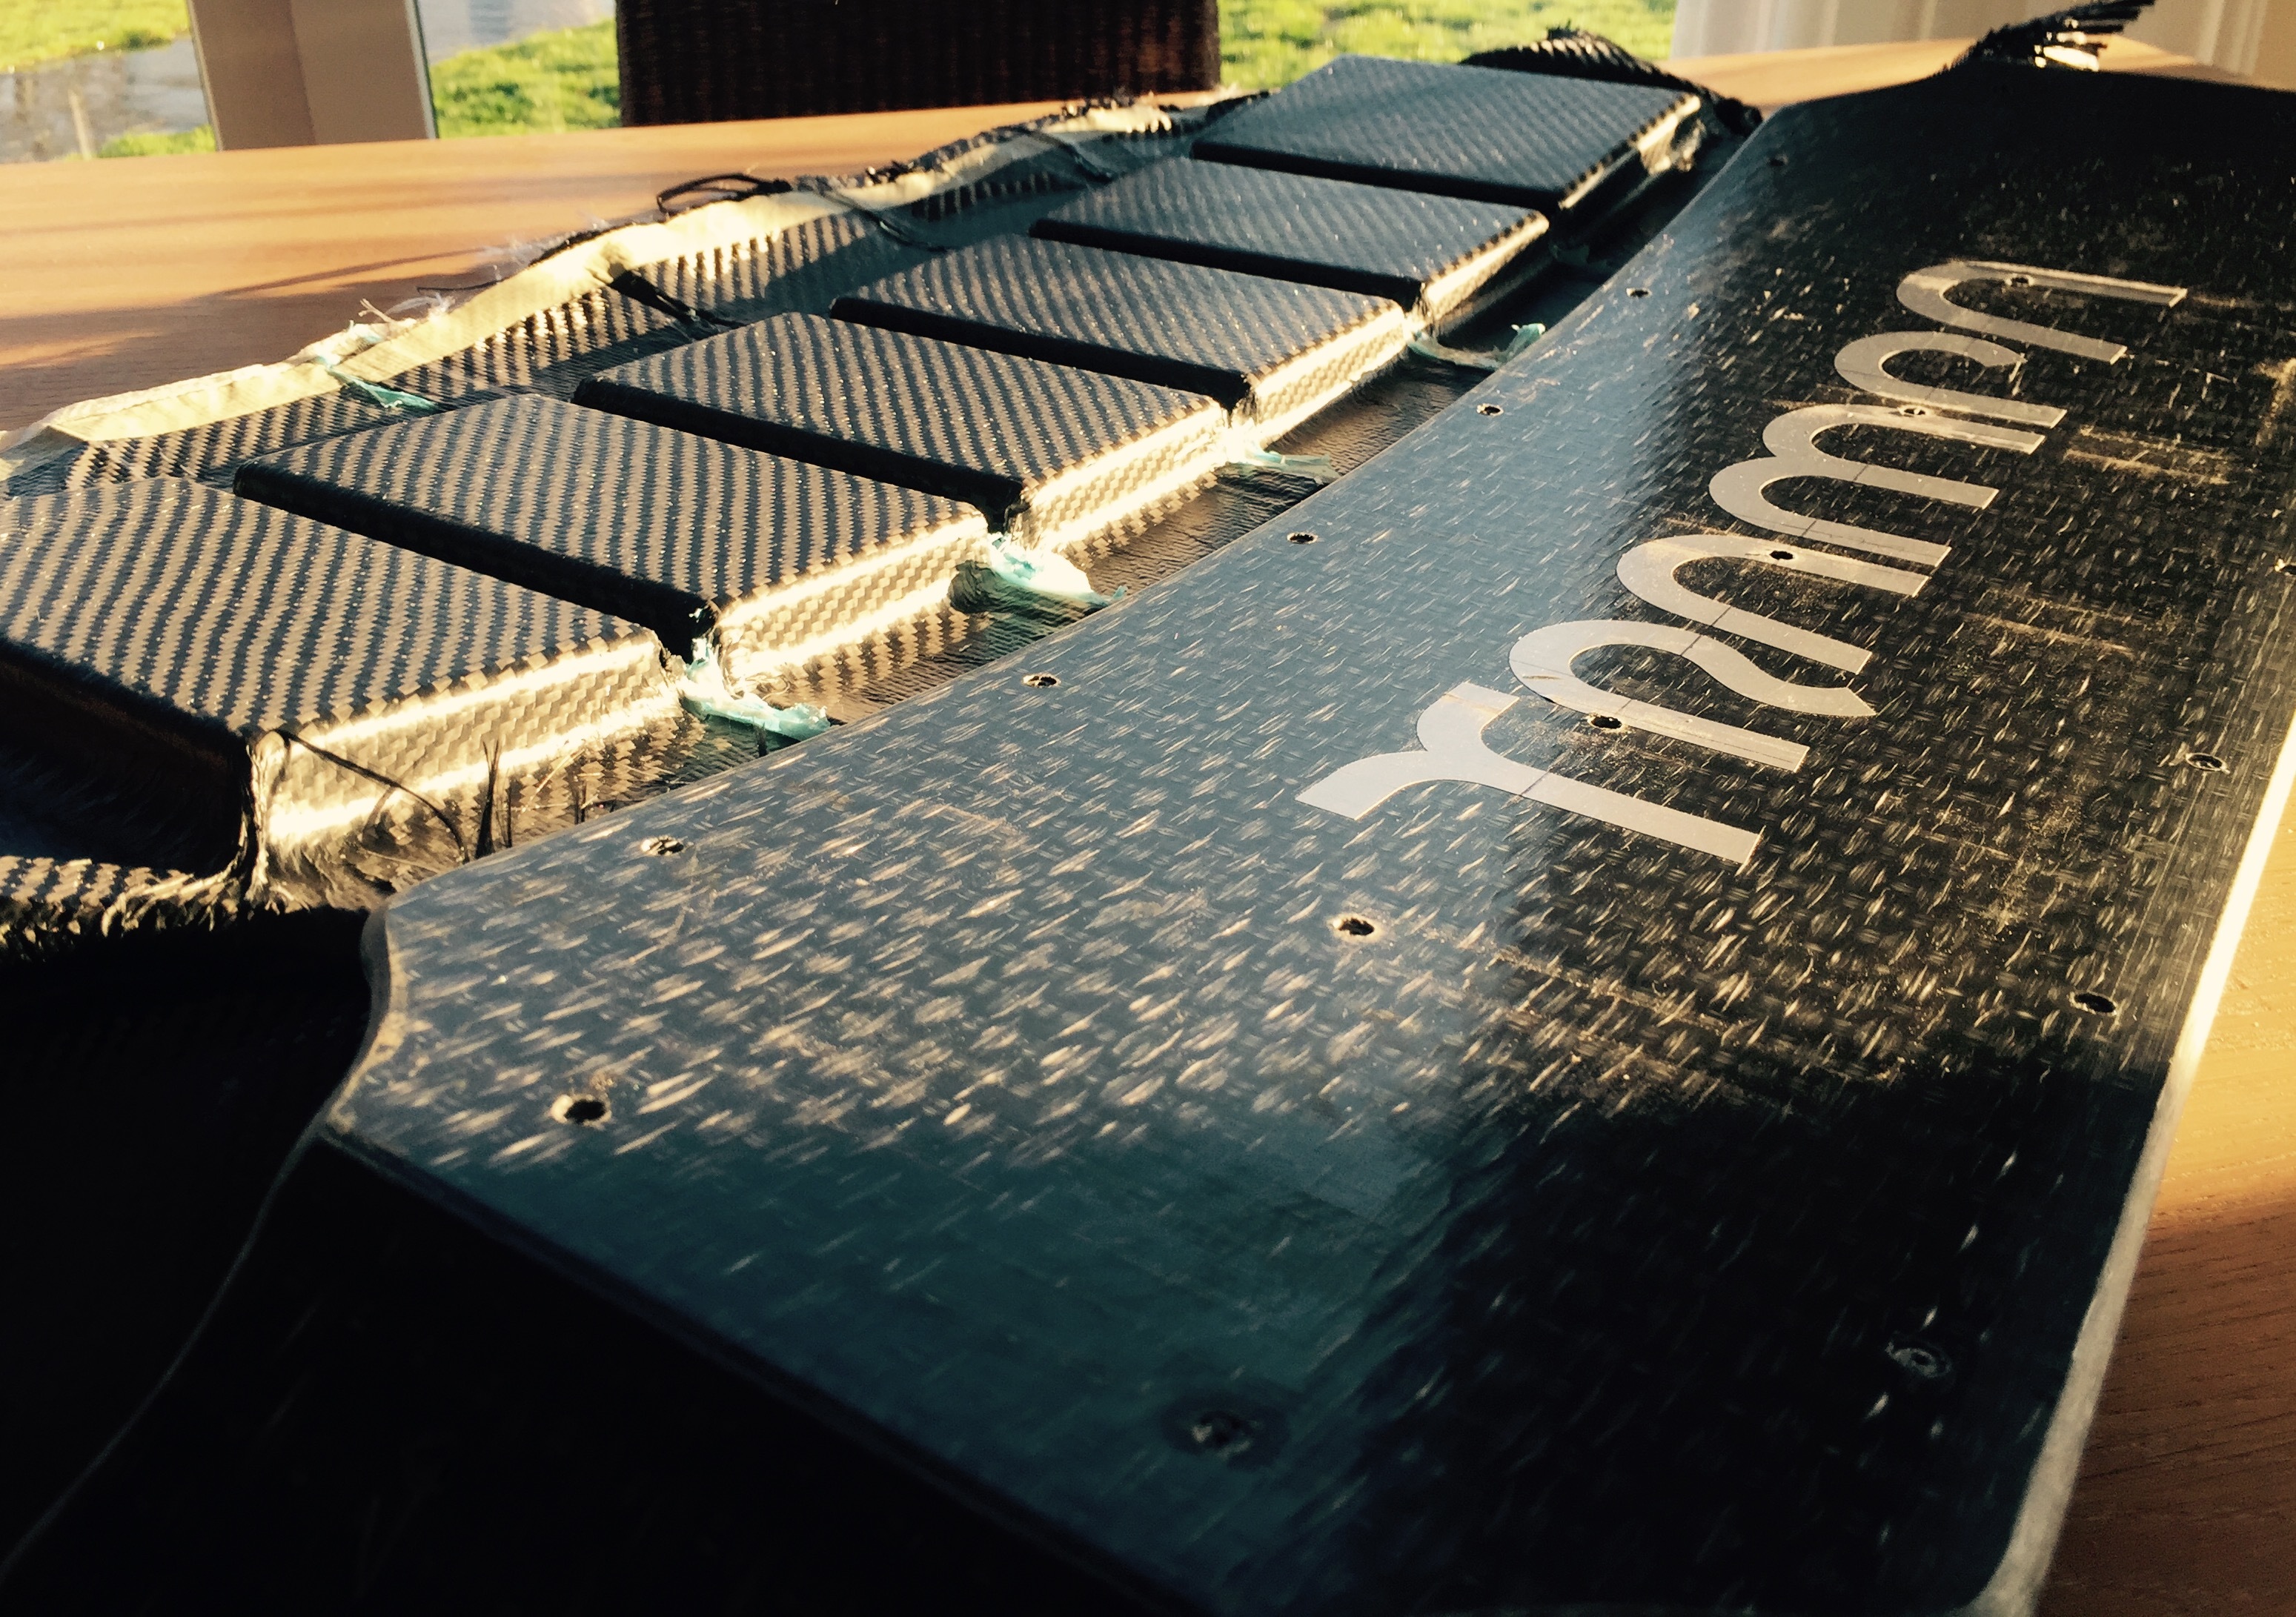


 ill make the enclosure just a little bit slimmer and use my typical screw combo.