The other photo with another riser on top looks like it would close it all in though? Having the last sensor stacked on top?
It might, I’ll check tomorrow, though I recall it being higher than the riser when stacked like you said and the last thing I wanna do is injure the most annoying phase wire of the motors. I was gonna use the thin riser to ensure that there’s full contact with the deck & so the wires aren’t smacking up and down between polyurethane and wood. Should’ve le also contribute towards reducing vibrations.
One of the challenging things about this build is seeing if having such tall risers and wheels will gravely affect stability. I do want to eventually use an Endless Ride mode setting on this board.
Speaking of such… @Wajdi, will the person control panels come with that Push Assist mode you’ve been working on?
1 Like
Same concern as well. Hope that we can get them to fit somehow. I was under the impression that they would all fit in there maybe might need to shave down some parts on the riser to get them to fit stacked? Id hate to do so though. Wanted these to cleanly channel through and connect to the enclosure wire channel. So minimal exposure of the cables.
Still on the fence on pneumatics or gummies cause I dont want to get stuck if I get a flat on my first set unless i order a couple extra tires and tubes which is gonna up the cost even more 
I like the idea of keeping the wires snug between the deck and riser so I’ll try and look for a thin one like yours but preferably have some play for the wires to slide to prevent them from getting yanked on for whatever reason
Edit: No idea how I’m gonna achieve this and likely easier said than done but will post my findings when I get the chance to test
Maybe but there’s not a lot of room to work with [quote=“Wraith, post:23, topic:67040”] so I’ll try and look for a thin one like yours [/quote]
Gotchu bro, it’s a 1/8th riser pad.
Shouldn’t be too hard if you’re working on a short deck. I haven’t measured it out but I suspect that with the risers and motor mounts, the majority of the play will be inside the enclosure since the wires are long enough. I only worry about the wires playing too much and unplugging something… when the second focbox comes in I’m gonna commission someone to soldier and hot glue the canbus cable
1 Like
Sounds like a good idea. Thanks for the link! Ive got a Hummie deck so its much longer than your build but that play is mainly going to be caused by the tilting of the hangar so it should only have so much movement if what I imagine is right.
Yeah this is the orca spud so I expect it to be one of the most water resistant builds here.
Official theme song.

3 Likes
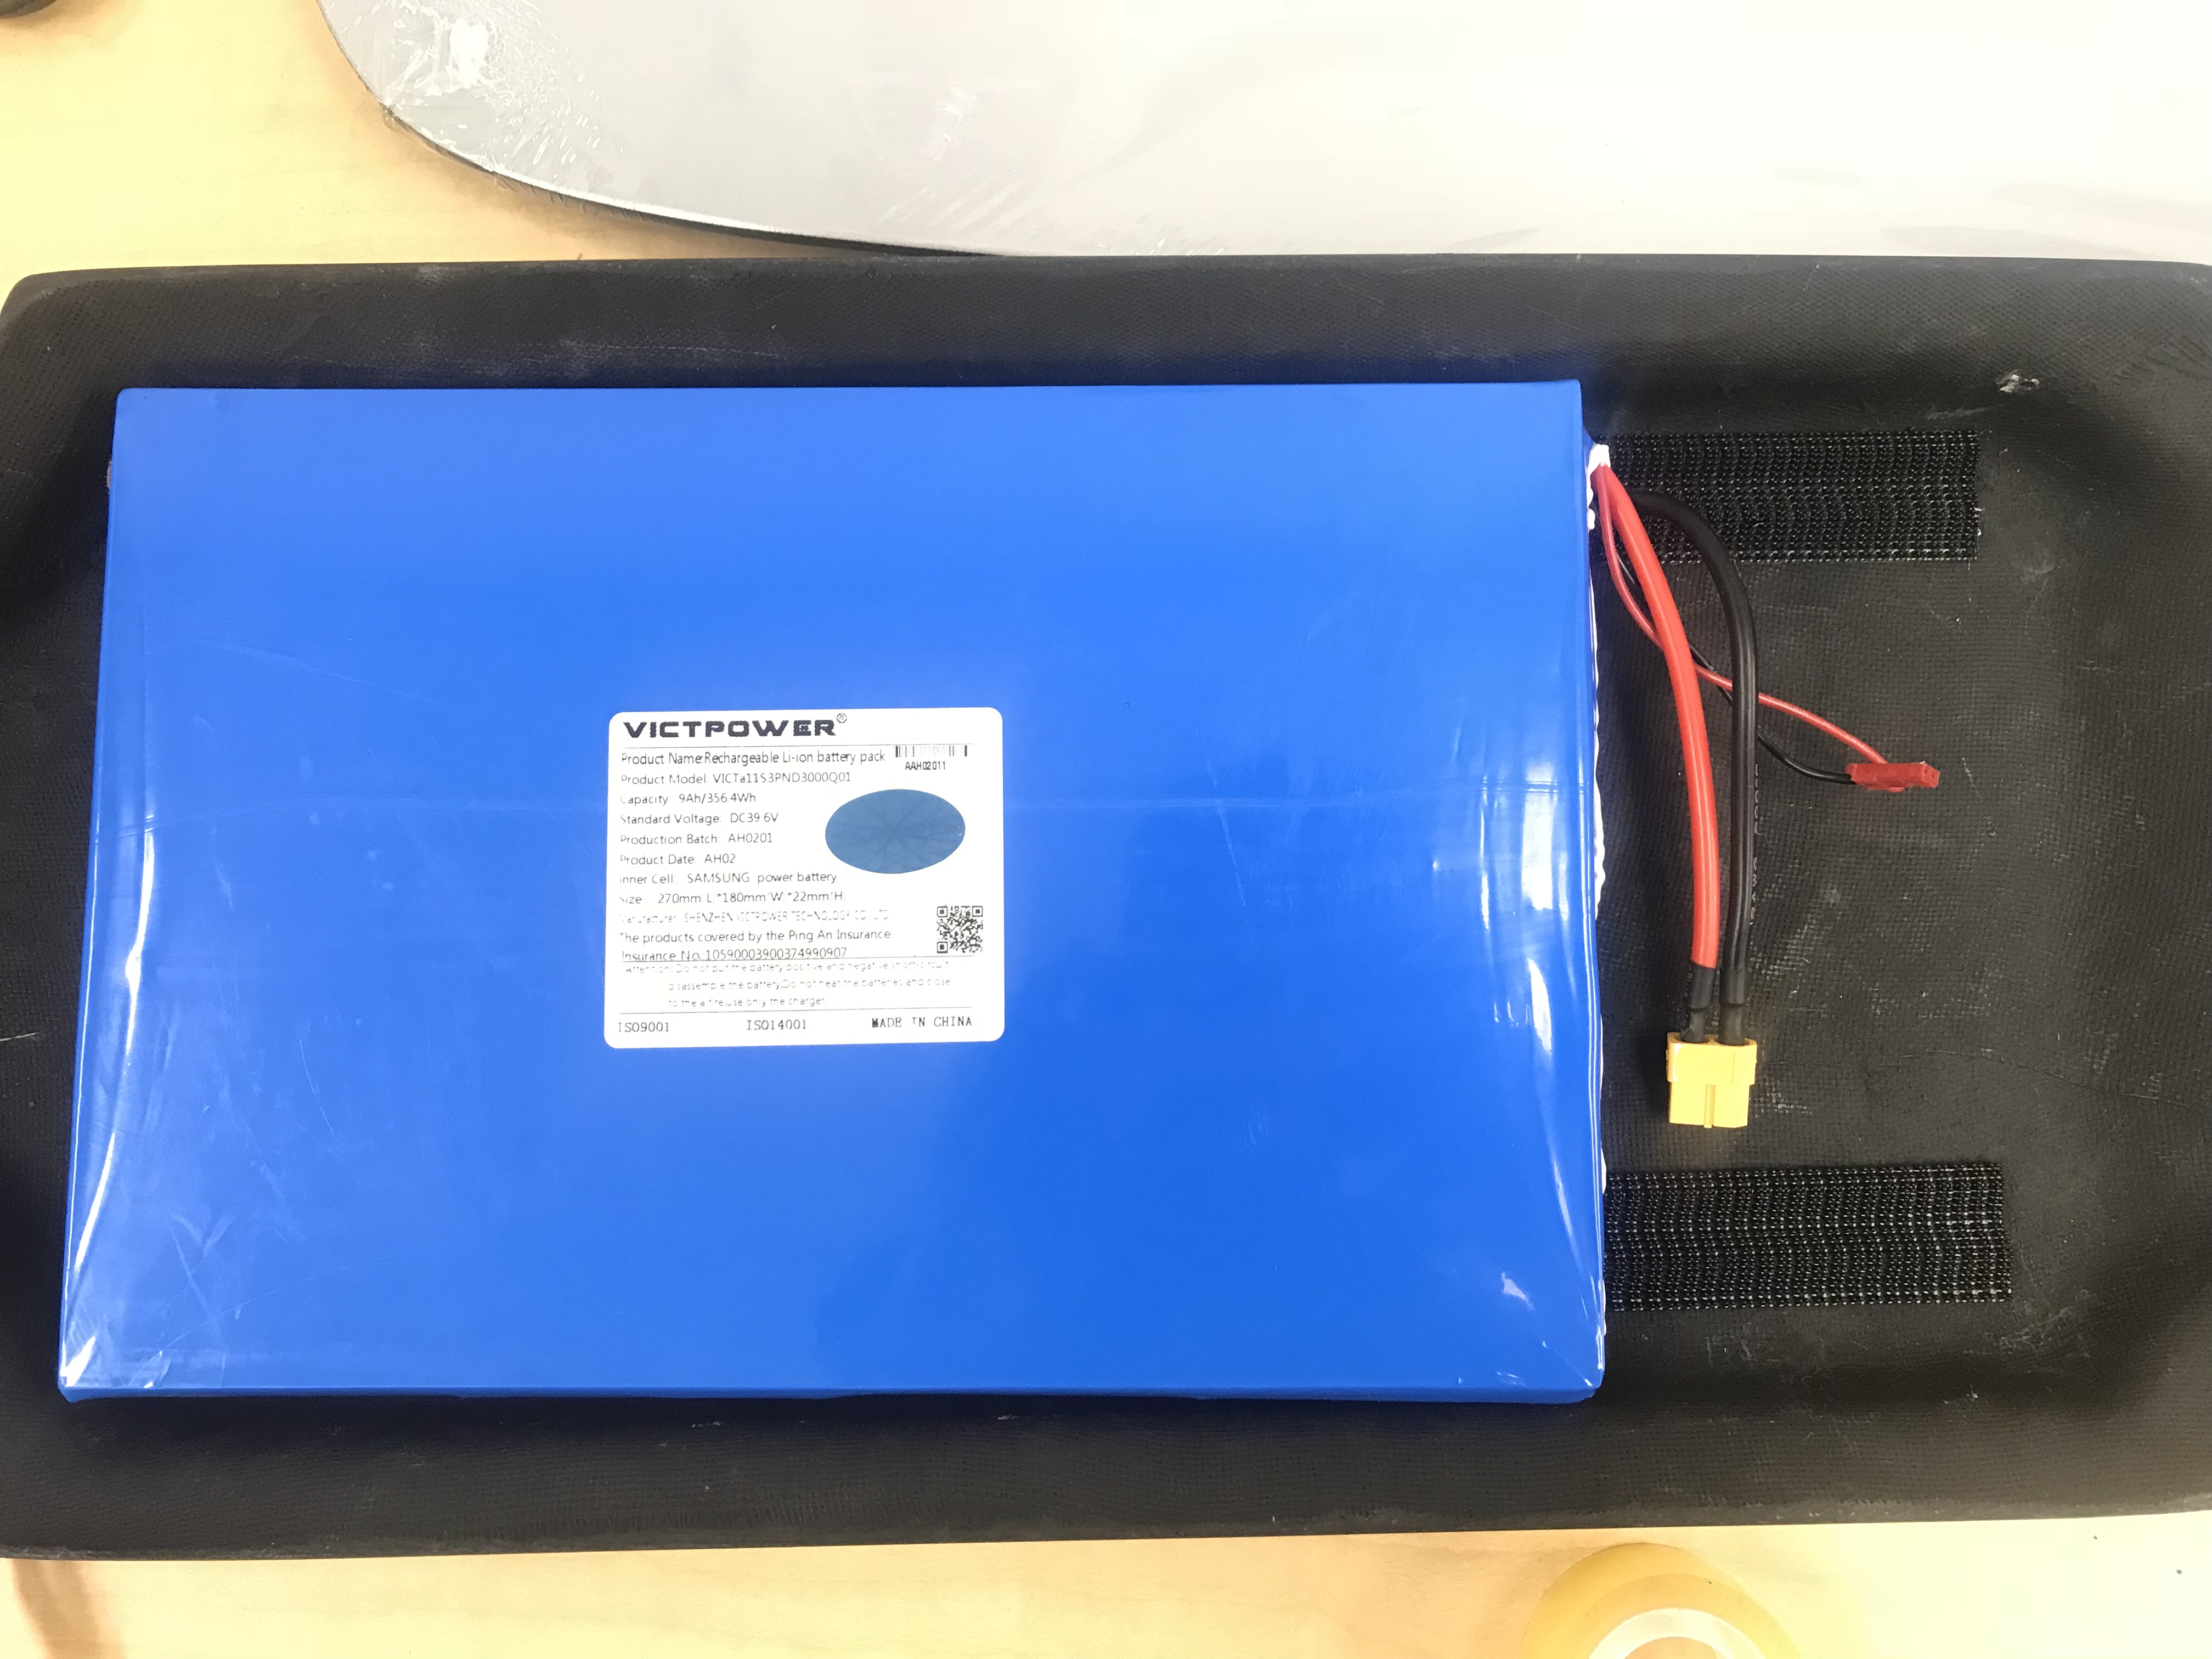
Is gonna be a super nice build. Love the Spud. Do you know which BMS is used for your 11s battery?
I believe it’s a Bestech BMS since it seems that @jlabs has a distribution kinda deal with them, but I’m not exactly sure. I do know you get 11s BMS via this website
Lol i was actually thinking of listening to this song if I ever hit 30mph
3 Likes
You could stack two tunnel risers ontop of each other mirrored. Then you have enough room for all cables. Could be too high then. Just a thought.
2 Likes
that actually makes sense. had to read it twice to picture it but yeah a 1 inch riser would be huge lol
1 Like
I’ll see but my concern is being that high ( I’m also complementing getting riser Bash guards) will lead to an unstable ride.
edit: Just tried out @catweazle’s idea here’s how it looks (keep in mind that one of them is a prototype hence why they’re different sizes.


4 Likes
Nah, they are too thick. If they only were narrower. It’ll probably be better to carve out a regular rubber riser.
@Jc06505n Yes Push Assist will be implemented on the Proton control panel, you will still need a remote control for braking tho. It might not be released right away, but it will be added as an update later on.
That wouldve looked good if it wasn’t so big. Thinking of widening or making the channel deeper but I don’t know if thats safe to do
Fun isn’t something one considers when emptying their wallet. But this… does put a smile on my face


I expect the package to arrive in my hands next week due to the way my university does their mail, but luckily it was delivered straight to where i needed it to. I wasn’t able to dive deep into things since I had to see Crazy Rich Asians (great movie btw). Too tired to do a full update , will fix this up tomorrow when I’m awake.
But here’s what I was able to do in short time:
- “Velcroing”
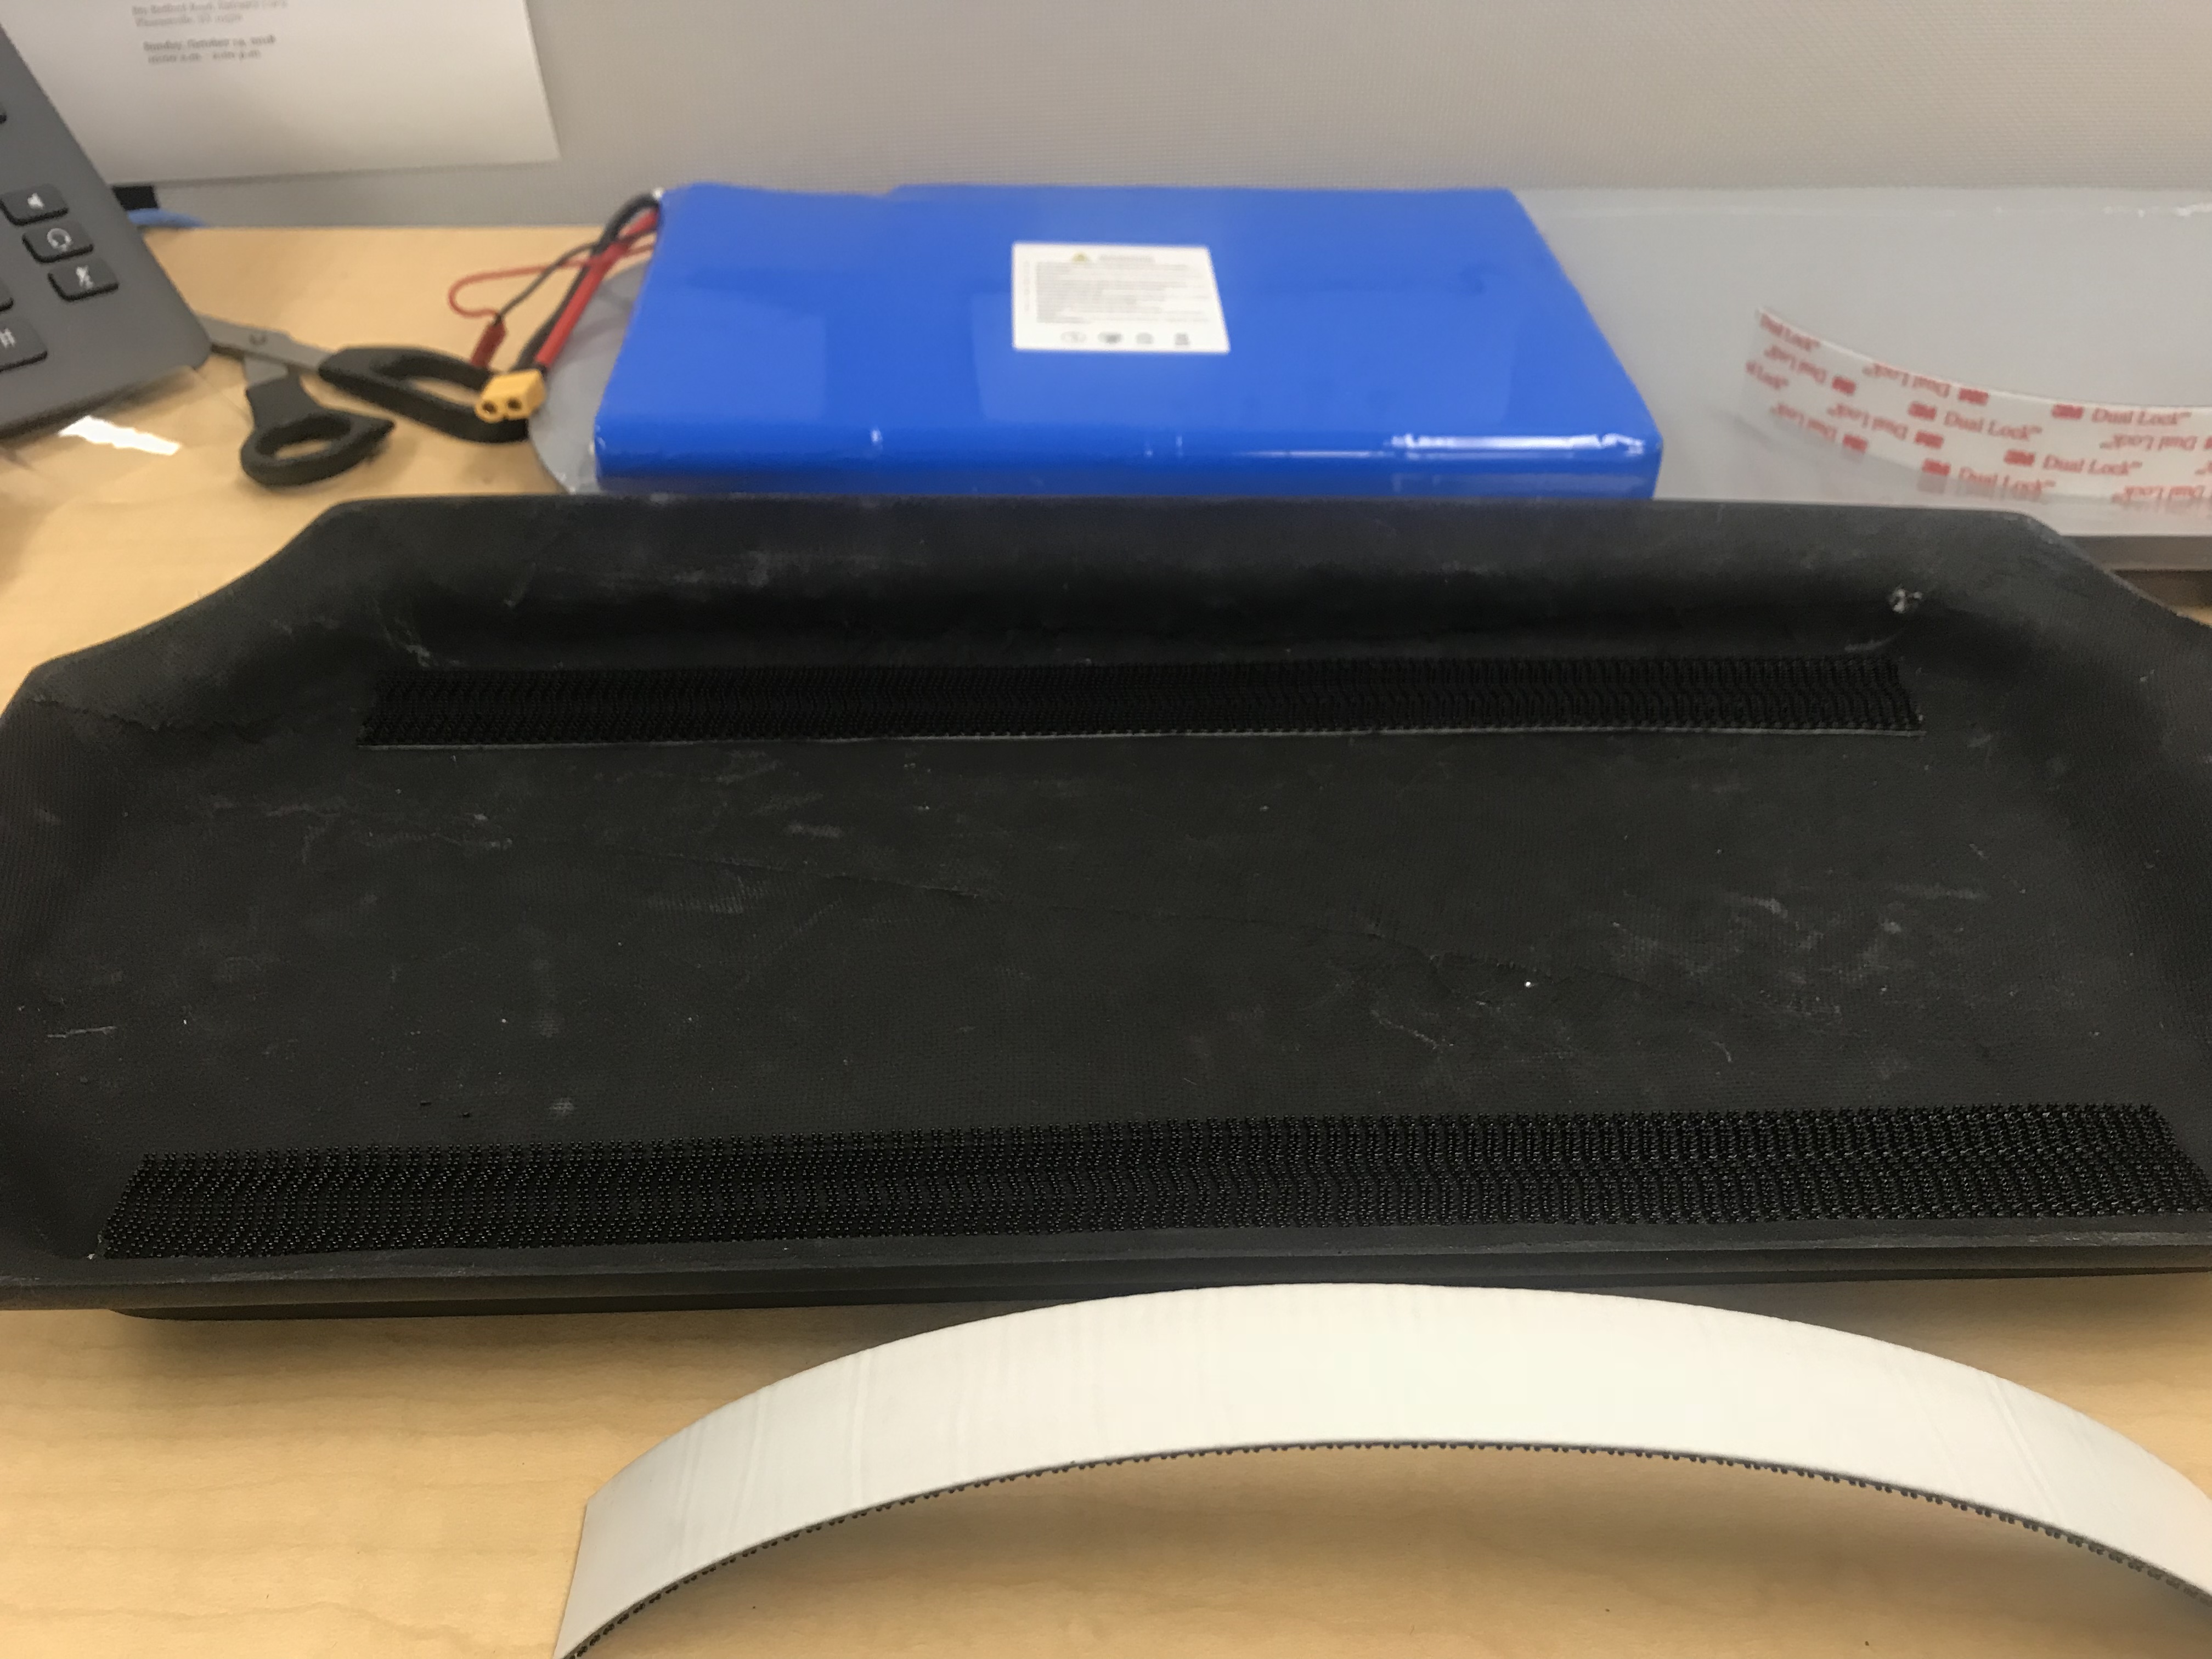
Safety is important to me (if not the most important) , and nothing is more dangerous than letting your electronics run loose in an enclosure. I need my shit locked down and locked down good. But I also don’t want to resort to using solutions that can be messy with a reckless hand (and I’m not a fan of liquid-solid stuff like glue, weird I know).
As such I opted to use Velcro (to be more exact 3M Dual Lock Reclosable Fastener)
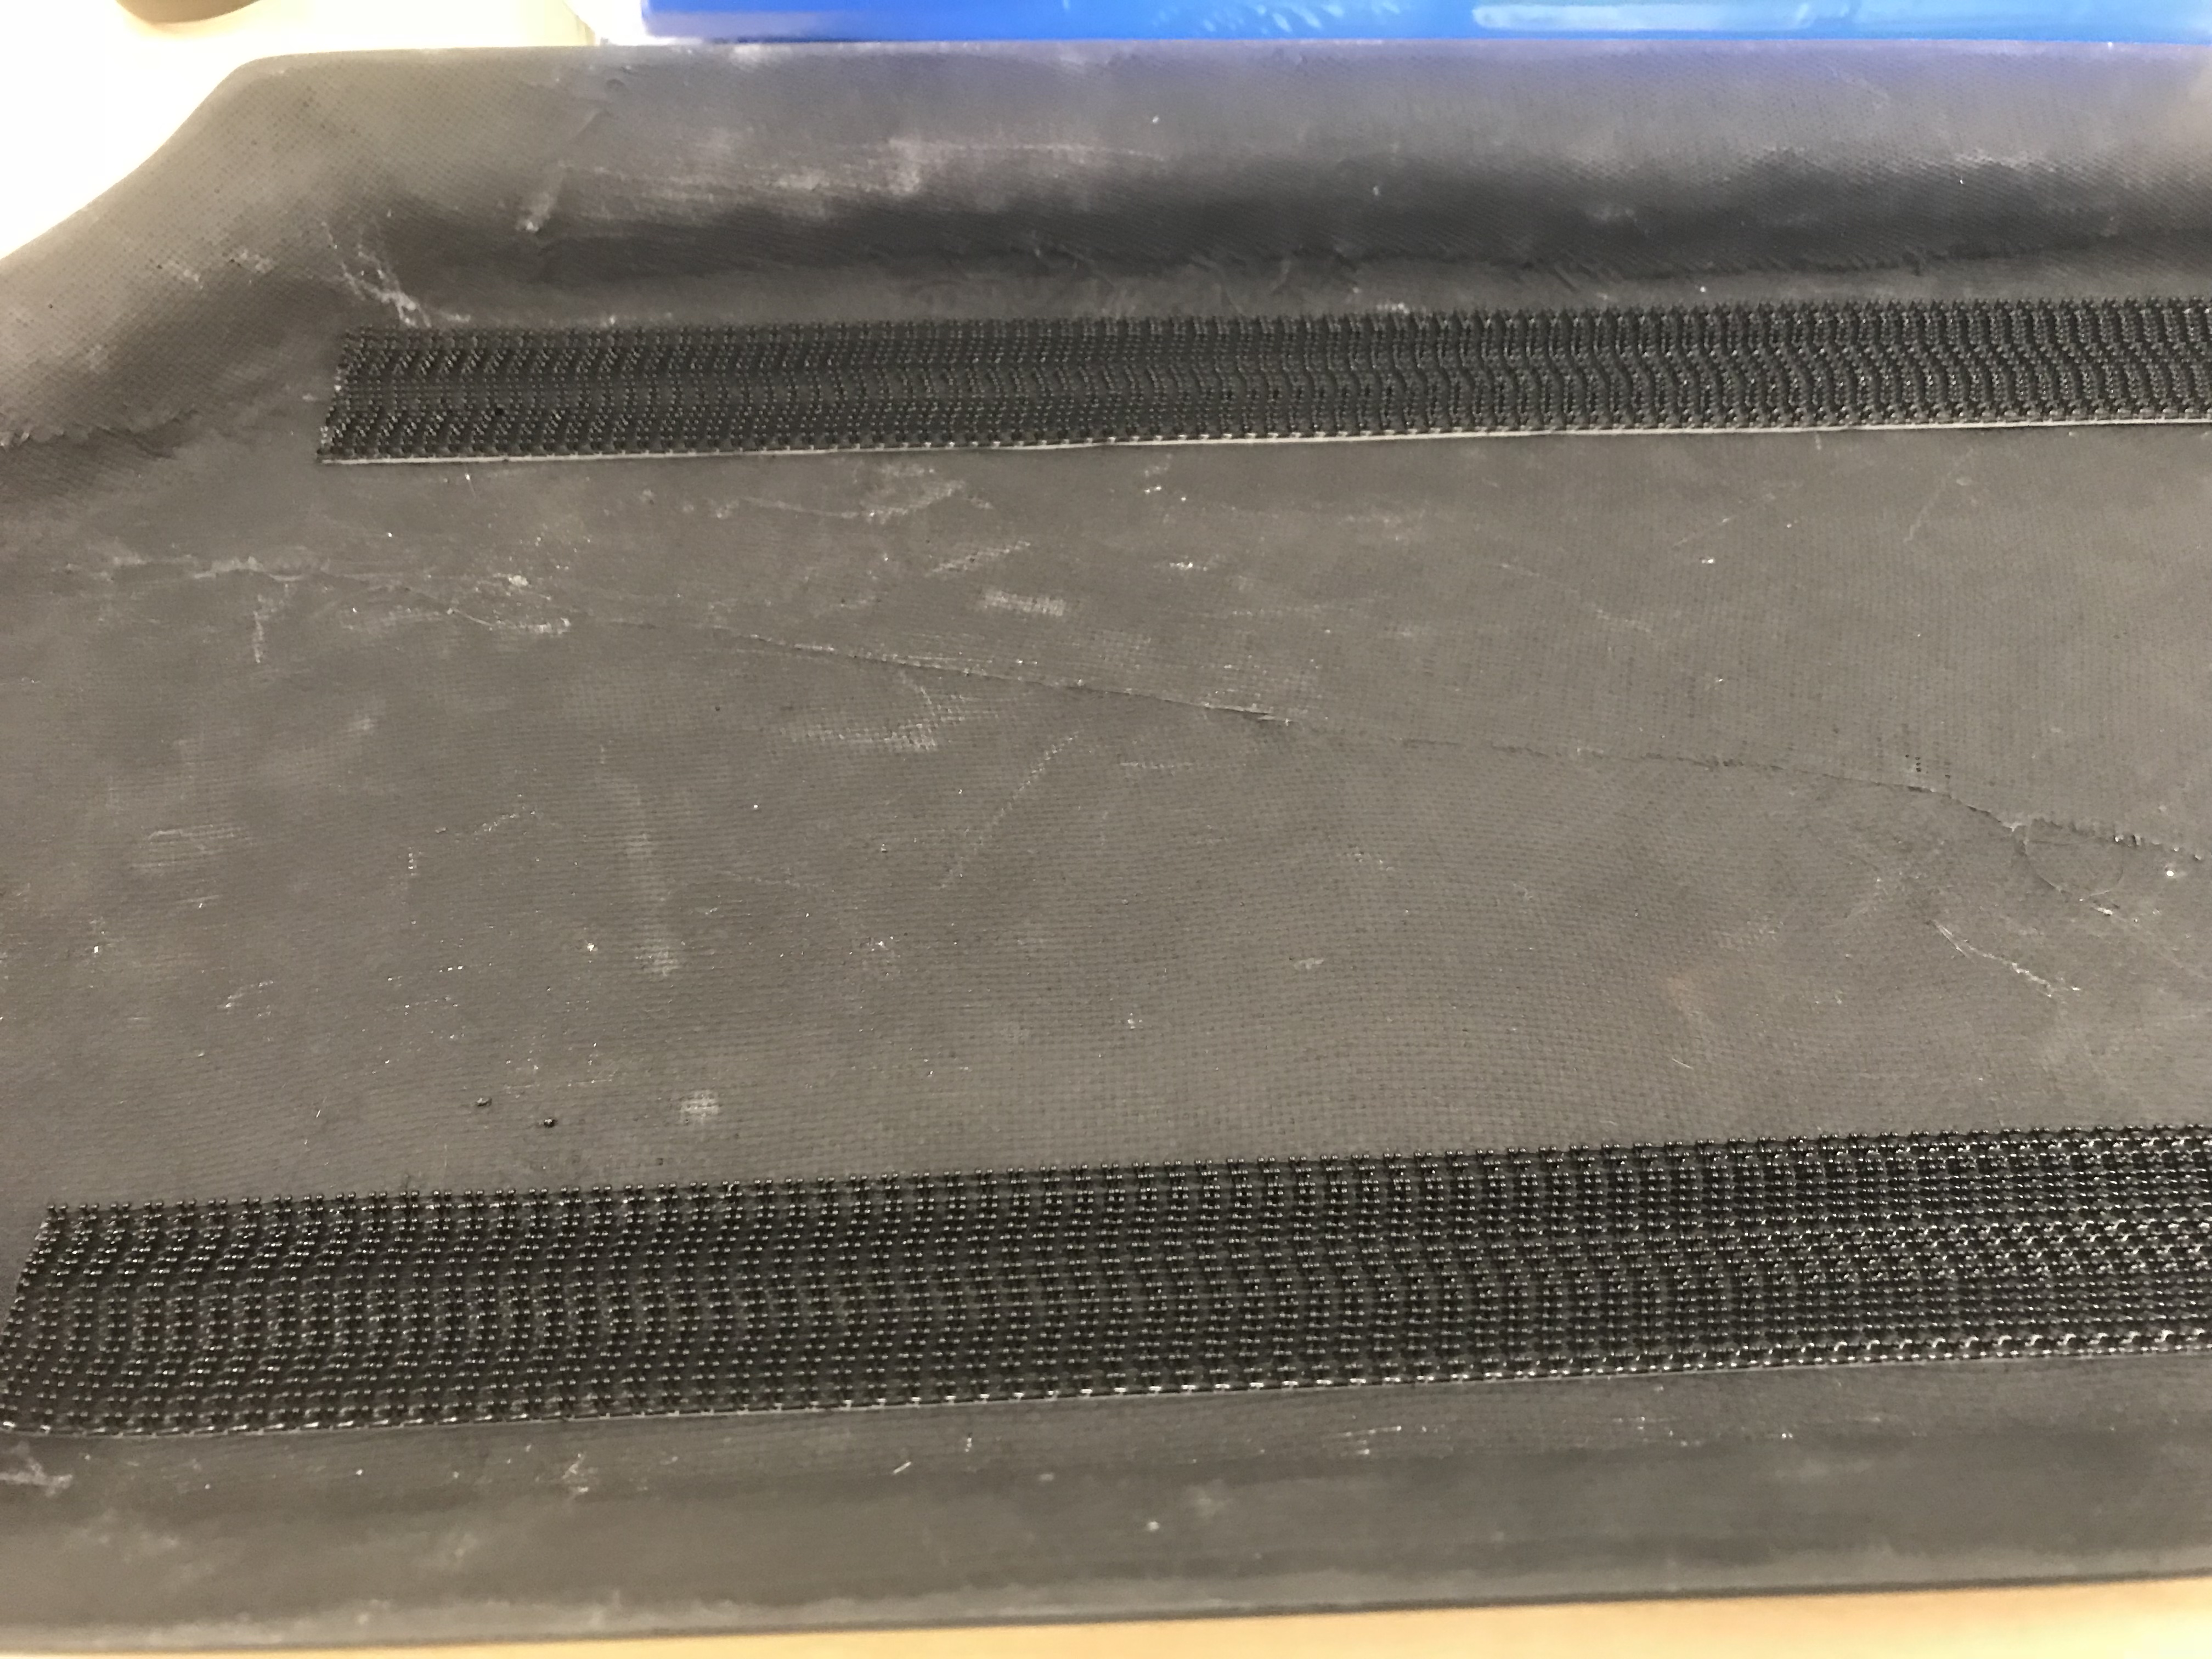
And it’s pretty freaking strong
https://im3.ezgif.com/tmp/ezgif-3-9e61735ada.gif
I’ll take better pictures once I’m back at the office and have time to.
For now I’ve outlined the two long sides of the enclosure with the Velcro and same with the battery. I plan on lining the whole length of the enclosure with Velcro so that all the electronics are secured down.
Still debating if I should leave Velcro out of the Area designated for the VESC’s to put a heat sink. Though , will a heat sink even do anything if it’s just occupying the space the VESC’s would ?
I also placed Velcro on the bottom of the 100A Antispark. , still have yet to have a concrete plan of where the electronics are going to be but I do have a rough idea:
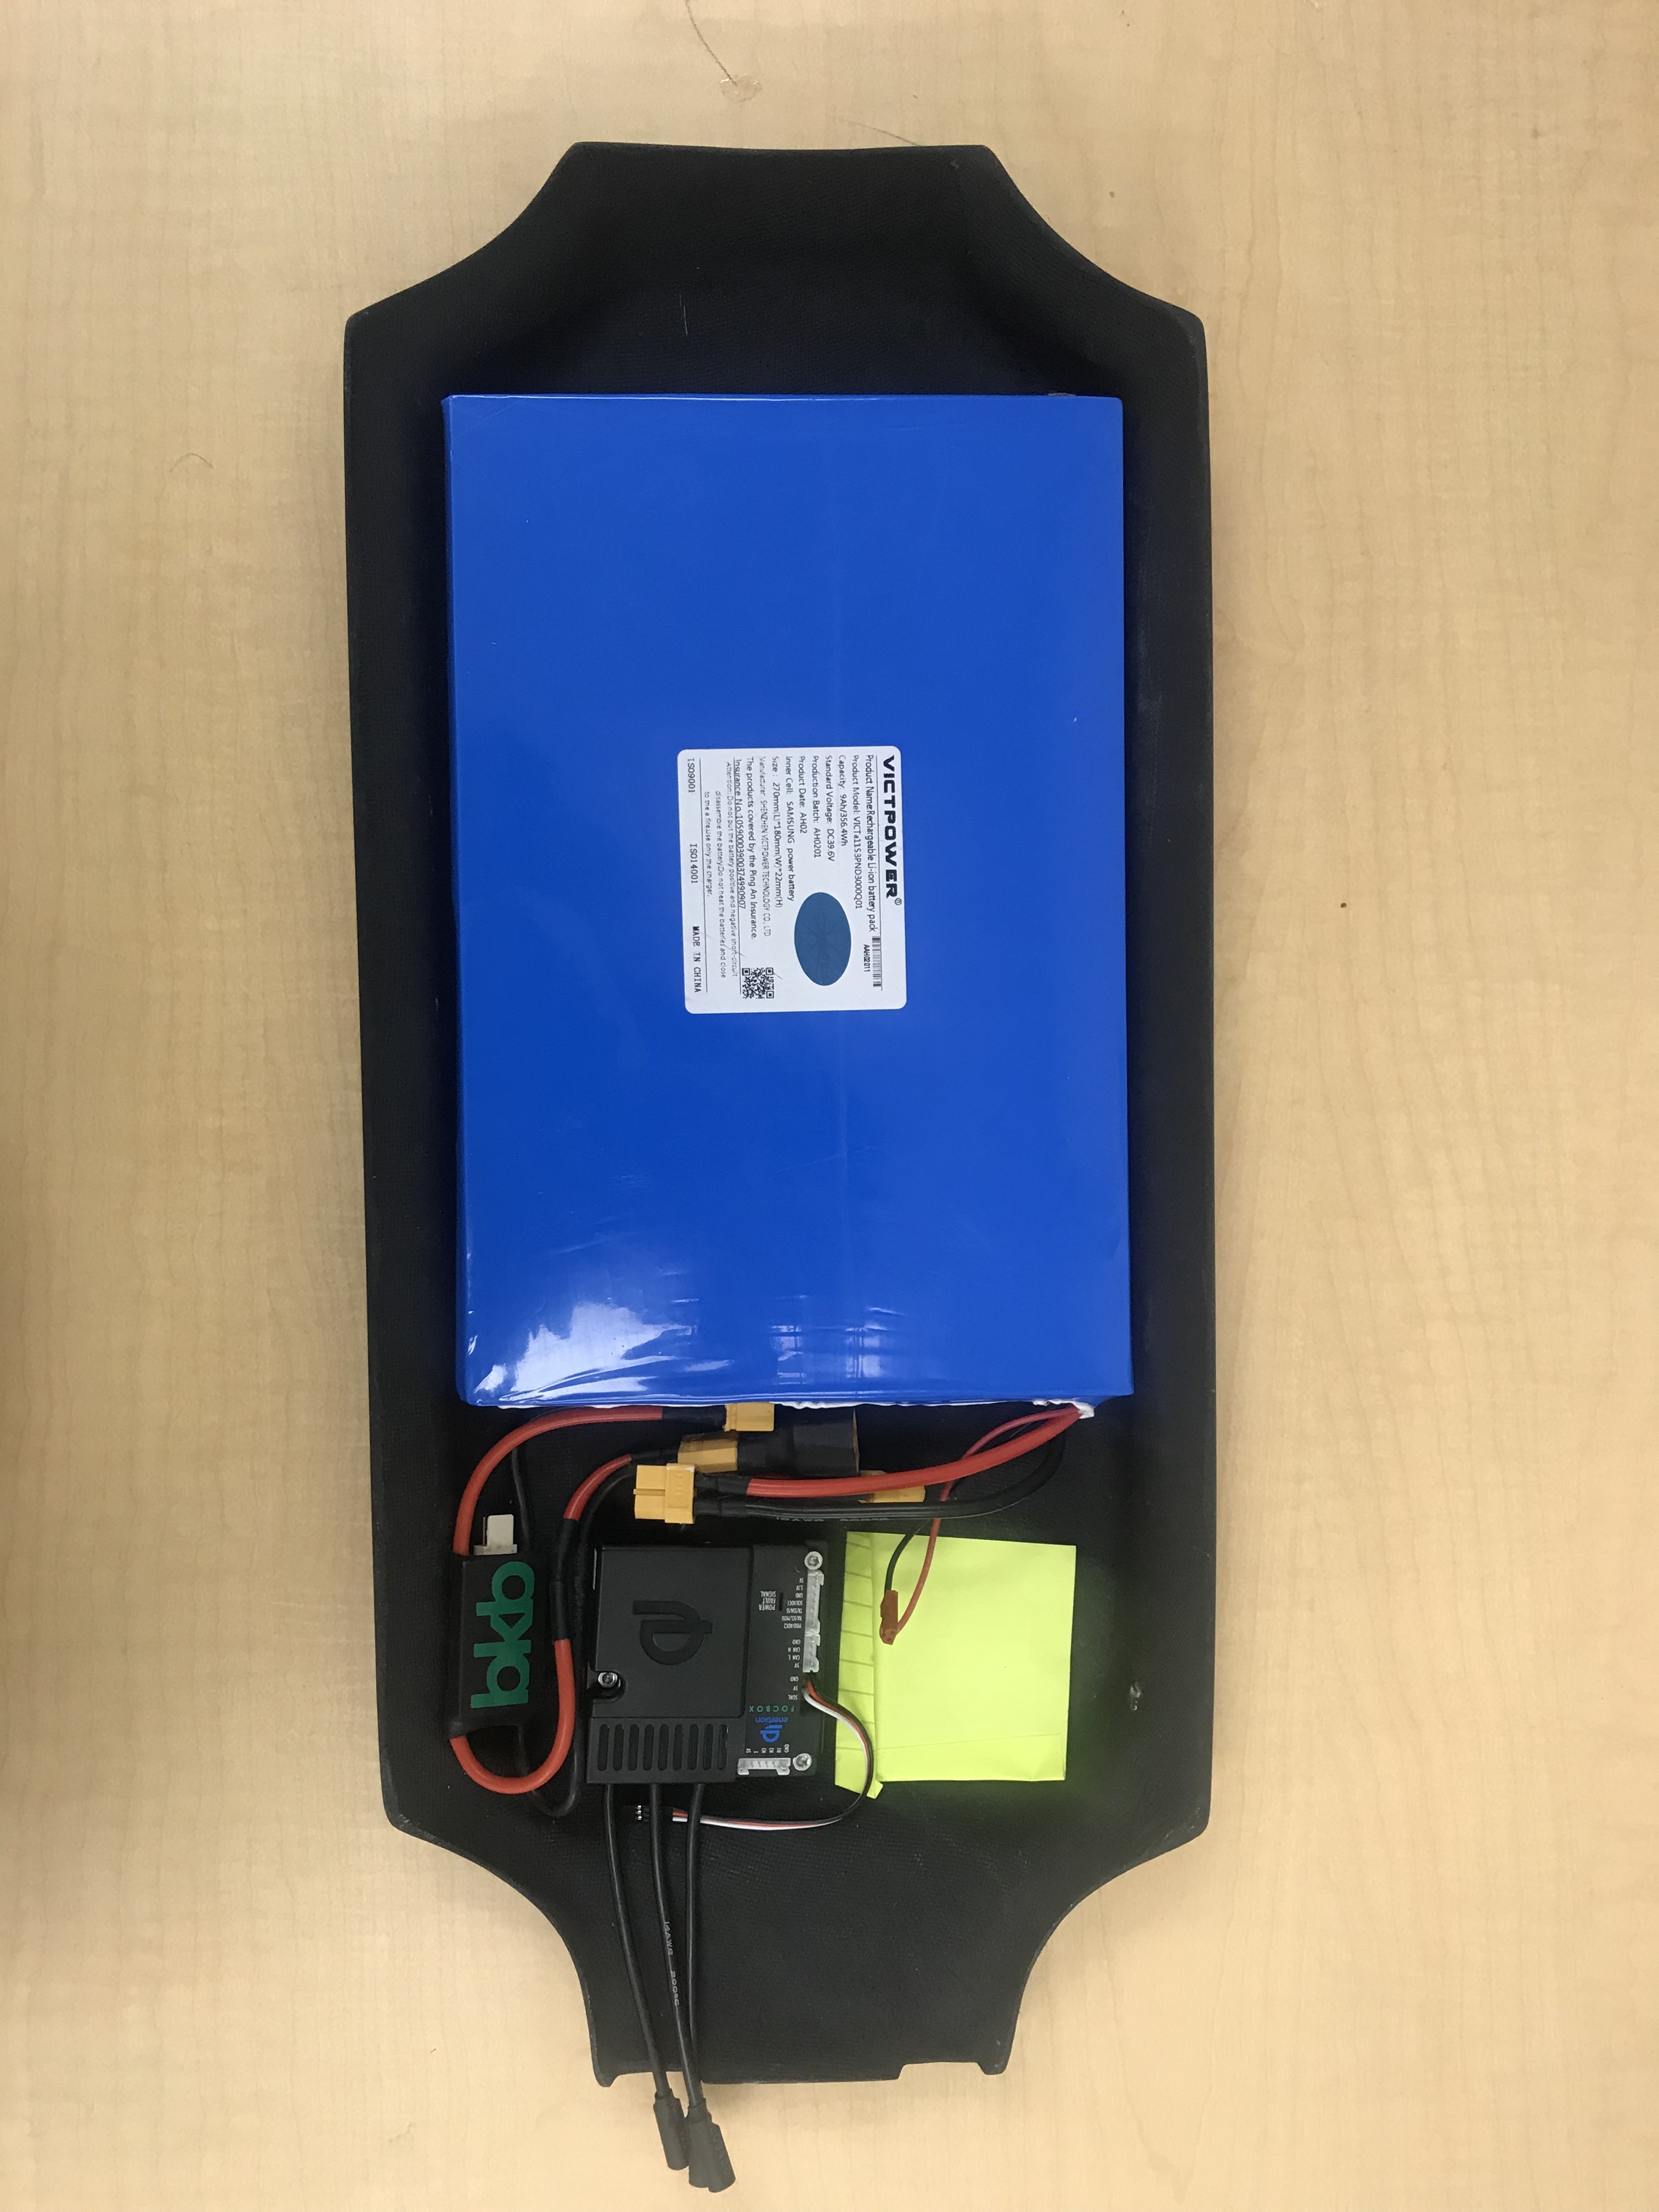
The Sticky Note is meant to be a placeholder for another Focbox.
The trickiest thing would be the wiring though. Didn’t expect the battery to take up as much space as it does but I’ll figure it out.
- Drivetrian
I didn’t expect it to be in my hands so fast so I haven’t even acquired Locktite yet. Will probably head to the hardware store tomorrow or order some on Amazon. I’m not sure if I should have anything off the trucks cause I’ve Been able to slide them inside with a bit of ease. The only thing giving me issues is a motor pulley not fully letting the shaft in. The other one slides in fine but this one is being an arrogant bastard.
Once I’ve got it loosely assembled I’ll show everyone tomorrow.
- Deck
I love it, it’s the right size , not too big, wide enough to feel comfortable , and I don’t feel awkward with my foot placement. I was concerned st first that I might step on the Proton Module like @Linny said but i don’t think that’s going to be a problem

Once I’m in the office tomorrow I’ll sit down and start tinkering around seeing how everything fits. Too tired to add or think more
Thanks @jlabs 
7 Likes
Glad you got everything safely! Thank you for tour patience, and I all ready like how your documenting the build.
Maybe you can do a two color scheme on the enclosure to go with the black/white theme.
Also I wouldn’t recommend the proton module solely because you need all the deck space to ride. When your going fast you will want your feet wide over the trucks, or you will wobble until you street your face.
3 Likes
Nice! For me, i’ll have both feet where the truck holes are when riding, that’s my comfortable stance. Really wide, but stable and maneuverable.
1 Like
Thanks, man, I was thinking if I should go with making the enclosure white, but since the enclosure is susceptible to scratching and whatnot I think it’s better to leave it black. But I will think about it more as the build continues.
I don’t really cruise past 15 mph but I’ll keep that in mind. Maybe a case to cover the touchscreen would be best so that stepping on it won’t matter or I’ll move it up to the front of the deck
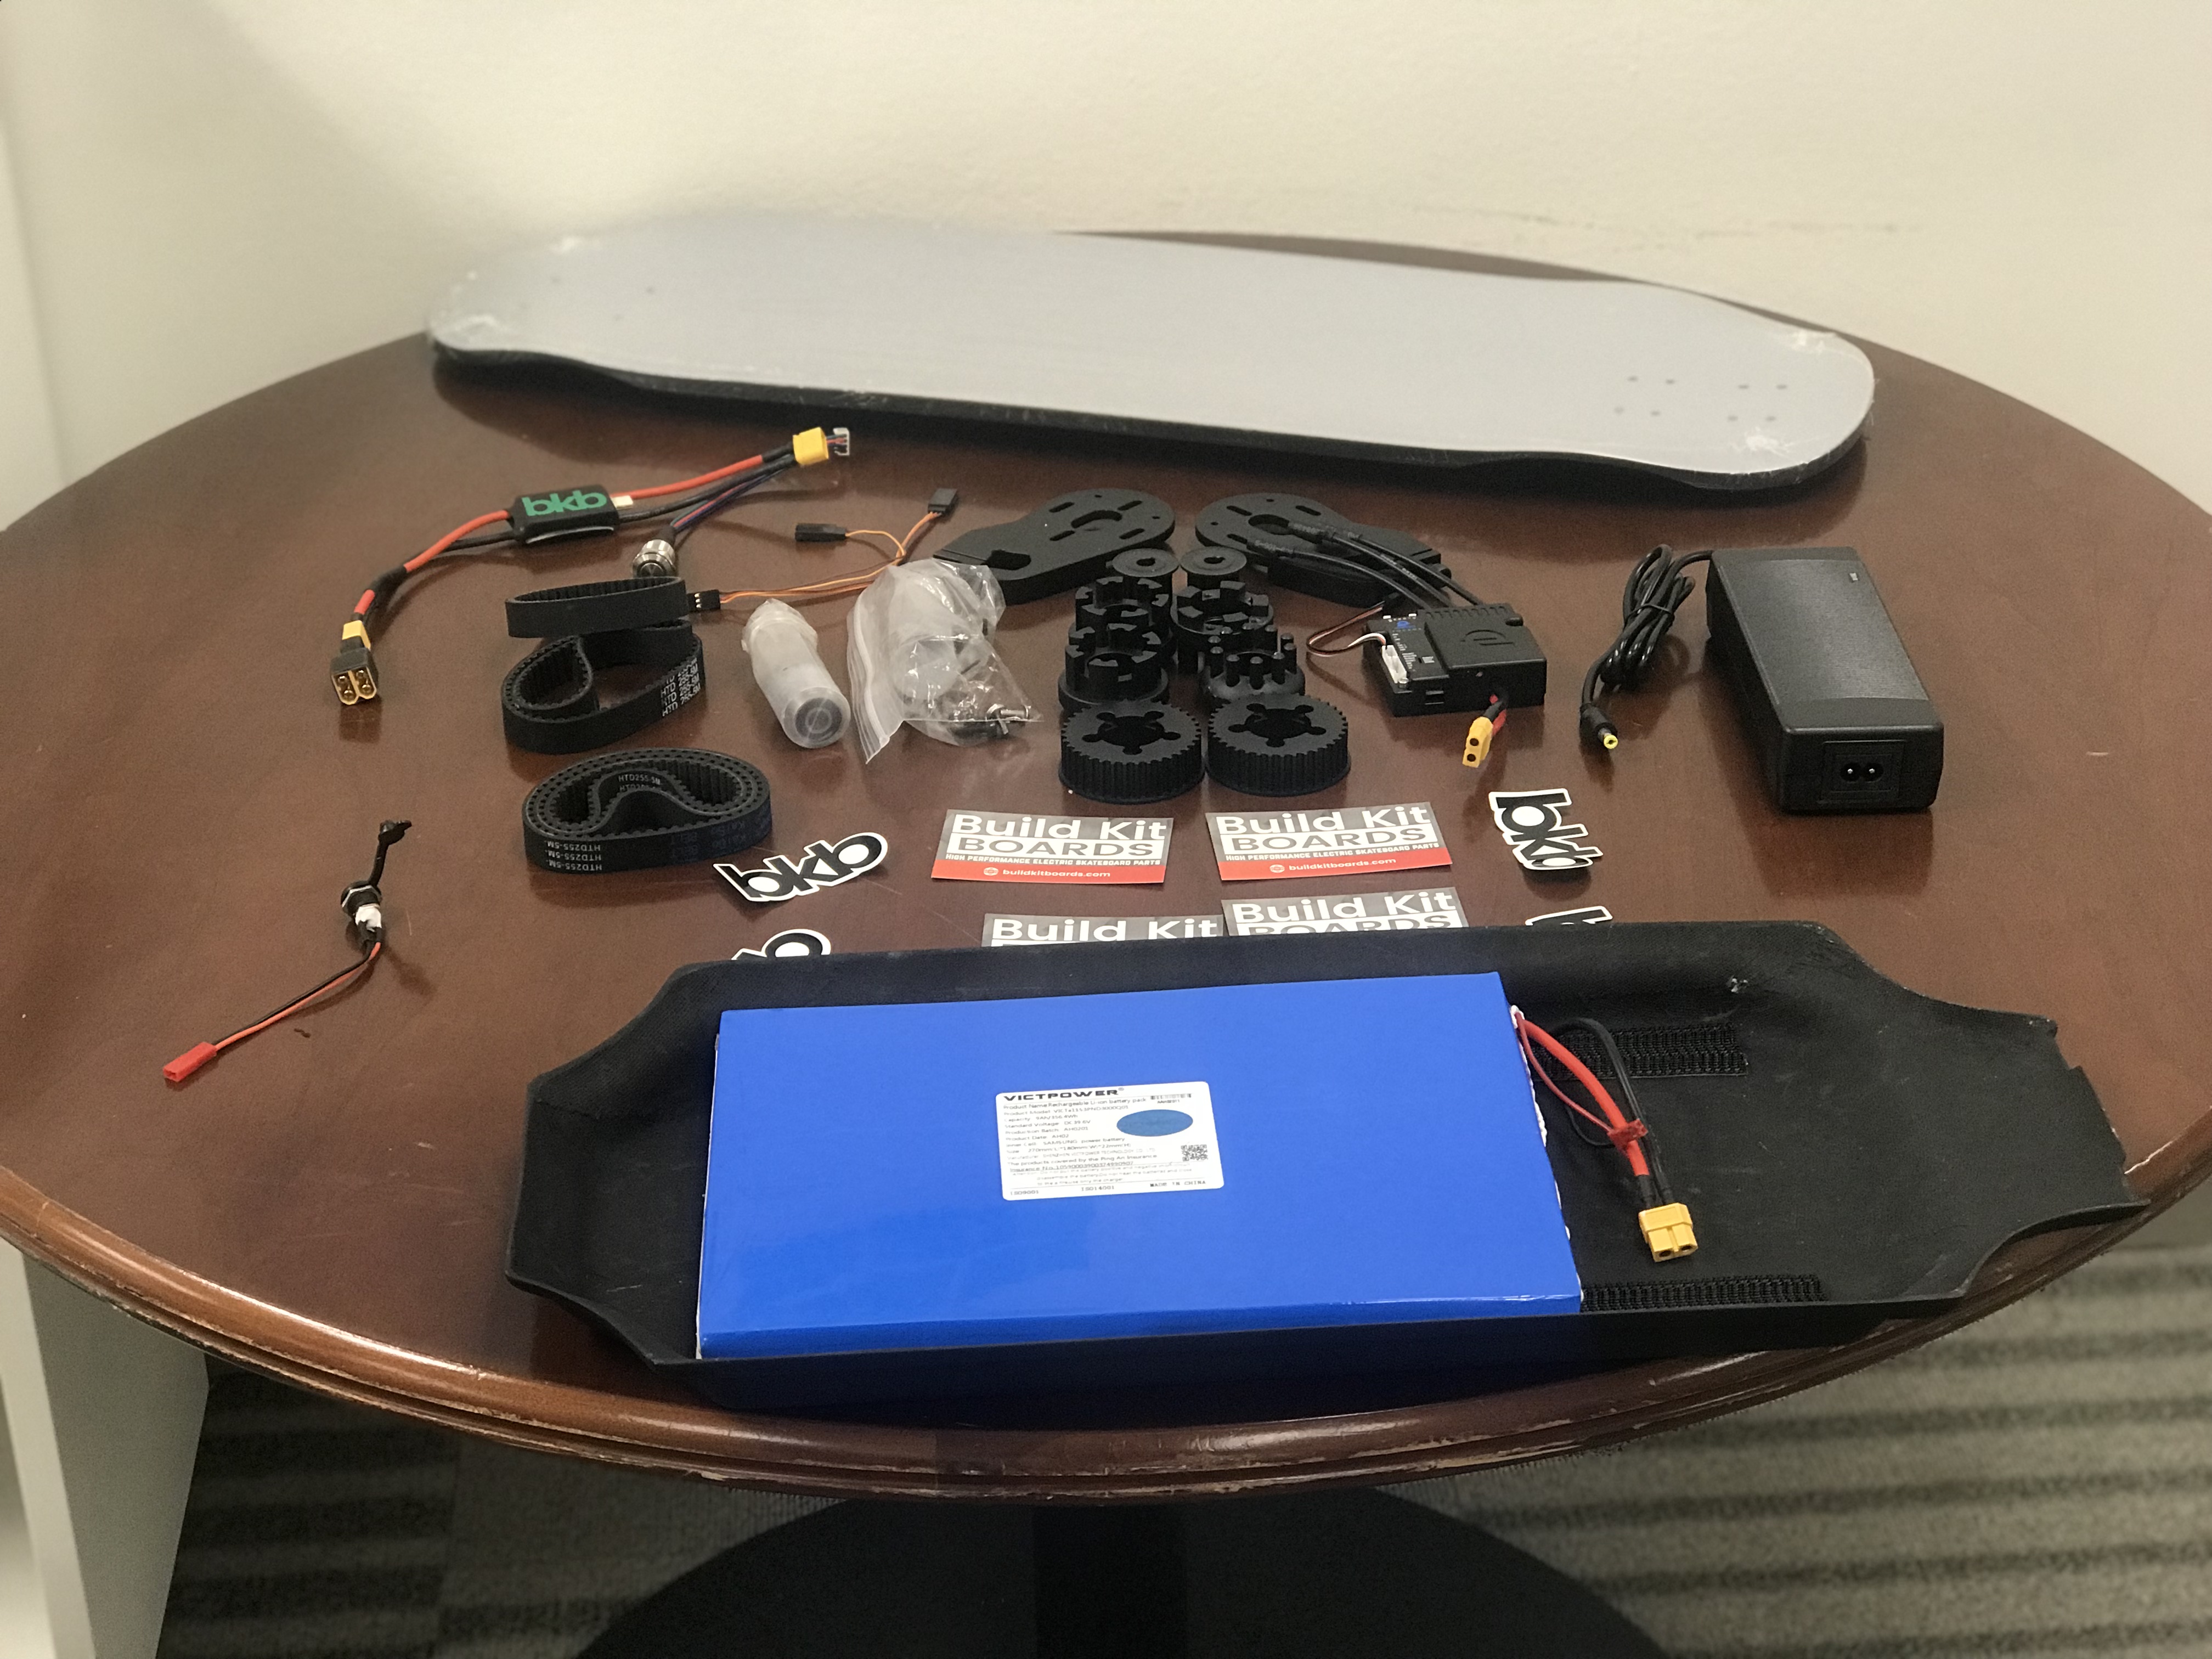
Before any permanent thread-locking or gluing, I like to pre-assemble my components to see if they all fit together. Today I undertook the task of kinda doing so.
Excuse the messy desk:

As one can see, the enclosure extends a good length of the board and is limited to by the wheel wells. the Phase wire compartment extends under the motors and near the Rear trucks themselves.

It may not look like it in the pic, but with the tunnel riser, there is some degree of clearance for the motor mounts. I expect that to be present when I do a full screw-tape on Monday. I also noticed I put on the tunnel risers wrong and according to the instructions I’ve been routing them wrong?

I’ll figure it out eventually.
But I did get to pre-assembling this though:


If the Motor Pulley and Wheel Pulley don’t look aligned it’s because they aren’t. This is only a pre-final-assembled drivetrain.I’m also having a hard time getting one of the wheel pulley to fully sit down on the Popocoas. I might need to find an Arbor Press in New York.
The Tunnel Riser docent seems so necessary since the motor chamber for the enclosure is so close, but I’m going to use them anyway to give the wires some organization. The Sensor wires, unfortunately, won’t fit.
Next Week I’ll tape on the enclosures and do a real pre-assembly fitting to see how well everything plays together and how much clearance I’m granted with 90mms.
One question though: Why do people shave their trucks? My motor mounts were able to slip in easily and I screwed in the back screws to hell to make them stay in place and so far, they aren’t moving? Is there a step I’m missing? Something that will bite me In the ass later? Should I thread lock the screw that secures the mount to the trucks? Thanks, guys.
5 Likes
Those mounts were designed for caliber trucks. You might have to shave some of the truck for caliber clones or TB218mm. Its just a disclaimer really, all those trucks are made from cast aluminium so its not as accurate as precision trucks. Thats why some trucks are slightly thicker than others
1 Like