DIY Trigger Style Remote with Telemetry - Complete Guide

Transmitter_DM_SwitchTransmitter_1

First off, hats off to SolidGeek’s DIY remote thread (https://www.electric-skateboard.builders/t/simple-3d-printed-nrf-remote-arduino-controlled/28543 & https://github.com/SolidGeek/nRF24-Esk8-Remote) from which this is based off. I decided to start another thread so as not to dilute his original version of the remote.


If you build your own electric skateboards, you’ll know that the current off the shelf remotes are not exactly ideal. Most do not have telemetry data, others are rather expensive for what they are and of course for some reason a lot of them are thumbwheel driven which I personally don’t like.

In my search for my own personal remote, I’ve bought, hacked and built several variations including the very popular GT2B mod, the mini remote and I finally stumbled upon SolidGeek’s Simple 3D-printed NRF remote. I built that as well but really didn’t like the thumbwheel.

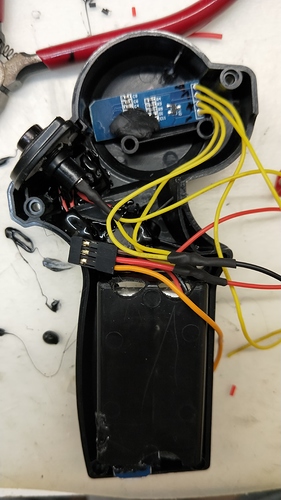
I ended up hacking a mini remote to hold the electronics in SolidGeek’s design but it required extreme creativity in dremeling out the necessary cavity for the new electronics.
Hacked_MiniRemote_1Hacked_MiniRemote_2

I also really hated the fact that there are a million and one wires to individually solder between all the various components. Thus I began my journey to build my own based on SolidGeek’s initial schematic with a goal of sharing it with the esk8 community.

The idea was simple, design an a easy to build, decent sized trigger style ambidextrous remote with telemetry and a deadman’s switch as a safety feature. The last point was made painfully clear to me after my finger got caught in the gears when I accidentally bumped the trigger in my old remote.

The remote I designed has the following features:

  • A dead man’s switch which deactivates the throttle when the remote is not held (safety feature because the trigger can accidentally go off otherwise, ask me how I know)
  • A mode switch which swaps between displayed data (Speed, distance, battery voltage, Ah drawn, current draw)
  • Ergonomic OLED display position so you don’t need to twist your wrist to read it.
  • Menu to adjust settings
  • Programmable deck selection via menu
  • Calibration of throttle via menu
  • Ambidextrous design, swap to left hand use by adjusting the script-
  • Skate bearing used in trigger mechanism for smoother operation as well just a fun detail considering it’s meant for an esk8
  • Hall sensor instead of potentiometer to prevent potential wear of a pot

To do this, I started designing my own custom PCB to hold the electronics (https://easyeda.com/ervinelin/New_Project-35f7bf3537744cda8e1064904f6a78a5), which is a completely new adventure for me. I made some minor mistakes along the way but I am glad it worked out. The latest versions have corrected these mistakes.

Schematic PCB_Soldered

I also took weeks to refine the remote design starting from paper sketches, to iteration after iteration of the 3D model, test fitting, re-modelling, re-printing and more testing to get to the final design (which still could do with more refinements).

The trigger mechanism uses hall sensor instead of a potentiometer as well as a skate bearing to ensure a smooth operation (as well as to pay homage to the fact that it’s a skateboard). Again refinements were made to the position of the magnets as well as the size of the magnets.

The receiver itself is also relatively easy to build and is very small. Rx_2

The eventual remote works as I had intended, telemetry, deadman’s switch, deck selection, mode button and work.

Deck_SelectTransmitter_2

It’s also slim enough to easily fit into pockets or bags.

Overall I’m very happy with the end results, it’s a fair bit of work with many parts to order but I hope this repository helps you build your own!


STLs available at https://www.thingiverse.com/thing:2800544

Youtube video available at https://www.youtube.com/watch?v=gQl7mLMAiAs&feature=youtu.be

Part List available at https://docs.google.com/spreadsheets/d/1vXR9ce0m25Ap6XxzlymFo_pfpIeT2RAqWCypW-a-Jes/edit?usp=sharing

PCB Files available at https://easyeda.com/ervinelin/New_Project-35f7bf3537744cda8e1064904f6a78a5

Firmware available at https://github.com/ModMiniMan/nRF24-Esk8-Remote

Build guide available at https://github.com/ModMiniMan/nRF24-Esk8-Remote/wiki


You will need to have intermediate soldering skills to complete the build as well as knowledge on how to program an Arduino and adjust simple code. Of course if you print this yourself you will need to know how to 3D print.

Caveats: Remote is experimental and not an off the shelf product that has undergone proper testing. Build and use at your own risk. Please bench test extensively before actual use. Lastly, I highly recommend protective gear when using the remote just in case something doesn’t work (many many things can go wrong)

99 Likes

I love it! Would have definitely done this if it was around when i built my GT2B Sparkle Mod Arduino Oled thingy! Looks really clean and i especially like the addition of the dead man switch where it is. Hope to see a lot of them on here since people now can’t complain that there isn’t a trigger remote with all the functions :smile:

love the trigger style design, its on my to do list after i finish my board! good work

I’m starting work on a STM32F103-based version, using the 433MHz nRF modules. Obviously, it won’t have any real-world difference, but I thought encryption and integrity for telemetry and control would be cool :slight_smile:

3 Likes

@Der6FingerJo - The G2TB Sparkle case mod was such a pain to do honestly, I still have mine but the lack of a safety mechanism makes me not want to use it.

@Zyb - Great! Let me now if you run into problems

@chocol4te - What difference is the STM32F103? It LOOKS very much similar to my Ardunio Nano V3.

2 Likes

@ervinelin The STM32F103 is a 32 bit ARM micro controller. Essentially it boils down to having much more processing power than the Arduino Nano’s ATmega 328P, running at nearly 5x the clock speed, and being much better at floating point math.

1 Like

Hm… I wonder what difference will it make. I don’t think the code is doing any crazy maths.

1 Like

Cool remote. Too bad telemetry is available only for vescs, as of now.

I like the design. I hope u manage to assemble and offer for sale at least a few units.

Not saying i would be the buyer but i think it would instill confidence and remove the hassle of ordering parts and assembling everything.

At least this looks like next logical step to me but depends how much time u have got for that.

Nice work non the less. Maybe more accent could be put on what battery it uses but im sure it is in the part list.

It takes too much time for me to assemble one for it to make monetary sense (also I don’t think I can ship the lipo inside the remote either). I have sold some kits to a couple of friends of mine who expressed interest.

As for the battery, yes it’s in the parts list. I use a 18350 battery, there is also an STL without the 18350 holder that you can use any generic 1S battery that will fit.

1 Like

Well… how do you know ?

4 Likes

Thank you so much for this guide

I prefer a thumb throttle/brake but the guide is wonderfully put together so very useable for someone following the original conception from a schematic-instructional perspective…where it was lacking tbh again thank you

1 Like

Oh it won’t make the slightest difference for the current codebase, I was planning on developing a fork with encryption, and error checking/correction which would require a more powerful MCU.

1 Like

@ervinelin Been watching your introduction, glad to see its got its own spot now. I agree with @banjaxxed, very well thought out and complete instructions.

Cheers!

@ElskerShadow I was checking the belt tension when I accidentally hit the throttle, finger got caught in the gears. Months later it still hurts.

@chocol4te that’ll be cool if you can somehow get the connection more secure. Do share what you come up with!

@banjaxxed some friends of mine also prefer thumbwheels and asked if I can design one. Quite frankly this trigger remote took up so much of my time that I rather be skating… if it’s a thumbwheel you want solidgeeks version works as well.

Glad you guys like the build guide… Hopefully someone can improve on this version.

2 Likes

This is pretty nice.

In a bit out of touch with solidgeeks repo… But does it work with ack 3.100 firmware?

Hm… I am not sure what ack firmware is. You can just use mine as it is modified specific for my remote.

Ackmaniac Extended ESC Tool… I figured your “firmware” was for the remote’s Arduino. I’m speaking of the VESC firmwares

Ah! I never tried that actually.

You’ll need to make sure it will work with RollingGeckos VESC UartControl first. If that is possible then shouldn’t be an issue.

If you have to estimate an approximate cost for components for this remote, assuming minimal mistakes so you don’t have to keep re-buying parts, what would you guess it to be?

@pennyboard the cost is tabled in the parts list.

The problem is many items require you to buy them in sets. Eg. You need 2 switches. It comes as 20.

Mostly this is okay but I just found out my PCB cost doubled after EasyEda made some changes… So that’s pretty irritating. I am asking them why this is so.

1 Like